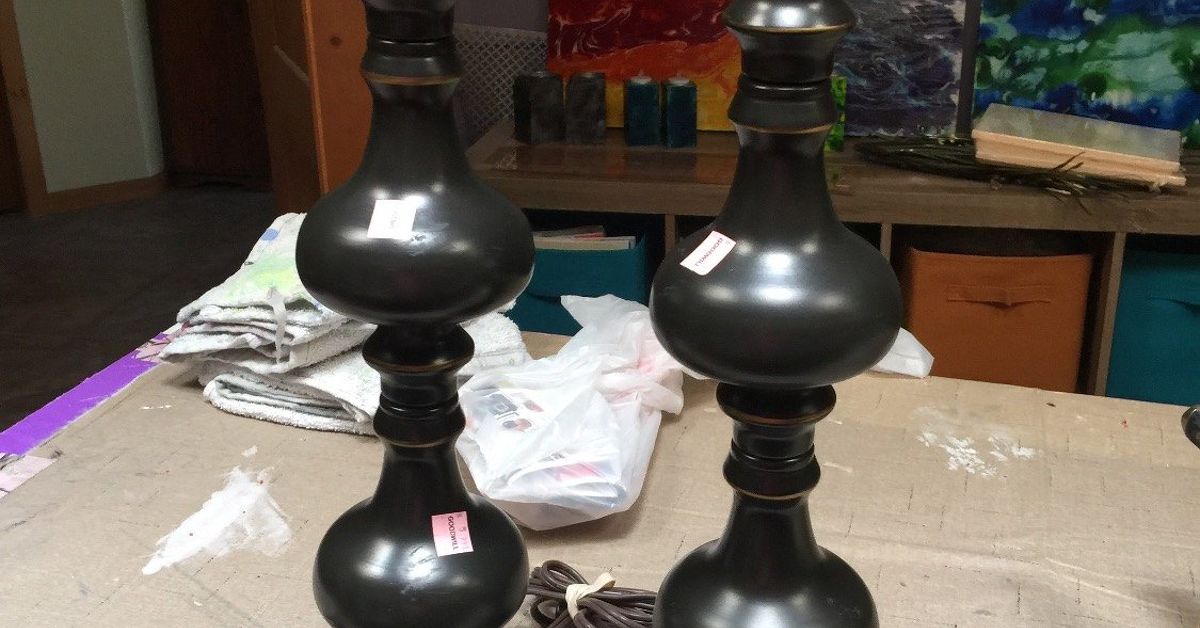

Every thrift store has at least one lamp that looks like it survived three decades, two moves, and a brief career in a dentist’s waiting room. It sits there with a dusty shade, a questionable cord, and a base color that can only be described as “retired oatmeal.” Most shoppers walk past it. DIY people stop, squint, tilt their heads, and whisper the magic words: “I can fix you.”
That is the beauty of a thrift store lamp repurpose. You are not just buying a cheap lamp. You are buying potential. A heavy ceramic base can become a modern bedside lamp. A brass lamp can turn into a moody library accent. A dated glass lamp can become a coastal, cottage, farmhouse, boho, or minimalist statement piece with a little paint, a better shade, and the confidence of someone who has already ruined one paintbrush and lived to tell the tale.
This guide walks through how to repurpose another thrift store lamp into something stylish, useful, and safe enough to actually plug in. We will cover how to choose the right secondhand lamp, inspect it, update the wiring when needed, paint or refinish the base, refresh the lampshade, style the finished piece, and avoid the classic DIY mistake of making something “quirky” when what you really created was “haunted garage sale.”
Why Thrift Store Lamps Are Perfect for Repurposing
Secondhand lamps are one of the best home decor items to buy used because the basic structure is often still solid. Many older lamps were made with ceramic, wood, glass, metal, or stone-like resin bases that feel heavier and sturdier than many new budget lamps. The shape may be great even if the finish is not. In DIY language, that means the lamp is not ugly; it is simply wearing the wrong outfit.
Repurposing also saves money. A new designer-style table lamp can cost anywhere from the price of a nice dinner to the price of pretending you do not need groceries this week. A thrifted lamp, however, might cost less than a sandwich. Add paint, a new shade, a lamp kit, and a modern bulb, and you can often create a custom piece for far less than retail.
There is also a sustainability angle. Reusing home goods keeps usable items in circulation longer, reduces unnecessary waste, and gives old objects a second life. That does not mean every lamp on the thrift shelf deserves a dramatic rescue montage, but it does mean a solid lamp with good bones is worth considering before it gets ignored into oblivion.
Step One: Choose the Right Lamp Before You Fall in Love
Thrift shopping is emotional. One minute you are looking for a lamp, and the next you are holding a ceramic pineapple from 1987 because “it has character.” Character is wonderful, but structure matters more. Before you buy, check the lamp’s weight, shape, stability, socket condition, cord condition, and shade attachment.
Look for Good Bones
The best thrift store lamp makeover candidates usually have a pleasing silhouette. Ignore the color at first. Paint can fix color. Primer can fix gloss. A new shade can fix proportion. But if the lamp’s shape is awkward, top-heavy, or wobbly, the makeover will be harder. Look for bases with clean lines, interesting texture, graceful curves, or a classic form.
Check the Base and Hardware
Turn the lamp over and inspect the bottom. Is the base cracked? Does it sit flat? Is the center rod loose? Does the socket wiggle? A little looseness can often be tightened, but major cracks or missing internal pieces may not be worth the trouble unless you enjoy turning a $6 lamp into a weekend-long emotional support project.
Inspect the Cord Like a Responsible Adult
Old cords can be brittle, cracked, frayed, or unsafe. If the cord looks damaged, assume it needs replacement. If the plug is loose or the lamp flickers, do not keep using it “just for now.” That phrase has caused many bad decisions, including questionable haircuts and unsafe electrical setups.
Step Two: Safety Comes Before Style
A thrifted lamp can look stunning, but it still needs to function safely. Before painting, sanding, wrapping, gluing, or styling, decide whether the electrical parts need attention. If you are not comfortable working with lamp wiring, take the lamp to a qualified repair shop or electrician. A safe lamp is always more beautiful than a crispy one.
At minimum, unplug the lamp before doing any work. Remove the bulb and shade. Check the maximum wattage rating on the socket or fixture label. Never use a bulb that exceeds that rating. For most repurposed lamps, an LED bulb is a smart choice because it provides brightness with lower energy use and less heat than traditional incandescent bulbs.
If the lamp has an old socket, an odd switch, a damaged plug, or a cord that feels stiff and ancient, consider rewiring it with a new lamp kit. Many table lamps are designed around simple parts: a cord, plug, threaded rod, socket, harp, finial, and shade. Rewiring is not complicated for experienced DIYers, but it does require careful attention to polarity, tight connections, and proper strain relief. When in doubt, do not guess. Electricity is not impressed by confidence.
Step Three: Clean the Lamp Thoroughly
Before any thrift store lamp repurpose, clean the base like it has secrets. Dust, nicotine residue, furniture polish, cooking grease, and mystery thrift-store film can prevent paint from sticking. Use a soft cloth and mild soap for most surfaces. For glossy ceramic, metal, or resin bases, a degreasing cleaner can help remove stubborn residue.
After cleaning, let the lamp dry completely. If the surface is glossy, lightly scuff it with fine-grit sandpaper. You are not trying to remove the whole finish; you are giving primer something to grip. Wipe away sanding dust before moving forward. This small step can be the difference between a smooth finish and paint that peels off like a bad sunburn.
Step Four: Choose a Makeover Style
One reason thrift lamp makeovers are so addictive is that the same base can become many different styles. The trick is choosing a direction before opening five cans of paint and letting chaos hold the steering wheel.
Modern Matte Finish
For a clean, current look, paint the base in matte black, soft white, warm beige, charcoal, olive, or muted clay. A matte or satin finish can make a dated glossy lamp look expensive. Pair it with a simple drum shade in linen or white cotton for a polished result.
Stone or Ceramic Look
If you want the popular artisan pottery look, use textured paint, baking soda mixed into paint, or a specialty stone-effect spray. Apply thin layers and build the texture gradually. A final dry-brush layer in a lighter tone can highlight raised details and make the base feel handmade instead of “I dropped it in pancake batter.”
Vintage Brass Refresh
Some brass lamps do not need paint. They need cleaning, a better shade, and maybe a little attitude. If the brass is real and attractive, polish it lightly or leave the patina for character. If it is shiny fake brass from the era of giant shoulder pads, spray paint may be mercy.
Cottage or Farmhouse Style
For a softer look, use chalk-style paint, off-white tones, warm gray, sage green, or dusty blue. Add a linen shade, pleated shade, or woven shade. A little distressing can work, but go easy. Distressing should whisper “collected over time,” not scream “attacked by a cheese grater.”
Step Five: Paint the Base the Right Way
Painting a thrifted lamp is one of the easiest ways to transform it. Remove the shade, bulb, harp, and finial. Tape off the socket and cord. If you are spraying, work outdoors or in a well-ventilated area and protect surrounding surfaces. Use primer if the lamp is glossy, slick, dark, or made of metal.
Apply several thin coats instead of one thick coat. Thick paint causes drips, gummy texture, and regret. Let each coat dry according to the product instructions. Rotate the lamp as you work so you do not miss the underside of curves, handles, ridges, or decorative details.
For brush painting, use a quality brush and avoid overworking the paint. If you want texture, dab or stipple lightly. If you want a smooth finish, sand gently between coats with very fine sandpaper after the paint has dried. Seal the lamp if it will be handled often or if the paint finish needs extra durability.
Step Six: Do Not Ignore the Lampshade
A lampshade can make or break the makeover. The wrong shade can turn a beautiful base into something that looks like it borrowed a hat from a much larger lamp. Proportion matters. A shade should generally be wide enough to balance the base and tall enough to cover the socket hardware.
If the original shade is stained, torn, yellowed, or shaped like a sad cone, replace it. Drum shades are versatile and modern. Tapered shades can look classic. Pleated shades add vintage charm. Woven shades bring texture and warmth. Linen shades soften the light beautifully.
You can also repurpose the shade itself. Cover it with fabric, wrap it with jute, add trim, paint a subtle pattern, or glue ribbon around the top and bottom edges. Just keep heat and safety in mind. Avoid heavy materials inside the shade, and make sure the shade does not touch the bulb. Again, LED bulbs are helpful because they run cooler than incandescent bulbs.
Step Seven: Add Character Without Overdecorating
A thrift store lamp repurpose should look intentional. That does not mean boring. It means every detail earns its place. A new finial can upgrade the lamp instantly. A wood bead pull, a brass finial, a marble-look knob, or a small vintage ornament can add personality without turning the lamp into a craft-store parade float.
Texture is another easy win. A ceramic base can be painted to resemble stone. A wood base can be sanded and stained. A glass base can be filled if it is designed to open safely. A plain shade can get grosgrain ribbon, block-printed fabric, or a thin line of contrast trim.
The goal is not to hide that the lamp was thrifted. The goal is to make people say, “Where did you get that?” and then watch their faces when you say, “Six dollars and mild panic.”
Specific Example: From Dated Brown Lamp to Warm Modern Accent
Imagine finding a heavy brown ceramic lamp with a shiny glaze, a dusty bell shade, and a brass finial that has seen things. The shape is good: rounded body, narrow neck, stable base. The finish, however, belongs in a basement next to a fax machine.
First, remove the shade and hardware. Clean the base with mild soap, then wipe it dry. Scuff the glossy surface with fine-grit sandpaper. Tape off the socket and cord. Apply a bonding primer. Once dry, brush on a warm greige paint mixed with a small amount of baking soda for texture. After two coats, dry-brush a lighter cream tone over the raised areas. Seal it with a matte clear coat.
Next, replace the old shade with a natural linen drum shade. Add a simple brass finial to echo the original metal without keeping the outdated look. Install a warm white LED bulb. The result feels earthy, modern, and expensive, even though the lamp started life looking like it wanted to sell you a timeshare.
Common Mistakes to Avoid
The first mistake is skipping the safety check. A lamp is not just decor; it is an electrical item. If the wiring is damaged, replace it or have it repaired. The second mistake is painting without cleaning or priming. Paint needs a clean surface, or it will chip the moment you brag about the makeover.
The third mistake is choosing the wrong shade size. A tiny shade makes the base look awkward. An enormous shade makes the lamp look like it is hiding from creditors. Bring measurements when shopping, or take the lamp with you if possible.
The fourth mistake is using too many trends at once. A lamp does not need to be matte black, wrapped in jute, covered in beads, dry-brushed, and topped with fringe. Pick one main idea and let the lamp breathe.
How to Style Your Repurposed Lamp
Once the lamp is finished, place it where it can do real work. A bedside table needs soft, warm light for reading. A console table can handle a taller statement lamp. A desk lamp should provide focused light without glare. A living room side table benefits from a lamp that adds height and balances nearby furniture.
Use the lamp as part of a small vignette. Pair it with books, a tray, a framed photo, a plant, or a ceramic bowl. Vary the heights of nearby objects so the arrangement feels layered. Leave some empty space, too. Not every surface needs to look like a home decor store exploded politely.
Color coordination helps the lamp feel connected to the room. Repeat one tone from the lamp base or shade elsewhere in the space, such as in a pillow, rug, picture frame, or vase. This makes the repurposed lamp look designed rather than randomly rescued.
Budget Breakdown for a Thrift Store Lamp Repurpose
A typical thrift lamp makeover can be surprisingly affordable. The lamp itself may cost $5 to $20. Paint or spray paint may cost $6 to $15. Primer may cost $8 to $15 if you do not already have it. A new lampshade can range from $15 to $50 depending on size and material. A lamp rewiring kit can often be found at hardware stores for a modest price.
If you already own basic supplies, the total cost can stay low. If you need to buy everything, the project may cost more, but the supplies can usually be used for future makeovers. That is how DIY begins: one innocent lamp, then suddenly you have a shelf full of paints, three unfinished side tables, and strong opinions about primer.
My Experience With Another Thrift Store Lamp Repurpose
The best thrift store lamp projects usually begin with very little dignity. My favorite one started when I found a lamp that looked aggressively unwanted. It had a dark reddish-brown base, a shade the color of old cereal, and a cord twisted into the shape of a question mark. The thrift store had priced it low, which felt less like a bargain and more like a dare.
But the base was heavy, and the shape was excellent. It had a rounded body with carved grooves that reminded me of vintage pottery. The finish was glossy and dated, but I could see that a matte, textured look would completely change it. This is the first lesson I learned: when thrifting lamps, shop for shape first. Color is temporary. Ugly glaze is temporary. Good proportions are the real treasure.
When I got it home, I did not plug it in immediately. That is tempting, especially when curiosity is yelling, “Let’s see if this thing lives!” Instead, I checked the cord, socket, and plug. The cord was not something I trusted for daily use, so I replaced it with a new lamp kit. This was not the glamorous part of the makeover, but it was the part that made the lamp usable. A pretty lamp with bad wiring is just a fire hazard wearing makeup.
After disassembling the lamp, I cleaned the base twice. The first cloth came away gray, which is always a humbling thrift-store moment. Once it was dry, I scuffed the surface and used a bonding primer. Then I mixed warm taupe paint with a small amount of baking soda to create a soft ceramic texture. The first coat looked terrible. This is normal. Many DIY projects have a middle stage where they look like evidence from a craft crime scene. The trick is not to panic too early.
By the second coat, the lamp started looking intentional. I added a lighter dry-brushed layer over the raised grooves, which made the details stand out. Then I sealed the base with a matte finish. The original shade was beyond saving, so I replaced it with a simple linen drum shade. That one change made the entire lamp look calmer and more expensive.
The biggest surprise was how much the lamp changed the room. It was not just a lighting upgrade; it added height, warmth, and personality to a plain side table. The texture made it feel handmade. The linen shade softened the light. The warm LED bulb gave the corner a cozy glow without turning it yellow. Suddenly, the little reading nook looked finished.
That project taught me that thrift lamp repurposing is not about perfection. It is about seeing possibility, respecting safety, and making thoughtful choices. Not every lamp needs a dramatic transformation. Sometimes it only needs cleaning and a new shade. Sometimes it needs paint. Sometimes it needs rewiring before anything else. The experience also taught me to keep spare finials, painter’s tape, and a measuring tape in my DIY drawer because lamps are sneaky. Once you make over one, another thrift store lamp will find you.
Would I do it again? Absolutely. In fact, “another thrift store lamp repurpose” might be the most honest DIY title ever. There is always another lamp. Another odd shape. Another chipped base with potential. Another chance to turn a forgotten object into something useful, stylish, and completely personal. And yes, another opportunity to explain to your family why there is a half-painted lamp drying on the dining table again.
Conclusion: Give the Weird Lamp a Second Chance
A thrift store lamp repurpose is one of the most rewarding DIY home decor projects because it combines creativity, practicality, sustainability, and budget-friendly style. With a careful safety check, a good cleaning, the right paint, a better shade, and a little patience, an outdated lamp can become a custom accent that looks far more expensive than it is.
The secret is to look beyond the dusty shade and dated finish. Focus on shape, scale, material, and potential. Respect the electrical parts. Choose a finish that fits your home. Keep the design simple enough to feel intentional. When done well, a repurposed lamp does more than light a room. It tells a story, saves money, reduces waste, and gives you the quiet satisfaction of knowing you saw beauty where everyone else saw “probably from Aunt Linda’s basement.”
Note: Always inspect secondhand lamps carefully before use. If the wiring, socket, plug, or switch looks damaged or unfamiliar, have the lamp repaired by a qualified professional before plugging it in.