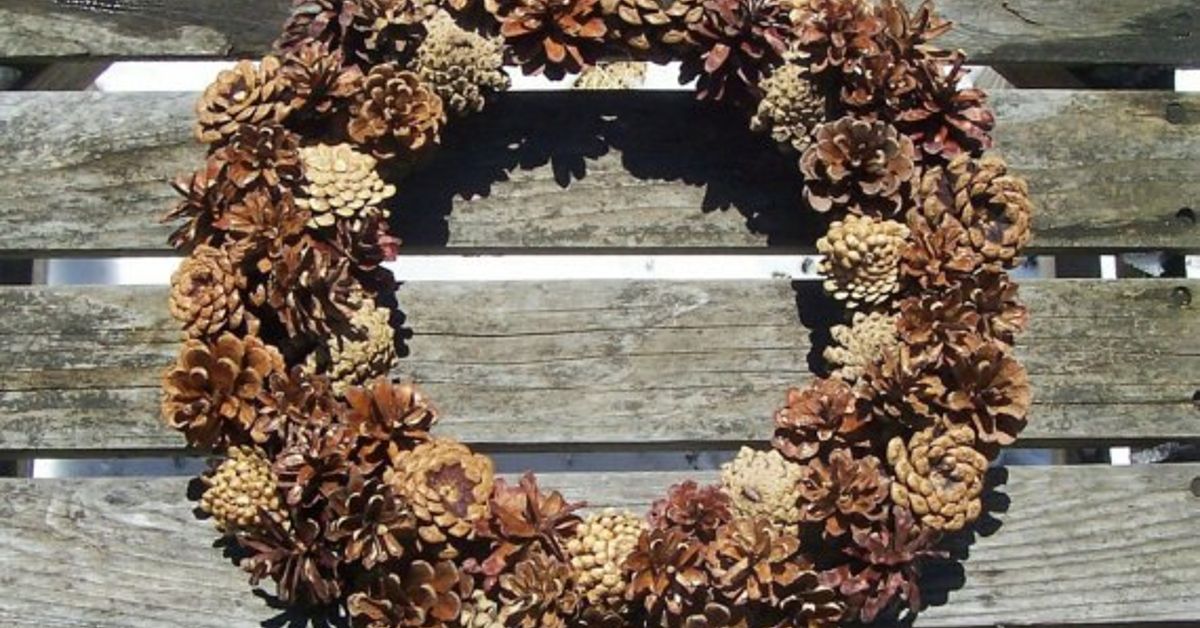

A natural pine cone wreath is one of those rare DIY projects that looks expensive, smells faintly like a walk in the woods, and costs far less than the “artisan woodland wreath” your favorite home store is trying to sell for the price of a small appliance. Better yet, it is forgiving. A pine cone may be lopsided, a little sticky, or shaped like it had a dramatic childhood, and it will still look charming once tucked into a wreath.
In this guide, you will learn how to make a natural pine cone wreath using real pine cones, a sturdy wreath base, and simple craft supplies. The design is rustic, earthy, and flexible enough for fall, Thanksgiving, Christmas, winter decorating, cabin décor, farmhouse style, or year-round woodland charm. No glitter storm required. No neon ribbon unless your pine cones are secretly going to a disco.
This tutorial combines practical wreath-making methods used by home décor experts, craft bloggers, garden-extension educators, and DIY retailers: clean and dry your cones first, use a strong base, layer large and small pine cones for fullness, attach everything securely, and finish with natural accents only if they improve the design. The result is a homemade pine cone wreath that looks collected, not chaotic.
Why Make a Natural Pine Cone Wreath?
A natural pine cone wreath brings texture, warmth, and handmade character to your home. Unlike fresh evergreen wreaths, a pine cone wreath can last for years when stored properly. It also transitions beautifully between seasons. Hang it in September with dried grasses and acorns, dress it up in December with cedar sprigs and ribbon, or keep it plain for a minimalist winter look.
The best part is that pine cones already have built-in design drama. Their layered scales create movement, shadows, and depth, so even a simple wreath looks rich and dimensional. If you enjoy natural home décor, rustic Christmas decorations, farmhouse wreaths, woodland crafts, or sustainable DIY projects, this is a project worth making.
Supplies You Will Need
Before you start, gather everything in one place. Pine cone wreath making is much more relaxing when you are not hunting for wire cutters under a pile of cones like a squirrel with a deadline.
Basic Materials
- 40 to 80 pine cones, depending on wreath size and cone variety
- One 12- to 18-inch wreath base, such as grapevine, wire, straw, or foam
- Hot glue gun and extra glue sticks
- Floral wire or paddle wire
- Wire cutters
- Work gloves
- Old baking sheet lined with foil or parchment
- White vinegar and water for cleaning
- Ribbon, twine, or jute cord for hanging
Optional Natural Accents
- Acorns
- Dried orange slices
- Cinnamon sticks
- Small evergreen clippings
- Seed pods
- Dried grasses
- Magnolia leaves
- Rose hips or faux berries
For the most natural look, choose accents in earthy tones: brown, tan, cream, muted green, copper, rust, and deep red. A natural pine cone wreath works best when the materials look like they came from the same peaceful woodland neighborhood.
Step 1: Collect or Buy the Right Pine Cones
You can forage pine cones from your yard, buy them from a craft store, or order them online. Foraged pine cones add character and cost nothing, but they should be cleaned and dried before use. Store-bought cones are convenient, often uniform in size, and usually cleaner, though it is still smart to inspect them.
Look for pine cones that are dry, open, and sturdy. Avoid cones that are moldy, mushy, heavily damaged, or full of dirt. A little imperfection is fine. In fact, variation makes a natural pinecone wreath more interesting. Mix large cones for structure, medium cones for coverage, and small cones for filling gaps.
If you want a full 18-inch wreath, plan on using around 70 to 100 cones. For a smaller 12-inch wreath, 40 to 60 may be enough. Wide, open cones cover more area, while narrow cones require more layering.
Step 2: Clean the Pine Cones
Cleaning pine cones is not glamorous, but neither is discovering tiny forest residents crawling across your craft table. Start by brushing off loose dirt, pine needles, and debris. Then fill a sink or bucket with warm water and add about half a cup of white vinegar. Soak the cones for 20 to 30 minutes.
The cones may close up in water. Do not panic. Pine cones naturally respond to moisture, and they usually reopen after drying. After soaking, rinse them well and place them on a towel or in a colander to drain.
Step 3: Dry and Heat-Treat the Pine Cones
Once the pine cones are rinsed, spread them in a single layer on a foil-lined baking sheet. Bake them at a low temperature, around 200 to 250 degrees Fahrenheit, for 30 to 60 minutes. Check them often, especially if they have sap. The goal is to dry them, encourage them to reopen, and reduce the chance of insects hiding inside.
Never leave pine cones unattended in the oven. Pine cones are natural, resinous materials, and low heat is important. If you smell strong smoke or see sap bubbling aggressively, turn the oven off and let everything cool. After baking, allow the cones to dry completely. Depending on humidity, this may take a few hours or overnight.
Step 4: Choose the Best Wreath Base
The wreath base determines the style and strength of your finished project. A grapevine wreath is the best choice for a natural pine cone wreath because it already looks rustic and gives glue and wire plenty of places to grip. A wire frame is excellent if you want to wire each cone securely. A foam wreath is easy for hot glue, but it may need burlap, ribbon, or moss wrapped around it first so gaps do not reveal bright foam underneath.
For a natural design, a grapevine base is hard to beat. It has texture, it hides small mistakes, and it lets the wreath look good even if a little of the base peeks through. That is not a flaw; that is rustic confidence.
Step 5: Plan the Layout Before Gluing
Before attaching anything, lay your pine cones on the wreath base. This dry run helps you avoid awkward gaps, strange clumps, or one side of the wreath looking like it ate the other side.
Place the largest pine cones first. Angle some outward, some inward, and some slightly upward. Then add medium cones between them. Save the smallest cones for the final layer. A wreath looks more natural when the cones do not all face the same direction. Nature is many things, but it is rarely perfectly lined up like soldiers in a craft-store parade.
Layout Ideas
- Classic full wreath: Cover the entire base with pine cones in overlapping layers.
- Asymmetrical wreath: Cluster cones on one side or lower corner and leave part of the grapevine visible.
- Modern natural wreath: Use fewer cones, more negative space, and a simple linen ribbon.
- Woodland wreath: Mix pine cones with acorns, seed pods, and evergreen sprigs.
Step 6: Attach the Pine Cones
You can attach pine cones with hot glue, floral wire, or a combination of both. Hot glue is fast and works well for indoor or covered-door wreaths. Floral wire creates a stronger hold, especially for heavier cones or outdoor display.
Hot Glue Method
Apply a generous amount of hot glue to the bottom or side of a pine cone, then press it firmly into the wreath base for several seconds. Start with large cones and work around the wreath. Add medium cones next, then finish with small cones to hide gaps. Use enough glue to create a strong bond, but not so much that glue strings turn your wreath into a haunted spider hotel.
Floral Wire Method
Cut a piece of floral wire about 10 to 14 inches long. Wrap it around the base of the pine cone, twisting it tightly so the wire grips beneath the lowest scales. Then feed the wire through the grapevine or around the wire frame and twist it at the back. Trim extra wire and tuck the ends safely into the base.
Combination Method
For the most secure homemade pine cone wreath, wire the largest cones and glue the smaller filler cones. This gives structure and saves time. It is especially useful if the wreath will hang on a front door, where wind, movement, and enthusiastic door-slamming may test your craftsmanship.
Step 7: Fill Gaps Like a Pro
Once the main layer is attached, hold the wreath upright and look at it from several angles. You will probably notice small gaps. This is normal. Fill them with tiny pine cones, acorns, seed pods, or pieces of preserved moss.
Pay special attention to the inner and outer edges. A wreath can look full from the front but unfinished from the side. Add cones at slight angles to create depth. If one area looks too heavy, balance it with a similar-sized cone or accent on the opposite side.
Step 8: Add Natural Details
A natural pine cone wreath does not need much decoration. The cones are already the star. However, a few carefully chosen accents can make the wreath feel seasonal.
For fall, add acorns, dried grasses, wheat stems, or small faux pumpkins in neutral tones. For winter, tuck in cedar, juniper, pine sprigs, cinnamon sticks, or dried orange slices. For a farmhouse look, use burlap ribbon or jute twine. For a cleaner modern style, use a wide linen ribbon in cream, taupe, or black.
Keep accents uneven and organic. Three clusters often look better than ten scattered decorations. Think “fresh from the forest,” not “craft bin exploded near the front door.”
Step 9: Add a Hanger
Turn the wreath over and attach a loop of floral wire, jute cord, or sturdy ribbon to the back of the base. Make sure it is centered and strong enough to support the finished wreath. Pine cone wreaths can be surprisingly heavy, especially when made with large cones.
If you plan to hang the wreath on a door, test it indoors first. Gently shake it. If anything wiggles, reinforce it with glue or wire. Better to discover a weak spot on the table than after a pine cone makes a dramatic leap onto your porch.
Step 10: Display and Store Your Wreath
Hang your natural pine cone wreath on a covered front door, interior wall, mantel, mirror, kitchen hood, garden shed, or above a console table. A covered location is best because heavy rain and direct sun can weaken glue, fade natural materials, or encourage moisture problems.
To store the wreath, place it in a wreath storage bag, shallow box, or plastic bin. Keep it in a cool, dry area. Avoid crushing it under heavier decorations. If stored properly, your DIY pine cone wreath can last for several seasons. A few loose cones can be reattached with hot glue, which is basically the duct tape of the crafting kingdom.
Natural Pine Cone Wreath Design Variations
Rustic Farmhouse Pine Cone Wreath
Use a grapevine base, medium pine cones, burlap ribbon, and a few dried wheat stems. Keep the colors warm and simple. This style works beautifully on wood doors, brick porches, and cozy interiors.
Minimalist Woodland Wreath
Attach pine cones only to the bottom third of the wreath. Add moss and a simple linen ribbon. Leave much of the grapevine exposed for a calm, modern look.
Holiday Pine Cone Wreath
Add cedar sprigs, dried orange slices, cinnamon sticks, and a deep red or velvet ribbon. This version feels festive without becoming overly shiny.
All-Natural Winter Wreath
Use pine cones, evergreen clippings, seed pods, and a jute hanger. Skip paint, glitter, and plastic decorations. The finished wreath looks timeless and earthy.
Common Mistakes to Avoid
The first mistake is skipping the cleaning and drying process. Even clean-looking pine cones can hold dirt, moisture, or tiny insects. The second mistake is using too little glue or wire. Pine cones are heavier than they look, and gravity has no respect for your holiday spirit.
Another common mistake is attaching cones without planning the layout. A quick dry arrangement helps you build a balanced wreath. Finally, avoid overdecorating. Natural pine cones have plenty of personality. Too many extras can make the wreath look crowded instead of elegant.
Helpful Tips for a Better Homemade Pine Cone Wreath
- Use different pine cone sizes for a fuller, more natural shape.
- Attach large cones first, then fill with smaller ones.
- Wear gloves if cones are sharp or sticky.
- Use a low-temperature oven and never leave pine cones unattended while drying.
- Choose a covered display spot for longer-lasting results.
- Use floral wire for heavy cones and hot glue for small fillers.
- Keep the color palette simple for an upscale natural look.
Experience Notes: What Making a Natural Pine Cone Wreath Really Teaches You
The experience of making a natural pine cone wreath is wonderfully different from assembling a kit where every piece looks identical. Real pine cones have opinions. Some lean left. Some are tightly closed. Some are huge and dramatic, like they expect their own dressing room. That variation is exactly what makes the finished wreath feel warm and authentic.
One of the biggest lessons is that preparation matters more than perfection. Cleaning and drying pine cones may feel like the boring part, but it changes the entire project. Dry cones attach better, smell cleaner, and open into a prettier shape. When they come out of the oven fully dry and slightly more open, they suddenly look like craft-store materials instead of things you rescued from under a damp tree.
Another important experience is learning to build in layers. Beginners often try to glue pine cones in a flat ring, all facing forward. That can look stiff. A better approach is to work like nature does: unevenly, but with balance. Angle one cone outward, tuck another inward, overlap a third, then step back. The wreath begins to look full when the cones create shadows and movement. It is less like tiling a bathroom and more like arranging a forest crown.
You also learn that small pine cones are the secret heroes. Large cones give the wreath structure, but tiny cones save the day. They hide awkward holes, cover glue spots, and soften transitions between bigger pieces. If you only collect large cones, the wreath may look chunky. If you gather a mix, it looks intentional. The little cones deserve applause, or at least a nice dry storage box.
Hot glue is fast, but patience still matters. Pressing each cone firmly for a few seconds helps prevent future wobbling. If the wreath will hang on a door that opens and closes often, floral wire gives extra confidence. Many experienced crafters use both: wire for the big cones, glue for the fillers. That combination creates a wreath that can survive normal household life, including children, pets, delivery drivers, and that one relative who shuts doors like they are ending a courtroom scene.
Finally, the best natural pine cone wreaths usually come from restraint. It is tempting to add berries, ribbon, oranges, cinnamon, moss, bells, bows, and possibly a small woodland animal wearing a scarf. But the most elegant designs often stop early. Once the wreath looks balanced, full, and textural, pause before adding more. Natural décor shines when it has room to breathe.
Making this wreath is also satisfying because it connects your home to the outdoors. You are not just buying decoration; you are turning simple natural materials into something welcoming. Every pine cone has a slightly different shape, every gap teaches a small design decision, and every finished wreath looks one-of-a-kind. That is the quiet magic of this project: it is simple enough for beginners, but personal enough to feel special every time you hang it.
Conclusion
Learning how to make a natural pine cone wreath is a simple, affordable way to bring woodland beauty into your home. With clean pine cones, a sturdy wreath base, hot glue or floral wire, and a little patience, you can create a rustic wreath that works for fall, winter, Christmas, or everyday natural décor.
The key is to keep the process practical: clean and dry the cones, plan your layout, layer different sizes, secure everything well, and add only the accents that support the natural design. Whether you prefer a full pine cone wreath, a minimalist grapevine style, or a holiday version with evergreen sprigs and dried oranges, this project gives you plenty of room to be creative without requiring professional florist skills.
In other words, grab the pine cones, heat up the glue gun, and let nature do most of the decorating. She has been working on texture for a few million years, so we might as well borrow her notes.
Note: This article is written as original web-publishing content and synthesizes practical wreath-making guidance from reputable U.S. craft, home décor, garden, and DIY resources without copying source text.