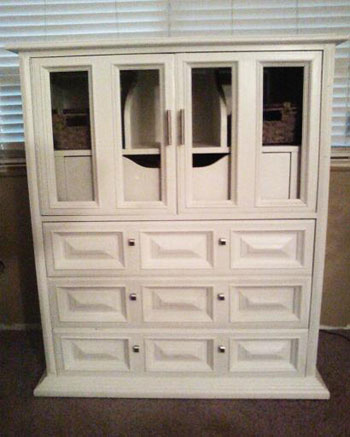

Note: This article is written for web publishing and synthesizes practical guidance from reputable U.S. paint brands, home improvement retailers, safety agencies, and DIY renovation experts.
Introduction: Give That Tired Cabinet a White-Paint Glow-Up
Painting an old wood cabinet with white paint is one of those home projects that looks innocent at first. You think, “How hard can it be? It’s paint. It’s wood. I own a brush.” Then three hours later, you’re labeling hinges with painter’s tape, wondering why one cabinet door has more grease than a diner grill, and negotiating with a drip mark like it owes you money.
The good news? A beautiful white painted cabinet is absolutely possible without hiring a professional, replacing the whole cabinet, or pretending “rustic distressing” was your plan all along. With the right prep, primer, paint, tools, and patience, an outdated wood cabinet can become bright, clean, modern, and surprisingly expensive-looking.
White paint is popular for a reason. It reflects light, makes small rooms feel larger, pairs with almost every hardware finish, and gives old wood furniture a fresh second life. Whether you are updating a kitchen cabinet, bathroom storage unit, hallway cupboard, built-in shelving, or a thrift-store treasure, the process follows the same basic rule: the finish is only as good as the prep beneath it.
This guide walks you through how to paint an old wood cabinet white, from cleaning and sanding to priming, painting, curing, and avoiding the classic mistakes that make cabinet paint peel faster than a bad sunburn.
Why Paint an Old Wood Cabinet White?
White paint has a magical way of making tired wood look intentional again. A dark, scratched, orange-toned cabinet can suddenly feel crisp and updated. A bulky cabinet can look lighter. A mismatched cabinet can blend into a room. And a piece that once screamed “basement storage from 1987” can calmly whisper “coastal farmhouse with a good credit score.”
Painting is also cost-effective. Replacing cabinets or buying new furniture can be expensive, while painting usually requires basic supplies: cleaner, sandpaper, primer, paint, brushes, rollers, drop cloths, and a weekend or two of determination. For homeowners, renters with permission, or DIY enthusiasts, white cabinet paint is one of the most budget-friendly ways to refresh a room.
Best Places to Use White Painted Cabinets
White painted wood cabinets work well in kitchens, bathrooms, laundry rooms, mudrooms, bedrooms, offices, and craft spaces. They can brighten dark corners, balance colorful walls, and make storage look cleaner. In a kitchen, white cabinets can pair beautifully with butcher block countertops, black pulls, brass knobs, stainless steel appliances, subway tile, or natural stone.
However, white paint is honest. It shows smudges, fingerprints, dust, and rushed brushwork. That does not mean you should avoid it. It simply means you should choose a durable paint finish and take your time with preparation.
Before You Start: Check the Cabinet’s Condition
Before opening a paint can, inspect the cabinet carefully. Look for loose veneer, peeling finish, water damage, cracked panels, deep scratches, sticky residue, worn corners, missing hardware, and structural problems. Paint can transform appearance, but it cannot magically fix rotten wood or a door that hangs like it has given up on life.
If the cabinet is sturdy but ugly, congratulationsyou have an excellent paint candidate. If it has minor dents or nail holes, those can be filled. If the finish is glossy, it can be scuff-sanded or deglossed. If the wood is stained and likely to bleed through white paint, you will need a stain-blocking primer. If the cabinet is very old and may contain lead-based paint, pause before sanding.
Important Safety Note for Older Cabinets
If the cabinet or home was painted before 1978, assume lead-based paint may be present until testing proves otherwise. Sanding, scraping, or disturbing lead paint can create hazardous dust. Use a lead test kit or consult a certified professional before disturbing the finish. Safety glasses, gloves, ventilation, and a proper dust mask or respirator are also smart choices for any sanding or painting project.
Tools and Supplies You Will Need
Gathering your supplies first prevents the dreaded mid-project store run while wearing paint-splattered sweatpants. For painting an old wood cabinet with white paint, you will usually need:
- Degreasing cleaner or TSP substitute
- Clean rags or microfiber cloths
- Screwdriver or drill for removing doors and hardware
- Painter’s tape and labels
- Drop cloths or plastic sheeting
- Wood filler and putty knife
- Sandpaper or sanding sponges in 150-, 180-, and 220-grit
- Vacuum with brush attachment or tack cloth
- High-quality bonding or stain-blocking primer
- White cabinet paint, enamel paint, or trim paint
- Angled brush for edges and details
- Mini roller with a smooth or microfiber cover
- Paint tray and liners
- Painter’s pyramids, blocks, or a drying rack for doors
For a smoother finish, you may also want a liquid deglosser, wood grain filler for oak, caulk for tiny seams, and a bright work light to spot drips before they dry into permanent little monuments of regret.
Step 1: Remove Doors, Drawers, and Hardware
Start by taking off cabinet doors, drawers, knobs, pulls, and hinges. Technically, you can paint around hardware, but that is how cabinets end up looking like they were painted during a power outage. Removing hardware gives cleaner edges and prevents paint from clogging hinges or making knobs look chunky.
Label everything. Use painter’s tape, small bags, or a simple numbering system. Mark each door and its matching location. Old cabinets are not always perfectly square, and doors may not fit as neatly if they are swapped around. Labeling saves you from playing a frustrating game called “Why Won’t This Door Close?”
Step 2: Clean the Cabinet Like You Mean It
Cleaning is not glamorous, but it is one of the most important steps. Old wood cabinets collect grease, fingerprints, cooking residue, furniture polish, dust, and mysterious sticky spots that seem to come from another dimension. Paint will not bond well to grime.
Use a degreasing cleaner or TSP substitute and wipe every surface you plan to paint. Pay special attention to areas around handles, edges, corners, and cabinet frames near cooking zones. After cleaning, wipe with fresh water if the cleaner requires rinsing, then allow the cabinet to dry completely.
Do Not Skip Cleaning
Sanding dirty cabinets can grind grease and residue deeper into the surface. That creates adhesion problems later. Clean first, sand second. Your future selfthe one not dealing with peeling paintwill thank you.
Step 3: Repair Dents, Holes, and Imperfections
Once the cabinet is clean and dry, inspect it again. Fill old hardware holes, dents, cracks, and gouges with wood filler. Let the filler dry according to the product directions, then sand it smooth. If you are switching from knobs to pulls, measure carefully before filling or drilling new holes.
White paint tends to highlight shadows and texture, so repairs matter. A dent that looked charming in dark wood can become very noticeable under bright white paint. Think of prep work as the skincare routine of cabinet painting. Paint is the makeup; sanding and filling are the moisturizer, exfoliation, and eight glasses of water.
Step 4: Sand or Degloss the Wood
Sanding gives primer something to grip. You do not usually need to strip the cabinet down to bare wood. In fact, over-sanding can create more work. The goal is to dull the existing finish and create a slightly rough surface for adhesion.
Use 150- or 180-grit sandpaper for the first scuff sanding. Sand with the grain where possible. For detailed trim, use a sanding sponge that can bend into curves and grooves. After sanding, vacuum the dust and wipe with a tack cloth or slightly damp microfiber cloth.
When to Use Liquid Deglosser
If the cabinet has a shiny varnish or glossy painted finish, a liquid deglosser can help dull the surface. Some DIYers use deglosser in addition to light sanding, especially on detailed doors where sandpaper cannot reach every groove. Always follow the product directions and use good ventilation.
Step 5: Choose the Right Primer
Primer is the difference between “Wow, you painted that?” and “Oh no, why is the wood bleeding through?” Old wood cabinets, especially stained wood, can release tannins that discolor white paint. This can create yellow or brown stains that appear after painting. A quality stain-blocking primer helps prevent bleed-through.
If the cabinet has a slick finish, use a bonding primer designed for difficult surfaces. If the wood is raw, stained, knotty, or likely to bleed, use a stain-blocking primer. For oak cabinets with heavy grain, consider grain filler before primer if you want a smoother, more modern finish.
How to Apply Primer
Use an angled brush for corners, grooves, trim, and edges. Use a mini roller for flat panels and cabinet sides. Apply thin, even coats. Thick primer can drip, pool in corners, and create texture. Let the primer dry fully, often overnight or at least as long as the manufacturer recommends.
After primer dries, lightly sand with 220-grit sandpaper. This smooths dust nibs, brush marks, and tiny raised areas. Wipe away all dust before painting. Yes, this is another round of sanding. Cabinet painting is basically a relationship with sandpaper, but at least it does not text you at midnight.
Step 6: Pick the Best White Paint for Cabinets
Cabinets are high-touch surfaces, so wall paint is usually not the best choice. Choose a durable cabinet paint, trim enamel, acrylic enamel, alkyd enamel, or high-quality interior paint designed for furniture, doors, and trim. These paints cure harder and stand up better to cleaning, fingerprints, and daily use.
For sheen, satin and semi-gloss are popular choices. Satin gives a softer, modern look while still being cleanable. Semi-gloss reflects more light and is easier to wipe down, but it can show imperfections more clearly. Avoid flat paint on cabinets because it is harder to clean and less durable in busy areas.
Choosing the Right Shade of White
Not all white paints are the same. Some whites are warm and creamy. Some are cool and crisp. Some look perfect on a paint chip and then turn slightly gray, yellow, blue, or blindingly bright in your room. Test samples before committing.
Look at your white paint sample in morning light, afternoon light, and evening artificial light. Compare it with your wall color, flooring, countertop, backsplash, and hardware. A warm white can soften older wood tones, while a clean neutral white can create a fresh modern look. Ultra-bright white can be beautiful, but in some rooms it may feel stark.
Step 7: Paint the Cabinet in Thin Coats
Now comes the satisfying part. Start with the cabinet frame, then move to doors and drawers. Brush detailed areas first, then roll flat surfaces. Work in small sections and keep a wet edge to avoid lap marks. Do not overload the brush or roller.
Thin coats are better than thick coats. A thick coat may look like progress, but it dries slowly, sags easily, and can remain soft. Two or three thin coats usually create a smoother, stronger finish than one heavy coat. Follow the paint manufacturer’s recoat time, even if the cabinet looks dry sooner.
Painting Cabinet Doors
Paint the backs of the doors first. Let them dry fully, then flip and paint the fronts. This way, if there are tiny marks from resting the door on supports, they are less visible on the inside. Use painter’s pyramids, blocks, or a drying rack to keep doors elevated while painting edges.
Watch for drips along door edges and inside corners. White paint can hide wet drips until they dry into little ridges. Check your work with a light from different angles before walking away.
Step 8: Let the Paint Cure Before Reassembly
Dry paint and cured paint are not the same thing. Paint may feel dry to the touch within hours, but it can take days or weeks to fully harden. Reinstalling doors too soon can cause sticking, dents, or scratches.
Let the cabinet pieces dry as long as possible before reassembly. If you can wait a few days, do it. If the paint label suggests a longer cure time before heavy use, respect it. Cabinet paint rewards patience. Rushing the curing stage is like baking a cake and cutting it while it is still soup.
Common Mistakes to Avoid
Skipping Primer
White paint over old wood without primer can lead to stains, poor adhesion, and uneven coverage. Primer is especially important when painting stained wood, glossy finishes, knots, or previously painted cabinets.
Using Cheap Brushes
A low-quality brush can leave bristles, streaks, and heavy marks. Use a quality angled brush and a smooth mini roller for a cleaner finish.
Painting Over Grease
Grease is paint’s enemy. It may look invisible, but it can cause peeling or fisheye spots. Degrease thoroughly before sanding or priming.
Applying Paint Too Thick
Thick paint takes longer to dry and is more likely to drip. Thin, even coats create a stronger and smoother result.
Forgetting to Label Doors
Old cabinets have quirks. Label doors, drawers, hinges, and screws so everything returns to its original spot.
How to Maintain White Painted Cabinets
Once your cabinet is painted and cured, treat it gently for the first few weeks. Avoid harsh scrubbing, abrasive pads, and strong cleaners. Use a soft cloth with mild soap and water for routine cleaning. Wipe spills quickly, especially around sinks and cooking areas.
Add felt bumpers inside cabinet doors to prevent painted surfaces from slamming together. If the cabinet is in a kitchen, clean around handles regularly because that is where oils from hands collect. Touch up chips when they are small rather than waiting until they become dramatic.
Should You Distress or Glaze a White Painted Cabinet?
Distressing and glazing can add character, especially for farmhouse, cottage, vintage, or antique-inspired designs. Light distressing along edges can make a cabinet look aged on purpose rather than accidentally worn. A glaze can settle into grooves and highlight details.
However, if your goal is a clean modern cabinet, skip distressing and focus on smooth prep, crisp paint, and updated hardware. Black, brass, bronze, nickel, or chrome hardware can completely change the final look. Sometimes a simple white cabinet with new pulls looks better than a complicated finish.
Specific Example: Updating a Dark Oak Cabinet With White Paint
Imagine you have an old oak cabinet with golden-orange stain, visible grain, brass knobs, and a glossy finish. First, remove the doors and label them. Clean every surface with degreaser. Fill dents and old hardware holes if changing the pulls. Scuff-sand with 150- or 180-grit paper until the shine is gone. Vacuum and wipe clean.
Because oak has strong grain and can show texture under white paint, apply grain filler if you want a smoother look. Then use a stain-blocking primer. After it dries, sand lightly with 220-grit and wipe away dust. Apply two thin coats of durable white cabinet enamel in satin or semi-gloss, sanding lightly between coats if needed. Let the doors cure before reinstalling. Finish with matte black pulls for contrast or brushed brass knobs for warmth.
The result: a cabinet that once looked like it belonged beside a bowl of potpourri now looks fresh, bright, and ready for its close-up.
Extra Experience: Real-World Lessons From Painting an Old Wood Cabinet White
Painting an old wood cabinet with white paint teaches you things that no paint label can fully explain. The first lesson is that old cabinets have history, and sometimes that history is sticky. Around handles, edges, and drawer fronts, you may find layers of oil, polish, fingerprints, and dust that regular wiping does not remove. A second round of cleaning is often worth it. If your rag still looks dirty after the first pass, the cabinet is politely telling you it is not ready for primer.
The second lesson is that lighting changes everything. A white paint that looks soft and elegant in the store can look icy blue in a north-facing room or buttery yellow under warm bulbs. Always test paint on a sample board or hidden cabinet area. Move the sample around the room. Look at it during the day and at night. White paint is not one color; it is a whole personality test.
The third lesson is that drying space matters. Cabinet doors take up more room than expected. You may begin with one tidy worktable and quickly realize you need a garage, spare room, or carefully protected dining area. Doors should lie flat or rest securely while drying. If they lean against a wall too soon, paint can stick, dent, or collect dust. Pets should also be banned from the paint zone unless you want a cat-hair textured finish, which is not currently trending.
The fourth lesson is to check edges twice. Cabinet door edges love to collect extra paint. After rolling the front, look along the sides for drips. Smooth them out immediately. A small drip is easy to fix while wet and annoying to sand after it dries. The same goes for inside corners and decorative grooves. Paint likes to gather there like it paid rent.
The fifth lesson is that hardware can make or break the final look. Old hinges or dated knobs may stand out more once the cabinet is freshly white. Sometimes cleaning and reusing original hardware works beautifully, especially on vintage pieces. Other times, new pulls are the finishing touch that makes the cabinet look professionally updated. Measure hole spacing before buying new hardware, or be prepared to fill and drill.
The sixth lesson is patience. White paint often needs more coats than darker paint because it must cover old stain, shadows, and primer evenly. The first coat may look streaky. Do not panic. Do not glob on more paint. Let it dry, lightly sand if needed, and apply the next thin coat. The transformation usually happens gradually. Coat one is “uh-oh.” Coat two is “okay, I see it.” Coat three is “why didn’t I do this years ago?”
The final lesson is that imperfections are part of DIY charm, but shortcuts are not. A tiny brush mark on an old cabinet door is normal. Peeling paint because you skipped cleaning is avoidable. A slightly visible wood grain can look beautiful. Brown stains bleeding through white paint because you skipped stain-blocking primer are less beautiful. Respect the process, and the cabinet will reward you with years of useful, fresh-looking storage.
Conclusion: White Paint Can Give an Old Cabinet a New Life
Painting an old wood cabinet with white paint is one of the most satisfying DIY upgrades you can tackle. It brightens a room, saves money, and gives solid wood furniture a second chance. The secret is not rushing. Clean thoroughly, sand or degloss properly, repair flaws, use the right primer, choose durable cabinet paint, apply thin coats, and let the finish cure before heavy use.
White painted cabinets can look timeless, modern, cozy, or classic depending on the shade, sheen, and hardware you choose. Whether you are rescuing a kitchen cabinet, updating a bathroom cupboard, or transforming a thrifted storage piece, the process is manageable with patience and the right materials. And when you stand back and see that once-tired cabinet glowing in fresh white paint, you may feel the powerful DIY urge to paint everything else in the house. Stay strong. Start with the cabinet.