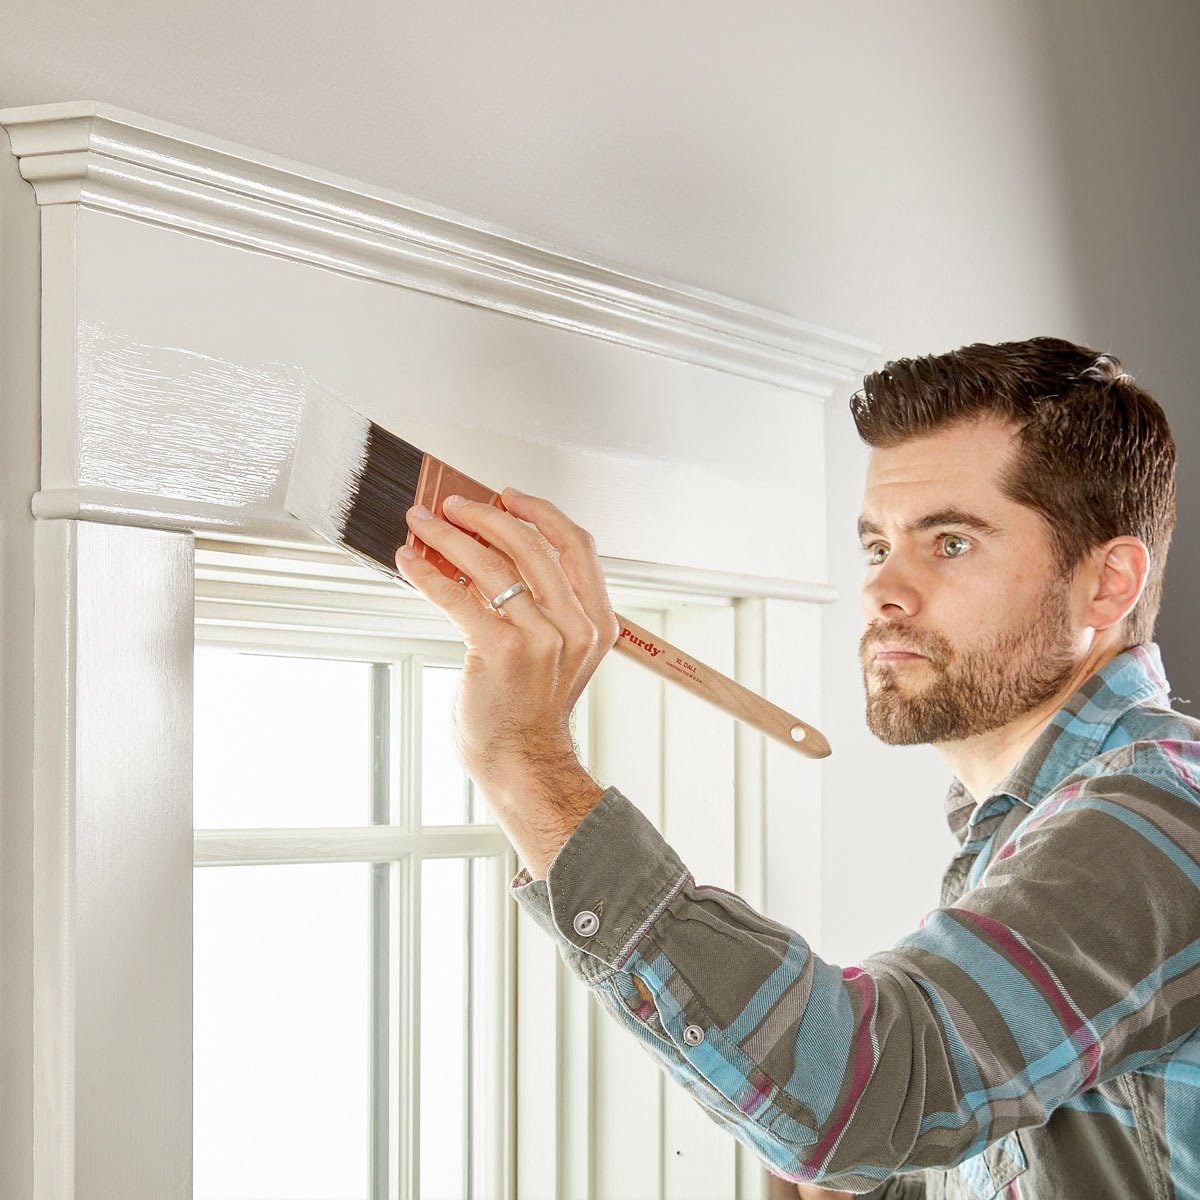

You have moved the furniture, covered the floor, opened the paint cans, and reached the question that has started more DIY debates than anyone expected: Should you paint the trim or walls first?
The mildly annoying answer is that professional painters do not all follow the same sequence. Some prefer painting trim first because finished trim is relatively easy to mask before rolling the walls. Others paint walls first so roller splatter cannot ruin carefully finished baseboards and door casings. Both methods can produce beautifully crisp results.
The better question, then, is not simply “trim or walls first?” It is which order makes the most sense for your room, your tools, and your painting skills?
For many DIY projects, painting the trim first is an efficient approach because you can work quickly without worrying about getting a little trim paint onto unfinished walls. Once the trim is sufficiently dry for masking, protect it and finish the walls. However, walls-first can be smarter when you are comfortable cutting in trim by hand, have lots of wall area to roll, or simply want to keep roller splatter away from your final trim coat.
Before sacrificing a weekend to a gallon of eggshell and increasingly questionable music choices, use these 11 professional painting tips to decide what should get painted first.
Should You Paint Trim or Walls First?
There is no universal rule. Professional guidance varies because painters develop workflows based on speed, equipment, surface condition, and the type of finish they are trying to achieve.
A common trim-first sequence is:
- Prepare the entire room.
- Paint the trim and other woodwork.
- Allow it to dry according to the paint and tape manufacturer’s instructions.
- Mask the trim.
- Cut in and roll the walls.
- Complete small touch-ups.
A common walls-first sequence is:
- Prepare the room.
- Paint the ceiling if necessary.
- Cut in and roll the walls.
- Allow the wall paint to dry sufficiently.
- Mask or carefully cut in around the walls.
- Paint baseboards, window trim, door casings, and doors.
Neither sequence rescues poor preparation. Dirty trim, loose paint, unfilled nail holes, badly sealed tape, and rushed drying times will happily sabotage either method.
11 Professional Tips for Painting Trim and Walls
1. Decide Your Painting Order Before Opening the Paint
Avoid bouncing between walls and woodwork. Completing one surface category before moving to another generally makes it easier to maintain clean edges, organize tools, and avoid accidental smears.
If you choose trim first, finish the trim coats rather than painting half the baseboard, getting bored, rolling a wall, returning to the window casing, and turning the room into a paint-themed obstacle course.
If the ceiling also needs paint, it usually makes sense to tackle it near the beginning of the project. Working from the upper parts of a room downward reduces concern about occasional drips landing on surfaces that have already received their final coat.
2. For Many DIYers, Trim First Makes Masking Easier
One major argument for painting trim before walls is simple: flat, smooth trim can be easier to tape than a large freshly painted wall.
When the walls have not yet received their finish coat, you also do not need to obsess over the wall-side edge while brushing the trim. Slightly overlapping trim paint onto the wall is usually harmless because wall paint will later cover it.
After the trim has dried sufficiently, apply the appropriate painter’s tape along its edge, cut in the wall color, and roll the walls.
This strategy can be especially useful for beginners who want crisp lines but are not yet confident enough to cut in freehand.
3. Paint Walls First if Roller Splatter Is Your Biggest Concern
There is a perfectly reasonable case for doing the opposite.
Rolling walls can produce tiny specks of paint, particularly when the roller is overloaded or moved too quickly. If you have already created a flawless glossy white baseboard, discovering gray wall speckles across it is not exactly the grand finale you were hoping for.
Painting walls before trim means those speckles are irrelevant because the trim’s final coat comes later.
This approach also works well for painters who can create a clean line with an angled sash brush without relying heavily on tape.
4. Spend More Time on Preparation Than Feels Reasonable
Professional-looking paint jobs begin long before paint touches a brush.
Remove dust, grime, grease, and cobwebs. Inspect trim and walls under good lighting. Fill nail holes, dents, and small imperfections with the appropriate patching material. Sand repaired areas smooth and remove the sanding dust.
Trim deserves particularly close attention. Old semi-gloss or glossy finishes may need scuff sanding so the new coating can bond properly. Loose or peeling paint must be dealt with rather than buried beneath another coat.
Caulk suitable gaps where trim meets walls when appropriate. A smooth transition between surfaces can make an ordinary paint job look considerably more polished.
Paint is surprisingly honest. It does not make dents disappear. It usually gives them better lighting.
5. Use Primer When the Surface Actually Needs It
Primer is not automatically necessary for every previously painted room, but skipping it when it is needed can create more work.
Consider an appropriate primer when dealing with bare wood, new drywall repairs, significant color changes, stains, troublesome adhesion, or incompatible existing coatings. Spot-prime repaired areas when necessary so patches do not absorb finish paint differently from the surrounding surface.
On trim, proper priming can improve adhesion and help create a more uniform finish, particularly on bare or repaired wood.
Always select primer based on the substrate and finish coating instead of assuming one primer handles every situation.
6. Choose Different Paint Characteristics for Walls and Trim
Walls and trim have different jobs.
Interior walls are frequently finished in flat, matte, eggshell, or satin products depending on the room and desired washability. Trim often benefits from a tougher finish because baseboards, door casings, and window trim are touched, bumped, vacuumed, wiped, and generally treated with less respect than walls.
Satin, semi-gloss, and other durable trim-oriented finishes are common choices, although modern product lines provide more options than the old “walls are flat and trim is shiny” rule suggests.
Sheen also affects how imperfections appear. Higher-sheen finishes reflect more light, which can make sloppy sanding, brush marks, and dents easier to see. That makes careful trim preparation particularly important.
7. Invest in a Good Angled Sash Brush
Buying decent paint and applying it with a bargain-bin brush that sheds bristles like an anxious golden retriever is a questionable strategy.
An angled sash brush gives you better control along baseboards, window casings, door frames, corners, and ceiling lines. Brushes around 2 to 2.5 inches wide are comfortable for many interior cutting-in jobs, although trim size and painter preference matter.
Do not bury the entire brush in paint. Load the working portion of the bristles, remove excessive paint, and use controlled strokes.
For trim, work manageable sections rather than brushing an enormous length at once. Apply the paint, then smooth the section with longer finishing strokes while the coating is still workable.
8. Cut In and Roll While Maintaining a Wet Edge
When painting walls, use your brush to create a border along trim, corners, and the ceiling where the roller cannot comfortably reach. This technique is known as cutting in.
Then roll the larger wall area while the cut-in paint is still reasonably fresh whenever practical. Keeping adjoining sections wet helps produce a more uniform texture and reduces visible bands around the perimeter sometimes called picture framing.
Work systematically rather than cutting in an entire room in the morning and returning with the roller after lunch.
Also bring the roller reasonably close to the brushed area without striking the trim. The goal is consistent texture, not an exciting demonstration of how quickly a loaded roller can repaint a baseboard.
9. Respect Drying, Recoat, and Cure Times
This is where impatient DIY painters frequently create unnecessary problems.
Dry to the touch, ready to recoat, and fully cured are not the same thing. Temperature, humidity, ventilation, coating formulation, thickness, sheen, and surface material can all influence the timeline.
If you intend to apply painter’s tape over newly painted trim or walls, follow the tape manufacturer’s requirements and the paint manufacturer’s instructions. Certain delicate-surface tapes are designed for relatively fresh paint, but that does not mean ordinary masking tape should be pressed onto every recently painted surface.
Rushing this step can lead to pulled paint, dents, adhesive problems, or a tape-shaped reminder that patience would have been cheaper.
10. Seal Painter’s Tape Carefully and Remove It Correctly
Painter’s tape is useful, but simply placing blue tape somewhere near an edge does not automatically create professional lines.
The surface should be clean and dry. Apply the tape directly along the desired line and press the edge firmly so paint is less likely to creep underneath.
A putty knife or similar smooth tool can help secure the tape edge, provided you use it carefully enough not to damage the surface.
When removing tape, follow its manufacturer’s directions. Pull slowly rather than ripping it away like you just won a home-renovation game show. If dried paint has formed a film bridging the tape and painted surface, carefully scoring the edge can help prevent tearing.
Different tape products have different adhesion levels and permitted application times, so always check the specific product rather than assuming all painter’s tape behaves identically.
11. Save Touch-Ups for the End, but Keep Them Small
Once everything has dried, inspect the room in daylight and under artificial lighting.
Look for thin spots, missed edges, tiny drips, accidental marks, and obvious differences in coverage. Correct these carefully.
However, do not endlessly dab random wall areas with a brush. Touch-up paint can sometimes appear different because of changes in texture, application method, sheen, or lighting.
If a noticeable section needs correction, using the same type of applicator that produced the original finish can improve your chances of blending the repair. Sometimes repainting a larger section is less visible than creating a constellation of tiny brush patches.
Trim First vs. Walls First: Which Method Should You Choose?
Use this practical rule of thumb:
Choose trim first when:
- You plan to mask the trim before painting walls.
- You are less confident cutting in trim freehand.
- You want freedom to overlap a little trim paint onto unfinished walls.
- Your trim requires extensive brushing and detailed work.
- You can give the finished trim sufficient drying time before masking it.
Choose walls first when:
- You are comfortable painting trim accurately with a brush.
- You want to eliminate concern about roller splatter on finished trim.
- The room contains large wall areas and relatively little trim.
- You prefer moving quickly through ceiling and wall painting before completing detail work.
- Your chosen paint or schedule makes masking freshly painted trim inconvenient.
Both methods can deliver professional-looking results. The biggest mistake is not choosing the “wrong” sequence; it is failing to plan the sequence at all.
What Is the Best Order for Painting an Entire Room?
If every painted surface in the room needs attention, a practical workflow might look like this:
- Remove hardware and protect floors and furniture.
- Clean, patch, caulk, sand, and prime as required.
- Paint the ceiling.
- Paint trim first or walls first according to your preferred workflow.
- Complete the remaining surface after the first is sufficiently dry.
- Paint doors and detailed finish areas.
- Remove masking carefully.
- Inspect and make controlled touch-ups.
The exact middle stages can change. Professional painters themselves use different sequences. What stays remarkably consistent is the emphasis on surface preparation, appropriate tools, controlled application, and sufficient drying time.
Real-World Painting Experiences: What Usually Makes the Biggest Difference?
The trim-versus-walls debate sounds enormously important before a project begins. Once a room is finished, however, homeowners often discover that painting order was only one piece of the puzzle.
Experience 1: The Bedroom Where Trim First Saves Time
Imagine repainting a typical bedroom containing baseboards, two door casings, and a window. The trim needs fresh white paint while the walls are changing from beige to blue.
Painting the trim first can be forgiving. While brushing the top edge of a baseboard, there is no need to maintain a microscopic perfect line against the beige wall because blue wall paint will cover small overlaps later. Once the trim is ready for the appropriate tape, masking those smooth surfaces makes rolling the blue walls relatively fast.
The lesson is not simply that trim first is “better.” The advantage comes from moving the precision work to the stage where mistakes are easiest to cover.
Experience 2: The Large Living Room Where Walls First Feels Faster
Now picture a spacious living room with long walls and relatively simple baseboards. Most of the labor involves covering large wall areas.
In this situation, some painters find walls first more natural. The room can be cut in and rolled efficiently without worrying about tiny specks landing on the old baseboard finish. The trim receives its final coat afterward.
For someone comfortable controlling an angled brush, painting the trim last can produce excellent edges without elaborate masking. The critical skill becomes brush control rather than tape placement.
Experience 3: The Project Ruined by Rushing Tape
One of the most frustrating scenarios has little to do with whether walls or trim came first. A surface looks dry, tape goes on too early or the wrong tape is used, and sections of the fresh coating come away during removal.
The repair can require sanding damaged edges, repainting sections, waiting again, and reconsidering several life choices.
The practical lesson is straightforward: build drying time into your painting schedule. Do not assume a surface that feels dry is automatically ready for masking. Consult both coating and tape instructions.
Experience 4: Preparation Wins the Beauty Contest
Compare two baseboards. One receives expensive trim paint over dirty, scratched, glossy old paint. The other is cleaned, repaired, lightly sanded where needed, properly primed when required, and then coated with a good-quality finish.
The carefully prepared baseboard will usually have the enormous advantage.
This is why experienced painters talk so much about preparation. Customers notice color first, but smooth joints, filled nail holes, clean edges, consistent sheen, and the absence of drips are what make a finished room feel professionally painted.
It is also why rushing through prep to “get to the actual painting” is backwards. Preparation is a major part of the actual painting.
Experience 5: The Best Sequence Is the One You Can Repeat
Efficiency improves dramatically when you establish a system. Prep everything before repeatedly switching tasks. Keep wall tools and trim tools organized. Work around the room in a predictable direction. Complete manageable sections and inspect them before moving on.
A repeatable workflow reduces missed areas and accidental contact with fresh paint. By the second room, the project often feels substantially easier because you are no longer improvising every five minutes.
That may be the most useful professional habit of all: consistency beats clever tricks.
Final Verdict: Paint Trim or Walls First?
If you want a simple starting recommendation, painting trim first is an excellent choice for many DIYers, especially when you plan to mask the finished trim and then roll the walls. It allows small trim-paint overlaps to be covered later and can make achieving crisp wall edges easier.
But painting walls first is not wrong. In rooms with lots of wall area, painters concerned about roller splatter, or projects handled by someone skilled at cutting in trim, walls first may be the smoother workflow.
Whichever order you choose, professional-looking results depend far more on cleaning, repairing, sanding where appropriate, selecting suitable coatings, using quality brushes and rollers, respecting drying requirements, and taking your time at the edges.
In other words, there is no secret painting ritual. There is mostly good preparation, decent tools, patience, and the ability to resist touching paint every six minutes to see whether it is dry yet.
Note: Use extra caution when sanding or disturbing old painted surfaces. Homes built before 1978 may contain lead-based paint, and sanding or other renovation work can create hazardous lead dust. Determine whether lead-based paint may be present and follow current EPA lead-safe guidance or use a qualified lead-safe professional when appropriate.
SEO Information