
Replacing a tired fireplace hearth with slate tile is one of those home projects that looks wildly fancy when it is finished but does not require you to own a golden hammer or speak fluent contractor. Slate has a naturally layered, slightly rugged surface that makes a fireplace feel grounded, custom, and a little bit “old stone cottage,” even if your living room is currently decorated with laundry baskets and one heroic houseplant.
That said, a hearth is not just decorative. It sits in front of a fireplace for a reason: protection. A proper hearth extension helps shield nearby flooring from sparks, embers, heat, and ash. So while this is a very achievable DIY project for a careful homeowner, it is also one where accuracy matters. You need a stable base, noncombustible materials, the right mortar, clean layout lines, and enough patience to avoid creating a slate-tiled speed bump in front of your fireplace.
This guide walks through how to replace a hearth with slate tile from demolition to sealing. It also explains what to check before you start, how to avoid common mistakes, and how to get a crisp, professional-looking result without turning your living room into a permanent construction exhibit.
Why Slate Tile Is a Smart Choice for a Fireplace Hearth
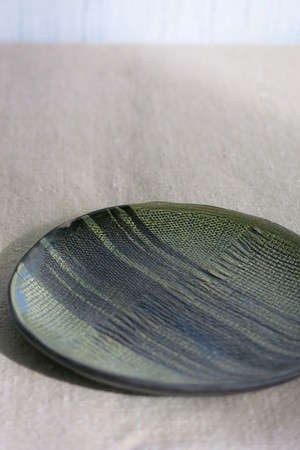
Slate tile is popular for hearths because it is strong, heat tolerant, and naturally beautiful. Unlike glossy ceramic tile, slate has depth and variation. One tile may be charcoal gray with blue undertones; the next may have rust, green, or copper streaks. That natural inconsistency is part of the charm. It hides small messes better than a shiny surface and gives the fireplace a substantial, built-in look.
Slate is also a natural stone, which means it is dense and durable when installed correctly. For a fireplace hearth, that matters. People step on it, set tools on it, kneel near it, and occasionally drop a log on it with the elegance of a confused raccoon. A properly bonded slate hearth can handle everyday use and still look handsome for years.
The key phrase is “installed correctly.” Slate is less forgiving than some manufactured tile. It can vary in thickness, it may need sealing, and its surface can flake slightly if you choose a heavily cleft variety. For hearth work, gauged slate tile is usually easier to install because the back is more uniform. That helps the tile sit flatter and reduces the amount of mortar adjustment needed.
Before You Begin: Check Safety, Code, and Fireplace Type
Before you pick up a pry bar, confirm what kind of fireplace you have. A masonry wood-burning fireplace, a gas insert, a prefabricated fireplace, and an electric fireplace may have different requirements. The hearth extension size, material thickness, and clearance rules can vary depending on the appliance and local building code.
As a common rule used in residential construction, a fireplace hearth extension often needs to project at least 16 inches in front of the firebox opening and at least 8 inches beyond each side. For larger fireplace openings, the required extension may increase to 20 inches in front and 12 inches on each side. However, do not treat those numbers as permission to ignore your local inspector, fireplace manual, or common sense. Local codes and appliance instructions win every time.
Also check what is underneath the existing hearth. If the current hearth is cracked because the subfloor flexes, simply installing new slate over the same weak base is like putting a tuxedo on a scarecrow. It may look better briefly, but the structure is still not doing its job. Natural stone needs a very stiff, flat, clean substrate. Movement leads to cracked grout, loose tiles, or broken stone.
Tools and Materials You Will Need
Tools
- Safety glasses, gloves, dust mask, and knee pads
- Pry bar, hammer, and cold chisel
- Utility knife and painter’s tape
- Shop vacuum
- Tape measure, pencil, straightedge, and level
- Notched trowel sized for your tile
- Margin trowel
- Rubber grout float
- Tile spacers
- Wet saw or angle grinder with a diamond blade
- Sponges, buckets, microfiber cloths
- Caulk gun, if using high-temperature sealant at edges
Materials
- Slate tile, preferably gauged for easier installation
- Cement backer board, if needed for the substrate
- Backer board screws, if installing over an approved wood subfloor system
- Polymer-modified thin-set mortar rated for natural stone
- Grout suitable for the joint width
- Natural stone sealer or enhancing sealer
- Painter’s plastic or drop cloths
- High-temperature flexible sealant for perimeter gaps, if appropriate
Step 1: Protect the Room and Prepare the Work Area
Fireplace projects create dust. Not cute dust. Not “light sprinkle on a bookshelf” dust. Demolition dust has ambition. Start by removing furniture near the fireplace, rolling up rugs, and covering nearby flooring with drop cloths. Tape plastic sheeting over the fireplace opening if soot or debris may fall out while you work.
If the existing hearth meets surrounding wood flooring, use painter’s tape along the edges to reduce scratches. You can also score caulk lines or old paint with a utility knife so removal does not tear adjacent finishes. Keep a shop vacuum nearby and use it often. A cleaner workspace helps you see what you are doing and reduces the chance of setting tile over grit, crumbs, or mysterious ancient fireplace confetti.
Step 2: Remove the Old Hearth
The removal method depends on what is there now. Old tile may come up with a hammer and cold chisel. Brick or thick stone may need more persuasion. Start at a loose edge if possible, working slowly so you do not damage the subfloor, firebox, or surrounding trim. If the old hearth is set in a mortar bed, chip away the material in manageable sections.
Do not attack the hearth like you are auditioning for a demolition show. Controlled removal is safer and usually faster. Strike the chisel at a low angle to lift material rather than pulverizing everything downward. As debris comes loose, remove it from the area so you are not kneeling on sharp tile shards. Your knees will thank you; your vocabulary will remain more family-friendly.
Once the old surface is gone, vacuum thoroughly. Scrape away thin-set ridges, adhesive, mortar chunks, or loose debris. The goal is a clean, sound base that can support the new slate tile without hollow spots.
Step 3: Inspect and Repair the Substrate
A fireplace hearth needs a noncombustible, stable surface. Concrete, masonry, mortar bed, and properly installed cement backer board are common bases for tile hearths. If you find damaged plywood, loose boards, rot, water stains, or excessive movement, stop and fix the structure before tiling.
Natural stone tile needs more rigidity than many ceramic tile installations. If the floor flexes when someone walks nearby, grout and slate can crack. For a raised hearth or a hearth built over framing, make sure the assembly is stiff enough and appropriate for stone. When in doubt, ask a qualified contractor, tile professional, or local building official to assess the structure. That consultation is cheaper than replacing your replacement.
If you are installing cement backer board, follow the manufacturer’s instructions exactly. That usually means bedding the board in mortar, fastening it with approved screws, staggering seams, and taping joints with alkali-resistant mesh tape and mortar. Do not install slate directly over regular drywall, particleboard, flexible flooring, or questionable old adhesive. Slate wants a serious foundation, not a trampoline wearing a disguise.
Step 4: Confirm Hearth Size and Layout
Measure the fireplace opening and mark the required hearth dimensions. Confirm that your new hearth will extend far enough in front of and beside the firebox. If your old hearth was too small, this is the moment to correct it. A beautiful hearth that does not meet safety requirements is not a design upgrade; it is a future problem with excellent lighting.
Next, dry-lay the slate tiles without mortar. Use spacers to represent grout joints. Start from the centerline of the firebox or the visual center of the hearth, then work outward. Your goal is symmetry and clean edges. Avoid tiny slivers of tile along the front or sides. A narrow strip may crack, look awkward, or announce to the world that layout planning left the chat.
If the hearth is rectangular, a simple grid or running bond pattern usually works well. Large-format slate tiles can create a clean modern look, while smaller tiles provide more grout lines and a traditional texture. For a rustic fireplace, mixed-color slate can look great. For a sleeker room, choose uniform charcoal or black slate.
Step 5: Cut the Slate Tile
Slate cuts best with a wet saw fitted with a diamond blade. Mark each cut carefully, then cut slowly to reduce chipping. Wear eye protection and keep your fingers clear of the blade. If you need to notch tile around trim, masonry corners, or a firebox edge, make several relief cuts and gently remove the waste.
After cutting, dry-fit each piece again. Slate can have slight size variations, so do not assume every tile will behave like a factory-perfect square. If one edge looks rough, position it where grout, trim, or the fireplace edge will make it less noticeable. Keep your best full tiles in the most visible spots, usually the front edge and center field.
If you want a finished front edge, consider using bullnose slate, a compatible stone trim, or a clean metal edge profile rated for the installation area. Some hearths finish flush with the surrounding floor, while others are raised. The edge detail makes a big difference in whether the project looks intentional or like it stopped one Saturday because everyone got hungry.
Step 6: Seal Slate Before Grouting
Many slate tiles are porous, textured, or both. Applying a penetrating stone sealer before grouting can make cleanup much easier because grout is less likely to cling to the surface. This is especially helpful with cleft slate, where grout haze can settle into ridges and turn a beautiful tile into a dusty-looking regret.
Test the sealer on a spare tile first. Some sealers leave the stone looking natural, while enhancing sealers deepen the color and create a richer, slightly wet appearance. Neither is automatically better; it depends on the look you want. Apply sealer according to the label, wipe off excess, and let it dry as directed before setting or grouting.
Step 7: Mix and Apply Thin-Set Mortar
Use a polymer-modified thin-set mortar suitable for natural stone and the substrate. Mix it to a peanut-butter-like consistency, then let it slake if the manufacturer requires it. Slaking simply means allowing the mixed mortar to rest before remixing. It sounds fancy, but it is basically mortar taking a short coffee break so the ingredients hydrate properly.
Spread mortar over a small area using the flat side of the trowel first to key it into the substrate. Then comb it with the notched side in straight, even ridges. Do not spread more mortar than you can cover before it skins over. For slate, back-buttering each tile is often a smart move. That means applying a thin coat of mortar to the back of the tile before setting it. It improves contact and helps compensate for minor stone thickness variation.
Press each tile into the mortar with a slight sliding motion perpendicular to the trowel ridges. Use spacers to maintain consistent joints. Lift an occasional tile to check coverage. You want strong mortar contact, especially on a hearth where heat changes and foot traffic may occur.
Step 8: Set the Slate and Keep It Flat
As you set the tiles, check frequently with a level or straightedge. Slate often has natural surface variation, but the finished hearth should not have obvious lippage where one tile edge sits much higher than the next. Small changes can be adjusted by adding or removing a little mortar. Work carefully; mortar is more cooperative before it hardens into a tiny cement opinion.
Clean mortar from grout joints as you go. Once thin-set dries in the joints, removing it becomes tedious. Also wipe smears from the slate surface with a damp sponge before they cure. Avoid flooding the tile with water, which can weaken fresh mortar or create a mess.
When all tiles are set, leave the hearth undisturbed for the curing time recommended by the mortar manufacturer. Usually, that means at least 24 hours before grouting, but always read the product label. Do not walk on it, poke it, or invite anyone to admire it with their shoes.
Step 9: Grout the Joints
Choose grout based on joint width and appearance. Sanded grout is common for wider joints, while unsanded grout may be used for very narrow joints, depending on the tile and product instructions. Many modern grouts are polymer-enhanced and offer better stain resistance than older formulas.
Apply grout with a rubber float, holding it at an angle and pressing grout firmly into the joints. Work diagonally across the tile so you do not pull grout back out. After the joints are filled, use the edge of the float to remove excess grout from the surface.
Wait until the grout begins to firm up, then wipe with a damp sponge. Rinse the sponge frequently and avoid using too much water. Several light passes are better than one swampy wipe. When a haze appears after the grout dries, buff it with a soft cloth. If haze remains on textured slate, use a grout haze remover approved for natural stone, but only after checking the grout manufacturer’s timing recommendations.
Step 10: Seal the Finished Hearth
After the grout cures, apply a stone sealer to the slate and grout if the products call for it. Sealing helps reduce staining from ash, soot, water, and everyday dirt. It does not make the hearth indestructible, but it does give you a fighting chance when someone drops fireplace tools, spills coffee, or tracks in winter slush.
Use a clean applicator and apply evenly. Let the sealer penetrate, then wipe off excess before it dries on the surface. Excess sealer can create streaks or a sticky film. Follow the drying and recoat instructions on the label. Some slate may need more than one coat, especially if it absorbs sealer quickly.
Common Mistakes to Avoid
Installing Over a Weak Base
The most common failure is not the slate itself; it is what sits underneath. A loose, flexible, dirty, or uneven substrate can ruin the installation. Fix the base first, even if it adds time.
Ignoring Fireplace Clearance Requirements
Do not shrink the hearth because a smaller one looks tidier. The hearth extension exists to protect combustible flooring. Always verify the correct size for your fireplace and local code.
Skipping the Dry Layout
Dry-fitting tile may feel like extra work, but it prevents awkward cuts and off-center patterns. The best tile jobs are planned before mortar enters the room.
Using the Wrong Adhesive
Do not use mastic on a hearth. Use an appropriate thin-set mortar rated for stone, heat-adjacent areas, and your substrate. When in doubt, check the mortar label or call the manufacturer.
Forgetting to Seal Slate
Slate can be porous, and textured slate loves to trap grout haze. Sealing before grouting and again after curing can save a lot of cleanup frustration.
Design Tips for a Better-Looking Slate Hearth
For a classic look, pair charcoal slate with white trim, brick, or painted millwork. For a rustic room, choose multicolor slate with copper, green, and gray movement. If the fireplace surround is busy, use simpler slate. If the surround is plain, a more varied slate can become the star.
Grout color matters more than people expect. A dark gray grout blends with charcoal slate and hides soot better. A lighter grout emphasizes each tile shape and gives the hearth a more graphic look, but it may need more cleaning. For most fireplaces, a medium gray grout is the Goldilocks choice: not too bold, not too delicate, and less likely to panic at the first ash smudge.
Consider the height of the finished hearth. Slate, mortar, backer board, and edge trim all add thickness. If the new hearth meets wood flooring, carpet, or luxury vinyl, plan the transition before installation. A clean transition strip or flush edge can make the project look polished instead of improvised.
How to Maintain a Slate Tile Hearth
Once installed, slate is fairly easy to maintain. Sweep or vacuum loose debris regularly. Wipe with a damp cloth or a stone-safe cleaner when needed. Avoid harsh acidic cleaners, vinegar, or abrasive powders because they can dull or damage natural stone and grout.
If the fireplace is used often, inspect the hearth each season. Look for cracked grout, loose tiles, stains, or worn sealer. A quick water-drop test can help: if water darkens the stone quickly, it may be time to reseal. Keeping the hearth sealed and clean helps it age gracefully instead of looking like it has been personally insulted by every winter fire.
Experience Notes: What Replacing a Hearth with Slate Tile Really Teaches You
Replacing a hearth with slate tile is one of those projects that teaches patience in very specific ways. The first lesson is that the old hearth is usually more stubborn than expected. A tile that looked barely attached yesterday may suddenly cling to the floor like it has signed a long-term lease. The trick is not brute force; it is rhythm. Work from the edges, keep the chisel low, clear debris often, and give yourself room to see the next weak point.
The second lesson is that layout is everything. When slate is dry-laid on the floor, it becomes obvious which tiles deserve the spotlight. Some pieces have beautiful veining or color variation, while others look like they woke up on the wrong side of the quarry. Put the best tiles where eyes naturally land: front center, along the main edge, and near the firebox. Save the less exciting pieces for cuts or corners. This one choice can make an affordable slate hearth look custom.
The third lesson is that slate has personality. It is not perfectly flat, perfectly smooth, or perfectly identical from box to box. That is the entire point. But because of that variation, you need to check each tile as it goes down. A little extra mortar under one corner or a firmer press on another tile can keep the surface from feeling uneven. The goal is not to erase slate’s natural texture; the goal is to avoid toe-stubbing drama.
Another practical experience: grout cleanup on slate deserves respect. Textured slate can hold grout haze in its ridges, and once it dries, cleanup becomes much less entertaining. Pre-sealing the tile helps, but so does working in small sections and wiping carefully. Do not flood the surface with water. A damp sponge, frequent rinsing, and several patient passes are better than scrubbing like you are trying to erase a parking ticket.
Finally, the finished hearth usually changes the whole room more than expected. Slate has visual weight. It can make a fireplace feel anchored, intentional, and more expensive than the project actually was. It also has a satisfying “I made this” quality. Every time you walk past the fireplace, you notice the clean edge, the stone color, the even grout lines, and the fact that the room now has one less outdated feature quietly judging you from the wall.
The best advice from experience is simple: do not rush the invisible steps. The substrate, layout, mortar coverage, curing time, and sealing are what make the visible part last. Anyone can place pretty tile in wet mortar. The real craft is making sure it stays pretty after a few heating seasons, a few dropped logs, and many cups of coffee enjoyed by the fire.
Conclusion
Learning how to replace a hearth with slate tile is a rewarding way to upgrade both the appearance and function of a fireplace. The project involves demolition, surface preparation, careful layout, stone cutting, mortar application, grouting, and sealing. None of those steps are impossible for a careful DIYer, but each one matters. A strong, noncombustible base keeps the hearth safe and stable. A thoughtful layout keeps the finished tile balanced. Proper mortar coverage and sealing help the slate perform well over time.
Slate is an excellent hearth material because it blends durability with natural character. It can look rustic, modern, traditional, or dramatic depending on the color, size, pattern, and grout you choose. Best of all, a slate tile hearth gives the fireplace a finished look that feels permanent in the best possible way.
Note: Always verify local building code, fireplace manufacturer instructions, and hearth extension requirements before beginning. If the existing hearth, subfloor, or fireplace structure is damaged, consult a qualified professional before installing new slate tile.