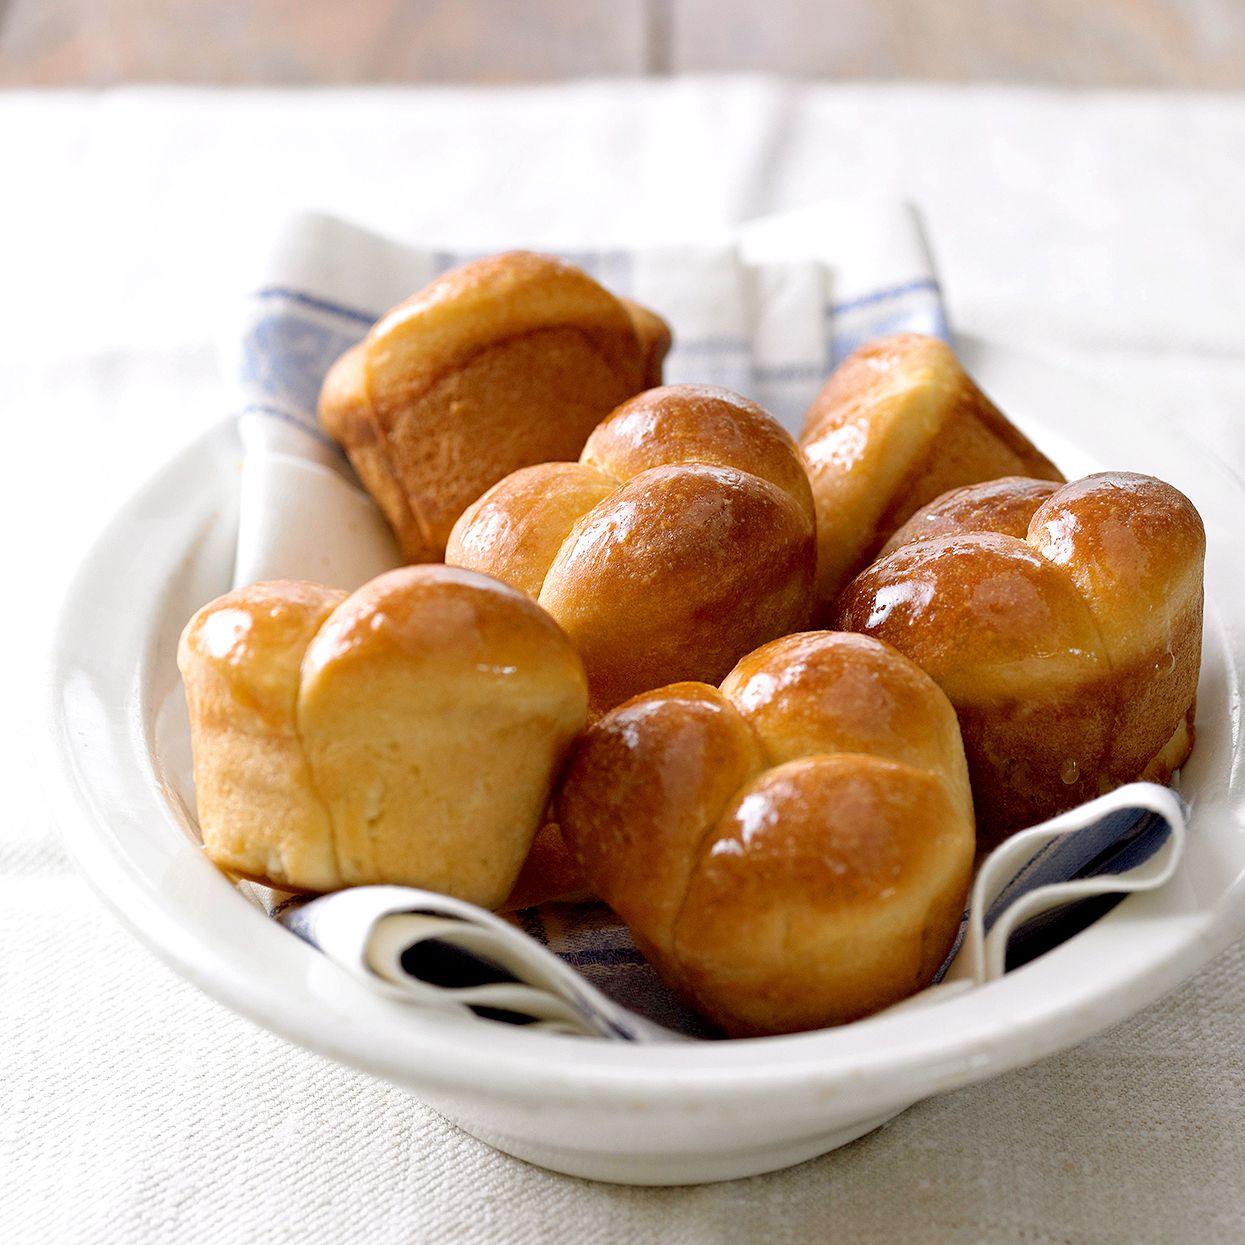

There are side dishes, and then there are dinner rollsthe little golden clouds that somehow steal attention from the roast, the mashed potatoes, and possibly even the family gossip. A truly classic dinner roll recipe should be soft, buttery, lightly sweet, and sturdy enough to swipe through gravy without collapsing like a dramatic soap opera character.
The good news? Homemade dinner rolls are not difficult. They simply ask for a little patience, a warm spot to rise, and the emotional strength not to eat three before dinner officially starts. This guide walks you through a reliable, beginner-friendly yeast roll recipe with clear steps, practical tips, troubleshooting advice, make-ahead options, and real kitchen experience to help you bake rolls that look bakery-worthy and taste like home.
Why This Classic Dinner Roll Recipe Works
The best classic dinner rolls use simple ingredients: flour, yeast, milk, butter, sugar, salt, and egg. Each one has a job. Flour gives structure, yeast creates lift, milk adds tenderness, butter brings richness, sugar helps with browning and flavor, salt balances everything, and egg adds softness and color.
This recipe uses warm milk instead of only water because milk makes the crumb softer and gives the rolls a gentle, comforting flavor. Butter is added directly to the dough and brushed on after baking for that glossy, irresistible finish. The dough rises twice, which builds better texture and flavor while keeping the rolls fluffy instead of dense.
Classic Dinner Roll Recipe Card
Recipe Overview
- Prep time: 25 minutes
- Rise time: 1 hour 30 minutes to 2 hours
- Bake time: 18 to 22 minutes
- Total time: About 2 hours 30 minutes
- Yield: 15 dinner rolls
- Skill level: Beginner-friendly
Ingredients
- 1 cup whole milk, warmed to about 105°F to 110°F
- 2 1/4 teaspoons instant yeast or active dry yeast
- 2 tablespoons granulated sugar
- 1 large egg, room temperature
- 1/4 cup unsalted butter, softened
- 1 teaspoon fine salt
- 3 to 3 1/2 cups all-purpose flour, plus more as needed
- 2 tablespoons melted butter, for brushing after baking
Optional Topping
- 1 tablespoon honey mixed with the melted butter
- Flaky sea salt for a savory finish
- Fresh parsley or rosemary for herb dinner rolls
How to Make Classic Dinner Rolls
Step 1: Wake Up the Yeast
Pour the warm milk into a large mixing bowl. Add the yeast and sugar, then stir gently. Let the mixture sit for 5 to 10 minutes, or until it looks foamy. If you are using instant yeast, this step is optional, but it is still helpful because it confirms your yeast is alive and ready to party.
If nothing happens after 10 minutes, your milk may have been too hot, your yeast may be expired, or your kitchen may be colder than a grocery store freezer aisle. Start over with fresh yeast and milk that feels warm, not hot.
Step 2: Mix the Dough
Add the egg, softened butter, salt, and 3 cups of flour to the yeast mixture. Stir with a wooden spoon or use a stand mixer fitted with a dough hook. The dough should look soft, slightly tacky, and a little shaggy at first. Add more flour, one tablespoon at a time, only if the dough is too sticky to handle.
A common mistake is adding too much flour. Dinner roll dough should not feel dry or stiff. If it does, the finished rolls may turn out heavy instead of tender. Think soft pillow, not modeling clay.
Step 3: Knead Until Smooth
Knead the dough by hand on a lightly floured surface for 6 to 8 minutes, or knead it in a stand mixer for 4 to 5 minutes. The dough is ready when it becomes smooth, elastic, and springs back slightly when pressed.
To test it, stretch a small piece of dough between your fingers. If it stretches thin without tearing immediately, the gluten has developed well. This helps the rolls rise tall and hold their fluffy shape.
Step 4: First Rise
Place the dough in a lightly greased bowl and turn it once so the surface is coated. Cover the bowl with a clean towel or plastic wrap. Let it rise in a warm, draft-free spot for 60 to 90 minutes, or until doubled in size.
A slightly warm oven that has been turned off, the top of the refrigerator, or a sunny countertop can work well. Do not rush this step. Yeast dough is not interested in your schedule; it prefers a calm afternoon and a little respect.
Step 5: Shape the Rolls
Gently punch down the dough to release excess air. Turn it onto a clean surface and divide it into 15 equal pieces. For even rolls, use a kitchen scale. Each piece should be about the same size so they bake evenly.
Shape each piece into a smooth ball by pulling the edges underneath and rolling it gently against the counter. Place the dough balls in a greased 9×13-inch baking dish, leaving a little room between them.
Step 6: Second Rise
Cover the pan and let the rolls rise again for 30 to 45 minutes, or until puffy. They should touch slightly and look soft, rounded, and ready for their big oven debut.
Step 7: Bake Until Golden
Preheat the oven to 350°F. Bake the rolls for 18 to 22 minutes, or until the tops are golden brown and the centers are cooked through. If the tops brown too quickly, loosely tent the pan with foil during the last few minutes.
Step 8: Brush with Butter
As soon as the rolls come out of the oven, brush them with melted butter. This gives them a shiny finish, softens the crust, and creates the kind of aroma that makes people wander into the kitchen asking, “Are those ready yet?”
Tips for Soft and Fluffy Dinner Rolls
Use Warm, Not Hot, Milk
Yeast loves warmth, but too much heat can damage it. Aim for milk that feels comfortably warm to the touch. If you use a thermometer, 105°F to 110°F is a safe range for activating yeast.
Do Not Over-Flour the Dough
The dough should be soft and slightly tacky. Adding too much flour may make it easier to handle, but it can also make the rolls dense. Add flour gradually and stop as soon as the dough becomes workable.
Let the Dough Rise Fully
Under-proofed rolls can bake up tight and heavy. Fully risen dough should look puffy and nearly doubled. Rising times vary depending on room temperature, so trust the dough more than the clock.
Brush with Butter Twice
For extra flavor, brush the rolls with melted butter before baking and again after baking. The first layer helps with browning, while the second keeps the crust soft and rich.
Common Dinner Roll Problems and How to Fix Them
Why Are My Dinner Rolls Dense?
Dense rolls usually come from too much flour, old yeast, not enough kneading, or not enough rise time. Make sure your yeast is active, your dough is soft, and your first rise doubles the dough before shaping.
Why Did My Rolls Not Rise?
Your yeast may be expired, the liquid may have been too hot, or the kitchen may have been too cold. Place the dough in a warmer area and give it more time. If there is still no rise after two hours, the yeast was likely inactive.
Why Are the Tops Too Dark?
The oven may be running hot, or the pan may be too close to the top heating element. Move the pan to the center rack and cover loosely with foil if browning happens too quickly.
Make-Ahead Dinner Rolls
This classic dinner roll recipe is perfect for holidays, Sunday dinners, and busy hosting days because the dough can be prepared ahead of time. After shaping the rolls, cover the pan tightly and refrigerate overnight. The next day, remove the pan from the refrigerator and let the rolls sit at room temperature for 45 to 60 minutes before baking.
You can also freeze shaped, unbaked rolls. Place them in a greased pan, cover tightly, and freeze. When ready to bake, thaw them in the refrigerator overnight, then let them rise at room temperature until puffy. Bake as directed.
How to Store and Reheat Homemade Dinner Rolls
Store leftover dinner rolls in an airtight container at room temperature for up to three days. To keep them soft, make sure they are completely cool before storing. Warm rolls release steam, and trapped steam can make them soggy.
To reheat, wrap the rolls in foil and place them in a 300°F oven for 8 to 10 minutes. For one or two rolls, a quick 10-second warm-up in the microwave works too. Add a tiny swipe of butter afterward, because life is short and dinner rolls understand that.
Delicious Variations
Honey Butter Dinner Rolls
Mix 2 tablespoons melted butter with 1 tablespoon honey and brush it over the warm rolls. This gives the rolls a sweet, glossy finish that pairs beautifully with ham, roast chicken, or holiday turkey.
Garlic Herb Dinner Rolls
Add 1 teaspoon garlic powder and 1 tablespoon chopped fresh parsley or rosemary to the melted butter. Brush it over the rolls after baking for a savory, restaurant-style finish.
Cheddar Dinner Rolls
Add 3/4 cup shredded sharp cheddar cheese to the dough after the first cup of flour is mixed in. These rolls are excellent with chili, soup, or barbecue.
Whole Wheat Dinner Rolls
Replace 1 cup of all-purpose flour with whole wheat flour. The rolls will have a slightly nuttier flavor and heartier texture. Avoid replacing all the flour unless you are comfortable adjusting hydration, as whole wheat flour absorbs more liquid.
What to Serve with Classic Dinner Rolls
Classic dinner rolls are wonderfully flexible. Serve them with roasted turkey, pot roast, baked chicken, creamy soup, beef stew, meatloaf, pasta, or a simple salad. They also make excellent mini sandwiches the next day. Split one open, add leftover ham or turkey, a little mustard, and maybe a slice of cheese. Congratulations: lunch just became charming.
For holiday meals, place the rolls in a basket lined with a clean towel to keep them warm. Add a small dish of salted butter, honey butter, or whipped cinnamon butter nearby. Do not be surprised if the bread basket empties faster than the dessert table.
Experience Notes: What Baking Classic Dinner Rolls Teaches You
Baking classic dinner rolls is one of those kitchen experiences that feels small at first, then suddenly becomes memorable. You begin with a bowl of ordinary ingredientsflour, milk, yeast, butterand somehow end up with something that makes the whole house smell like a cozy family gathering. It is practical magic, but with fewer wands and more measuring cups.
The first thing you learn is patience. Yeast dough cannot be bullied. You can stare at it, encourage it, or suspiciously check under the towel every seven minutes, but the dough will rise when it is ready. This is actually comforting. In a world where everything seems instant, dinner rolls remind you that some good things still need time.
The second lesson is that texture matters. When the dough is too dry, the rolls lose their softness. When the dough is too sticky, shaping can feel like wrestling a friendly octopus. After making them a few times, you start to recognize the ideal feel: soft, smooth, slightly tacky, and elastic. That moment when the dough transforms from messy to silky is deeply satisfying.
Shaping the rolls is another experience all its own. At first, the dough pieces may look uneven, like a tiny bread family with very different personalities. But once they rise in the pan, they become beautifully puffy and forgiving. Even imperfect rolls bake up lovely, which is one of the reasons this recipe is so rewarding for beginners.
There is also something special about serving homemade rolls. People notice. They may not comment on whether the green beans were steamed for exactly the right number of minutes, but they will absolutely notice warm bread. A basket of homemade dinner rolls instantly makes a meal feel more generous. It says, “Someone cared enough to make bread,” which is basically the culinary version of a hug.
Classic dinner rolls are also a confidence builder. Once you master them, yeast baking feels less intimidating. You begin to understand rising, kneading, shaping, proofing, and baking in a way that transfers to cinnamon rolls, sandwich bread, pizza dough, and even holiday breads. One reliable dinner roll recipe can become the doorway to an entire baking habit. Dangerous? Maybe. Delicious? Absolutely.
The best experience, though, is eating one while it is still warm. Pull it apart and watch the steam escape. Add butter and let it melt into the soft center. Take a bite and enjoy the gentle sweetness, the fluffy crumb, and the buttery finish. That is the moment you understand why homemade dinner rolls never go out of style. They are simple, classic, and quietly spectacular.
Conclusion
A classic dinner roll recipe does not need fancy ingredients or complicated techniques. It needs balanced dough, active yeast, proper rising time, gentle shaping, and a generous brush of butter at the end. Whether you are baking for Thanksgiving, Christmas, Sunday dinner, or a regular Tuesday that deserves a carb upgrade, these soft homemade dinner rolls bring comfort, flavor, and a little golden joy to the table.
Once you make them from scratch, store-bought rolls may start looking a little nervous. And honestly, they should.
Note: This article was written in original American English and synthesized from established baking methods, common yeast bread techniques, and practical dinner roll recipe guidance without inserting source links or citation placeholders.