
Some table decorations whisper, “Welcome.” Others shout, “I spent six hours making this centerpiece and now nobody is allowed to breathe near it.” A bunny napkin fold lands happily in the middle. It is cute, festive, surprisingly simple, and just fancy enough to make guests think you have your life togethereven if the mashed potatoes are still negotiating with the stove.
Learning how to fold a napkin into a bunny is a small hosting trick with big visual payoff. It works beautifully for Easter brunch, spring dinner parties, baby showers, garden lunches, children’s parties, and any meal where a little whimsy is welcome. The best part? You do not need professional origami skills, a crafting degree, or a suspiciously perfect lifestyle. You only need a square napkin, a flat surface, a little patience, and possibly a ribbon if your bunny has the posture of a sleepy toddler.
This guide breaks the bunny napkin fold into 12 clear steps, using practical tips gathered from classic tablescape tutorials and real-world hosting wisdom. Whether you are using crisp linen napkins, cotton dinner napkins, or sturdy paper napkins, this method helps you create adorable bunny ears that stand neatly on a plate, cradle an egg, or add a playful finishing touch to your place settings.
Why Bunny Napkins Are So Popular
Bunny napkins are popular because they instantly turn an ordinary place setting into a festive moment. A folded napkin can add height, color, texture, and personality without requiring expensive décor. For Easter table settings, bunny ears are especially charming because they pair naturally with dyed eggs, pastel plates, fresh tulips, chocolate treats, and spring greenery.
Unlike some formal napkin folds that look like they escaped from a hotel banquet manual, the bunny napkin fold feels cheerful and approachable. It can be elegant with white linen and satin ribbon, rustic with cotton napkins and twine, or playful with colorful paper napkins and plastic eggs. In short, this fold is the table-setting version of a party guest who brings dessert and compliments your playlist.
What You Need Before You Start
Before folding, gather your supplies. A square napkin is essential because uneven shapes make the bunny ears look lopsided. Cloth napkins usually hold their shape best, especially cotton or linen. If the fabric is soft or floppy, iron it first and consider a light starch. Sturdier paper napkins can also work, but fold gently because paper creases quickly and does not forgive dramatic mistakes.
Basic Supplies
You will need one square napkin per place setting, a clean flat surface, and optional ribbon, twine, raffia, or a small elastic band to secure the base. If you want the bunny ears to wrap around an egg, prepare hard-boiled eggs, dyed eggs, chocolate eggs, wooden eggs, or plastic eggs. For a personalized touch, write each guest’s name on the egg or attach a small place card.
Best Napkin Size
A 17-inch to 20-inch square napkin is ideal for most bunny folds. Smaller napkins can still work, but the ears may look short and shy, as if the bunny just heard unexpected gossip. Larger napkins create taller ears and a more dramatic look, especially on dinner plates.
How to Fold a Napkin Into a Bunny: 12 Steps
Step 1: Lay the Napkin Flat
Place your square napkin on a clean table or counter. Smooth it with your hands so there are no wrinkles, bubbles, or mystery crumbs from breakfast. If your napkin has a decorative edge, position it so that the prettiest side will become part of the bunny ears.
Step 2: Fold the Napkin in Half
Fold the napkin in half from bottom to top to create a rectangle. Align the corners carefully. This is the foundation of the bunny fold, so take a moment to make the edges neat. A tidy first fold makes every later step easier.
Step 3: Fold It in Half Again
Fold the rectangle in half lengthwise to make a long, narrow strip. Press the fold firmly with your fingers. You should now have a slim rectangle that looks nothing like a bunny yet. Do not panic. Most crafts go through an awkward teenage phase.
Step 4: Find the Center Line
Lightly mark the center of the strip with your eyes or by making a tiny crease. This middle point helps you keep both sides even. Symmetry matters because uneven bunny ears can make your napkin look like it is confused about its career path.
Step 5: Fold the Right Side Down
Take the right end of the long strip and fold it downward along the center line. The top edge should angle down toward the middle, creating one side of a house-like shape. Press the fold firmly so it stays put.
Step 6: Fold the Left Side Down
Repeat the same fold on the left side, bringing it down to meet the right side at the center. Now your napkin should look like a simple pentagon or an upside-down paper airplane. This is where the bunny starts quietly entering the chat.
Step 7: Fold the Bottom Corners Up
Take the bottom right corner and fold it upward toward the center. Then fold the bottom left corner upward in the same way. These folds create a diamond shape and help form the rounded body of the bunny napkin.
Step 8: Bring the Side Corners Toward the Center
Fold the right side corner inward toward the center line. Repeat with the left side corner. The napkin should become slimmer and more structured. At this stage, press the folds firmly, especially if you are using fabric napkins. Cloth likes to have opinions, and a good crease politely tells it who is in charge.
Step 9: Turn the Napkin Over
Carefully flip the folded napkin over while keeping the folds together. This step can feel slightly dramatic, like flipping pancakes in front of people. Use both hands and move slowly. Once flipped, the smoother side should face up.
Step 10: Fold the Bottom Point Up
Fold the bottom point upward to create the bunny’s base. This helps the napkin stand and gives the ears a cleaner shape. Press firmly. If the napkin feels too bulky, adjust the folds slightly rather than forcing them.
Step 11: Curve the Napkin Into a Bunny Shape
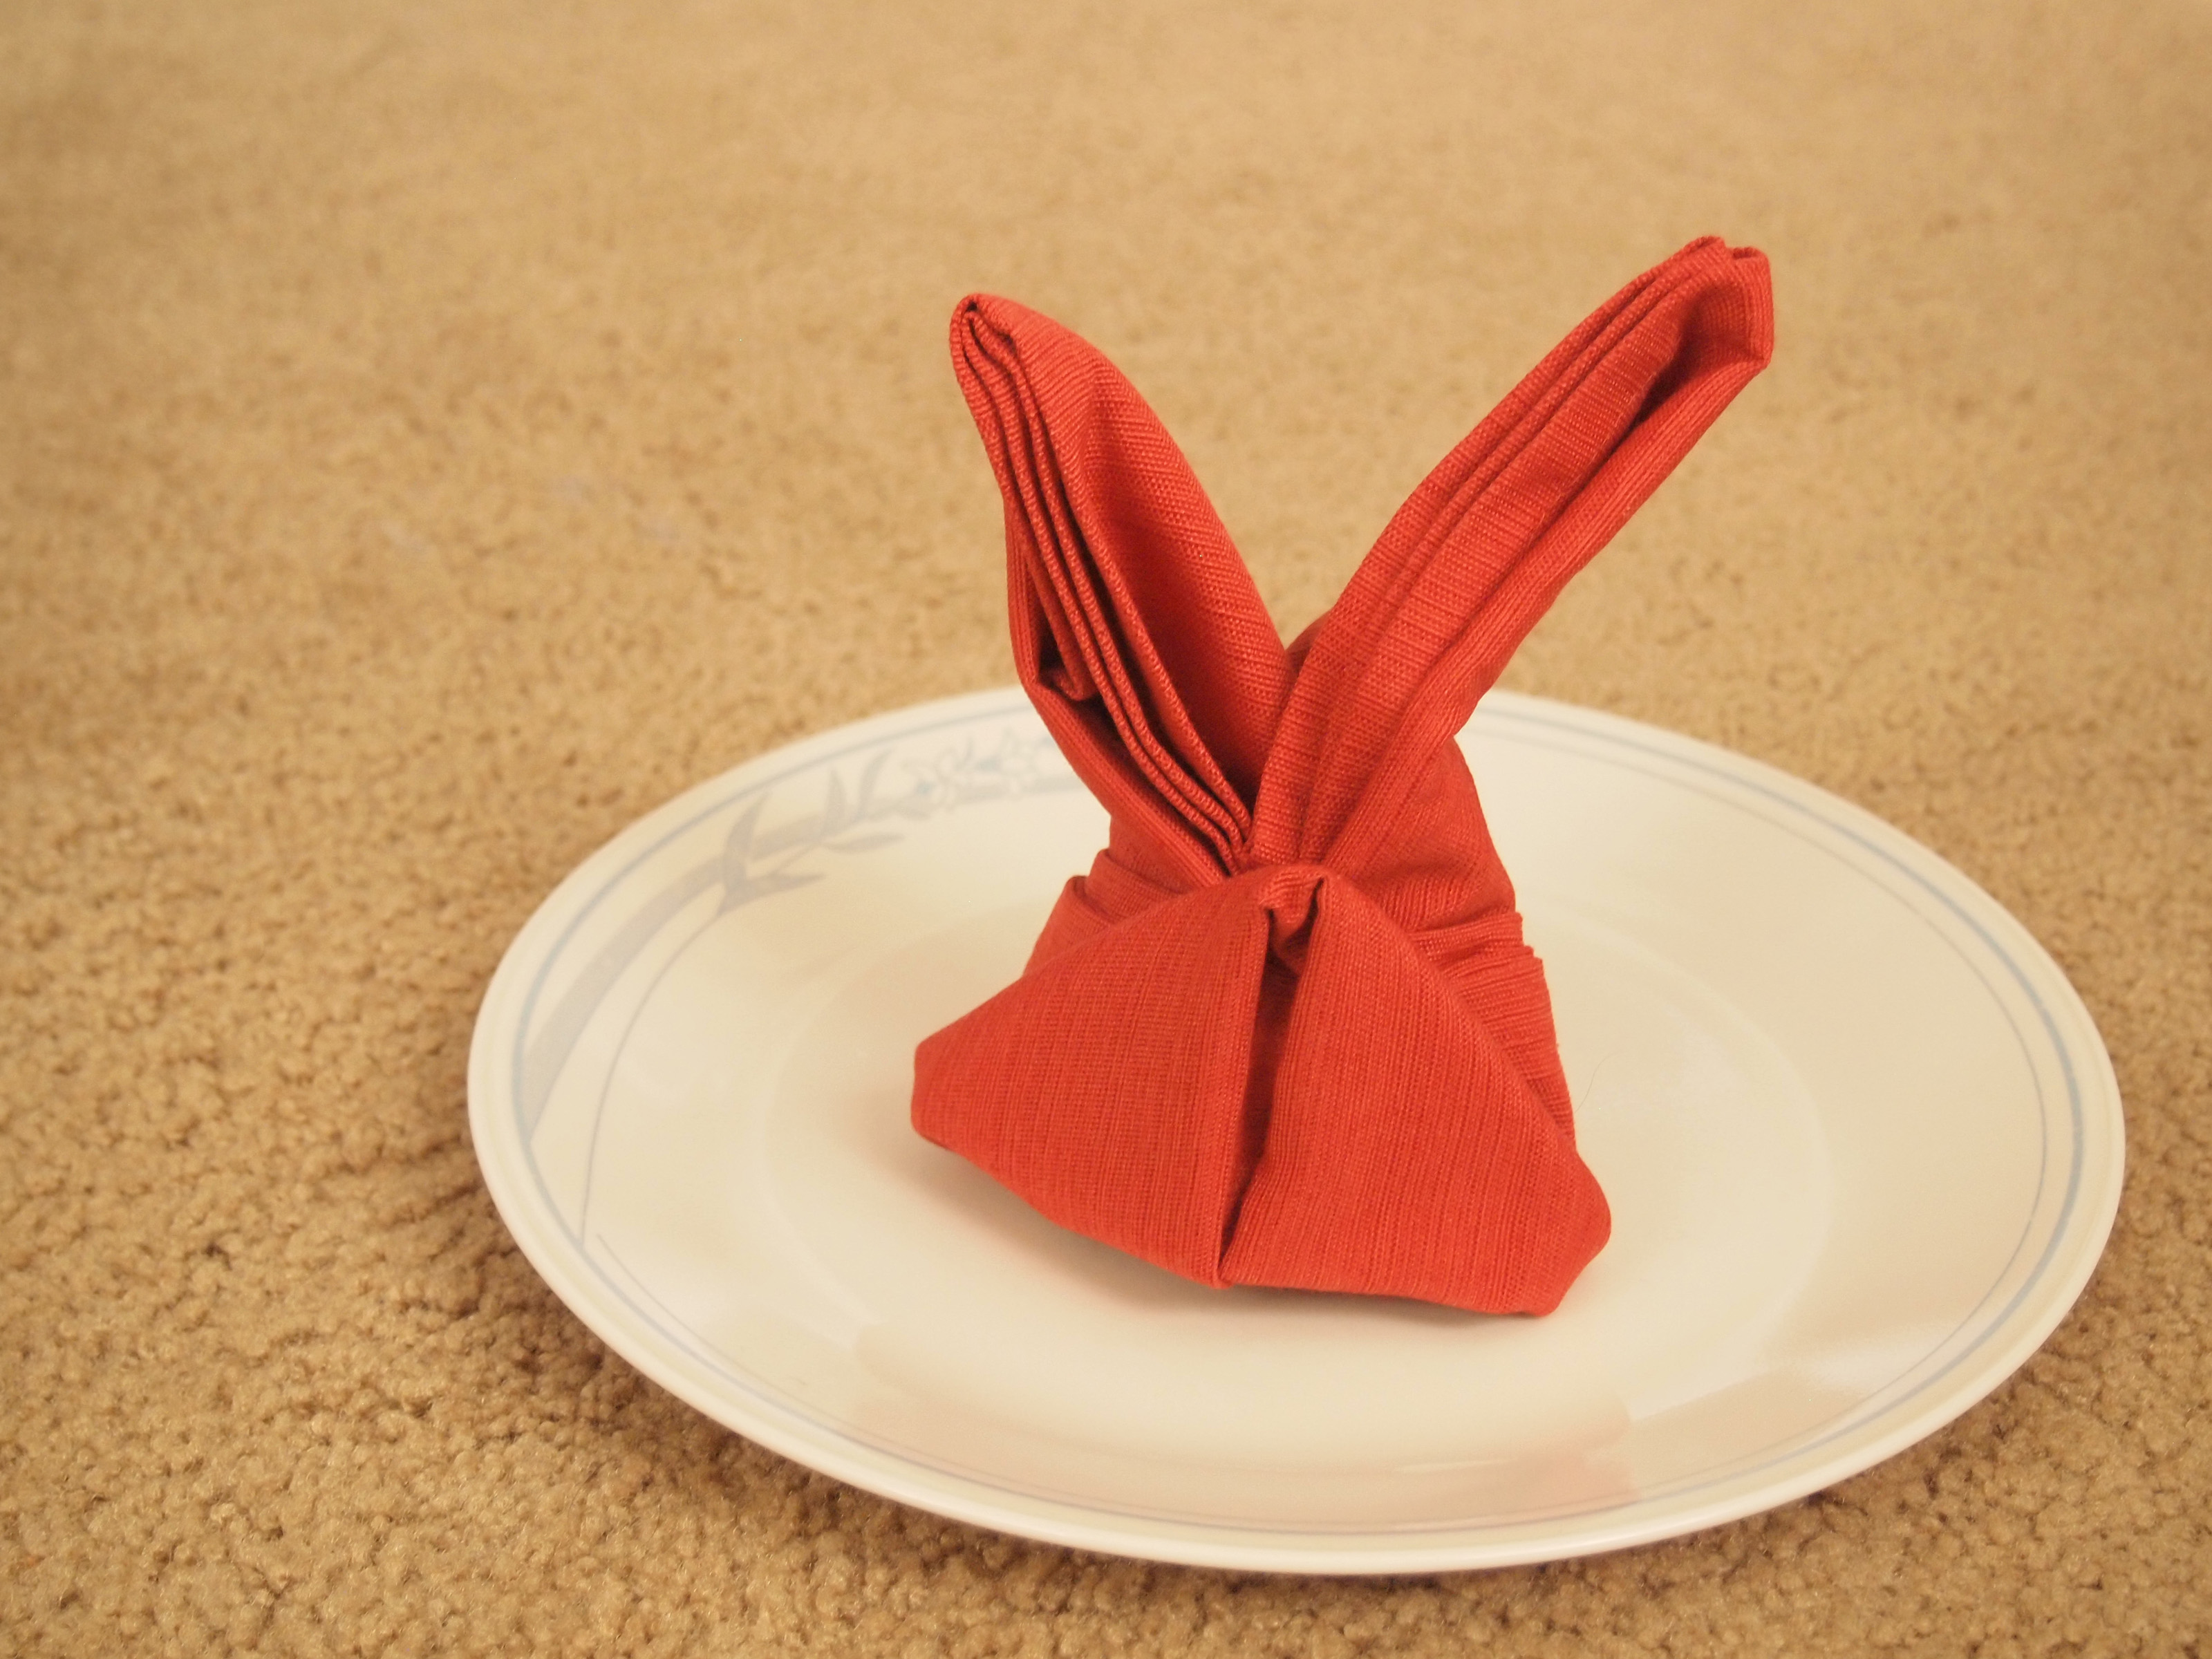
Pick up the napkin and gently curve the two sides backward so they meet. Tuck one side into the pocket created by the other side, if your napkin allows it. This creates a rounded base and brings the two long points upward as bunny ears. If the napkin will not stay tucked, use a small ribbon, twine, or elastic band around the base.
Step 12: Shape the Ears and Style the Plate
Stand the bunny napkin on a plate and gently pull the ears apart. Adjust the base until the bunny sits securely. Add an egg between the ears, tie a ribbon around the lower portion, or tuck in a sprig of rosemary, thyme, lavender, or baby’s breath. Congratulations: your napkin is now cuter than most things on the internet.
Alternative Bunny Ear Napkin Fold With an Egg
If you want a faster version, try the rolled bunny ear method. Lay the napkin flat in a diamond shape, then roll it tightly from one corner to the opposite corner. Fold the roll in half around an egg, bringing the two ends upward to form ears. Tie the base with twine, ribbon, or raffia. This version is especially easy for beginners and works well when you want each napkin to hold a decorated egg.
The rolled version is less sculptural than the classic fold, but it is charming and practical. It also works better with softer napkins because the ribbon does most of the structural heavy lifting. Think of it as the “I have guests arriving in 20 minutes” bunny fold.
Tips for Making Bunny Napkins Look Better
Use Crisp Napkins
Crisp napkins create sharper folds and ears that stand upright. Cotton and linen are excellent choices because they crease well when ironed. If your napkins are very soft, iron them first or use a light starch spray. This one small step can turn a floppy fabric situation into a confident little rabbit.
Match the Napkin to Your Table Theme
White napkins create a classic bunny look. Pastel pink, blue, mint, yellow, or lavender napkins feel cheerful and springlike. Natural linen looks elegant and rustic, especially with wooden chargers, ceramic plates, and fresh flowers. Patterned napkins can work too, but avoid extremely busy prints if you want the bunny shape to be easy to recognize.
Secure the Base When Needed
There is no shame in using ribbon, twine, raffia, or a small elastic band. In fact, securing the base often makes the fold look more polished. It also helps the ears stay upright during the meal, instead of slowly collapsing into the salad like they have given up on spring.
Add a Place Card
A bunny napkin can double as a place card holder. Write a guest’s name on a small tag and tie it to the ribbon, or write names directly on decorative eggs. This is useful for Easter brunches, family dinners, bridal showers, and kids’ parties where seating arrangements prevent tiny diplomatic incidents.
Common Mistakes to Avoid
The most common mistake is starting with a wrinkled or uneven napkin. Wrinkles make the fold look messy, and uneven edges can throw off the bunny ears. Another mistake is using napkins that are too small or too thin. A flimsy napkin may technically fold, but the ears will have the enthusiasm of wet lettuce.
Another issue is rushing the center folds. If the right and left sides do not meet evenly, the ears will be different lengths. This is not the end of the world, of course. Nature has asymmetry. But if you want a clean table setting, slow down during the first few folds and press each crease firmly.
Best Occasions for Bunny Napkin Folds
The bunny napkin fold is most famous for Easter, but it is not limited to one holiday. It works beautifully for spring brunches, baby showers, woodland-themed birthdays, garden parties, school events, and family dinners. For a child’s party, use bright paper napkins and plastic eggs filled with small treats. For an adult dinner, use linen napkins, muted ribbons, and natural elements like herbs or flowers.
You can also use bunny napkins as part of a buffet display. Place a few folded bunnies near the serving area or on dessert plates. They add charm without taking up much space, which is helpful when the table is already crowded with casseroles, cupcakes, and someone’s famous potato salad that comes with a backstory.
How to Store Folded Bunny Napkins Before Guests Arrive
If you are hosting, fold the napkins a few hours ahead of time or even the night before. Place them upright on plates or lay them gently in a shallow tray. Avoid stacking them, because pressure can flatten the ears. If you use ribbon or twine, the bunnies will hold their shape longer.
For paper napkins, fold them closer to serving time if possible. Paper can crease permanently and may lose its shape if handled too much. Cloth napkins are more forgiving and can be adjusted right before guests sit down.
My Experience Folding Bunny Napkins for a Real Table
The first time I tried folding a napkin into a bunny, I was wildly overconfident. I looked at a finished photo and thought, “Obviously, this is just a napkin with ears.” This is the same dangerous optimism that convinces people they can assemble furniture without reading the instructions. I grabbed a soft cotton napkin, folded it twice, flipped it around, and ended up with something that looked less like a bunny and more like a tiny fabric canoe having an identity crisis.
What changed everything was slowing down and treating each crease like it mattered. The bunny fold is not hard, but it does reward patience. When I aligned the corners carefully and pressed each fold with my fingers, the shape suddenly made sense. The long strip became two sides. The sides became a diamond. The diamond became a base. Then, almost magically, the two points stood up as ears. It felt like a small domestic victory, the kind that makes you briefly believe you should host more often.
I also learned that the napkin itself matters more than people expect. Thin paper napkins can work, but they need a gentle touch. Thick, floppy fabric napkins are pretty, but they may need ribbon to behave. The easiest napkins I used were medium-weight cotton squares that had been ironed. They folded cleanly, stayed upright, and did not fight back like the soft linen ones. Linen looked beautiful, but it preferred a casual bunny ear style tied around an egg rather than the more structured upright bunny.
Another practical lesson: make one test bunny before the day of your event. Do not wait until guests are parking in the driveway to discover that your napkins are too small, your ribbon is missing, or your “quick craft” has become a personal duel. A test fold lets you decide whether you need starch, ribbon, larger napkins, or a backup plan involving simply placing napkins under forks and calling it minimalist.
For styling, I found that less is usually better. A white plate, a folded bunny napkin, a pastel egg, and a small green sprig can look more elegant than a table covered in every Easter decoration available within a five-mile radius. The bunny already brings personality, so the surrounding décor can stay simple. Tulips, daffodils, small bowls of candy, or natural woven placemats all pair nicely with the fold.
The best part of making bunny napkins is the reaction. Adults smile because the table feels thoughtful. Kids immediately want to touch them, rename them, or ask whether they can take them home. Even guests who claim not to care about table settings usually notice. That is the real charm of this fold: it turns a basic household item into a tiny moment of delight. It is inexpensive, reusable if you use cloth, and easy enough to repeat once your fingers understand the rhythm.
So, if your first bunny looks a little strange, keep going. Adjust the ears. Tie the base. Smooth the folds. Real bunnies are not perfectly symmetrical either, and they still get invited to every spring decoration theme ever invented.
Conclusion
Knowing how to fold a napkin into a bunny gives you an easy way to make a table feel festive, personal, and memorable. With 12 simple steps, a square napkin can become a charming place setting for Easter brunch, spring parties, baby showers, and family celebrations. The key is to use a crisp napkin, keep the folds even, secure the base when needed, and style the finished bunny with thoughtful details like ribbon, eggs, herbs, or name tags.
You do not need expensive decorations to create a beautiful table. Sometimes all it takes is one folded napkin with two perky ears and the confidence to say, “Yes, I made these myself.” Your guests will be impressed, your plates will look adorable, and your table will have just enough whimsy to make the meal feel special.