
A renewed dining table is more than a weekend project with sandpaper, stain, and a brave playlist. It is a small domestic resurrection. One day, the table is covered in scratches, water rings, mystery dents, and the emotional residue of seven thousand rushed breakfasts. The next, it looks like it belongs in a design magazineor at least in a home where people pretend they use cloth napkins on weekdays.
The beauty of renewing a dining table is that it can be practical, affordable, sustainable, and deeply personal. Instead of replacing a solid table just because the finish looks tired, homeowners can refinish, repaint, restyle, repair, or reimagine it. A renewed dining table can become the anchor of a dining room, breakfast nook, open kitchen, apartment corner, or even a hybrid work-and-snack command center.
This guide explores how to evaluate, restore, and style a renewed dining table with confidence. Whether you have an inherited oak beast, a thrift-store rescue, a farmhouse table with character, or a modern piece that has been bullied by hot coffee mugs, the right renewal plan can give it another decade of life.
What Is a Renewed Dining Table?
A renewed dining table is any dining table that has been refreshed instead of replaced. That renewal can be cosmetic, structural, functional, or all three. For some tables, renewal means sanding down the top and applying a new stain. For others, it means painting the base, swapping legs, repairing loose joints, adding a protective finish, or styling the table differently so it feels intentional again.
The keyword is not “perfect.” A renewed dining table does not have to look factory-new. In fact, many of the best table makeovers preserve a little history. A tiny dent from a birthday party, a softened edge from years of family dinners, or a warm patina in the wood can make the table feel more expensive than it technically is. Character is not damage unless it is actively ruining dinner.
Why Renew a Dining Table Instead of Buying New?
Buying a new dining table can be exciting, but it can also be expensive, wasteful, and surprisingly stressful. Sizes are wrong, finishes clash, shipping takes forever, and assembly instructions often read like they were translated by a tired robot holding an Allen wrench.
Renewing a dining table gives you more control. You can choose the exact finish, color, sheen, and style. You can keep a table that already fits your space. You can improve quality instead of settling for cheaper materials. Best of all, you can reduce waste by extending the life of furniture that still has solid bones.
Renewal Is Often Better for Solid Wood
Solid wood tables are ideal candidates for renewal because they can usually be sanded, stained, sealed, and repaired. Oak, maple, walnut, pine, cherry, and mahogany all respond differently to stain and finish, but they generally offer room for restoration. If your table is heavy, sturdy, and made from real wood, do not be too quick to kick it to the curb. It may just need a spa day with better ventilation.
Renewal Can Save Money
A basic dining table makeover can cost far less than buying a comparable new table. Supplies may include cleaner, sandpaper, wood filler, stain, primer, paint, brushes, tack cloth, and a protective topcoat. Even if you invest in quality materials, the project can still be budget-friendly compared with replacing a well-built table.
Renewal Makes the Room Feel Custom
A renewed dining table can be tailored to your home. Want a warm walnut top with a black painted base? Done. Prefer a pale oak look with simple modern chairs? Also done. Dreaming of a cottage-style table that says “fresh biscuits” even when dinner is frozen pizza? Absolutely possible.
Start With an Honest Table Assessment
Before sanding anything, inspect the table like a polite detective. Look at the tabletop, legs, apron, joints, veneer, finish, and overall stability. The goal is to decide whether the table needs a light refresh, a full refinish, a painted makeover, or professional help.
Check the Surface
Light scratches, dullness, cloudy spots, and minor stains often mean the finish is tired, not the table itself. Deep gouges, burns, peeling veneer, and water damage may require more repair. If the tabletop has veneer, be careful. Veneer is a thin layer of wood over another material, and aggressive sanding can cut through it faster than you can say, “Well, that escalated.”
Check the Structure
Wiggle the table gently. If it rocks, squeaks, or shifts, check screws, brackets, corner blocks, and leg attachments. Tightening hardware may solve the issue. If joints are loose, wood glue and clamps may help. If the table has serious cracks, unstable legs, or warped boards, consider consulting a furniture repair professional.
Check for Old Paint Risks
If the table is old and painted, especially if it may date from before 1978, use caution before sanding or scraping. Older painted surfaces may contain lead-based paint. In that case, testing and safe handling matter. Do not create dust casually. A charming vintage table is wonderful; toxic dust in the breakfast cereal is not part of the design plan.
Popular Ways to Create a Renewed Dining Table
There is no single correct method. The right approach depends on your table’s material, condition, style, and how much chaos you are willing to invite into your weekend.
1. Clean and Revive the Existing Finish
Not every table needs stripping. Sometimes a deep clean, gentle polish, and small repairs are enough. Start with a mild cleaner suitable for wood furniture. Remove grease, wax buildup, dust, and sticky residue. Dry the surface thoroughly. Then assess whether the finish still has life.
For tables with minor dullness, a furniture restorer or compatible polish may improve the appearance. This is the least invasive renewal option and works well when the finish is intact but tired.
2. Sand and Refinish the Tabletop
For a table with a damaged top but a good base, refinishing the tabletop can deliver dramatic results. This usually involves removing the old finish, sanding evenly with progressively finer grits, cleaning away dust, applying stain if desired, and sealing with a durable topcoat.
Always sand with the grain, not against it. Sanding against the grain can leave scratches that become painfully visible once stain is applied. Think of the wood grain as traffic direction. Ignore it and the project may honk at you forever.
3. Paint the Base and Stain the Top
This is one of the most popular dining table renewal ideas because it balances charm and durability. A stained wood top keeps warmth and natural texture, while a painted base adds contrast. White, cream, black, navy, sage green, and charcoal are common choices.
This approach works especially well for farmhouse, cottage, transitional, and modern rustic interiors. It can also make mismatched dining chairs look deliberate, which is one of the great miracles of paint.
4. Fully Paint the Table
A fully painted dining table can look crisp, colorful, and modern. It is a smart option when the wood is not attractive enough to stain, when the veneer is damaged, or when the room needs a stronger design statement. The key is preparation. Clean thoroughly, sand or scuff the surface, use the right primer, apply thin coats, and protect the surface with a durable sealer.
For high-use dining tables, avoid skipping the protective topcoat. Paint alone may look beautiful on day one, but dinner plates, homework, elbows, and hot bowls are not gentle roommates.
5. Replace or Update the Legs
Sometimes the tabletop is fine but the table feels dated because of the legs. Swapping bulky legs for tapered, turned, metal, or pedestal-style supports can change the entire personality of the table. New legs can make a traditional table feel modern, or a plain table feel custom.
Before replacing legs, measure carefully. Check the table height, apron placement, mounting plates, and stability. A dining table should feel sturdy, not like it is auditioning for a wobble-based reality show.
6. Add a New Protective Finish
A renewed dining table must survive real life. That means moisture, heat, spills, crumbs, crafts, laptops, and the occasional dramatic fork drop. Polyurethane is a common protective option because it creates a durable surface. Water-based finishes tend to dry clearer, while oil-based finishes can add warmth and amber tones. The best choice depends on the wood, desired color, ventilation, and durability needs.
Apply thin, even coats and allow proper drying time. Sand lightly between coats when the product instructions recommend it. Rushing the finish is the fastest way to create bubbles, streaks, tackiness, and regret.
Step-by-Step Guide to Renewing a Dining Table
Step 1: Choose Your Vision
Decide what you want before buying supplies. Are you going for natural, rustic, modern, coastal, vintage, farmhouse, or dramatic? Save inspiration photos and compare them to your actual room. A black table may look chic online, but if your dining room already has dark floors and low light, it might turn into a stylish cave.
Step 2: Gather Supplies
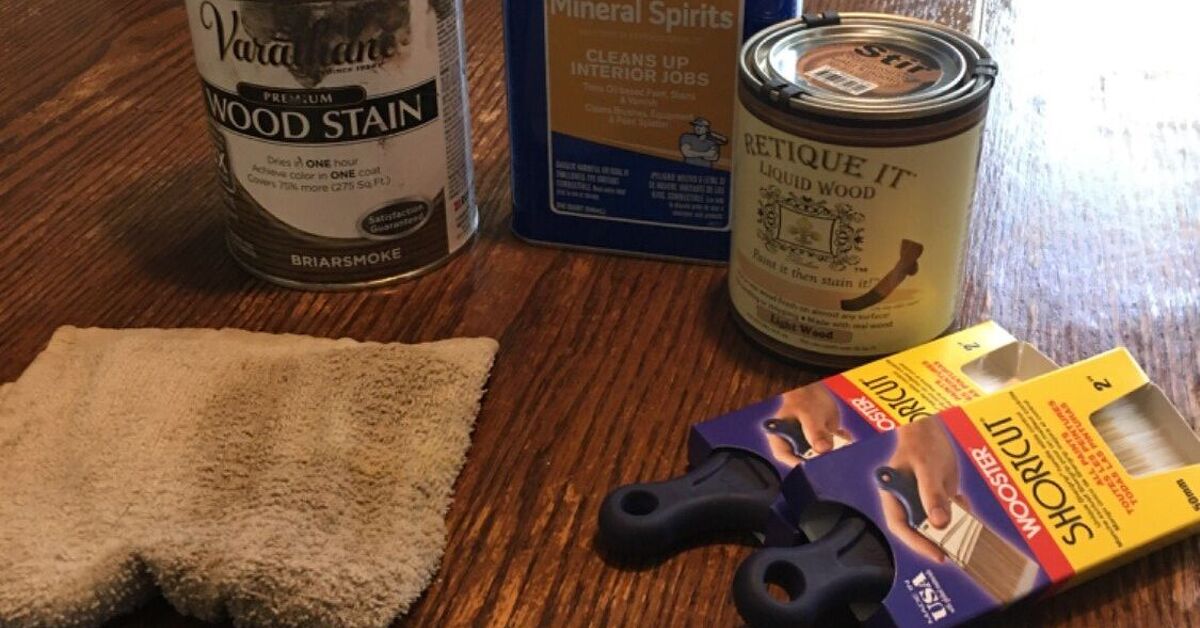
Common supplies include drop cloths, gloves, safety glasses, a respirator or mask suited to the task, cleaner, tack cloth, sandpaper, sanding block or orbital sander, wood filler, putty knife, primer, stain, paint, brushes, foam rollers, and topcoat. Good preparation tools are not glamorous, but they are the difference between “custom furniture” and “craft project that fought back.”
Step 3: Clean the Table Thoroughly
Clean first, always. Old furniture collects oils, food residue, wax, dust, and invisible grime. If you sand without cleaning, you can push contaminants into the wood. Use a cleaner appropriate for the surface, then let the table dry completely.
Step 4: Make Repairs
Fill dents, holes, and cracks with wood filler or epoxy filler depending on the damage. Tighten hardware. Glue loose joints. Clamp where needed. Allow repairs to cure fully before sanding or finishing.
Step 5: Sand With Patience
Start with the grit needed for your table’s condition, then move to finer grits for a smooth surface. Flat tabletops may be easier with an orbital sander, while edges, curves, and details often require hand sanding. Remove dust carefully with a vacuum and tack cloth.
Step 6: Apply Stain, Paint, or Both
If staining, test the color on an inconspicuous area or scrap wood of the same species. Wood conditioner can help some woods absorb stain more evenly. If painting, apply primer when needed, especially on slick, glossy, dark, stained, or laminate-like surfaces. Use thin coats rather than one thick coat. Thick coats are tempting, but they often dry poorly and show brush marks.
Step 7: Seal the Surface
A dining table needs a tough finish. Choose a topcoat compatible with your stain or paint. Apply according to product directions, allow full drying time, and give the finish enough curing time before heavy use. Dry to the touch does not always mean ready for spaghetti night.
Design Ideas for a Renewed Dining Table
Warm Wood Top With Black Base
This look works well in modern farmhouse, industrial, and transitional homes. The wood top keeps the table inviting, while the black base adds structure and contrast. Pair it with woven chairs, metal chairs, or upholstered end chairs for a designer feel.
Light Oak Finish for an Airy Room
A pale wood finish can make a dining area feel larger and brighter. This is especially helpful in small apartments, breakfast nooks, and open-plan kitchens. Keep the styling simple with linen runners, ceramic bowls, and soft neutral chairs.
Two-Tone Vintage Charm
A cream or sage painted base with a medium-stained top gives an old table a cozy, collected look. This works beautifully with antique hutches, floral arrangements, brass candlesticks, and chairs that are cousins rather than twins.
Bold Painted Statement
For a playful home, consider a deep green, navy, terracotta, or muted red table. A bold renewed dining table can become the room’s focal point. Keep nearby decor balanced so the table feels confident, not chaotic.
Common Mistakes to Avoid
Skipping Prep Work
Prep is not optional. Cleaning, sanding, repairing, and priming create the foundation for a finish that lasts. Skipping prep is like putting a tuxedo on a raccoon. Interesting? Yes. Sustainable? No.
Using the Wrong Finish
A decorative finish may not hold up on a dining table. Choose products designed for furniture and high-use surfaces. Consider water resistance, heat resistance, scratch resistance, odor, drying time, and cleanup.
Not Testing Stain
Stain can look wildly different depending on wood species. Pine may turn blotchy. Oak may highlight grain dramatically. Cherry may deepen over time. Always test before committing to the entire tabletop.
Rushing Cure Time
Many finishes need days or even weeks to fully cure. During that period, be gentle. Use placemats, avoid hot dishes, and do not leave damp items on the surface. Your renewed dining table just got a makeover; let it enjoy its recovery period.
How to Style a Renewed Dining Table
Once the table is renewed, styling helps it feel finished. Start with scale. A large table can handle a substantial centerpiece, while a small round table may only need a simple vase or bowl. Use texture to keep the room interesting: wood, ceramic, glass, linen, metal, woven fibers, or greenery.
Chairs can match, contrast, or intentionally mix. If the table is rustic, modern chairs can sharpen the look. If the table is sleek, vintage chairs can add warmth. A renewed dining table often looks best when the surrounding pieces feel collected over time rather than ordered as a matching set with no personality.
Maintenance Tips for a Renewed Dining Table
Protect the finish from the start. Use coasters, placemats, trivets, and table pads when needed. Wipe spills quickly, especially wine, coffee, oil, and tomato sauce. Clean with gentle products rather than harsh chemicals. Avoid dragging heavy objects across the surface.
For daily care, a soft damp cloth is usually enough. Dry the table after cleaning. Reapply wax, oil, polish, or protective products only if they are compatible with the finish. When in doubt, test in a hidden area first.
Experience Notes: What Renewing a Dining Table Really Teaches You
The experience of renewing a dining table is part home improvement, part patience exercise, and part emotional negotiation with yourself. At the beginning, most people think the project will be simple: sand, stain, seal, admire. Then the table reveals its secrets. A scratch is deeper than expected. The old finish clings like it has legal ownership. One corner absorbs stain differently. Suddenly, the project has a plot.
The first lesson is that furniture renewal rewards patience more than brute force. People often want to rush sanding because it feels repetitive, but sanding is where the final look begins. A tabletop that feels smooth under your hand before staining usually looks more refined afterward. A rushed surface, on the other hand, announces every shortcut. The table may not speak, but under overhead lighting, it will testify.
The second lesson is that small imperfections are not always failures. A renewed dining table lives in a real home, not a showroom guarded by velvet ropes. Once the table is back in use, tiny variations in color or texture often add warmth. The goal is not to erase every sign of age. The goal is to make the table beautiful, functional, and loved again.
The third lesson is that choosing the finish matters as much as choosing the color. A matte finish can feel soft and modern, but it may show oils or marks more easily. A satin finish is often a practical middle ground because it has a gentle glow without looking too shiny. A gloss finish can be dramatic, but it highlights surface flaws. In real homes, satin is often the friend who brings snacks and does not cause drama.
The fourth lesson is that the dining table affects the mood of the whole room. After renewal, people often notice that the room feels cleaner, warmer, or more intentional. Chairs that looked tired suddenly make sense. A rug feels more grounded. Lighting seems better. Even meals feel a little more special, which is impressive considering the meal may still be reheated leftovers eaten while someone asks where the phone charger went.
The fifth lesson is that renewed furniture creates attachment. When you put time into a table, you notice it differently. You remember the sanding dust, the color test, the first coat of finish, and the moment it finally looked right. That memory becomes part of the table. Buying new can be satisfying, but renewing something gives it a story.
For families, a renewed dining table can become a quiet symbol of continuity. The same table that once looked worn out can host birthdays, homework, holidays, late-night talks, coffee breaks, and ordinary Tuesday dinners. For renters or first-time homeowners, it can be a confidence-building project that proves a room does not need a huge budget to feel personal. For design lovers, it is a chance to create a one-of-a-kind piece that no catalog can duplicate.
In the end, the best renewed dining table is not the one with the most flawless finish. It is the one that makes people want to sit down, stay longer, and maybe use a coaster without being asked eight times. That is real success.
Conclusion
A renewed dining table is a smart, stylish, and sustainable way to transform a dining space without replacing a piece that still has life left in it. With careful cleaning, repairs, sanding, finishing, and styling, an old or outdated table can become the heart of the home again. The process takes patience, but the reward is worth it: a table that fits your space, reflects your taste, and carries a story no brand-new piece can fake.
Whether you choose a natural wood refinish, a painted base, a bold color makeover, or a subtle protective refresh, the key is to respect the table’s structure and use products that match how the table will live. Dining tables work hard. They deserve finishes that can handle dinner, homework, coffee, laughter, and the occasional “who put the sticky thing here?” mystery.
Renewing a dining table is not just about furniture. It is about seeing potential in what you already own. And sometimes, the best design upgrade is not a shopping cart. It is a second chance.