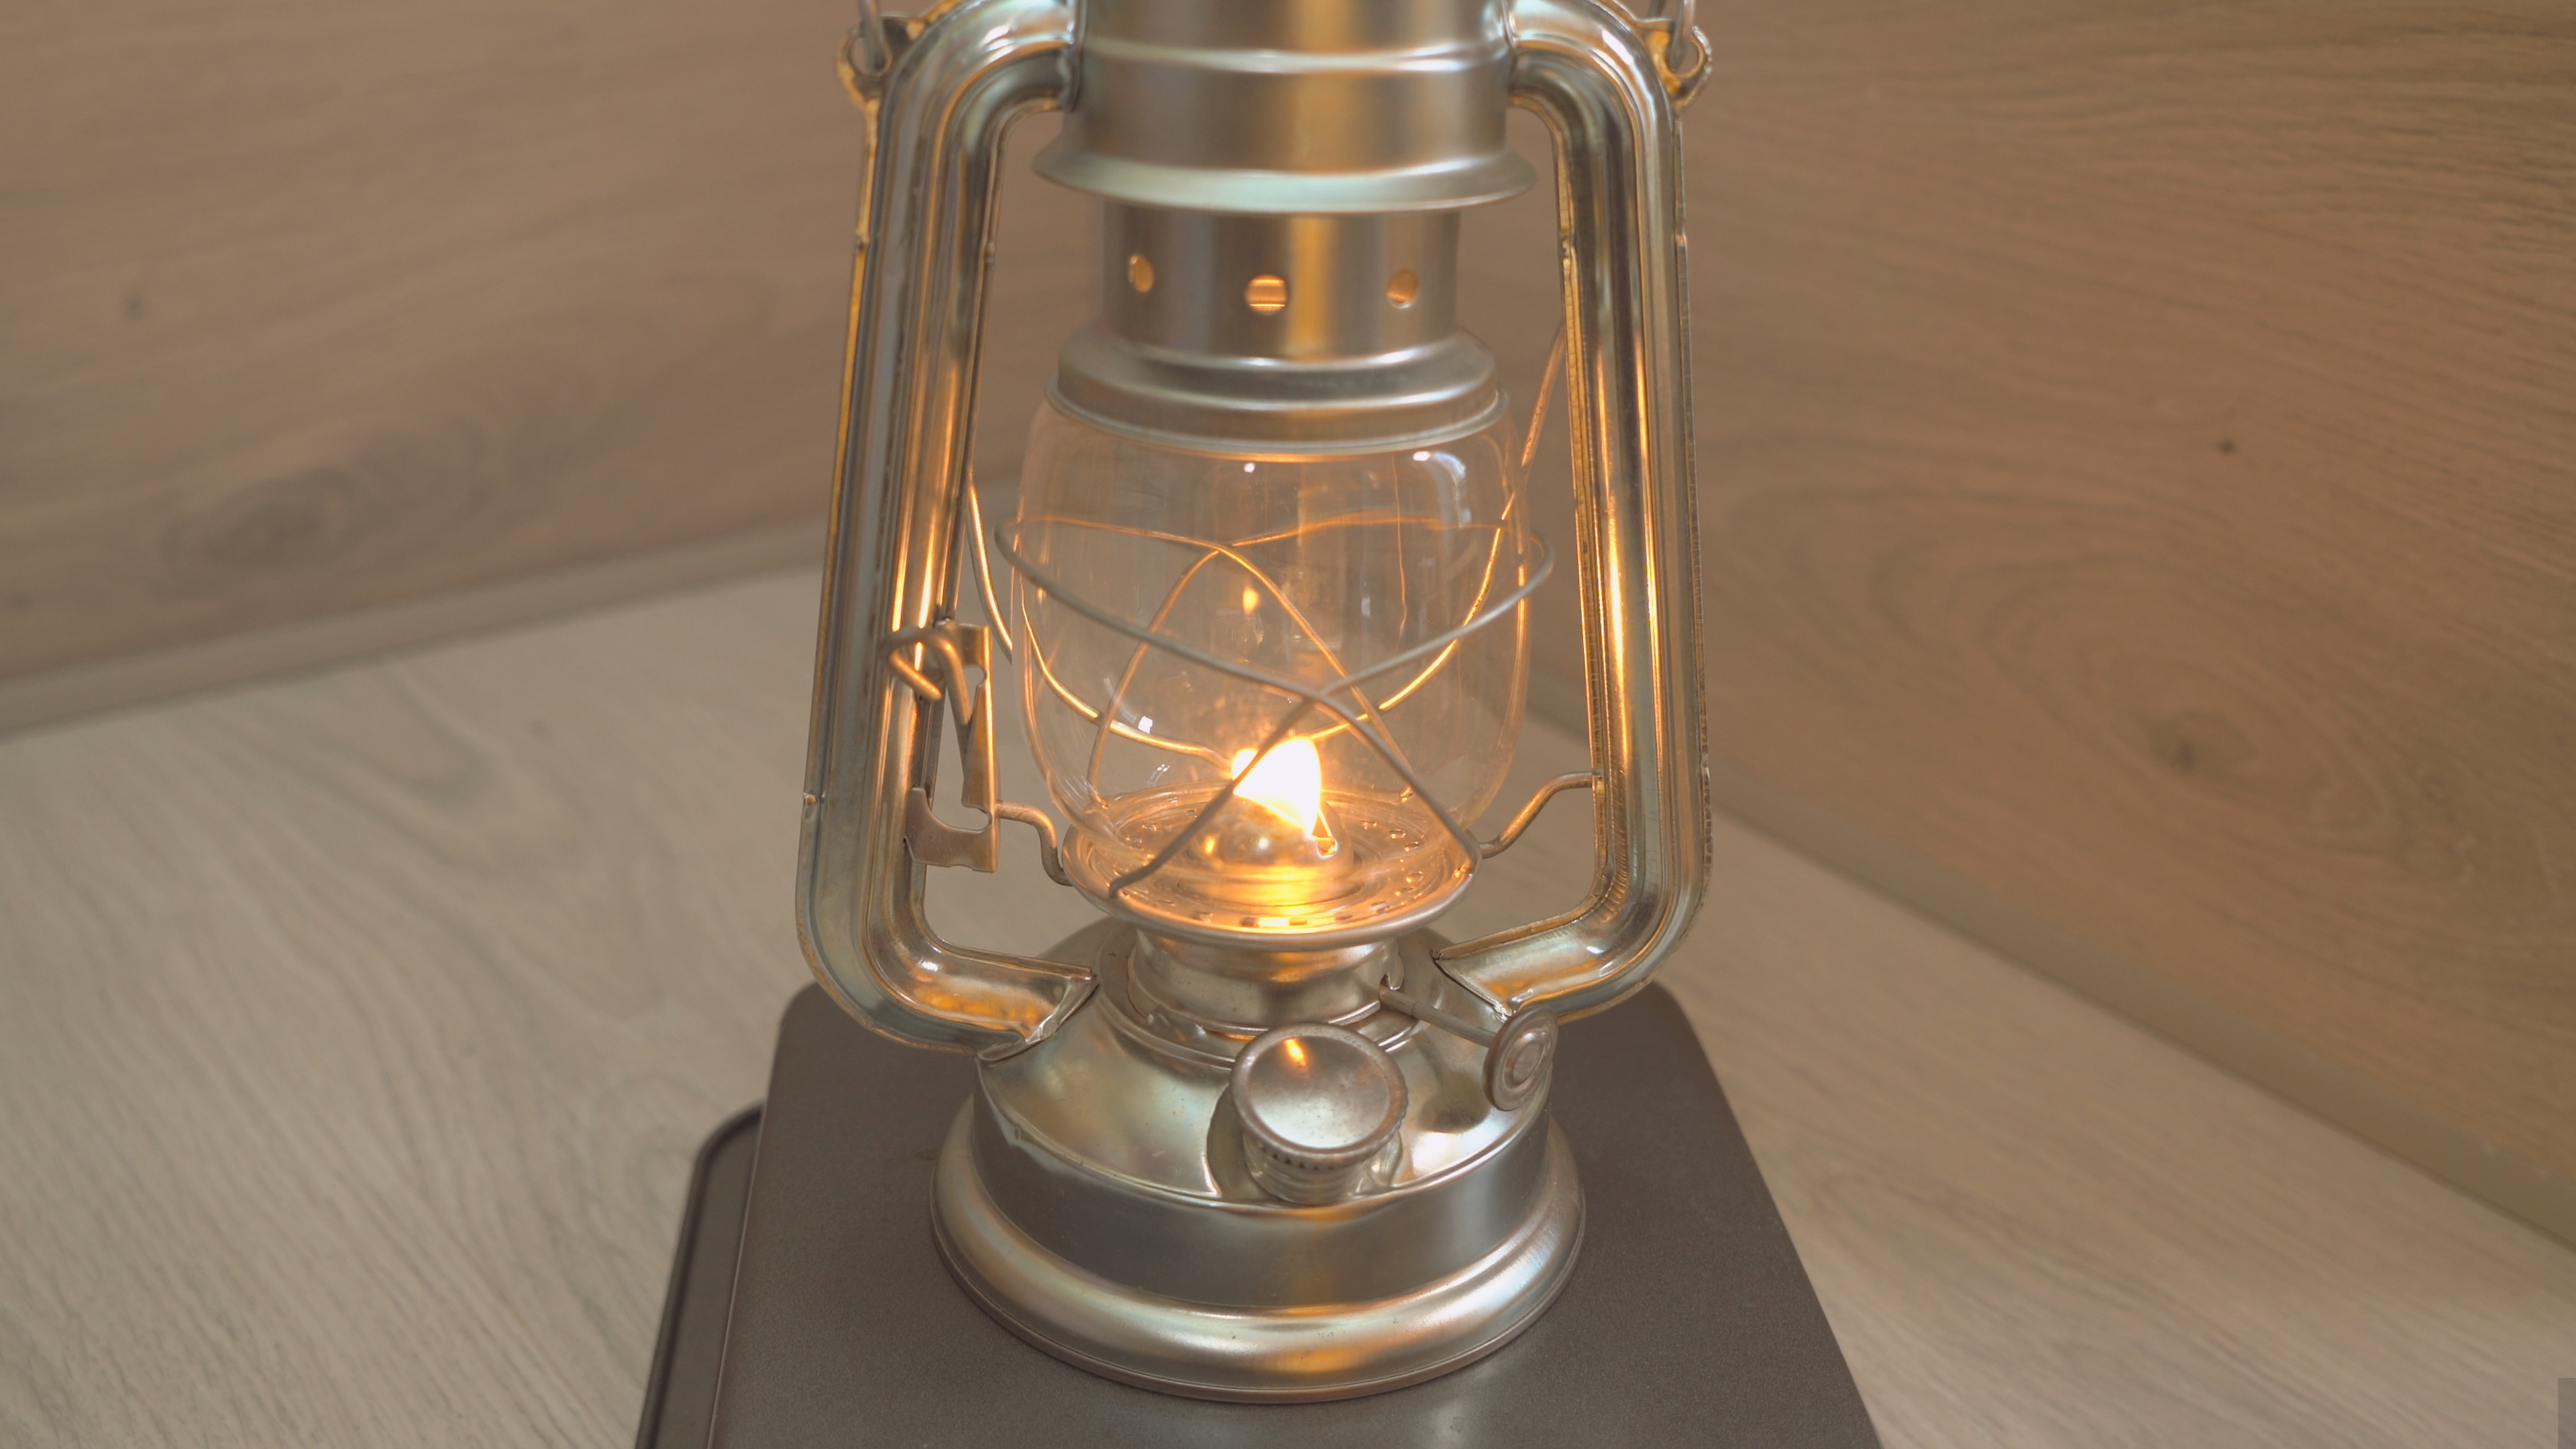

An oil lantern is one of those wonderfully old-school tools that makes you feel prepared, cozy, and slightly like you should be wearing suspenders. It gives off a warm, steady glow, works without electricity, and can be useful for camping, emergency lighting, porch ambiance, workshops, cabins, and power outages. But let’s be clear from the start: an oil lantern is not a toy, not a mood lamp for unattended daydreaming, and definitely not something to fuel with whatever mystery liquid is hiding in the garage.
Learning how to use an oil lantern safely is simple once you understand the basic parts, the right fuel, wick adjustment, lighting technique, and cleanup routine. This guide walks you through everything step by step, from choosing lamp oil to trimming the wick, controlling smoke, storing fuel, and avoiding the classic “why is my ceiling turning gray?” situation.
Whether you are using a hurricane lantern, kerosene lantern, flat-wick lamp, or decorative oil lamp, the same rule applies: respect the flame, use approved fuel, and never leave it burning unattended. Do that, and your lantern can be a reliable, charming, and surprisingly practical lighting source.
What Is an Oil Lantern?
An oil lantern is a portable lighting device that burns liquid fuel through a wick. The wick draws fuel upward by capillary action, and the flame burns the fuel vapor at the top. Most traditional lanterns have three main parts: a fuel tank, a wick and burner assembly, and a glass globe or chimney that protects the flame while helping air flow properly.
The most familiar design is the hurricane lantern, often seen at campsites, barns, cabins, and emergency-preparedness shelves. It has a metal frame, a glass globe, a fuel reservoir, and a wick adjustment knob. The design helps shield the flame from wind while allowing enough oxygen for a steady burn.
Oil Lantern vs. Oil Lamp
People often use the terms “oil lantern” and “oil lamp” interchangeably, but there is a small difference. An oil lamp usually sits on a table and is designed mainly for indoor use. An oil lantern is typically portable, enclosed, and better suited for outdoor or semi-outdoor conditions. In everyday conversation, though, both mean the same basic thing: a controlled flame powered by liquid fuel.
Choose the Right Fuel
The first step in using an oil lantern is choosing the correct fuel. This is where many beginners accidentally turn a calm evening into a chemistry experiment with terrible lighting.
Use only fuel recommended by the lantern manufacturer. Common options include clear lamp oil, clean-burning paraffin lamp oil, kerosene, or a kerosene substitute designed for wick lamps and lanterns. Clear, unscented, and undyed fuel is usually best because it burns cleaner and is less likely to clog the wick.
Fuels You Should Never Use
Never use gasoline, alcohol, mineral spirits, acetone, paint thinner, diesel, aviation fuel, tiki torch fuel not approved for indoor lanterns, or any unknown liquid. These fuels can flare, explode, produce dangerous fumes, damage the lantern, or create a fire hazard. A lantern is designed for controlled wick combustion, not for auditioning as a backyard rocket.
If you are using the lantern indoors, make sure the fuel is labeled for indoor use. Some fuels are meant only for outdoor torches and can release heavy odors or harmful fumes in enclosed spaces.
Know the Parts of Your Lantern
Before lighting anything, get familiar with the lantern. Most oil lanterns include the following parts:
- Fuel tank or font: The bottom reservoir that holds lamp oil or kerosene.
- Wick: Usually made of cotton, it draws fuel upward to the flame.
- Burner: The metal part that holds and controls the wick.
- Wick adjustment knob: Raises or lowers the wick to control flame height.
- Glass globe or chimney: Protects the flame and helps create proper airflow.
- Lift lever: Raises the globe so you can light the wick.
- Carrying handle: Allows you to move the lantern only when it is cool and safe to handle.
Every model is slightly different, so read the instructions that came with your lantern. Antique lanterns deserve extra caution because seals, burners, and fuel tanks may be worn or damaged.
How to Fill an Oil Lantern
Filling the lantern correctly prevents leaks, smoke, and fuel spills. Work slowly, preferably outdoors or in a well-ventilated area.
Step 1: Make Sure the Lantern Is Cool
Never refill a hot or burning lantern. Extinguish the flame and allow the lantern to cool completely. Fuel vapors can ignite if they meet a hot burner or open flame.
Step 2: Open the Fuel Cap
Locate the filler cap on the fuel tank. Unscrew it carefully and place it somewhere clean so dirt does not get into the reservoir.
Step 3: Add Fuel Slowly
Using a small funnel, pour approved fuel into the tank. Do not overfill. A good rule is to fill the tank about three-quarters to 80 percent full, leaving air space for expansion. Overfilling can cause leaks through the burner or side tubes, especially in hurricane lanterns.
Step 4: Wipe Up Spills Immediately
If any fuel drips onto the lantern, table, floor, or your hands, wipe it up before lighting. Store the fuel container away from the lantern before striking a match or lighter.
Prepare and Trim the Wick
The wick is the little strip of fabric with a big responsibility. A clean, properly trimmed wick gives you a bright flame with less smoke and soot. A ragged, crooked, or too-high wick gives you a smoky little dragon.
How to Trim the Wick
Trim the top of the wick evenly with sharp scissors. For most flat-wick lanterns, a straight-across trim works well. Some users slightly round the corners to reduce uneven burning. Remove charred edges, loose threads, and fuzzy bits.
Before lighting, adjust the wick so only a small amount extends above the burner. Many lanterns burn best when the wick is about one-eighth to one-quarter inch above the burner cone. If the wick is too high, the flame will smoke, flicker, and blacken the glass.
Let the Wick Soak
If the lantern is new, empty, or has a dry wick, let the wick absorb fuel before lighting. Five to ten minutes is usually enough for a small lantern, though a completely dry wick may need longer. Lighting a dry wick burns the cotton instead of the fuel, shortening wick life and creating an unpleasant smell.
How to Light an Oil Lantern
Now comes the satisfying part: lighting the lantern. Do it calmly. This is not a birthday candle race.
- Place the lantern on a stable, heat-resistant surface.
- Keep it away from curtains, paper, bedding, clothing, wood shavings, dry grass, and anything else that can burn.
- Lift the glass globe using the lantern’s lever or open the chimney access point.
- Turn the wick knob so a small amount of wick is visible.
- Use a match or long lighter to light the wick.
- Lower the glass globe carefully back into place.
- Adjust the wick until the flame is steady, bright, and not smoking.
The ideal flame is even and controlled. If it looks like a tiny campfire trying to escape, lower the wick. If the flame is barely visible, raise it slightly. Small adjustments are better than dramatic knob-twirling.
Adjusting the Flame
Flame control is the main skill in using an oil lantern. The wick height determines how much fuel reaches the flame. Too little wick gives you weak light. Too much wick produces smoke, soot, odor, and wasted fuel.
Signs the Flame Is Too High
- The glass globe turns black quickly.
- The flame flickers wildly.
- You smell heavy fuel odor.
- Smoke appears above the chimney.
- The flame becomes tall, uneven, or orange-black at the tips.
If any of these happen, lower the wick until the flame settles. A slightly smaller clean flame is better than a dramatic smoky one. Your lantern should light the room, not season it like barbecue.
Where to Use an Oil Lantern Safely
Use your lantern in a stable, open, well-ventilated area. Even clean-burning lanterns consume oxygen and produce combustion byproducts, so ventilation matters. Avoid using oil lanterns in small sealed rooms, tents, closets, bathrooms, or sleeping areas.
Indoor Use
For indoor use, choose fuel labeled for indoor lamps and keep the lantern on a flat, uncluttered, heat-resistant surface. Keep it at least 12 inches away from anything combustible, and more distance is better. Never place it under a shelf, near curtains, or where children, pets, or elbows can knock it over.
Outdoor Use
Outdoor use is where hurricane lanterns shine. They work well on porches, picnic tables, campsites, and garden paths. Still, avoid placing them near dry leaves, tent fabric, fuel containers, paper plates, or that one friend who gestures wildly while telling stories.
How to Extinguish an Oil Lantern
To put out an oil lantern, turn the wick down slowly until the flame goes out. Do not blow hard into the globe because this can spread soot or disturb hot glass. Some lanterns can also be extinguished with a proper snuffer, depending on the design.
After the flame is out, let the lantern cool before touching the globe, refilling the tank, or moving it. Glass and metal parts can stay hot longer than you expect.
Cleaning and Maintenance
A well-maintained lantern burns brighter, smells better, and lasts longer. It also looks less like it survived a chimney sweep convention.
Clean the Glass Globe
If soot builds up on the glass, remove the globe after the lantern is cool. Wash it with warm water and mild dish soap, then dry it completely before reinstalling. For stubborn soot, a soft cloth and a little vinegar can help. Avoid abrasive pads that scratch the glass.
Replace the Wick When Needed
Replace the wick when it becomes too short, stiff, badly charred, uneven, or difficult to adjust. Use the correct width and type for your lantern. A wick that is too wide may jam; one that is too narrow may burn unevenly.
Check for Leaks
Before each use, inspect the fuel tank, cap, seams, burner, and base. If you see leaks, rust holes, cracks, or loose fittings, do not use the lantern until it is repaired or replaced.
Common Oil Lantern Problems and Fixes
Problem: The Lantern Smokes
The wick is probably too high, uneven, or charred. Lower it, trim it, and clean the glass. Also check that you are using the correct fuel.
Problem: The Flame Is Weak
The wick may not be saturated, the fuel may be old, the wick may be clogged, or the tank may be nearly empty. Let the wick soak, refill with fresh approved fuel, or replace the wick.
Problem: The Lantern Smells Bad
Some odor is normal with certain fuels, especially kerosene, but strong odor can mean poor fuel quality, a dirty wick, too-high flame, poor ventilation, or fuel spilled on the lantern body.
Problem: The Glass Turns Black
This usually means incomplete combustion. Lower the wick, trim it evenly, and make sure the chimney is seated correctly. The flame should not touch the glass.
Oil Lantern Safety Rules You Should Never Ignore
An oil lantern is useful because it is simple, but simple does not mean risk-free. Follow these safety rules every time:
- Never leave a burning lantern unattended.
- Never sleep with an oil lantern burning.
- Keep lanterns away from children and pets.
- Use only manufacturer-approved fuel.
- Keep fuel in its original container with the cap tightly closed.
- Store fuel away from heat, sparks, flame, and living areas.
- Do not refill a hot lantern.
- Use lanterns only in ventilated areas.
- Keep a fire extinguisher nearby.
- Install and maintain smoke alarms and carbon monoxide alarms.
Lamp oil can be especially dangerous if swallowed or aspirated into the lungs, so store it where children cannot access it. Never transfer lamp oil into drink bottles, food containers, or decorative jars. Clear lamp oil can look harmless, which is exactly why it must be treated seriously.
Best Uses for an Oil Lantern
Oil lanterns are not meant to replace modern lighting in every situation, but they are excellent for specific uses:
- Power outages: A backup light source when batteries run low.
- Camping: Warm campsite lighting that feels calmer than harsh LEDs.
- Cabins: Reliable off-grid lighting for evenings.
- Workshops: Emergency light when electricity is unavailable.
- Decor: Rustic ambiance when used safely and supervised.
- Preparedness kits: Long-lasting lighting when stored with proper fuel and spare wicks.
For emergency use, keep at least one spare wick, approved fuel, matches or a long lighter, a funnel, and cleaning cloths with your lantern. A lantern without fuel is just farmhouse decor with responsibilities.
Oil Lantern Storage Tips
When storing an oil lantern, make sure it is cool, clean, and upright. If the lantern will not be used for a long time, consider emptying the tank and storing the fuel separately in its original container. This helps prevent leaks, stale fuel, wick clogging, and unpleasant odors.
Store lanterns away from direct sunlight, moisture, and extreme heat. Keep fuel containers closed tightly and out of reach of children. Label everything clearly, especially if you own several types of fuel for camping stoves, heaters, torches, or lamps.
Beginner Mistakes to Avoid
Using the Wrong Fuel
This is the biggest mistake. The wrong fuel can create dangerous flare-ups, toxic fumes, soot, or fire. When in doubt, check the manufacturer’s instructions.
Raising the Wick Too High
A taller flame is not always brighter. Past a certain point, it just becomes smokier. Keep the flame modest and clean.
Skipping Ventilation
Oil lanterns need air. Do not use them in sealed spaces. If you feel lightheaded, smell heavy fumes, or notice poor air quality, extinguish the lantern and ventilate the area.
Moving a Burning Lantern Carelessly
Even lanterns with handles should be handled carefully. Avoid carrying a burning lantern unless necessary, and never swing it around. This is lighting, not medieval choreography.
Field Notes: Real-World Experiences With Oil Lanterns
Using an oil lantern teaches you a few things quickly. The first lesson is patience. Modern lights turn on instantly, but an oil lantern prefers a small ritual: check the fuel, trim the wick, let it soak, light it gently, and adjust the flame. It is a slower process, but that is part of the charm. The lantern gives you light, and in return, it asks you not to behave like you are late for a subway train.
One of the most common experiences beginners have is over-adjusting the wick. You light the lantern, see a tiny flame, and think, “Surely more wick means more light.” Then the globe starts collecting soot like it has taken up coal mining. The fix is simple: lower the wick until the flame becomes smooth. A clean flame may look less dramatic, but it provides better light and saves you from scrubbing black residue off the glass every ten minutes.
Another practical lesson is that fuel quality matters. Clean, clear, unscented lamp oil usually creates a more pleasant experience than dyed or heavily scented fuel. Decorative fuels may look pretty in a bottle, but they can clog wicks and create odor. If your goal is dependable light, choose function over fragrance. Your lantern does not need to smell like tropical vanilla thunderstorm.
People who use lanterns during power outages often learn to set up a “lantern station.” This means one safe table or counter where the lantern always sits, away from curtains, paper towels, cabinets, and foot traffic. Keeping the lantern in one place reduces accidents. It also stops everyone in the house from asking, “Where did the light go?” every five minutes.
Campers often appreciate oil lanterns because the light is softer than many battery lamps. Around a picnic table, a lantern gives enough glow for eating, talking, and finding the marshmallows someone definitely did not hide. It also creates a calmer atmosphere than a bright LED beam pointed directly into everyone’s retinas. Still, outdoor use requires the same safety habits: stable surface, no dry leaves nearby, no refueling while hot, and no hanging the lantern where wind can slam it into something.
Maintenance becomes easier once you build a routine. Trim the wick before use, clean the globe after smoky burns, keep the tank from overfilling, and store fuel carefully. These small habits make the lantern feel reliable instead of fussy. Over time, you learn the sound, smell, and look of a proper burn. A steady lantern is quiet, controlled, and almost boring in the best possible way.
The biggest experience-based takeaway is this: an oil lantern rewards careful users. It is not difficult, but it is hands-on. Treat it like a real flame, not a decorative gadget. Give it good fuel, a neat wick, fresh air, and a safe place to sit. In return, it gives you warm light, backup security, and a little old-fashioned satisfaction every time the room glows.
Conclusion
Learning how to use an oil lantern is mostly about respecting a few simple principles: use the right fuel, avoid overfilling, let the wick soak, trim it properly, adjust the flame carefully, and never leave the lantern unattended. Once you understand those basics, an oil lantern becomes a dependable tool rather than a mysterious antique with a handle.
Whether you keep one for camping, emergency preparedness, cabin life, or cozy porch lighting, the key is consistency. Check the lantern before every use, keep the glass clean, store fuel safely, and pay attention to smoke or odor. A properly used oil lantern can provide beautiful, practical light when electricity is unavailable or when you simply want a warmer glow than modern bulbs provide.
Note: This article is written for general educational purposes. Always follow the manufacturer’s instructions for your specific lantern and fuel, and follow local fire-safety rules.