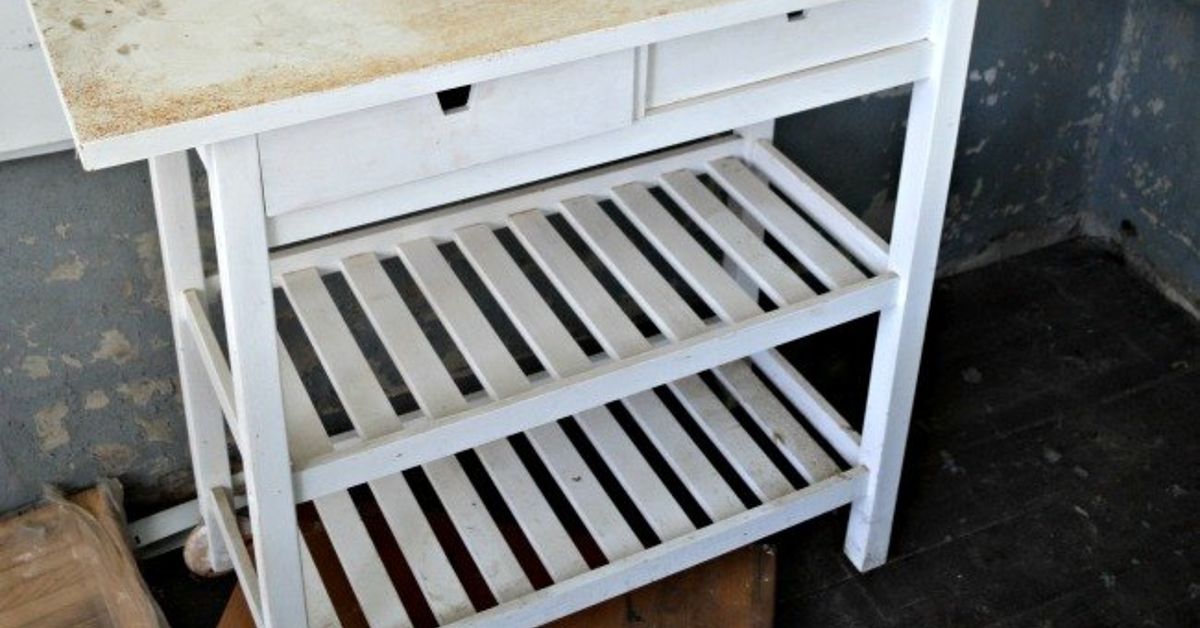

An IKEA kitchen cart is one of those small-space heroes that quietly works overtime. It holds snacks, serves coffee, stores pans, catches mail, and occasionally becomes a landing zone for a mysterious pile of reusable grocery bags. But with a little creativity, a basic rolling cart can become a stylish kitchen island, coffee bar, pantry station, baking cart, or entertaining sidekick.
This IKEA kitchen cart makeover guide shows how to turn a simple utility trolley into a custom-looking piece that feels intentional rather than “I bought this during a weekend trip and assembled it while eating takeout.” The best part: you do not need a woodworking studio, a professional spray booth, or the confidence of someone who casually says, “I just installed crown molding.”
Whether you are upgrading a RÅSKOG-style utility cart, a NISSAFORS trolley, or another compact IKEA kitchen cart, the makeover process is mostly about combining three things: a durable finish, a practical top surface, and storage that works with your actual routine.
Why an IKEA Kitchen Cart Makeover Is Worth It
A rolling kitchen cart solves several small-kitchen problems at once. It creates movable storage, gives frequently used items a dedicated home, and can provide a little extra prep space without committing to a full kitchen island. That flexibility matters in apartments, condos, galley kitchens, and homes where every countertop inch already has a job.
The real appeal is customization. A basic metal cart may look neat but generic. Add a wood topper, paint it in a rich color, install hooks, line the shelves, and organize it by purpose, and suddenly it looks like a boutique kitchen piece instead of a utility cart that wandered in from a break room.
Rolling carts also make kitchens more adaptable. Need a coffee station in the morning? Roll it near the outlet. Hosting friends? Move it beside the dining area for drinks and dessert. Baking cookies? Park it next to the oven with flour, mixing bowls, and baking sheets ready to go. A well-designed cart can change jobs faster than a reality-TV contestant changing alliances.
Start With a Clear Purpose
Before buying paint, baskets, or a wood top, decide what the cart needs to do. A beautiful cart that stores random items is still random storage wearing a nice outfit. Give it a job first.
Popular IKEA Kitchen Cart Uses
- Coffee bar: mugs, coffee beans, syrups, filters, and a small machine.
- Mini pantry: dry goods, snacks, produce, lunch supplies, and reusable containers.
- Baking station: flour, sugar, measuring tools, mixing bowls, parchment paper, and decorating supplies.
- Mobile island: chopping surface, dish towels, utensils, and frequently used cookware.
- Bar cart: glassware, cocktail tools, mixers, napkins, and a small serving tray.
- Family command center: lunchboxes, water bottles, chargers, calendars, and that one pen everyone loses daily.
Once you know the cart’s job, it becomes easier to decide how much visual polish it needs. A pantry cart may benefit from labeled containers and wire baskets. A coffee cart may need a warmer wood top and stylish mugs. A bar cart can handle bolder paint, brass-toned hardware, and a little personality.
Materials for an IKEA Kitchen Cart Makeover
You can complete a simple makeover with very few supplies, but the finish will look more polished when you use products suited to the cart’s material. Most IKEA utility carts have metal frames or metal shelves, while toppers are commonly made from bamboo, plywood, hardwood, or pre-cut butcher block.
Basic Supply List
- Degreasing cleaner or mild soap and water
- Microfiber cloths
- Fine-grit sandpaper or sanding sponge
- Metal primer, if painting a metal cart
- Paint formulated for metal or furniture
- Painter’s tape and drop cloths
- Wood board, cutting board, or butcher block topper
- Food-safe wood oil for a food-prep surface
- Screws, brackets, or non-slip pads if attaching a topper
- Baskets, hooks, labels, jars, or shelf liners
For a cart that will hold food, coffee tools, or prep supplies, choose easy-to-clean materials. If you add a wood top for cutting or serving, use a finish specifically designed for food-contact surfaces. Decorative paint belongs on the cart frame and shelves, not on the surface where you plan to chop vegetables or roll pie dough.
How to Make Over an IKEA Kitchen Cart Step by Step
1. Assemble the Cart and Test the Wheels
Build the cart according to the manufacturer’s instructions before changing anything. Check that the shelves are level, the screws are tight, and the wheels roll smoothly. If your cart has locking casters, make sure they engage properly. A kitchen cart should glide when you want it to move and stay put when you are slicing tomatoes. Nobody wants an onion-chopping session to become a low-budget action scene.
Take measurements before ordering a wood top, baskets, liners, or accessory rails. Even carts that look similar can have slightly different shelf dimensions. Measure the width, depth, lip height, and distance between shelves.
2. Clean and Prep the Metal Surface
Paint prep is the least glamorous part of the makeover, but it is the step that keeps your cart from looking fabulous for approximately four days. Wipe down the metal with a degreasing cleaner or mild soap solution to remove dust, oils, fingerprints, and cooking residue. Let the cart dry completely.
Lightly scuff glossy surfaces with fine-grit sandpaper or a sanding sponge. You are not trying to sand the cart into a new personality. You simply want to dull the finish enough for primer and paint to grip. Remove sanding dust with a clean, dry cloth.
If you see rust, flaking paint, or chipped areas, remove loose material with sandpaper or a wire brush. Then use a metal primer designed to help with adhesion and corrosion resistance. Good prep usually makes a bigger difference than buying the most expensive paint color in the store.
3. Prime and Paint the Cart
Choose a paint labeled for metal, furniture, or direct-to-metal use. Satin finishes are usually a smart choice for kitchen carts because they offer a soft sheen while hiding minor scratches better than high gloss. Matte finishes look sophisticated but can show scuffs more easily in busy kitchens.
Apply thin, even coats rather than one heavy coat. Heavy paint tends to drip, pool in corners, and create the kind of texture that makes people say, “Was that intentional?” Light coats create a smoother finish and are easier to control.
For spray paint, work outdoors or in a well-ventilated area, protect nearby surfaces, and follow the product label for distance, drying time, and recoat windows. For brush-on paint, use a small foam roller for broad areas and a brush for edges, shelf lips, and tight corners.
Let the paint cure fully before loading the cart. Dry-to-the-touch is not the same as ready-for-real-life. A cart that feels dry after an hour may still scratch if you stack cast-iron pans, jars, or appliances on it too soon.
4. Add a Wood Topper
A wood top is one of the easiest ways to make an IKEA kitchen cart look more expensive. Bamboo cutting boards, hardwood panels, butcher block remnants, and pre-finished wood boards can all work well. The goal is to create a top that looks intentional and stays stable.
For a simple removable topper, use non-slip rubber pads underneath. This works especially well when you want a serving or coffee surface but do not need a permanent prep station. For a more secure option, attach the board with small brackets underneath or use screws positioned so they do not interfere with the cart’s structure.
Sand wood edges until they feel smooth and comfortable. A slightly rounded edge looks more finished and feels better when you lean against the cart while waiting for water to boil. If the top will touch food, finish it with a food-safe wood oil or conditioner and maintain it periodically according to the product instructions.
For a decorative top that will not be used for food prep, you can stain it darker, whitewash it, or seal it with a durable clear finish. A warm walnut-toned top looks excellent with black, navy, olive green, or cream cart frames. Pale wood works beautifully with soft gray, sage, muted blue, or natural white finishes.
5. Organize the Shelves by Zone
The secret to a useful kitchen cart is not owning more containers. It is giving each shelf a specific job. Think vertically and organize from top to bottom based on frequency of use.
- Top shelf: everyday tools, coffee supplies, a fruit bowl, or a serving tray.
- Middle shelf: jars, mugs, cookbooks, snack bins, or baking ingredients.
- Bottom shelf: heavier items such as appliances, extra cookware, bottles, or bulk pantry goods.
Use baskets to prevent loose items from turning into shelf chaos. Clear containers help with visibility, while opaque bins are better for hiding visual clutter. Labels are useful when multiple people use the kitchen, especially if your household has a mysterious habit of placing tea bags beside batteries and calling it “organization.”
IKEA Kitchen Cart Makeover Style Ideas
Modern Farmhouse Cart
Paint the frame matte black, add a medium-toned wood top, and use woven baskets on the lower shelves. Finish with black hooks for dish towels and oven mitts. This style works well in kitchens with white cabinets, subway tile, wood accents, or open shelving.
Colorful Cottage Kitchen Cart
Try soft green, butter yellow, pale blue, or muted coral paint. Pair the cart with a natural wood top, floral tea towels, ceramic canisters, and vintage-style labels. This look feels cheerful without making the kitchen resemble a candy store after a sugar rush.
Minimalist Coffee Station
Use a white, charcoal, or warm beige base with a light wood top. Keep the shelves simple: a coffee machine, matching mugs, a small tray for syrups, and airtight containers for beans or pods. Hide cords using adhesive clips or a cable sleeve so the cart looks calm rather than electrically ambitious.
Industrial Bar Cart
Choose black, charcoal, bronze, or deep navy paint. Add a darker stained wood top, metal hooks, glassware, and a small tray for cocktail tools. A battery-operated lamp or warm-toned LED puck light can make the cart feel especially inviting for evening entertaining.
Small-Space Pantry Cart
Focus on function. Use stackable bins for snacks, labeled jars for dry ingredients, narrow baskets for seasoning packets, and a basket for reusable bags. Add a slim cutting board on top for quick prep. This setup works beautifully in rental kitchens where cabinets are scarce and counter space has already filed for overtime.
Common IKEA Kitchen Cart Makeover Mistakes
Skipping surface prep: Paint sticks best to clean, dry, properly prepared surfaces. Grease and gloss are not your friends here.
Using a heavy wood topper: A thick countertop can look great, but it may make a lightweight cart harder to move or less stable. Keep the cart’s size and weight capacity in mind.
Overloading the top shelf: Heavy appliances and glass containers belong lower on the cart whenever possible. This helps keep the cart stable and easier to roll.
Adding too many decorations: The cart should serve a purpose. A few stylish pieces are lovely; twelve signs telling everyone to “Gather” may be a little emotionally demanding for a Tuesday morning.
Ignoring wheel maintenance: Hair, crumbs, and dust can collect around casters. Clean the wheels occasionally so your cart continues to roll smoothly instead of performing a dramatic squeak every time it moves.
How to Keep Your Kitchen Cart Looking Good
Wipe the cart regularly with a damp cloth and mild cleaner. Avoid abrasive scrubbers that can scratch painted metal. Use coasters, trays, or shelf liners under bottles, jars, and appliances that may leak or leave rings.
If you have a wood top, wipe spills quickly and refresh the finish as needed. Do not leave wet dish towels or standing water on wood surfaces for long periods. Wood likes a little care; it does not enjoy becoming a tiny indoor swamp.
Every few months, tighten screws, inspect the wheels, and check for chipped paint. A quick touch-up before a small chip spreads can keep the cart looking fresh for years.
Real-Life IKEA Kitchen Cart Makeover Experiences
The most successful IKEA kitchen cart makeovers usually come from solving an everyday annoyance rather than chasing a perfect photo. One renter might start with a cart because there is nowhere to put a coffee maker without sacrificing precious counter space. Another person may need pantry storage because a tiny kitchen has one cabinet, two drawers, and the emotional energy of a shoebox.
A common experience is discovering that the cart becomes more useful after a few weeks of trial and error. At first, someone may set up the top shelf with decorative mugs, a candle, and a little plant. Then real life arrives. The coffee scoop needs a home. The filters end up in a drawer across the room. The syrup bottle keeps getting knocked over. Eventually, the cart evolves into something more practical: machine on top, mugs in a basket, filters in a labeled canister, and a tray that catches drips before they become a sticky archaeological site.
Many people also learn that a rolling cart works best when it has a “parking spot.” Without one, the cart can drift around the kitchen like a polite but confused guest at a party. Place it near the task it supports most often. A baking cart should live near the oven or pantry. A coffee cart belongs near an outlet. A prep cart should stay close enough to the sink and refrigerator that you are not walking laps around the kitchen while holding a wet cutting board.
Another real-world lesson is that paint color can be more powerful than expected. A plain black or white cart often blends in, which is great for minimalist spaces. But a deep green, dusty blue, terracotta, or warm cream finish can make the cart feel like a deliberate design feature. People are often surprised by how a small painted piece changes the mood of the entire kitchen. It is a low-commitment way to introduce color without repainting cabinets or convincing yourself that a weekend backsplash project sounds relaxing.
Wood toppers also earn their reputation quickly. A cart without a topper is useful, but a cart with a smooth wood surface suddenly becomes a landing place for groceries, a quick chopping station, a breakfast tray, or a spot to assemble sandwiches. The key is keeping the topper practical. A removable cutting board is great for renters and easy cleaning. A secured butcher block top works better for households that use the cart as a true mini island.
Families often find that carts reduce clutter when each shelf is assigned to a person or activity. The top shelf might hold breakfast items. The middle shelf can contain lunch supplies. The bottom shelf can store reusable containers, water bottles, and snack bins. This setup can make mornings easier because the “Where is my lunchbox?” question stops echoing through the house quite as often.
For people who enjoy entertaining, a kitchen cart can become the most flexible piece in the room. During the week, it may hold pantry staples or coffee supplies. On weekends, it can roll into the dining room as a drink station, dessert cart, or buffet extension. That ability to switch roles makes the makeover feel worthwhile because the cart adapts to the way people actually live instead of taking up space as a decorative object with a very limited career path.
The most satisfying IKEA kitchen cart makeovers are rarely the most expensive. They are the ones that make daily routines easier. A cart that saves ten minutes in the morning, clears a crowded counter, or keeps baking supplies together can feel like a major kitchen upgrade. It may be small, but in a busy home, small improvements have a surprisingly large impact.
Final Thoughts
An IKEA kitchen cart makeover is one of the easiest ways to add storage, style, and flexibility without renovating your entire kitchen. Start with a clear purpose, prepare the surface carefully, choose durable finishes, and organize the shelves for real life instead of a staged photo. With paint, a wood topper, and a smart storage plan, a humble rolling cart can become one of the hardest-working pieces in your home.
Note: Measure your exact cart before buying a topper, shelf liners, or accessories. IKEA cart dimensions, finishes, and available accessories can vary by product line and market.