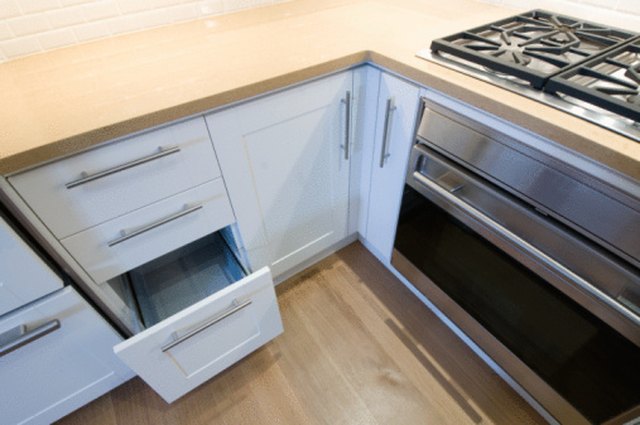

Few household sounds are as oddly dramatic as a drawer that groans, grinds, or sticks halfway open like it has suddenly remembered a personal grudge. One day your kitchen drawer glides like a tiny luxury vehicle. The next day, it moves like it is hauling bricks through peanut butter. The usual culprit is not a ghost, a bad cabinet mood, or your spoon collection staging a protest. It is usually dirty, dry, or contaminated ball-bearing drawer slides.
Learning how to clean a ball-bearing drawer slide is a simple DIY maintenance skill that can make cabinets, desks, dressers, tool chests, and pantry pull-outs feel new again. Ball-bearing drawer slides use small steel balls rolling inside metal raceways to reduce friction and support the drawer. When dust, crumbs, sawdust, old grease, pet hair, spilled sugar, or mystery kitchen particles invade those raceways, smooth movement disappears fast. Fortunately, most sticky drawer slides do not need immediate replacement. They need a careful cleaning, light lubrication, and a little patience.
This guide explains how to remove the drawer, clean the slide tracks, treat the ball-bearing retainer, apply the right lubricant, avoid common mistakes, and know when a slide is too damaged to save. Put another way: we are going to help your drawer stop sounding like a haunted shopping cart.
What Is a Ball-Bearing Drawer Slide?
A ball-bearing drawer slide is a metal sliding mechanism that lets a drawer move in and out of a cabinet. Unlike older wooden runners or basic roller slides, ball-bearing slides contain rows of small bearings inside channels called raceways. These bearings distribute weight and reduce friction, which is why this hardware is common in kitchen cabinets, office desks, filing cabinets, garage storage, workshop toolboxes, and heavy-duty pull-out shelves.
Most side-mount ball-bearing slides have two main pieces: the cabinet member, which attaches to the cabinet, and the drawer member, which attaches to the drawer box. Many full-extension models also include a lever disconnect. This small black or plastic lever lets you separate the drawer from the slide without unscrewing anything. Full-extension slides allow the drawer to pull out far enough to access the back, which is wonderful when you are searching for the one measuring spoon that has apparently joined witness protection.
Because the slide depends on clean metal-to-metal movement, contamination matters. A small amount of gritty debris can make the bearings drag, click, or grind. Too much lubricant can also become a problem because grease collects dust and turns into a sticky paste. The goal is not to drown the slide. The goal is to clean it, dry it, lubricate the raceways lightly, and cycle the drawer so the lubricant spreads evenly.
Signs Your Drawer Slides Need Cleaning
Before you grab tools, confirm that cleaning is the right fix. Ball-bearing drawer slides usually need attention when you notice any of these symptoms:
- The drawer feels rough, gritty, or uneven when opened.
- The slide makes squeaking, grinding, clicking, or scraping sounds.
- The drawer starts smoothly but sticks near the middle or end of travel.
- The drawer does not close fully unless pushed hard.
- You see old yellow grease, dust clumps, rust spots, crumbs, or sawdust in the track.
- The drawer was recently exposed to construction dust, sanding debris, humidity, or a spill.
If the drawer is crooked, sagging, or rubbing against the cabinet face, the problem may also involve alignment, loose screws, overloaded contents, or a bent slide. Cleaning helps friction problems. It does not magically straighten a bent rail, although we all wish household hardware responded to optimism.
Tools and Supplies You Will Need
Cleaning ball-bearing drawer slides does not require a professional shop. Most supplies are inexpensive and easy to find.
Basic Cleaning Supplies
- Vacuum with a crevice attachment
- Soft brush or old toothbrush
- Microfiber cloths
- Cotton swabs
- Mild dish soap and warm water
- Water-based spray cleaner or citrus cleaner
- Small screwdriver
- Flashlight
- Painter’s tape or labels for marking left and right parts
Lubrication Supplies
- Light bearing grease, white lithium grease, or universal joint grease
- Dry lubricant spray for cleaner, dust-prone areas
- Silicone spray for light-duty sliding surfaces, if compatible with nearby materials
- Disposable gloves
- Cardboard or drop cloth to protect floors and cabinet interiors
Use lubricant sparingly. A thin film is usually enough. If you can see globs of grease hanging from the slide like frosting on a hardware cupcake, you used too much.
Step-by-Step: How to Clean a Ball-Bearing Drawer Slide
Step 1: Empty the Drawer
Start by removing everything from the drawer. This prevents items from shifting while you pull the drawer out and keeps the weight manageable. Heavy drawers can surprise you, especially tool chest drawers full of sockets, kitchen drawers packed with utensils, or office drawers containing every pen you have owned since 2014.
Place the contents nearby in a bin or on a towel. If you are cleaning multiple drawers, label the contents so you do not create a new problem called “Why are the measuring cups in the tax folder?”
Step 2: Remove the Drawer from the Cabinet
Pull the drawer out fully. Look along both side slides for release levers, tabs, or clips. On many side-mount ball-bearing slides, one lever pushes up while the other pushes down. Press both at the same time and pull the drawer straight toward you. If the drawer resists, do not yank it like you are starting a lawn mower. Check that both levers are fully released.
Some slides use friction disconnects instead of levers. With those, the drawer may need a firm pull at the end of travel. Others, especially older or specialty slides, may require lifting the drawer slightly or removing screws. If your slide has a manufacturer’s label, follow that design’s instructions.
Step 3: Inspect the Slide Hardware
Once the drawer is out, inspect both the drawer-side and cabinet-side slides. Use a flashlight. Look for debris in the track, bent rails, missing screws, rust, broken plastic pieces, damaged ball retainers, or loose mounting brackets.
This inspection matters because cleaning cannot fix everything. If the rail is bent inward, the bearings may bind no matter how clean the slide is. If a screw head sticks out too far, it may catch the slide. If the cabinet is out of square, the slides may fight each other. Smooth drawer movement depends on both clean raceways and proper alignment.
Step 4: Vacuum Loose Dirt and Debris
Use a vacuum with a crevice tool to remove loose dust, crumbs, sawdust, and grit from the slide track and cabinet area. Move slowly along the full length of the slide. Brush stubborn debris with an old toothbrush while vacuuming.
This is especially important in kitchen cabinets and workshop storage. Kitchen slides collect flour, sugar, coffee grounds, and crumbs. Garage slides collect sawdust, metal shavings, and general “I probably should have swept last month” material. Removing loose debris first prevents you from turning dust into sludge when you apply cleaner.
Step 5: Wipe the Tracks with a Damp Cloth
Dampen a microfiber cloth with warm water and a drop of mild dish soap. Wipe the exposed metal tracks, the outer slide surfaces, and the drawer member. Avoid soaking the slide. Ball-bearing slides are metal, and excess water can encourage corrosion if it sits in the raceway.
For grease-borne debris, use a water-based spray cleaner or citrus cleaner on the cloth rather than blasting the cabinet interior. Spray lightly, wipe thoroughly, and keep cleaner away from unfinished wood edges when possible. If cleaner gets into the slide, wipe it out and let the hardware dry completely before lubrication.
Step 6: Clean the Ball-Bearing Retainer
The ball-bearing retainer is the moving cage that holds the bearings. It may be visible as a narrow strip inside the slide. Use cotton swabs to remove dirty grease from the raceways and around the retainer. Rotate or slide the mechanism gently to expose more of the track.
Do not remove individual ball bearings unless you are disassembling the slide for repair and know exactly what you are doing. Most homeowners should clean the retainer in place. Tiny bearings have a magical ability to roll under appliances, into floor vents, or into alternate dimensions.
Step 7: Dry Everything Completely
After cleaning, wipe the slides with a dry microfiber cloth. Let the hardware air-dry for several minutes. If you used a damp cleaner, drying is not optional. Lubricant applied over moisture can trap water against metal surfaces, which may lead to rust or sticky residue later.
You can also cycle the slide gently by hand to help expose hidden wet spots. Keep your fingers clear of pinch points. Ball-bearing slides move smoothly, but they are still metal hardware with narrow spaces that do not care about your manicure.
Step 8: Apply a Small Amount of Lubricant
Apply a thin line of light bearing grease, white lithium grease, or universal joint grease along the raceways where the bearings roll. A cotton swab works well because it gives control. You do not need to coat every visible surface. Focus on the bearing path.
If you prefer a cleaner finish in a dusty environment, a dry lubricant may be a better choice. Dry lubricants leave a slick film without a heavy greasy residue, which can help reduce dust buildup. Silicone spray may also work for some light-duty applications, but always check compatibility with nearby plastic, rubber, wood finishes, and painted surfaces.
Avoid heavy over-application. Too much grease attracts dirt and can make the slide sluggish. Think “thin protective film,” not “mechanical lasagna.”
Step 9: Cycle the Slide
Move the slide in and out several times by hand. This spreads the lubricant across the raceways and bearings. Wipe away any excess that squeezes out. If the slide still feels gritty, repeat the cleaning process before adding more lubricant. More lubricant over dirt is not maintenance; it is dirt marinated in grease.
Step 10: Reinstall the Drawer
Line up the drawer members with the cabinet members. Push the drawer straight in until the slides engage. You may hear or feel a click as the release levers lock back into place. Open and close the drawer several times to confirm smooth travel.
If the drawer binds after reinstalling, remove it again and check alignment. Make sure the slide members are fully seated, screws are tight, and both sides are parallel. A clean slide can still perform badly if one side is mounted higher, lower, or farther forward than the other.
What Lubricant Should You Use?
The best lubricant for ball-bearing drawer slides depends on the slide type, location, and level of use. In many household cabinets, a small amount of light grease on the raceway works well. For a garage tool chest, heavier-duty grease may be appropriate because the drawers carry more weight. For dusty workshops, dry lubricant can be cleaner because it attracts less debris.
Good Options
- Light bearing grease: Good for metal ball-bearing raceways and moderate-to-heavy use.
- White lithium grease: Useful for metal-to-metal sliding parts, especially where longer-lasting lubrication is needed.
- Dry lubricant: Helpful in dusty areas because it leaves less sticky residue.
- Silicone spray: Good for some light-duty sliding surfaces, but test first and use carefully near finishes.
Use Caution With These
- General penetrating oils: These may loosen grime but often do not provide ideal long-term lubrication.
- Graphite grease: Some slide manufacturers warn against certain graphite or molybdenum-based greases for specific slides.
- Vegetable oil or cooking spray: It may seem clever for five minutes, then turns sticky and rancid. Your drawer does not need salad dressing.
- Too much lubricant of any kind: Excess product traps dirt and can cause sluggish movement.
When in doubt, follow the slide manufacturer’s recommendations. If you cannot identify the brand, clean first, then apply the smallest effective amount of a lubricant suitable for metal bearings.
Common Mistakes to Avoid
Spraying Before Cleaning
One of the biggest mistakes is spraying lubricant directly onto a dirty slide. This temporarily masks the problem but usually creates a sticky mixture of old grease, cleaner, dust, and debris. Clean first. Lubricate second. Celebrate third.
Using Too Much Water
Water can help remove grime, but soaking a metal slide is risky. Use a damp cloth, not a waterfall. Dry the slide thoroughly before applying lubricant.
Ignoring Loose Screws
A slide can feel rough because it is dirty, but it can also bind because a screw is loose or protruding into the track. Tighten loose screws and replace stripped fasteners before reinstalling the drawer.
Overloading the Drawer
Every drawer slide has a weight rating. If a drawer is stuffed beyond that rating, cleaning will not solve the strain. Heavy contents can bend slides, loosen screws, and make bearings wear faster. Tool drawers, pantry pull-outs, and file drawers are common offenders.
Forcing the Drawer
If the drawer will not release, stop and inspect the slide. Forcing it can bend the rail or snap a release lever. Drawer hardware rewards calm hands, not heroic wrestling.
When Cleaning Is Not Enough
Sometimes a ball-bearing drawer slide is too worn or damaged to restore. Replacement may be the better choice if you notice crushed bearings, a bent rail, heavy rust, broken disconnect levers, cracked soft-close parts, or a slide that still grinds after cleaning and lubrication.
Replacement is also smart when the slide no longer supports the drawer safely. For example, if a file drawer sags when fully extended or a pantry pull-out leans forward under load, do not rely on lubricant to compensate. Choose a slide with the correct length, side clearance, extension type, and weight rating.
How Often Should You Clean Ball-Bearing Drawer Slides?
Most household drawer slides do not need frequent deep cleaning. A quick inspection once or twice a year is enough for many kitchens, bathrooms, desks, and dressers. High-use drawers may need attention more often. Workshop drawers, garage cabinets, pantry pull-outs, and drawers exposed to dust, humidity, or spills should be checked whenever movement starts to feel rough.
A practical maintenance schedule looks like this:
- Every 3 months: Wipe visible dust from high-use kitchen or workshop slides.
- Every 6 to 12 months: Inspect and lightly clean ball-bearing slides.
- After construction or sanding: Vacuum and clean slides immediately.
- After spills: Clean before sticky residue reaches the bearings.
- When noise begins: Do not wait for grinding to become damage.
Real-World Experience: What Cleaning Drawer Slides Teaches You
Cleaning a ball-bearing drawer slide sounds like one of those tiny jobs that should take ten minutes. In real life, it often turns into a surprisingly educational tour of how your household actually functions. You discover that the junk drawer has been quietly grinding cracker crumbs into the slide track for months. You find one missing screw, three rubber bands, a receipt from a store that closed two years ago, and enough dust to knit a small sweater. The drawer was not being difficult. It was simply living in the consequences of everyday use.
One common experience is that the worst drawer is rarely the fanciest one. It is usually the drawer everyone uses: the silverware drawer, the office supply drawer, the bathroom vanity drawer, or the garage drawer where “miscellaneous hardware” goes to become mythology. These drawers open and close dozens of times a week. Every movement drags tiny particles along the slide. Over time, the factory lubricant gets contaminated, and the bearings stop rolling cleanly. The drawer still works, but it feels heavier, louder, and less precise.
The first lesson is that cleaning beats guessing. Many people immediately reach for a spray can when a drawer squeaks. Sometimes that helps for a day, but if dirt is packed in the raceway, fresh lubricant only gives the grime better transportation. A careful wipe with a microfiber cloth and cotton swab often produces a bigger improvement than adding more product. When you see dark residue coming off the slide, that is the drawer equivalent of a confession.
The second lesson is that less lubricant works better than more. The smoothest results usually come from a thin, targeted application along the bearing path. Over-greasing can make the drawer feel sluggish, especially in dusty spaces. In a garage or shop, heavy grease can collect sawdust quickly. A dry lubricant may be cleaner in that environment. In a kitchen, light grease applied carefully can work well, but it should not be smeared onto cabinet walls, drawer sides, or anything that might touch food packaging.
The third lesson is that alignment matters as much as cleanliness. After cleaning, some drawers glide beautifully the moment they are reinstalled. Others still bind. That is when you check screws, mounting brackets, side clearance, and whether the slide is parallel. A drawer slide is a pair of tracks that must agree with each other. If one side is slightly crooked, the bearings are forced to work harder. The drawer may feel dirty even when it is spotless.
Finally, cleaning drawer slides is satisfying because the reward is immediate. There is no waiting for paint to dry, no complicated calibration, and no mysterious app update. You clean the tracks, add a small amount of lubricant, reinstall the drawer, and suddenly the motion is quiet again. It is a small repair, but it changes how the furniture feels every day. A smooth drawer makes a cabinet feel cared for. A quiet tool chest feels more professional. A kitchen drawer that closes without a shove makes breakfast slightly less dramatic. That may not be glamorous, but neither is fighting a drawer before coffee.
Conclusion
Cleaning a ball-bearing drawer slide is one of those practical home maintenance jobs that delivers more satisfaction than expected. The process is simple: empty the drawer, remove it carefully, vacuum debris, wipe the tracks, clean the ball-bearing retainer, dry everything, apply a small amount of appropriate lubricant, cycle the slide, and reinstall the drawer. The key is restraint. Do not soak the slide, do not over-lubricate, and do not force parts that are meant to release with a lever or clip.
If your drawer still sticks after cleaning, inspect for bent rails, loose screws, overloaded contents, or poor alignment. A slide that is damaged, rusty, or worn beyond repair should be replaced with a properly rated model. But in many cases, a careful cleaning is all it takes to bring back that smooth, quiet glide. Your drawer will not send a thank-you card, but it will stop screaming every time you reach for a spoon. That is close enough.
SEO Tags