
Screen savers may feel like a tiny relic from the age of chunky monitors, dial-up internet, and waiting three business days for a photo to load, but they are still alive and well in Windows 10 and Windows 11. Better yet, they are still useful. A screen saver can add a little personality to your computer, hide your desktop when you step away, display a slideshow of favorite photos, or simply turn the screen blank so your monitor is not frozen on the same spreadsheet forever.
The funny thing is that Microsoft has tucked screen saver settings into a spot that feels slightly hidden. You do not usually find them beside wallpaper settings, even though that would make perfect sense. Instead, Windows places the screen saver controls under lock screen personalization. It is not difficult once you know where to look, but until then, it can feel like searching for a light switch in someone else’s house.
This guide explains exactly how to change your screen saver settings on Windows 10 and Windows 11, how to use the classic Screen Saver Settings window, how to choose Photos, 3D Text, Blank, Bubbles, Mystify, or Ribbons, and how to troubleshoot common problems when your screen saver refuses to show up like a shy raccoon.
What Is a Screen Saver in Windows?
A screen saver is a visual effect that appears after your PC has been idle for a set amount of time. In older days, screen savers helped prevent burn-in on CRT monitors. Today, most people use them for privacy, decoration, nostalgia, or OLED burn-in protection. On modern LCD and LED displays, sleep mode is usually more energy-efficient than running an animated screen saver, but a screen saver can still be useful in the right situation.
Think of a screen saver as your computer’s “I’m still here, but I’m not doing anything dramatic” mode. It does not replace sleep mode, hibernate mode, or proper screen lock security, but it can work nicely with those features.
How to Change Screen Saver Settings on Windows 11
Windows 11 keeps screen saver controls inside the Settings app, but the final window still looks like classic Windows. Yes, the interface has a charming “I survived several operating systems” energy. Here is the simplest method.
Method 1: Use Windows 11 Settings
- Click the Start button.
- Select Settings. You can also press Windows + I.
- Choose Personalization from the left menu.
- Click Lock screen.
- Scroll down and select Screen saver under related settings.
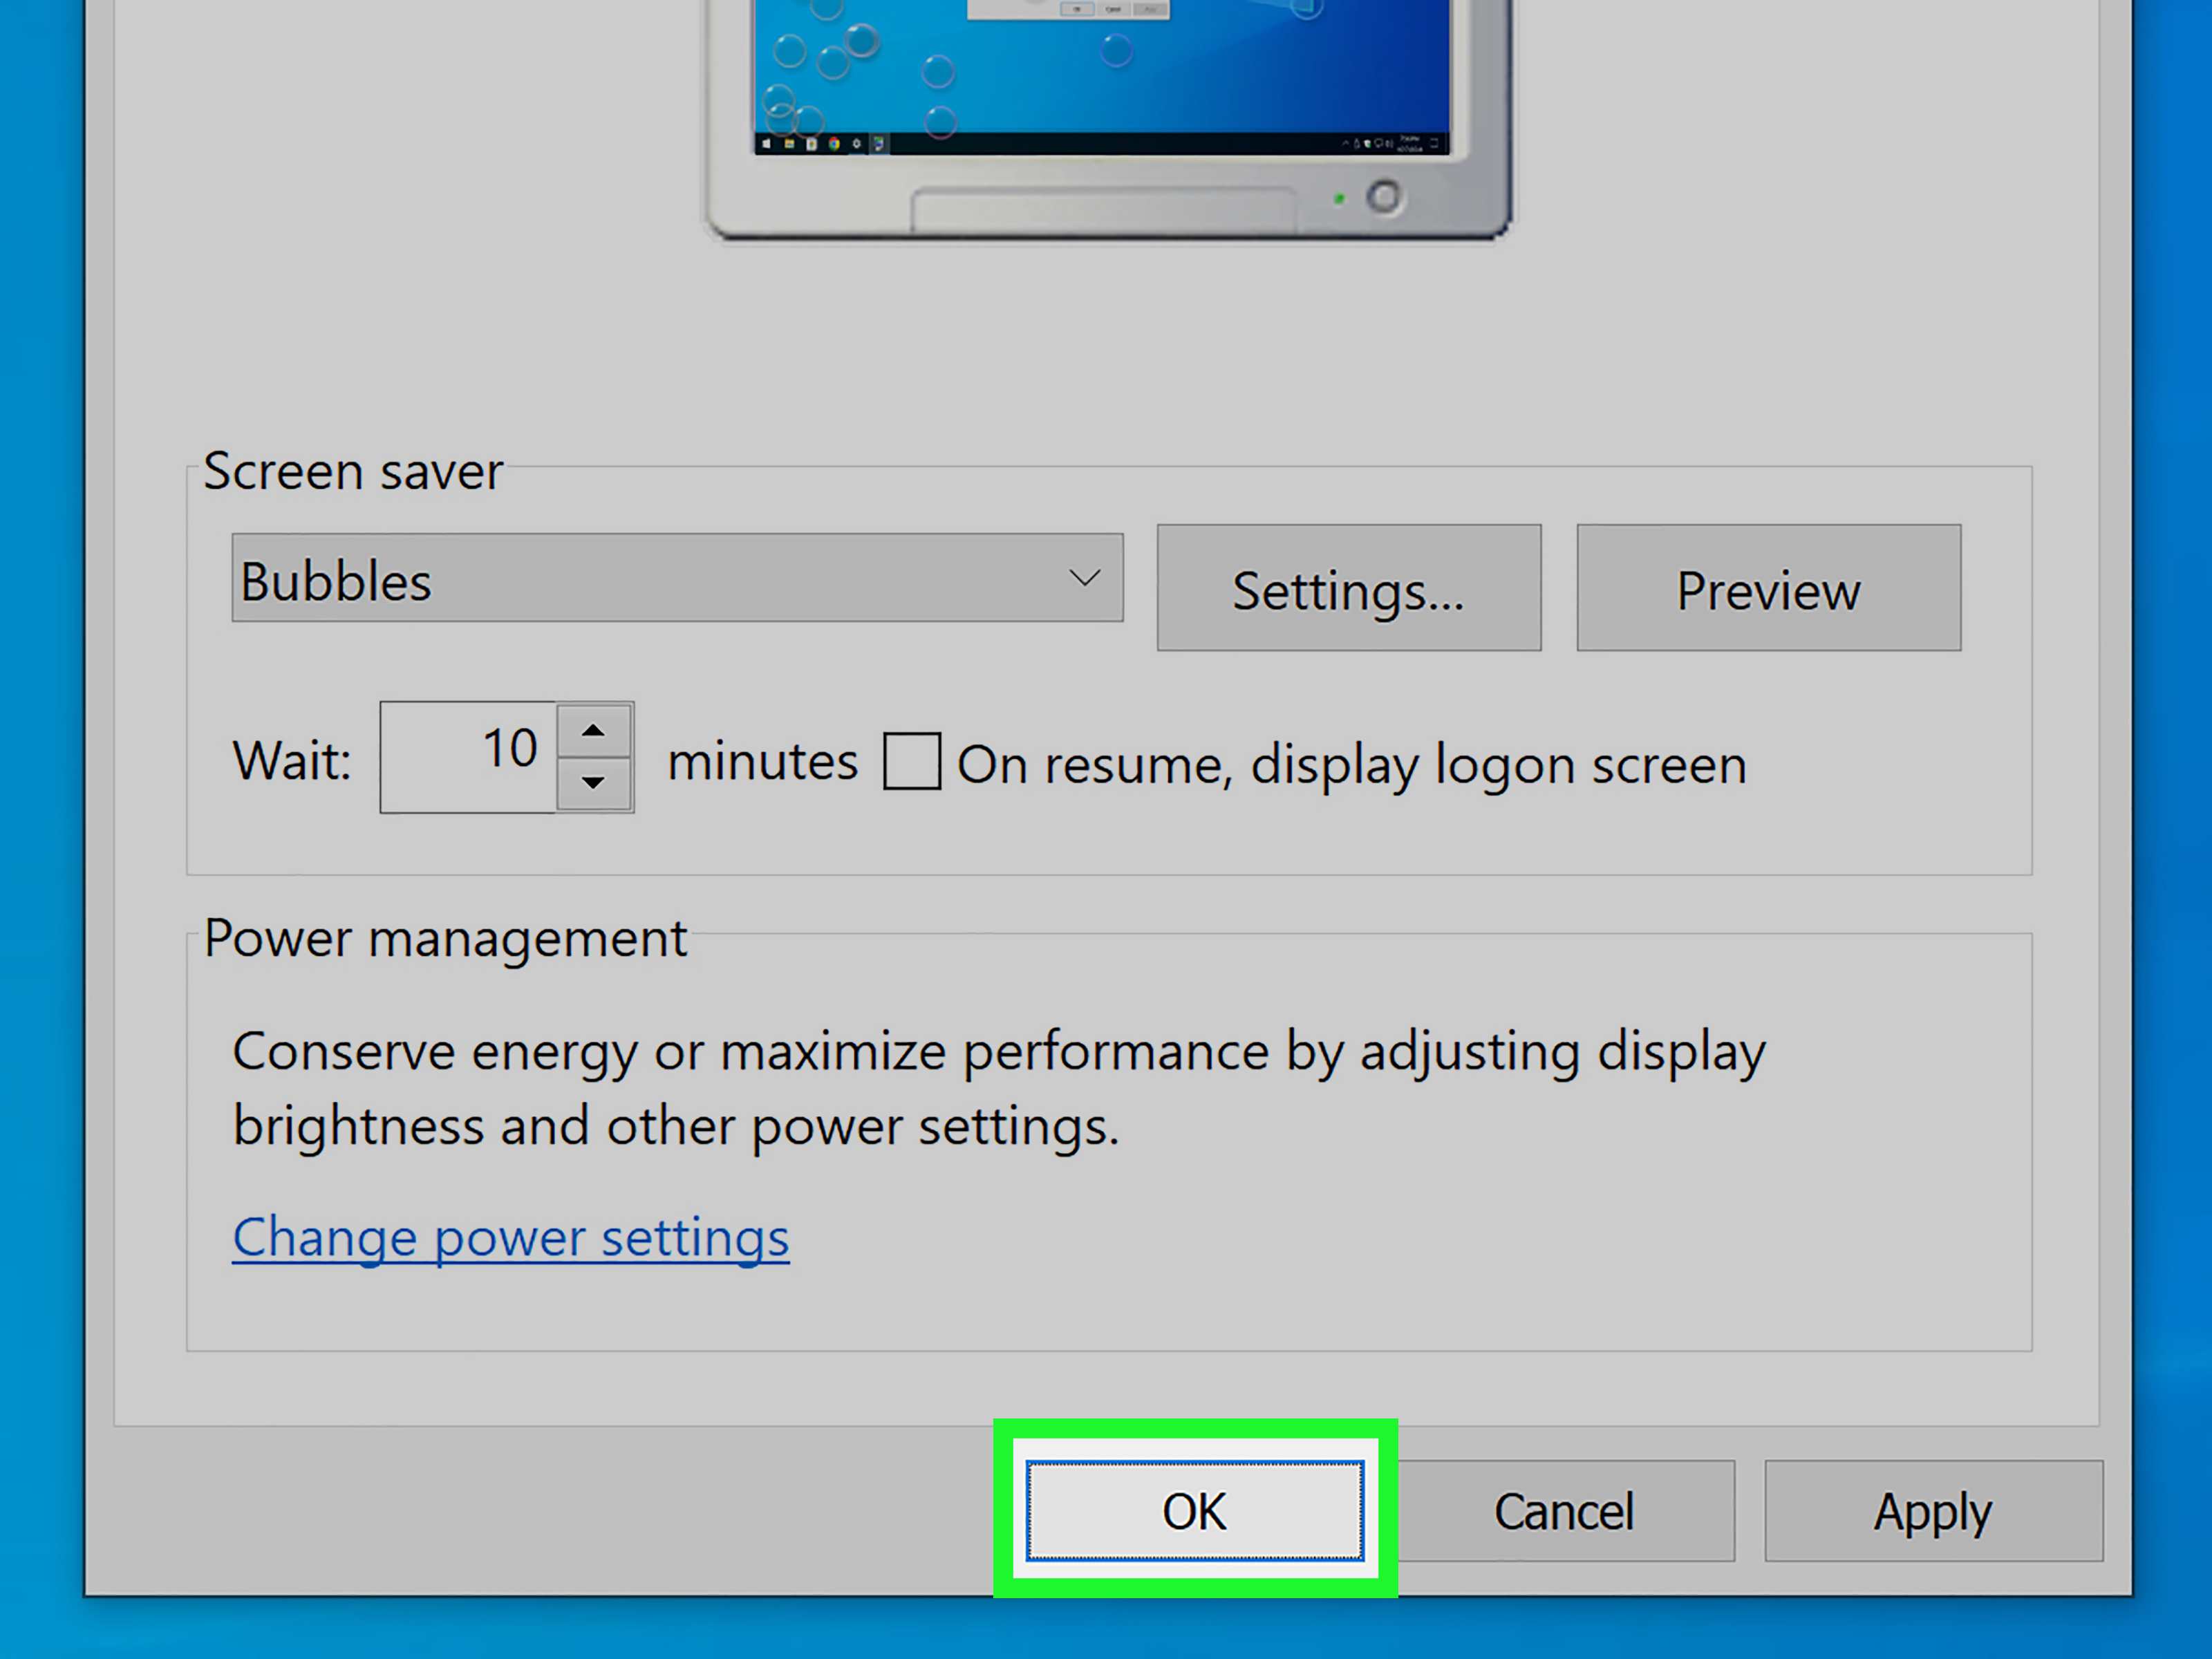
- In the Screen Saver Settings window, open the drop-down menu.
- Choose your preferred screen saver.
- Set the Wait time in minutes.
- Check On resume, display logon screen if you want Windows to require sign-in after the screen saver ends.
- Click Apply, then OK.
That is it. Your Windows 11 screen saver is now set. If you chose something dramatic like Bubbles, your monitor will soon look like it is hosting a tiny underwater conference.
Method 2: Search for Screen Saver Settings Directly
The fastest way is often the search method. Click Start, type Change screen saver, and select the matching result. This opens the classic Screen Saver Settings box immediately. It works well if you do not want to dig through menus.
Method 3: Use the Run Command
For users who enjoy shortcuts, press Windows + R, type the following command, and press Enter:
This command opens the Screen Saver Settings window directly. It is not exactly poetry, but it gets the job done.
How to Change Screen Saver Settings on Windows 10
Windows 10 uses a very similar process. The menus look a little different, but the destination is almost the same.
Method 1: Use Windows 10 Settings
- Click the Start button.
- Open Settings.
- Select Personalization.
- Choose Lock screen from the left sidebar.
- Scroll down and click Screen saver settings.
- Pick a screen saver from the drop-down menu.
- Adjust the Wait time.
- Turn on On resume, display logon screen if you want extra privacy.
- Click Apply and then OK.
Even though Windows 10 has reached the end of standard support, these settings still work on existing Windows 10 PCs. If you are staying on Windows 10 for now, keep your device as secure as possible and consider your upgrade options when practical.
Method 2: Use Windows Search
Click the search box or press the Windows key, type screen saver, and choose Change screen saver. This is the quickest route for most users and avoids the “Which Settings page was that again?” shuffle.
Available Screen Saver Options in Windows 10 and 11
Windows includes several built-in screen savers. They are simple, but they cover most basic needs.
None
This turns the screen saver off. Choose this if you prefer your display to sleep instead.
3D Text
This displays custom text or the current time in a rotating 3D style. It is great if you want your monitor to say something like “Back in 5” or “Do Not Touch My Snacks.”
Blank
This shows a plain blank screen. It is simple, clean, and useful when you want privacy without visual fireworks.
Bubbles
This displays floating transparent bubbles over your desktop. It is playful and classic Windows.
Mystify
This creates animated lines that move around the screen. It has a retro sci-fi feeling, as if your computer is trying to solve a mystery in 1998.
Photos
This option turns your screen saver into a slideshow. You can choose a folder of personal photos, travel pictures, family memories, pet portraits, or screenshots you forgot to delete three years ago.
Ribbons
This displays colorful ribbon-like animations. It is simple, smooth, and more decorative than practical.
How to Use Your Photos as a Screen Saver
The Photos screen saver is one of the best options if you want your PC to feel more personal. It can turn an idle monitor into a rotating photo frame.
- Open Screen Saver Settings.
- Select Photos from the drop-down menu.
- Click Settings.
- Choose the folder that contains your pictures.
- Select a slideshow speed if available.
- Click Save.
- Click Preview to test it.
- Click Apply, then OK.
For best results, create a dedicated folder for screen saver images. This prevents Windows from showing random downloads, blurry screenshots, or that one accidental photo of your keyboard.
How to Set the Screen Saver Wait Time
The Wait box controls how long Windows waits before starting the screen saver. For example, if you set it to 5 minutes, the screen saver starts after five minutes of no keyboard or mouse activity.
A good everyday setting is usually between 5 and 10 minutes. For office computers, shared spaces, or laptops used in public places, a shorter time such as 3 to 5 minutes may be better. For home desktops, you may prefer 10 to 15 minutes so the screen saver does not interrupt you while reading.
Should You Turn On “On Resume, Display Logon Screen”?
In most cases, yes. This option tells Windows to show the sign-in screen when you return from the screen saver. It is especially useful for work computers, school laptops, dorm rooms, shared family PCs, or any device that contains private files.
Without this option, someone can move the mouse and immediately see your desktop. With it enabled, Windows asks for your PIN, password, fingerprint, or facial recognition. That tiny checkbox is basically the polite bouncer standing between your files and curious humans.
Screen Saver vs. Sleep Mode: What Is the Difference?
A screen saver keeps the computer awake while displaying animation, text, photos, or a blank screen. Sleep mode saves power by putting the PC into a low-power state. On modern computers, sleep mode is usually better for battery life and energy savings.
Use a screen saver when you want visual display, privacy, or OLED protection. Use sleep mode when you want to save power. Use both if you want a screen saver to appear first and then the computer to sleep later.
Recommended Setup
A practical setup is to start the screen saver after 5 minutes and turn off the display after 10 or 15 minutes. On laptops, use shorter battery settings. On desktops, you can be a little more relaxed.
How to Change Power and Sleep Settings
If your screen turns off before the screen saver appears, your power settings may be taking over. To adjust this in Windows 11, go to Settings > System > Power & battery. In Windows 10, go to Settings > System > Power & sleep.
Look for screen and sleep timeouts. If the display is set to turn off after 2 minutes but your screen saver starts after 5 minutes, you will never see the screen saver. Windows is not being rude; it is just following the earlier timer.
How to Preview a Screen Saver
In the Screen Saver Settings window, click Preview. Windows immediately starts the screen saver so you can see how it looks. Move your mouse or press a key to exit preview mode.
Preview is especially useful for Photos and 3D Text. It lets you check whether your selected image folder looks good or whether your custom message is accidentally enormous, unreadable, or unintentionally dramatic.
How to Turn Off the Screen Saver
To disable the screen saver, open Screen Saver Settings, choose None from the drop-down menu, click Apply, and then click OK. You can still use display timeout and sleep settings after turning off the screen saver.
This is a smart choice if you want your monitor to turn off quickly instead of showing animations. It is also useful for laptops where battery life matters more than visual style.
Why Your Screen Saver Is Not Working
If your Windows screen saver is not starting, do not panic. The fix is usually simple.
Check the Wait Time
Make sure the Wait time is not set too high. For testing, set it to 1 minute. If it works, increase it later.
Check Power Settings
If your display turns off before the screen saver begins, adjust your screen timeout.
Disconnect Busy Devices
A mouse, touchpad, controller, or external device may send tiny input signals that keep Windows awake. Try unplugging unnecessary peripherals.
Clean Your Mouse or Touchpad
A dirty optical mouse sensor can cause small movements. Windows may think you are still active, even though you are nowhere near the desk.
Check Work or School Restrictions
Some company or school computers use Group Policy to control screen saver settings. If the options are grayed out, your administrator may manage them.
Restart Windows
It sounds basic because it is basic, but restarting often fixes stuck personalization and power behavior.
Best Screen Saver Settings for Privacy
For privacy, choose Blank or Photos with safe images, set the Wait time to 3 to 5 minutes, and enable On resume, display logon screen. This setup is excellent for shared spaces.
If you work with sensitive documents, financial information, client files, school assignments, or private messages, do not rely only on a screen saver. Press Windows + L whenever you leave your computer. It is faster than waiting for a timer and more reliable than trusting your cat not to walk across the keyboard.
Best Screen Saver Settings for OLED Displays
OLED displays can be more vulnerable to image retention or burn-in if static images remain on screen for long periods. A moving screen saver can help reduce the risk, but sleep mode and display timeout are still important. Avoid leaving bright static windows open for hours, especially at high brightness.
For OLED laptops or monitors, use a short display timeout, enable dark mode if you like it, hide static taskbar elements when practical, and avoid using a still image as a screen saver for long periods.
Best Screen Saver Settings for Laptops
For laptops, battery life matters. A screen saver may look nice, but it still uses power because the display remains on. A balanced setup is to use a screen saver only when plugged in and let the screen turn off quickly on battery.
Try this setup: screen saver after 5 minutes, display off after 10 minutes when plugged in, and display off after 3 to 5 minutes on battery. Adjust based on how you work.
Best Screen Saver Settings for Desktop PCs
Desktop users have more flexibility because battery life is not an issue. Still, energy use and monitor wear matter. A good desktop setup is a screen saver after 10 minutes and display sleep after 20 minutes.
If you use multiple monitors, test your screen saver carefully. Some setups display the saver on all screens, while others behave differently depending on drivers, docking stations, or monitor arrangements.
Experience Notes: What Actually Works Best in Real Life
In everyday use, the best screen saver setting is not always the prettiest one. It is the one that fits how you actually use your computer. For example, if you are working from home and constantly stepping away for coffee, deliveries, or the mysterious household task that starts as “one minute” and becomes twenty, a short screen saver delay with sign-in required is a smart move. It protects your work without forcing you to manually lock the PC every single time.
On the other hand, if you use your computer mainly for watching tutorials, reading long articles, or following recipes from across the kitchen, a screen saver that starts too quickly can become annoying. Nobody wants to move the mouse every three minutes while trying to learn how to make pasta sauce or troubleshoot a printer that has chosen emotional violence. In that case, a longer wait time or no screen saver at all may be better.
The Photos screen saver is excellent when it is curated. The key word is curated. If you point it at your entire Pictures folder, Windows may lovingly display everything from vacation sunsets to random screenshots, receipts, memes, and blurry images of your ceiling. A dedicated folder solves this problem. Create a folder named “Screen Saver Photos,” copy only the images you actually want to see, and select that folder in the Photos screen saver settings. Your future self will appreciate not having a giant screenshot of a tax document floating across the monitor during dinner.
For work computers, the Blank screen saver with logon on resume is usually the most professional choice. It is boring in the same way a seatbelt is boring: not glamorous, but very useful when needed. If you work in an office, classroom, library, co-working space, or shared home environment, privacy should beat decoration. A simple blank screen plus password requirement prevents casual glances and accidental access.
For personal desktops, the fun options still have charm. Bubbles, Mystify, and Ribbons are not essential tools, but they make Windows feel less sterile. They are small reminders that computers do not have to be all spreadsheets, updates, and notifications. Sometimes your PC can just blow bubbles while you make tea.
The biggest lesson is that screen saver settings and power settings should be planned together. If your display turns off before the screen saver starts, the screen saver will never appear. If your screen saver starts too soon, it interrupts you. If sleep mode starts too late, you waste power. The sweet spot is personal. Test a few combinations over a normal workday and adjust from there.
For most users, the best practical setup is simple: choose a screen saver you like, set it to begin after 5 to 10 minutes, enable the sign-in screen on resume, and set the display to turn off later. That gives you privacy first, power savings second, and just enough personality to make your PC feel like yours.
Conclusion
Changing your screen saver settings on Windows 10 and Windows 11 is easy once you know where Microsoft placed the controls. Open Personalization, go to Lock screen, launch Screen Saver Settings, choose your style, set the wait time, and decide whether Windows should require sign-in when you return.
Screen savers are no longer the must-have monitor protection tool they once were, but they still serve a purpose. They can improve privacy, add personality, reduce static images on OLED screens, and make idle time look a little less boring. Just remember that sleep mode and display timeout settings are equally important, especially if you care about battery life or energy savings.
Whether you want a blank screen for privacy, a family photo slideshow, or a gloriously nostalgic animation, Windows gives you the tools. You just have to know where to click.