
Note: This guide is written as original, publish-ready web content based on practical home-improvement best practices, including shelf installation, stud anchoring, TV ventilation, cable safety, and room styling principles.
Hanging a shelf over the TV sounds simple until you are standing in the living room holding a drill, a level, a pencil, and the sudden realization that drywall is not a magical force field. The good news? A shelf above your TV can look fantastic, add storage, create a polished media wall, and give your living room that “yes, an adult lives here” feeling. The bad news? If you hang it carelessly, it can sag, block TV ventilation, look crooked, or perform an unplanned dramatic fall during movie night.
This guide walks you through how to hang a shelf over the TV safely, neatly, and stylishly. We will cover planning, measurements, tools, wall studs, anchors, cable management, shelf height, decorating tips, and real-world lessons learned from people who discovered that “eyeballing it” is not a measurement system recognized by carpenters.
Why Hang a Shelf Over the TV?
A shelf above the TV can do more than hold a plant and three mysterious decorative objects from Target. It can visually frame the television, reduce the blank-wall effect, and give your media area a custom built-in look without the cost of built-ins. In smaller rooms, it also provides vertical storage, which is basically free real estate for your walls.
Common reasons homeowners install a shelf over a TV include displaying art, hiding cable clutter, holding small speakers, balancing wall decor, adding seasonal decorations, and creating a more finished entertainment center. A floating shelf over the TV is especially popular because it keeps the wall clean and modern. However, the shelf must be installed with enough clearance, strong support, and respect for the TV’s heat and airflow needs.
Before You Start: Plan the Shelf Like a Pro
The best shelf installations happen before the drill ever touches the wall. Start by looking at your TV wall as one complete design. The shelf should not feel like it randomly landed above the screen after losing a fight with gravity. It should align with the TV, furniture, or nearby architectural features.
Choose the Right Shelf Width
A shelf over the TV usually looks best when it is slightly narrower than the media console or close to the width of the TV. For example, if your TV is 55 inches wide, a shelf between 48 and 60 inches can look balanced. If the shelf is much shorter, it may look awkward. If it is much wider, it can overpower the TV and make the wall feel top-heavy.
For a clean modern style, choose a simple floating shelf. For a farmhouse or traditional room, a wood shelf with visible brackets can look intentional and sturdy. If you plan to place heavier items on the shelf, visible brackets attached to studs are often more forgiving than a lightweight floating shelf.
Decide What the Shelf Will Hold
Be honest about what you want to put on the shelf. A few framed photos and a faux plant are easy. Books, speakers, ceramic vases, game consoles, and heavy decor are a different story. The heavier the load, the more important it becomes to attach the shelf hardware directly into wall studs rather than relying only on drywall anchors.
As a rule of common sense, avoid placing very heavy, fragile, or valuable items above a TV. Nobody wants a decorative stone sculpture to become the villain in a flat-screen tragedy. Keep the shelf lightweight, balanced, and practical.
How High Should a Shelf Be Above the TV?
There is no single perfect height, because every TV size, ceiling height, and room layout is different. A good starting point is to leave at least 6 to 12 inches of space between the top of the TV and the bottom of the shelf. This gives the TV visual breathing room and helps prevent the shelf from feeling like it is pressing down on the screen.
If the TV vents are near the top or back, leave extra clearance. Many TV manufacturers recommend keeping open space around the TV so heat can escape properly. A shelf should never block vents or trap warm air behind the screen. If your TV already feels warm after a few hours of use, treat airflow like a VIP guest and give it space.
Also consider viewing comfort. If the shelf is too low, it can distract from the screen. If it is too high, decor may look disconnected from the media zone. The sweet spot is usually where the shelf feels visually connected to the TV but not crowded.
Tools and Materials You Will Need
For most shelf-over-TV installations, you will need a stud finder, tape measure, pencil, level, drill, drill bits, screwdriver or driver bit, wall anchors if needed, screws, shelf brackets or a floating shelf mounting plate, painter’s tape, and possibly a cable management kit. A helper is also useful, especially if the shelf is long. Technically, you can do it alone, but so can people who eat soup with a fork. It is not ideal.
If your shelf came with manufacturer instructions, read them carefully. Different floating shelves use different brackets, rods, cleats, or backplates. The included hardware may be fine for light decor, but for heavier shelves, upgrading to better screws or anchors may be necessary depending on your wall type.
Step-by-Step: How To Hang A Shelf Over The TV
Step 1: Measure and Mark the Center
Start by finding the center of your TV. Use a tape measure to determine the TV’s width, then mark the center point lightly on the wall above it. Next, find the center of your shelf and mark that too. Aligning these two points will make the shelf look intentional and symmetrical.
Painter’s tape is helpful here. Place a strip of tape on the wall where the shelf will go, then mark the center and edges on the tape. This lets you preview the placement before committing to holes. Step back and look from the main seating position. If the shelf looks too low, too high, or oddly wide, adjust before drilling.
Step 2: Find the Wall Studs
Use a stud finder to locate studs behind the drywall. Most wall studs are commonly spaced 16 or 24 inches apart, but do not assume your wall got the memo. Scan carefully and mark both edges of each stud, then mark the center. The center of the stud is where your screw will hold best.
Whenever possible, attach shelf brackets or the mounting plate directly into studs. Studs provide much stronger support than drywall alone. Drywall anchors can be useful for lighter loads or for secondary support, but they should not be your first choice for a shelf that might hold weight over an expensive TV.
Step 3: Check for Electrical Wires and Obstacles
Because the area around a TV often contains outlets, HDMI cables, power cords, and low-voltage wiring, be cautious before drilling. Some stud finders include AC detection, which can help identify live electrical wiring. Do not drill directly above or below outlets unless you understand what is behind the wall. When in doubt, stop and call a professional.
Also avoid running standard extension cords through the wall. Extension cords are not designed to be permanent in-wall wiring. If you want hidden power or cable routing, use products rated for in-wall use or hire an electrician to install a proper outlet behind the TV area.
Step 4: Mark the Shelf Bracket Holes
Hold the shelf bracket, cleat, or mounting plate against the wall at your chosen height. Place a level on top and adjust until the bubble is centered. Mark the screw holes with a pencil. If the hardware allows, line up as many screw holes as possible with wall studs.
This is the step where patience saves you from the famous “almost level” shelf. A shelf that is off by a tiny amount can become painfully obvious once objects are placed on it. Use a real level, not your phone, not your inner spirit, and definitely not “it looks fine from over here.”
Step 5: Drill Pilot Holes
Drill pilot holes where you marked the screw locations. For holes going into studs, use a drill bit slightly smaller than the screw diameter. Pilot holes reduce the chance of splitting wood and make the screws easier to drive straight.
If you must use drywall anchors, follow the anchor manufacturer’s instructions. Some anchors require pre-drilled holes, while self-drilling anchors can be installed with a screwdriver or drill. Do not overtighten anchors, because that can damage the drywall and weaken the hold.
Step 6: Install the Bracket or Mounting Plate
Secure the bracket or mounting plate to the wall. Start with the center screw if possible, check for level, then install the remaining screws. If the bracket shifts even slightly, loosen and adjust before tightening everything fully.
For a floating shelf, the hidden bracket must be mounted firmly and level. If it tilts forward, the shelf will tilt forward too. That might be acceptable for a ski slope, but not for a shelf above your television.
Step 7: Attach the Shelf
Slide or place the shelf onto the bracket according to the manufacturer’s instructions. Some floating shelves lock in with small underside screws. Others rest on rods or a cleat. Make sure the shelf is fully seated and secured.
Once installed, apply gentle downward pressure with your hands to test stability. Do not hang from it like you are auditioning for a home renovation circus. The goal is to confirm that the shelf does not wobble, sag, or pull away from the wall.
Step 8: Decorate Lightly and Safely
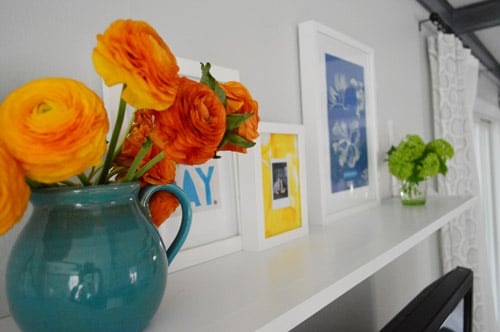
After the shelf is secure, decorate with lightweight items. Good choices include small framed prints, faux greenery, a low-profile clock, small baskets, candles that will not be lit near electronics, or a few carefully chosen decorative objects. Keep anything heavy away from the front edge.
Leave space between objects so the shelf does not look crowded. A common styling trick is to group decor in odd numbers, such as three small pieces on one side and one larger piece on the other. Use different heights and textures to create interest without turning the shelf into a storage garage in disguise.
Floating Shelf vs. Bracket Shelf: Which Is Better?
A floating shelf is the most popular choice for modern TV walls because the hardware is hidden. It looks sleek and clean, especially above a wall-mounted TV. However, floating shelves vary widely in strength. Some are made mainly for light decor and should not be trusted with heavy objects.
A bracket shelf is usually easier to install securely and can support more weight when brackets are attached to studs. The brackets become part of the design, which can be charming in rustic, industrial, or traditional rooms. If you care more about strength than invisibility, brackets are often the safer route.
For renters or people who change decor often, a lighter shelf with minimal decor may be better. For homeowners building a long-term media wall, a stud-mounted wood shelf or custom cleat system can provide a more permanent solution.
Common Mistakes to Avoid
Mistake 1: Hanging the Shelf Too Close to the TV
A shelf that sits too close to the TV can make the wall feel cramped and may restrict airflow. Leave enough clearance so the screen does not feel boxed in. Remember, the TV needs ventilation, and your living room needs visual breathing room.
Mistake 2: Ignoring the Shelf Weight Limit
Every shelf has a weight limit, but that limit depends on proper installation. A shelf rated for 50 pounds may not hold 50 pounds if installed into weak drywall with poor anchors. Always think about the combined weight of the shelf itself, the hardware, and everything you plan to place on it.
Mistake 3: Using the Wrong Anchors
Drywall anchors are not all the same. Plastic anchors are often suitable for lighter items, while toggle bolts or molly bolts can handle more demanding loads when installed correctly. Still, studs are preferred for a shelf above a TV. When the object below is expensive, stronger installation is not overkill; it is adulting with a drill.
Mistake 4: Forgetting About Cables
If your shelf will hold speakers, a streaming device, LED lighting, or a small sound component, plan the cables before hanging the shelf. Cable raceways, cord covers, and in-wall-rated cable systems can keep the area clean. Do not trap power cords behind a shelf or pinch cables between the shelf and wall.
Mistake 5: Overdecorating
The shelf should support the TV area, not compete with it. Avoid tall decor that blocks the screen from certain angles. Avoid shiny objects that reflect light. Avoid anything that can fall easily when someone closes a door, bumps the wall, or celebrates a touchdown with too much enthusiasm.
Best Decor Ideas for a Shelf Over the TV
Decorating above a TV can be tricky because the television is already a large black rectangle demanding attention. The shelf should soften that effect. Try warm wood tones, matte ceramics, greenery, woven baskets, or framed art with simple colors.
For a minimalist room, use one long floating shelf with two or three objects. For a cozy living room, combine framed family photos, a small trailing plant, and a candle holder. For a modern media wall, use a black or white shelf that blends into the wall and add only subtle decor.
Seasonal decorating also works well. In fall, add small pumpkins and amber glass. In winter, use garland and soft LED accents. In spring, swap in greenery and lighter frames. Just keep decor lightweight and secure. The shelf should say “beautiful home,” not “gravity experiment.”
Experience-Based Tips for Hanging a Shelf Over the TV
After helping with and observing many shelf-over-TV projects, one lesson stands above the rest: the wall always has an opinion. You may plan the perfect shelf placement, but the studs may sit in awkward locations, the outlet may be exactly where you want a bracket, or the wall may not be perfectly flat. This is why flexibility matters. A good installation is not just about following steps; it is about making smart adjustments when the room refuses to cooperate.
One practical experience is to use painter’s tape as a full-size preview. Tape the exact shelf width on the wall and live with it for a day. Sit on the couch, walk through the room, turn the TV on, and look at the tape from different angles. Many people realize the shelf they planned is too low only after seeing it in context. A shelf may look fine while standing directly in front of the wall, but from the sofa it can feel like it is hovering over the TV like a suspicious cloud.
Another helpful tip is to decorate the shelf before finalizing the height. Place the objects you plan to use on the floor or on a table and measure their tallest point. If your tallest decor piece is 12 inches high and your ceiling is low, you may need to adjust the shelf height so the arrangement does not feel squeezed. Good shelf styling needs both horizontal and vertical space.
It is also wise to test the TV after placing decor. Turn on a dark movie scene and check for reflections. Glossy frames, glass vases, and metallic objects can bounce light back at the screen. That tiny gold sculpture may look gorgeous at noon but become a shiny distraction during movie night. Matte finishes are usually safer near a TV.
From a DIY perspective, the most common regret is using weak anchors because they were included in the shelf box. Included hardware is not always the best hardware for your wall. If the shelf feels flimsy, upgrade the fasteners or reposition the shelf so at least one or two screws hit studs. The cost of better screws or anchors is tiny compared with replacing a damaged TV.
Another experience-based recommendation is to keep the shelf shallow. A shelf between 6 and 10 inches deep usually works better over a TV than a very deep shelf. A deep shelf can cast shadows, collect clutter, and make the TV area feel heavy. A shallow shelf is easier to style and less likely to interfere visually with the screen.
If you live in a rental, consider whether the shelf is worth the wall repair later. A small floating shelf may leave manageable holes, while a long heavy shelf with multiple anchors may require more patching. In rentals, lightweight decor and fewer holes are your friends. Always check your lease before making major wall changes.
Finally, take your time. The shelf over the TV is highly visible, so small mistakes stand out. Measure twice, level three times, drill once, and resist the urge to rush. A clean installation can make the whole room feel more custom. A crooked one will quietly bother you every time the opening credits roll.
Conclusion
Learning how to hang a shelf over the TV is really about balancing three things: style, safety, and common sense. Choose the right shelf, locate the studs, leave enough clearance for ventilation, use proper hardware, and decorate with restraint. When done well, the shelf adds warmth, dimension, and personality to your TV wall without making the room feel cluttered.
The best shelf is not necessarily the biggest or most dramatic. It is the one that looks balanced, stays secure, protects your TV, and makes your living room feel finished. In other words, the shelf should do its job quietly, unlike that one friend who says, “I don’t need a level,” and then creates a 7-degree tribute to chaos.