
Learning how to build in Minecraft is a little like learning how to cook without a recipe: first you stack things, then you accidentally create a wooden shoebox, then one day you look up and realize you have built a cliffside castle with a sheep named Sir Woolington guarding the gate. That is the magic of Minecraft building. Every block is simple, but the possibilities are enormous.
Whether you are making your first survival house, designing a medieval village, building a modern mansion, or trying to make a starter base that does not look like a dirt cube with anxiety, this guide will walk you through the process step by step. The goal is not just to place blocks. The goal is to build with purpose, shape, texture, safety, and personality.
This in-depth guide covers 15 practical Minecraft building steps, from choosing a location and planning your layout to adding roofs, lighting, interiors, landscaping, and personal details. It works for beginners, returning players, and anyone who has ever stared at a blank plains biome thinking, “Great. Now what?”
Why Building in Minecraft Feels So Rewarding
Minecraft is a sandbox game, which means it gives players tools instead of strict instructions. In Survival mode, you gather materials, manage danger, and build with the blocks you can mine or craft. In Creative mode, you have access to a huge block palette immediately, making it ideal for experimenting with styles, shapes, and large builds.
That freedom is why Minecraft building has become such a creative skill. A good build combines architecture, planning, resource management, color theory, landscaping, and a little bit of stubbornness. The best builders are not always the ones with the fanciest blocks. They are the ones who understand how to turn simple blocks into believable structures.
How to Build in Minecraft: 15 Steps
1. Choose the Right Game Mode
Before placing your first block, decide whether you are building in Survival or Creative. Survival mode adds challenge because every block has to be gathered, crafted, transported, and protected from mobs. That makes even a small cabin feel like an achievement. Creative mode removes resource limits, allowing you to test shapes, palettes, redstone ideas, roofs, towers, and landscaping without worrying about creepers redesigning your floor plan.
If you are new, try designing in Creative first, then rebuilding the structure in Survival. This gives you a blueprint and prevents the classic beginner tragedy of realizing your roof needs 400 stairs after you have collected exactly twelve.
2. Pick a Location That Matches the Build
Location matters. A cozy cottage looks great near a forest, a lighthouse belongs on a coast or cliff, and a mountain base feels more dramatic when carved into stone. Flat plains are beginner-friendly because they require less terraforming, but do not ignore hills, rivers, beaches, caves, and forests. Natural terrain can make your build look more interesting before you place a single decorative block.
For Survival, choose a location near basic resources: wood, stone, animals, water, and maybe a village. For Creative, think visually. Ask yourself: will this build look better at sunrise, beside water, on a hill, hidden underground, or surrounded by trees?
3. Gather or Select a Block Palette
A block palette is the set of materials you will use. Good palettes usually include a main wall block, a frame block, a roof block, a floor block, glass, lighting, and accent materials. For example, a beginner-friendly medieval cottage might use oak planks, spruce logs, cobblestone, stone bricks, glass panes, lanterns, and trapdoors.
Try not to use too many unrelated blocks. A rainbow house can be fun, but unless you are building a candy shop, it may look like your storage room exploded. Choose three to six core materials and repeat them consistently. Repetition creates style; random blocks create visual soup.
4. Sketch the Footprint First
Do not start with walls. Start with the footprint. Use temporary blocks such as dirt, wool, or cobblestone to outline the shape of your building on the ground. This lets you test size, doors, rooms, paths, and views before committing expensive materials.
A simple rectangle works, but adding extra shapes makes a build more interesting. Try combining a main rectangle with a smaller side room, tower, porch, storage wing, or greenhouse. Even one bump-out can turn a boring box into something that looks designed instead of panic-built before nightfall.
5. Build a Strong Foundation
A foundation visually anchors your build to the world. Use stone, cobblestone, deepslate, bricks, or logs to create a base layer. This helps the structure look heavier and more believable. Without a foundation, houses can appear pasted onto the grass like a sticker.
For a starter house, raise the floor one block above the ground and add stairs at the entrance. For a castle or tower, use thicker stone walls and a larger base. For a modern house, try smooth stone, concrete, quartz, or stripped logs for clean lines.
6. Add Walls With Depth
Flat walls are the biggest reason many Minecraft builds look plain. The fix is depth. Add logs, pillars, stairs, slabs, trapdoors, fences, windows, balconies, flower boxes, or recessed doorways. Even placing support beams one block forward from the wall can make the entire build feel more detailed.
For example, instead of making a flat oak-plank wall, use spruce logs as vertical supports, oak planks as the wall surface, glass panes for windows, and trapdoors as shutters. Suddenly, the wall has layers. It looks intentional. It may even earn approval from the village librarian, who is notoriously hard to impress.
7. Plan Doors and Windows Early
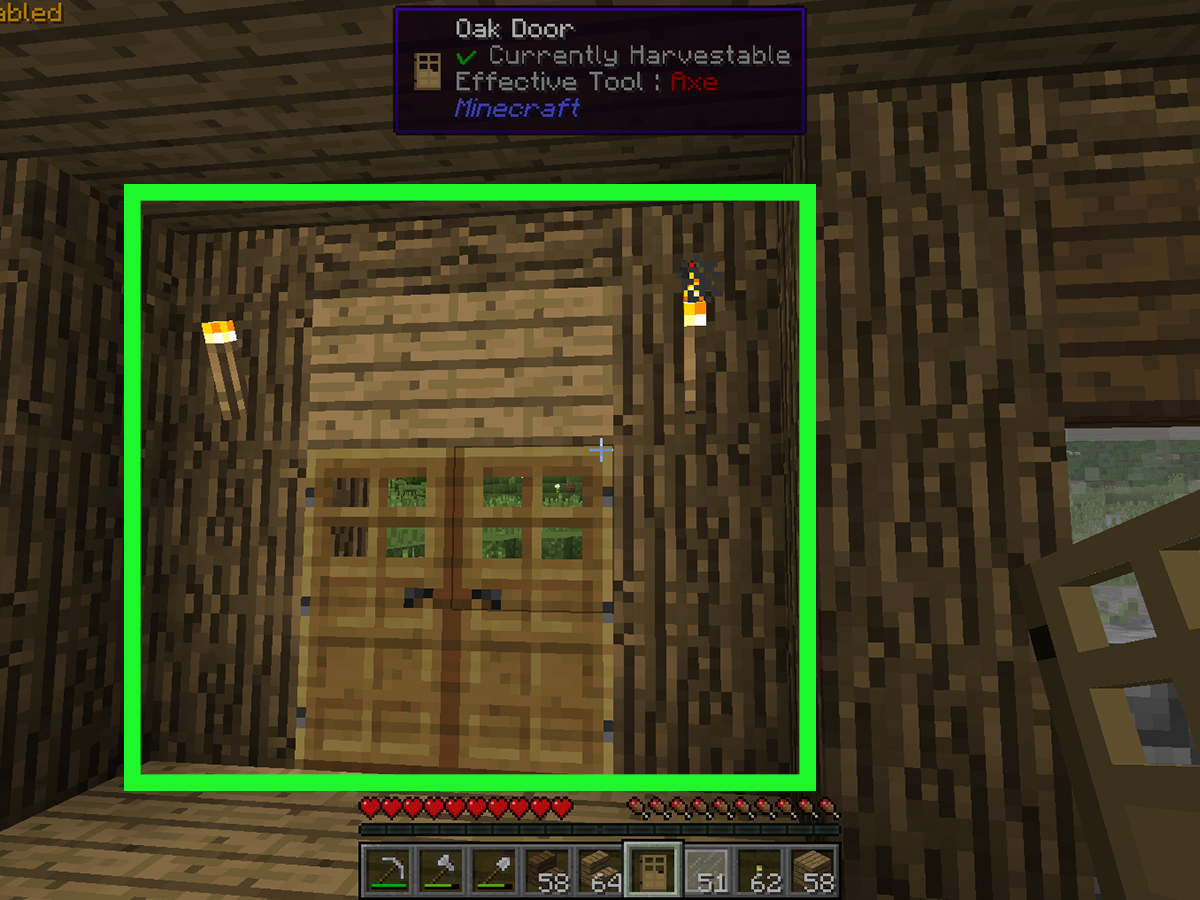
Doors and windows are not just holes in your wall. They control movement, light, symmetry, and style. Place your entrance where it feels natural, usually facing a path, open space, river, or village. Then add windows where they make sense from both outside and inside.
Glass panes often look better than full glass blocks in traditional builds because they sit thinner inside the wall. For modern builds, full glass blocks or large glass panels can create a clean, open look. Use stairs or trapdoors above windows to create small awnings or frames.
8. Create a Roof That Fits the Style
The roof can make or break a Minecraft house. A flat roof may work for modern builds, but most cottages, barns, towers, and fantasy houses need shape. Use stairs and slabs to create slopes, overhangs, peaks, dormers, and layered edges.
For beginners, start with a simple gable roof: two sloping sides meeting at the top. Extend the roof one block beyond the wall to create an overhang. This small detail instantly makes the house look more polished. For larger builds, mix roof heights so the structure feels organic rather than one giant triangle wearing a hat.
9. Light the Build Properly
Lighting is both decorative and practical. In Survival, dark areas can allow hostile mobs to spawn, so torches, lanterns, glowstone, sea lanterns, shroomlights, candles, and other light sources are essential. Place lights inside rooms, around entrances, along paths, near farms, and in caves beneath your base.
For style, hide lighting under carpets, leaves, trapdoors, or slabs. Lanterns work beautifully in medieval and rustic builds. Sea lanterns and end rods fit modern or futuristic builds. Torches are simple, cheap, and reliable, but if your grand mansion has one torch slapped on every wall, it may feel less “royal estate” and more “emergency basement.”
10. Design Useful Interior Spaces
A good Minecraft build should look nice and function well. Plan rooms based on what you actually need: storage, crafting, smelting, enchanting, brewing, sleeping, farming, armor display, maps, portals, and villager trading. In Survival, organization saves time. In Creative, interior detail makes the build feel alive.
Use barrels, chests, item frames, signs, carpets, bookshelves, stairs, slabs, trapdoors, paintings, flower pots, armor stands, and banners to add personality. A kitchen can use smokers, cauldrons, campfires, and trapdoors. A bedroom can use colored beds, bookshelves, candles, and carpet. A storage room should have labels unless you enjoy opening 47 chests to find one carrot.
11. Add Exterior Details
Exterior details turn a structure into a scene. Add a porch, chimney, garden, well, animal pen, crop field, path, bridge, pond, fence, mailbox, cart, or outdoor seating area. These details tell a story. A small farmhouse with wheat fields and a scarecrow feels more complete than a lonely house floating in grass.
Use campfires under chimneys for smoke, barrels for market stalls, composters for garden bins, leaves for hedges, and trapdoors for shutters. The goal is to make the area feel used. Minecraft builds become more believable when they look like someone lives, works, farms, studies, or causes mild redstone accidents there.
12. Use Landscaping and Terraforming
Landscaping is one of the fastest ways to improve any build. Shape the terrain around your structure instead of leaving it untouched. Add paths that curve naturally, raise or lower small areas, place rocks, mix grass blocks with coarse dirt, add custom trees, and use flowers or bushes to soften hard edges.
Paths are especially powerful. A simple path from your door to a farm, mine, dock, or village makes the build feel connected to the world. Try mixing path blocks, gravel, coarse dirt, and stone buttons for texture. Avoid perfectly straight paths unless your build style is formal, urban, or modern.
13. Mix Shapes and Heights
Great builds usually have variation. Mix tall and short sections, wide and narrow rooms, towers and courtyards, open balconies and enclosed storage areas. Height variation draws the eye and prevents the build from looking like one blocky mass.
If your house looks dull, add a second floor, attic window, side tower, raised porch, or attached workshop. If your castle looks flat, add battlements, towers, banners, bridges, and wall thickness. If your modern house looks empty, add balconies, pools, planters, skylights, and layered walls.
14. Build in Layers, Not All at Once
One of the best Minecraft building tips is to work in layers. Start with the footprint. Then build the frame. Add walls. Add the roof. Add windows and doors. Add lighting. Add interior rooms. Add landscaping. Finally, polish the details.
This process makes big builds less intimidating. It also helps you spot mistakes early. If something feels wrong, fix it before you decorate everything. There is no shame in rebuilding. Every good Minecraft builder has destroyed a roof, moved a wall, or stared silently at a tower that somehow became a potato.
15. Polish, Test, and Personalize
The final step is polish. Walk around the build from different angles. Look at it from far away and up close. Check whether the roof feels too tall, the walls too flat, the windows too random, or the lighting too harsh. Then make small improvements.
Add banners, signs, flower pots, armor stands, custom trees, pathways, hidden rooms, redstone doors, map walls, farms, statues, or themed decorations. Personal touches are what make your build memorable. Anyone can copy a house tutorial, but your own details make the world feel like yours.
Best Beginner Build Ideas in Minecraft
If you are not sure what to build first, start small. A starter house, survival cabin, underground base, treehouse, fishing hut, farm cottage, watchtower, mine entrance, storage barn, or village trading hall can teach you useful building skills without overwhelming you.
For players who want a challenge, try a lighthouse, castle gate, mountain base, underwater dome, desert temple home, Japanese-style house, modern villa, wizard tower, medieval market, or fantasy bridge. Each style teaches a different lesson. Castles teach scale. Modern houses teach clean lines. Treehouses teach organic shapes. Underground bases teach lighting and space planning. Underwater builds teach patience, glass, and the emotional consequences of forgetting doors or potions.
Common Minecraft Building Mistakes to Avoid
Building Too Small
Many beginners make rooms too cramped. Leave space for furniture, chests, stairs, enchanting setups, and movement. A 5-by-5 room may work for a first shelter, but larger builds need breathing room.
Using One Block Everywhere
One material can make a build look flat. Mix similar materials, such as cobblestone with stone bricks or oak planks with stripped oak logs. Texture matters.
Ignoring the Roof
A weak roof can ruin a strong house. Spend extra time shaping it, adding overhangs, and matching it to the building style.
Forgetting Lighting
In Survival, poor lighting can turn your beautiful base into a monster hotel. Place light sources inside, outside, underground, and along paths.
Skipping the Surroundings
A build without landscaping can feel unfinished. Add paths, trees, fences, farms, rocks, gardens, and terrain variation.
Advanced Tips for Better Minecraft Builds
Once you understand the basics, start thinking like a designer. Use contrast to highlight important areas. Dark roofs can make light walls stand out. Stone foundations can make wooden homes feel grounded. Bright accents can guide attention toward doors, towers, banners, or windows.
Use gradients when building large surfaces. For a stone wall, mix deepslate near the bottom, stone bricks in the middle, and lighter stone near the top. For a roof, mix stairs, slabs, and occasional texture blocks. For old buildings, add cracked, mossy, or weathered materials. Minecraft blocks are square, but your designs do not have to feel stiff.
Also, study real architecture. Look at cabins, castles, barns, temples, skyscrapers, bridges, and gardens. You do not need to copy them exactly. Instead, notice shapes: roof pitch, window placement, support beams, arches, towers, paths, and entrances. Real-world inspiration can turn a random build into a believable one.
Extra Experience: What Building in Minecraft Teaches You
Building in Minecraft is more than a game activity. It teaches patience, planning, creativity, and problem-solving in a way that feels natural. You start with an idea, test it, make mistakes, adjust the design, and eventually create something that did not exist before. That process is surprisingly close to real design work.
One of the biggest lessons is that planning saves time. Many players begin by randomly placing blocks and hoping the house magically becomes beautiful. Sometimes it works. Usually it becomes a rectangular storage shed with emotional baggage. When you plan the footprint, choose a palette, and build a frame first, the final structure becomes much easier to control.
Another important experience is learning how small details change everything. A wall made of oak planks is plain. Add spruce beams, glass panes, shutters, flower boxes, and a stone base, and suddenly it feels like a real cottage. Add a path, garden, lanterns, and a chimney, and now the house has atmosphere. Minecraft rewards observation. The more you notice details, the better your builds become.
Survival building also teaches resource management. You may design a massive castle, then realize you need thousands of stone bricks. That moment can be painful, but it teaches you to build in phases. Maybe you finish the gate first, then the walls, then the towers, then the interior. Large projects become manageable when broken into smaller goals.
Creative mode teaches experimentation. Because blocks are unlimited, you can test roof shapes, wall patterns, color combinations, and landscaping ideas quickly. Some players use Creative worlds as design studios before building the final version in Survival. This is a smart habit. It lets you make mistakes where they are cheap instead of discovering halfway through Survival construction that your tower is off-center by one block, which is the Minecraft version of stepping on a LEGO emotionally.
Building with friends adds another layer. Multiplayer projects teach cooperation, communication, and style matching. One player may handle walls, another interiors, another farms, and another landscaping. Of course, one friend will probably build a giant chicken statue nearby “for morale.” Accept this. It is part of the ecosystem.
The best experience you can gain is simply finishing builds. Do not abandon every project because it is not perfect. Complete small builds, learn from them, and move on. Your tenth house will be better than your first. Your fiftieth build may surprise you. Minecraft building skill grows block by block, roof by roof, and occasional creeper crater by occasional creeper crater.
Conclusion
Learning how to build in Minecraft starts with simple steps: choose a mode, pick a location, plan your layout, select a block palette, create depth, build a strong roof, light the area, decorate the interior, and polish the landscape. The more you practice, the more natural these choices become.
Great Minecraft builds are not only large or expensive. They are thoughtful. They use shape, texture, lighting, function, and personality. Whether you are building a survival starter house, a cozy cottage, a castle, a modern base, or an underground hideout, the same rule applies: start simple, improve in layers, and let your creativity do the heavy lifting.
And remember, every expert builder once made a dirt hut. The difference is they kept building after the dirt hut. Probably after adding a door. Hopefully.
SEO Tags