
Note: This guide is for general DIY planning and design inspiration. If your project involves hardwiring, old wiring, missing ground wires, a loose ceiling box, aluminum wiring, or anything that makes you say “hmm, that smells electrical,” stop and call a licensed electrician. A pretty pendant is not worth turning your ceiling into a toaster.
Converting a lamp into a pendant light is one of those home projects that feels slightly magical. You take a table lamp, floor lamp, or lonely lampshade that has been sitting in the corner pretending to be useful, and you transform it into a hanging light fixture that looks custom, intentional, and far more expensive than it has any right to be.
The basic idea is simple: remove the lamp parts you do not need, keep the shade or decorative body that works overhead, pair it with a safe pendant cord kit or hardwired pendant kit, and hang it at the right height. The important word there is safe. Pendant lights are suspended above people, tables, counters, and occasionally pets who believe every home improvement project is a personal attack. The fixture must be supported properly, wired correctly, and fitted with the right bulb.
This guide explains how to convert a lamp into a pendant light, when to use a plug-in swag kit, when to choose a hardwired pendant kit, how to match the lampshade fitting, and how to make the finished light look polished rather than “I built this during a caffeine spiral.”
What Does It Mean to Convert a Lamp Into a Pendant Light?
To convert a lamp into a pendant light means repurposing parts of an existing lampusually the shade, sometimes the decorative base or frameso it hangs from the ceiling instead of sitting on a table or floor. In many projects, you are not reusing the lamp’s original electrical parts. Instead, you are using a new, listed pendant light kit, cord set, canopy, socket, and mounting hardware.
The most common version is turning a lampshade into a pendant light. Drum shades, cone shades, basket-style shades, metal shades, rattan shades, and vintage glass shades can all work beautifully if they are structurally sound and compatible with a pendant socket. A second option is converting the entire decorative lamp body into a hanging fixture, but this is more advanced because weight, balance, heat clearance, and wiring space matter much more.
Plug-In Pendant vs. Hardwired Pendant: Choose Your Route
Before you grab a screwdriver and start negotiating with physics, decide whether your converted lamp pendant will be plug-in or hardwired.
Option 1: Plug-In Swag Pendant
A plug-in pendant, also called a swag light, uses a cord that plugs into a wall outlet. The cord runs up the wall, across a ceiling hook, and down to the shade. This is often the best choice for renters, rooms without ceiling wiring, reading nooks, breakfast corners, and anyone who wants a dramatic lighting upgrade without opening a junction box.
The advantages are obvious: it is simpler, reversible, and usually cheaper. The downside is that the cord is visible, so you need to make it look intentional. A fabric-covered cord, clean cord clips, a ceiling hook rated for the fixture weight, and careful placement can turn “visible cord” into “designer swag.” That is the home decor version of putting on sunglasses after tripping.
Option 2: Hardwired Pendant
A hardwired pendant connects directly to the electrical wiring in a ceiling junction box and is controlled by a wall switch. This looks cleaner because the wire connection is hidden inside a canopy. It is the better choice for kitchens, dining rooms, entryways, and anywhere you want a permanent fixture.
The tradeoff is that hardwired installation demands more care. Power must be shut off at the breaker, the ceiling box must be secure and rated to support the fixture, wires must be connected correctly, and all local electrical codes should be followed. If you are unsure at any point, hire a pro. Confidence is great; guessing with electricity is not.
Tools and Materials You May Need
The exact supplies depend on your lamp, shade, ceiling, and installation type, but most projects use a similar set of materials.
For a Plug-In Pendant Conversion
- A lampshade or decorative shade frame
- Plug-in pendant cord kit with socket and switch
- Ceiling hook or swag hook rated for the fixture weight
- Wall anchors or toggle bolts, if not fastening into a joist
- Measuring tape
- Pencil
- Drill and drill bits
- Cord clips or cord channel
- LED bulb that matches the socket and shade clearance
For a Hardwired Pendant Conversion
- Lamp shade or fixture body suitable for hanging
- Hardwired pendant light kit with canopy, socket, cord, strain relief, and mounting hardware
- Voltage tester
- Wire strippers
- Screwdrivers
- Wire connectors
- Mounting strap or crossbar
- Ceiling junction box rated for fixture support
- LED bulb within the fixture’s wattage rating
Step 1: Inspect the Lamp Before You Convert It
Start with a reality check. Not every lamp deserves a second career as a pendant light. Some lamps are charming on a nightstand but become deeply suspicious when hanging above your head.
Look for cracks, rust, brittle plastic, scorched areas, frayed fabric, loose seams, and wobbly shade rings. If the lampshade is fabric, make sure it is clean, sturdy, and not sagging. If it is metal, check that there are no sharp edges near the cord. If it is glass, confirm it has no hairline cracks and that the pendant kit can support it safely.
Weight is especially important. A light paper or fabric shade is easy to convert. A heavy ceramic lamp body, thick glass shade, or metal frame requires a secure ceiling box or properly installed hook. Do not hang a heavy fixture from drywall alone. Drywall is excellent at being a wall; it is less excellent at being a structural support system.
Step 2: Identify the Lampshade Fitter
The fitter is the metal part that connects a lampshade to the lamp. Understanding the fitter helps you choose the right pendant kit or adapter.
Spider Fitter
A spider fitter has arms that meet at a small center washer. It is common on table and floor lamps that use a harp and finial. To use a spider shade as a pendant, you may need a lampshade conversion adapter or a pendant kit designed to hold spider-fit shades.
Uno Fitter
An uno fitter has a larger ring that sits directly over or around the socket. Many uno shades are easier to adapt to pendant cord kits because the socket can pass through the ring and secure the shade in place.
Clip-On Fitter
A clip-on shade attaches directly to the bulb. These are usually small and best suited for sconces or mini chandelier shades. They are not ideal for full pendant conversions unless you are making a very lightweight decorative mini pendant and using the correct bulb type.
If the shade does not fit the cord kit, do not force it. Use the proper adapter, choose a different kit, or select another shade. Lighting should be snug, centered, and stablenot held together by wishful thinking.
Step 3: Remove the Old Lamp Hardware
Unplug the lamp first. If it was hardwired or connected in any unusual way, stop and have it checked by a professional. For a normal table or floor lamp, remove the bulb, shade, finial, harp, and socket assembly as needed. Keep small parts in a container because lamp hardware has a mysterious ability to vanish into another dimension.
If you are only using the lampshade, set the base aside. If you plan to reuse decorative metal or glass pieces from the lamp body, dry-fit everything before wiring. A pendant light needs to hang vertically, allow heat to escape, and keep the cord protected from sharp edges.
Step 4: Match the Pendant Kit to the Project
Choose a pendant kit that matches your installation type, shade fitting, bulb base, and fixture weight. For most DIY conversions, an E26 medium-base socket works well because it fits common U.S. household bulbs. If your shade is small, a candelabra socket may look better, but it will require compatible bulbs and adapters.
Look for a kit that is listed by a recognized testing laboratory such as UL, ETL, or CSA. This matters because the socket, cord, strain relief, and connections have been evaluated for safety. The kit should include clear instructions, a maximum wattage rating, and hardware designed for either plug-in or hardwired use.
For fabric, paper, wicker, and rattan shades, LEDs are usually the smarter bulb choice because they use less energy and produce less heat than old incandescent bulbs. Still, LEDs are not magic ice cubes. Keep the bulb from touching the shade and respect the fixture’s maximum wattage and clearance recommendations.
Step 5: Plan the Pendant Height
A pendant that hangs too high looks like it is afraid of commitment. A pendant that hangs too low becomes a forehead detector. The sweet spot depends on where the light will live.
Over a Kitchen Island
Hang the bottom of the pendant about 30 to 36 inches above the countertop. For taller people, higher ceilings, or larger shades, you may raise it slightly while still keeping the light useful for tasks.
Over a Dining Table
Hang the pendant about 30 to 36 inches above the tabletop. This keeps the light cozy and focused without blocking faces. Dinner is more enjoyable when guests can see each other and not just a lampshade conducting surveillance.
In an Open Room or Walkway
Leave enough head clearance for people to walk under comfortably. In many rooms, the bottom of the pendant should be at least 7 feet above the floor unless it is centered over furniture where people will not walk.
Step 6: Install a Plug-In Swag Pendant
For a plug-in conversion, assemble the shade on the pendant cord kit according to the kit instructions. Usually, the socket passes through the shade opening and tightens with a threaded ring. Make sure the shade sits level. If it tilts, check whether the fitter needs an adapter or washer.
Next, mark where the pendant should hang. If possible, screw the ceiling hook into a joist. If no joist is available, use a ceiling anchor rated for the fixture weight. Do not rely on a tiny cup hook from the junk drawer unless your pendant is made of feathers and optimism.
Hang the cord over the ceiling hook, adjust the drop, and route the remaining cord neatly down the wall to the outlet. Use cord clips or a cord cover to keep it tidy. Avoid running cords through walls, ceilings, under rugs, or anywhere heat can build up. A plug-in pendant should remain accessible and should not become hidden permanent wiring.
Step 7: Install a Hardwired Pendant Safely
For a hardwired pendant, turn off power at the breaker, not just the wall switch. Use a voltage tester to confirm the wires are not live. Remove the old ceiling fixture while supporting its weight, then inspect the ceiling box. It should be secure, properly attached, and rated for the weight of your converted pendant.
Attach the mounting strap or crossbar to the junction box. Feed the pendant cord through the canopy and strain relief according to the kit instructions. The strain relief is important because it prevents the fixture weight from pulling directly on the electrical connections.
Connect the wires as directed by the pendant kit and local code. In many standard U.S. fixtures, black connects to hot, white connects to neutral, and bare copper or green connects to ground. However, older homes and unusual wiring can vary, so do not assume if anything looks unfamiliar. After connecting the wires with properly sized wire connectors, tuck them into the box, secure the canopy, install the bulb, and restore power.
Step 8: Choose the Right Bulb
Bulb choice can make or break the finished pendant. Look at lumens for brightness, not just watts. As a rough guide, an 800-lumen LED can replace the brightness of a traditional 60-watt incandescent bulb, while 450 lumens is softer and 1,100 to 1,600 lumens is brighter.
Color temperature matters too. Warm white bulbs around 2700K to 3000K create a cozy glow for dining rooms, bedrooms, and reading corners. Neutral white around 3500K to 4100K works well for kitchens and work areas. Daylight bulbs around 5000K and higher can feel crisp, but in a decorative pendant they may also give your room the vibe of a very stylish dental office.
For most converted lamp pendants, use an LED bulb that stays within the pendant kit’s wattage rating and leaves space around the shade. If the shade is enclosed or semi-enclosed, choose a bulb rated for enclosed fixtures if needed.
Design Ideas for Converted Lamp Pendants
Turn a Drum Shade Into a Dining Pendant
A fabric drum shade makes a soft, modern dining pendant. Choose a warm LED bulb and hang it centered over the table. Add a diffuser disk if you want to reduce glare from below.
Use a Rattan Shade for a Coastal Look
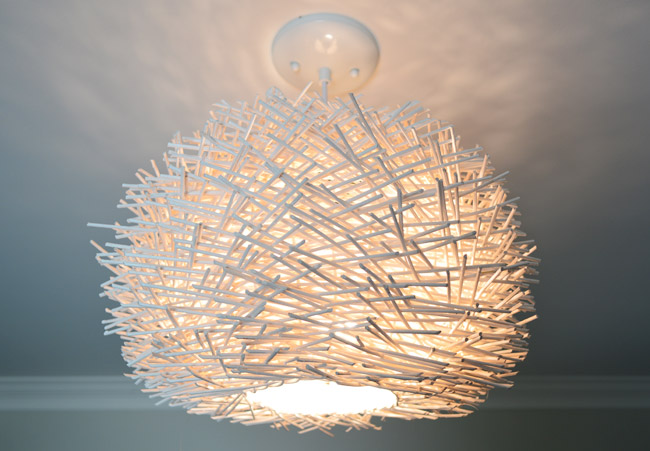
A woven rattan or bamboo shade gives instant texture. It works beautifully over breakfast nooks, bedside tables, and relaxed living spaces. Just make sure the bulb does not touch the shade and that heat has room to escape.
Convert a Metal Desk Lamp Shade
A metal shade from an old task lamp can become an industrial mini pendant. This works especially well over a bar, desk, or kitchen prep zone. Check for sharp edges and use a grommet or proper strain relief where the cord passes through metal.
Make Matching Bedside Pendants
Instead of using table lamps, hang two plug-in or hardwired pendants on either side of the bed. This frees up nightstand space and makes a bedroom feel custom. Hang them low enough for reading but high enough that you do not bonk them during a dramatic pillow adjustment.
Common Mistakes to Avoid
The biggest mistake is using the original lamp cord in a way it was never designed to be used. A table lamp cord may not include the right strain relief, ceiling canopy, mounting system, or listing for pendant use. When in doubt, replace the electrical parts with a proper pendant kit.
Another common mistake is hanging a heavy shade from the electrical wires. The wires are for electricity, not weightlifting. The fixture must be supported by a ceiling box, mounting strap, chain, hook, or hardware rated for the load.
Also avoid using bulbs that are too hot, too bright, or physically too large for the shade. If the bulb touches the shade, switch to a smaller bulb. If the pendant glares like a tiny sun with a grudge, try a frosted bulb, lower lumens, or a diffuser.
When to Call an Electrician
Call an electrician if the ceiling box is loose, the wires are brittle or damaged, the home has very old wiring, there is no ground wire, the breaker trips, the fixture flickers after installation, or you are adding a new ceiling box where none existed before. Also call a pro if the fixture is unusually heavy or if you are installing multiple pendants on one circuit and are unsure about load, spacing, or switching.
DIY should feel empowering, not like the opening scene of a cautionary documentary. A licensed electrician can often handle the hardwired portion quickly, leaving you to enjoy the fun part: choosing the shade, admiring the glow, and casually telling visitors, “Oh, I converted that myself.”
Experience Notes: What I’ve Learned From Lamp-to-Pendant Projects
The best converted pendant lights usually start with a shade that already has personality. A plain white drum shade can be lovely, but a vintage pleated shade, woven basket shade, perforated metal shade, or colorful glass shade gives the project a reason to exist. When the shade has texture or shape, the finished pendant looks like a design decision rather than a rescue mission.
One practical lesson: dry-fit everything before you install anything. Put the cord kit, socket, adapter, shade, and bulb together on a table first. Hold it up. Look at it from below. Look at it from the side. If the bulb hangs too low, the socket looks awkward, or the shade tilts, it is much easier to fix on the table than while balancing on a ladder and questioning your life choices.
Another lesson is that cord color matters more than people expect. A white plastic cord can disappear against a white ceiling, but it may look cheap against a dark wall. A black or fabric-covered cord can become part of the design, especially in a modern, farmhouse, industrial, or boho room. For plug-in pendants, treat the cord like trim: straight lines, clean clips, and intentional placement make the difference between stylish swag and “temporary college apartment energy.”
Height is also worth testing before final installation. Use painter’s tape, string, or a helper to hold the shade at different heights. Over a table, sit down and check sightlines. Over an island, stand where you chop vegetables and pretend to do normal kitchen things. If the pendant blocks your view or feels too close, raise it. If it looks lost near the ceiling, lower it. The best height is the one that works for the room and the humans using it.
I also prefer LED bulbs for converted pendants, especially when the shade is fabric, paper, wicker, or vintage. LEDs give you brightness without as much heat, and they come in warmer color temperatures that flatter a room. A warm 2700K bulb can make a converted lamp shade feel cozy and expensive, while a cold daylight bulb can make the same shade look like it is auditioning for a parking garage.
Finally, do not skip the finishing touches. A canopy that fully covers the ceiling box, a straight cord, a centered shade, a clean bulb shape, and a secure hook can elevate the whole project. Small details are what make a DIY pendant look custom. The goal is not for guests to say, “Did you make that?” The goal is for them to say, “Where did you buy that?” and then for you to smile with the quiet confidence of someone who has defeated retail pricing.
Conclusion
Learning how to convert a lamp into a pendant light is a smart way to reuse a favorite shade, upgrade a room, and create custom lighting without paying custom-lighting prices. The project can be as simple as pairing a lampshade with a plug-in pendant cord kit or as polished as installing a hardwired fixture with a canopy and wall switch.
The key is to plan carefully. Inspect the lamp, identify the shade fitter, choose a listed pendant kit, support the fixture properly, select an LED bulb with the right brightness and color temperature, and hang the pendant at a comfortable height. For any hardwired work that feels uncertain, bring in a licensed electrician. The finished result should be charming, functional, and safenot dramatic in the fire-department sense.
With the right parts and a little patience, that overlooked lamp can become the light fixture your room has been waiting for. It is recycling, decorating, and mild bragging rights all in one glowing package.