
A stripped screw is one of those tiny household disasters that feels wildly personal. One minute you are tightening a hinge, replacing a cabinet pull, fixing a deck board, or opening a battery compartment. The next minute, your screwdriver is spinning like a DJ at a wedding reception, and the screw head has turned into a shiny little crater of defeat.
The good news: a stripped screw is annoying, not unbeatable. Whether the screw is stuck in wood, metal, plastic, drywall, furniture, a door hinge, or a cabinet face frame, there are several practical ways to get it out without destroying the entire project. The trick is to start gently and work your way toward more aggressive methods. In other words, do not reach for the drill of doom before trying a rubber band.
This guide explains how to remove a stripped screw using 12 reliable methods, from simple household hacks to proper screw extractor tools. You will also learn why screws strip in the first place, which tools help most, and how to avoid turning the next screw into a tiny metal pancake.
What Is a Stripped Screw?
A stripped screw is a screw whose drive slot or recess has been damaged so badly that the screwdriver or drill bit can no longer grip it. This often happens with Phillips screws, but it can also happen with flathead, Torx, square-drive, hex, and Allen screws. Instead of biting into the screw head, the driver slips, chews the metal, and makes the problem worse.
Common causes include using the wrong screwdriver size, driving too fast with a drill, applying pressure at an angle, using worn bits, over-tightening, working with cheap soft-metal screws, or skipping pilot holes in hard materials. Sometimes the screw is old, rusty, painted over, or simply tired of participating in your weekend plans.
Before You Start: Safety and Strategy
Before trying any stripped screw removal method, put on safety glasses, especially if you will use a drill, rotary tool, extractor, hammer, or cutting wheel. Clear the area around the screw, remove loose paint or debris, and choose the least destructive method first. If the screw is in a delicate surface, such as finished furniture or electronics, protect the surrounding material with painter’s tape.
Here is the golden rule: stop as soon as the tool slips. Every extra slip makes the screw harder to remove. A calm hand beats brute force. Yes, this is unfair, because stripped screws usually appear when your patience is already in the garage trash can.
12 Ways to Remove a Stripped Screw
1. Switch to a Manual Screwdriver
If you stripped the screw with a drill or impact driver, put the power tool down. A manual screwdriver gives you better feel and control. Choose the largest screwdriver that still fits the damaged recess, press straight down firmly, and turn slowly counterclockwise.
This method works best when the screw is only lightly stripped. Push hard enough to prevent slipping, but not so hard that you crack the surrounding material. For cabinet hardware, door hinges, furniture screws, and light-duty home repairs, this should always be the first move.
2. Try a Different Driver Bit
Sometimes the screw is not too far gone; it just needs a better match. Try a slightly larger Phillips bit, a flathead screwdriver, a square-drive bit, or a Torx bit. The sharp points of an alternate bit may catch the damaged metal and give you enough grip to turn the screw.
This is especially useful when removing a stripped Phillips screw. A flathead screwdriver placed across the widest part of the worn recess can sometimes bite better than the original driver. Keep the tool straight, apply steady pressure, and turn slowly.
3. Use a Rubber Band for Extra Grip
The rubber band trick is popular because it is cheap, quick, and surprisingly effective. Place a wide rubber band over the stripped screw head. Press your screwdriver into the rubber band and into the damaged recess. Turn counterclockwise while maintaining firm downward pressure.
The rubber fills small gaps and increases friction between the tool and the screw. This method works best on shallow damage and screws that are not rusted or overtightened. If the rubber band tears immediately, try a thicker band or move to a more aggressive method.
4. Add Steel Wool or Abrasive Material
If you do not have a rubber band, try a small piece of steel wool, a bit of abrasive pad, or even a sprinkle of fine abrasive powder. Place the material between the screwdriver and the screw head. The added texture can help the driver grab the stripped recess.
This works well for screws in wood furniture, outlet covers, cabinet hinges, drawer slides, and other light-duty applications. Be careful around painted or polished surfaces because steel wool can scratch finishes. The goal is to add grip, not create modern art on your cabinet door.
5. Tap the Screwdriver With a Hammer
If the screw head is made of soft metal, tapping the screwdriver into the recess can create a fresh bite. Place the screwdriver squarely in the screw head and gently tap the handle with a hammer. Then keep downward pressure on the screwdriver and turn slowly.
This method can also help loosen a screw whose threads are stuck from age, paint, or corrosion. Use controlled taps, not superhero swings. If you are working on thin plastic, fragile furniture, tile, or electronics, skip this method or use extreme caution.
6. Grip the Screw Head With Locking Pliers
If the screw head sits above the surface, bypass the stripped recess entirely. Clamp locking pliers tightly around the screw head. Once the pliers are firmly attached, rotate them counterclockwise to back the screw out.
This method is excellent for partially raised screws, deck screws, machine screws, hinge screws, and bolts with damaged heads. Needle-nose locking pliers can help in tight spaces. Turn slowly so the head does not snap off. If the pliers keep slipping, tighten the adjustment screw and try again.
7. Cut a New Slot With a Rotary or Oscillating Tool
When the original drive recess is destroyed, create a new one. Use a rotary tool, oscillating tool, or small cutting wheel to cut a straight slot across the screw head. Then use a flathead screwdriver to turn the screw out.
This method works best when the screw head is accessible and there is enough metal to cut into. It is useful for screws stuck in wood, metal brackets, old hardware, and outdoor repairs. Wear safety glasses, protect nearby surfaces, and cut only as deep as needed for the screwdriver blade to seat firmly.
8. Use Hot Glue for Light-Duty Screws
For small screws or lightly stripped heads, hot glue may provide temporary grip. Fill the damaged screw head with hot glue, press the screwdriver into the glue, and hold it steady until the glue cools. Then turn slowly.
This is not the best method for rusted, deeply embedded, or high-torque screws, but it can help with small household repairs, craft projects, battery covers, and decorative hardware. Think of it as a polite negotiation before bringing in the extraction squad.
9. Try a Screw Extractor Kit
A screw extractor is designed specifically for damaged screws. Most kits include a drilling end that cuts into the screw head and a reverse-threaded extractor end that bites into the hole and turns the screw out. Use the size recommended for your screw, drill slowly, and keep the bit centered.
Extractor kits are among the best solutions for badly stripped screws, broken screws, rusted screws, and screws stuck below the surface. Follow the instructions for your specific kit. The most common mistake is drilling too fast or using the wrong extractor size. Slow speed, steady pressure, and patience matter.
10. Use a Left-Handed Drill Bit
A left-handed drill bit spins counterclockwise when the drill is set in reverse. Since screws loosen counterclockwise, the bit may catch the damaged head and back the screw out while drilling. Choose a bit slightly smaller than the screw head, place it in the center, and drill slowly in reverse.
This method is helpful because it may remove the screw before you need an extractor. It is commonly used on stuck metal screws, broken fasteners, automotive hardware, and stubborn household screws. Keep the drill straight and avoid enlarging the hole unnecessarily.
11. Drill Off the Screw Head
If the screw absolutely refuses to cooperate, you can drill off the head. Select a drill bit slightly larger than the screw shaft but smaller than the screw head. Drill into the center until the head separates from the shaft. Once the attached piece is removed, grab the remaining screw shank with pliers and twist it out.
This method is more destructive, so save it for situations where the screw head is the main thing holding the part in place. It is useful for removing damaged hinges, brackets, drawer slides, or hardware. Be careful not to enlarge the original hole unless you plan to repair it afterward.
12. Apply Penetrating Oil and Wait
If rust, corrosion, or age is part of the problem, penetrating oil can help. Apply a small amount around the screw head and let it sit. For badly rusted screws, give it at least 15 to 30 minutes. Then try a manual screwdriver, pliers, extractor, or left-handed bit.
Penetrating oil is especially helpful for outdoor furniture, deck hardware, gate hinges, metal fixtures, garage parts, and older screws exposed to moisture. Wipe away excess oil before using a power tool, and keep it away from surfaces that may stain.
How to Choose the Best Method
The best way to remove a stripped screw depends on three things: how damaged the head is, whether the screw head is raised or flush, and what material surrounds it. If the screw is only slightly stripped, try a manual screwdriver, different bit, rubber band, or steel wool. If the head is raised, pliers may solve the problem fast. If the head is flush or badly damaged, use a screw extractor, left-handed drill bit, or cutting-slot method.
For delicate materials, start with gentle methods. For heavy-duty repairs, extractor kits and drill bits usually work better. For rusted metal screws, add penetrating oil before applying force. For tiny screws in electronics, avoid hammers, large drills, and aggressive cutting tools unless you enjoy buying replacement parts.
How to Prevent Screws From Stripping Next Time
Preventing stripped screws is easier than removing them. Always use the correct driver type and size. A Phillips #2 bit is not the answer to every screw on Earth, even though many tool drawers seem to believe it is. Replace worn bits, keep the driver straight, and apply firm pressure before turning.
When driving screws into hardwood, metal, or dense material, drill a pilot hole first. Use the clutch setting on your drill instead of full power. Stop as soon as the screw is seated. Over-driving a screw is one of the fastest ways to destroy the head, split wood, or create a repair job inside your repair job.
For outdoor projects, use corrosion-resistant screws designed for the environment. For furniture and hardware that may need future removal, consider higher-quality screws with Torx or square-drive heads. They often provide better grip than basic Phillips screws.
Common Mistakes to Avoid
The biggest mistake is continuing to spin the driver after it slips. That only polishes the inside of the screw head into a smooth bowl of regret. Another mistake is using a power drill too early. A drill can help, but it can also turn a mildly stripped screw into a fully destroyed one in two seconds.
Avoid using bits that are too small, working at an angle, or forcing a screw that is rusted solid. Do not drill aggressively into delicate materials. And never forget eye protection when cutting, drilling, or extracting metal. A stripped screw is irritating; a metal shaving in your eye is a plot twist nobody ordered.
Field Notes: Real-Life Experience With Stripped Screws
Anyone who has done enough home repair eventually develops a personal relationship with stripped screws. Not a friendly relationship, exactly. More like a long-running rivalry. The first lesson is that stripped screws rarely appear in convenient places. They show up under sinks, inside cabinet corners, on old door hinges, behind appliances, in deck boards, and in that one furniture assembly step where the instruction booklet calmly says, “Attach part C to part D,” as if part C has not just declared independence.
In real projects, the rubber band trick is often the best first attempt because it costs almost nothing and does not damage the surface. It works nicely on cabinet screws, hinge screws, drawer pulls, and small household hardware. The key is pressure. Many people place the rubber band over the screw, poke at it gently, and decide the trick is fake. It is not magic; it needs a firm, straight push and a slow turn. If the screwdriver slips, stop and upgrade the method.
Locking pliers are the unsung heroes when the screw head is exposed. A partially raised screw may look like failure, but it is actually an opportunity. Clamp the pliers tightly, take a breath, and turn slowly. The first tiny movement is the victory moment. Once the screw starts moving, do not rush. Screws that have been stuck for years may come out like they are walking through molasses.
For old painted hinges, patience matters more than muscle. Paint often seals the screw head and threads. Scraping paint out of the recess with a utility knife or pick can make a huge difference before you try any extraction method. A gentle tap with a hammer can also break the paint bond. If the screw is in an old door, support the door properly so the hinge is not under tension while you work.
Deck screws and outdoor fasteners are a different beast. Rust, moisture, sun exposure, and pressure-treated lumber can make them stubborn. In those cases, penetrating oil and a screw extractor kit are worth having. A left-handed drill bit can feel almost miraculous when it catches and spins the screw out. When it does not work, the extractor usually has the next best chance.
Furniture screws require restraint. Cheap flat-pack furniture often uses soft metal screws in particleboard, which is basically the perfect laboratory for stripping. If a screw starts to resist, do not force it. Back it out, check alignment, and make sure the pieces are seated correctly. If the screw strips anyway, avoid drilling too aggressively because particleboard holes enlarge quickly. A manual screwdriver, rubber band, or slightly larger bit is usually safer.
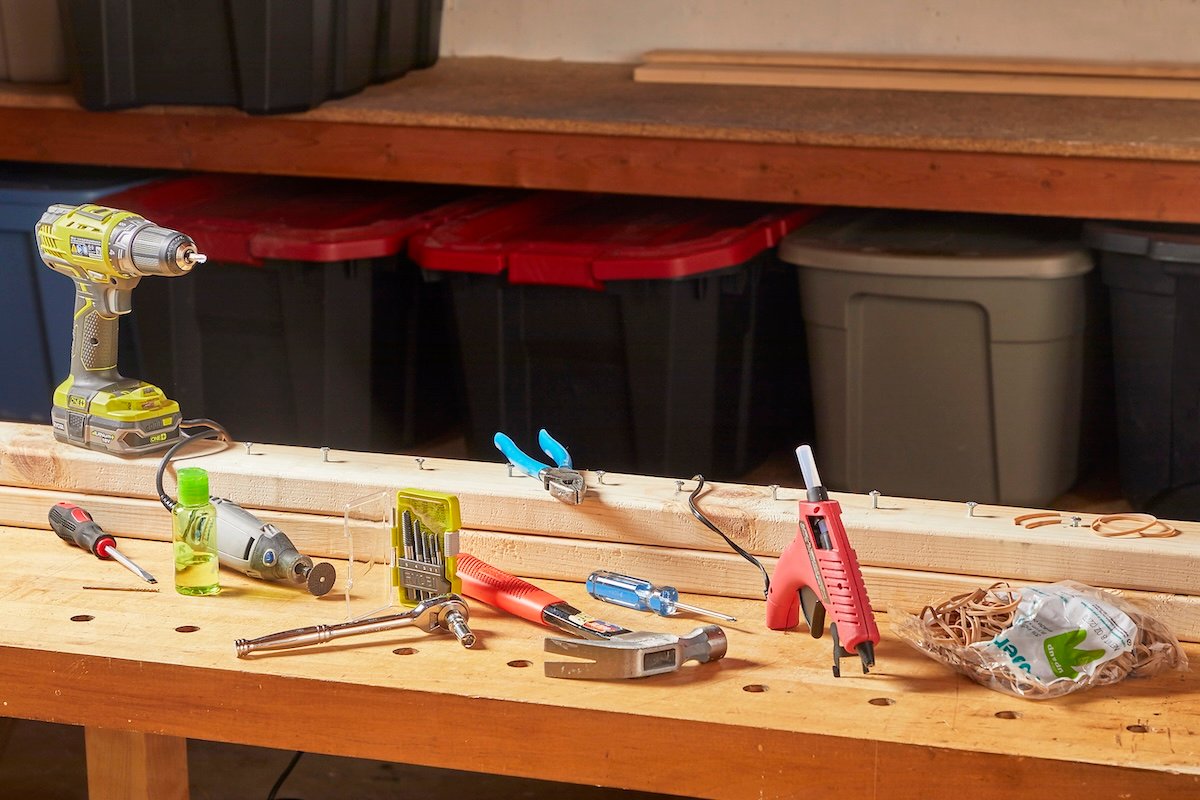
The most useful habit is building a small stripped-screw rescue kit before you need it. Keep a wide rubber band, steel wool, locking pliers, fresh driver bits, a small flathead screwdriver, penetrating oil, a center punch, left-handed drill bits, and a screw extractor kit in one place. The next time a screw decides to become a shiny little problem, you will be ready. You may still mutter at it. That is normal. Home improvement builds character, and occasionally vocabulary.
Conclusion
Learning how to remove a stripped screw is a must-have DIY skill because stripped screws appear in almost every corner of home repair. Start with low-risk methods like a manual screwdriver, different bit, rubber band, or steel wool. If the screw head is raised, use locking pliers. If it is badly damaged or stuck, move to a screw extractor, left-handed drill bit, or carefully cut a new slot.
The secret is not force; it is sequence. Work from gentle to aggressive, keep your tools aligned, protect the surrounding surface, and stop when a method is making things worse. With the right approach, even a badly stripped screw can usually be removed without ruining the project. And when it finally comes out, feel free to hold it up like a trophy. You earned that tiny piece of metal glory.
Note: This article is written as original, publication-ready content synthesized from established home repair practices and practical DIY guidance.