
Building a raised garden bed is one of the fastest ways to turn a sad patch of yard into a productive, good-looking growing space. It is also much easier than building a deck, less dramatic than adopting chickens, and far more rewarding than buying another plastic pot you promise you will use “someday.” A raised bed gives vegetables, herbs, flowers, and even strawberries a neat home with better drainage, less soil compaction, and easier access for planting, watering, weeding, and harvesting.
The best part? You do not need to be a master carpenter. If you can measure boards, drive screws, and resist the urge to fill the bed with random dirt from behind the garage, you can build a strong DIY raised garden bed in a weekend. This guide walks you through the planning, materials, construction, soil filling, planting, and maintenance steps so your raised bed garden starts strong and keeps producing season after season.
Why Build a Raised Garden Bed?
A raised garden bed is a planting area built above the surrounding ground. It may be framed with wood, metal, stone, concrete blocks, recycled plastic boards, or other durable materials. Some raised beds are only 6 to 8 inches high, while others are 18 inches or taller for easier access.
Raised beds are popular because they solve several common garden problems at once. Heavy clay soil? A raised bed lets you create a looser, better-draining growing mix. Poor drainage? Raising the soil helps water move away from plant roots. Compacted soil? Since you do not walk inside the bed, the soil stays fluffy enough for roots, worms, and beneficial microbes to do their quiet underground magic.
Raised beds also warm earlier in spring than surrounding ground, which can help gardeners get a head start. They are especially useful in small yards, urban gardens, school gardens, and places where native soil may be rocky, compacted, low in organic matter, or contaminated. Think of a raised bed as a custom apartment for your plants: better layout, better amenities, and fewer mysterious basement issues.
Step 1: Choose the Best Location
Before buying lumber or soil, choose the right spot. Most vegetables need at least 6 to 8 hours of direct sun per day. Fruiting crops such as tomatoes, peppers, cucumbers, squash, and beans usually perform best with more sun. Leafy greens like lettuce, spinach, kale, and Swiss chard can tolerate a little less, especially in hot climates.
Place your raised bed near a water source. A garden that is convenient to water is a garden that survives July. If the bed is far from the hose, you will eventually start bargaining with your plants like, “Maybe it will rain tomorrow.” Do not build your garden on hope. Build it near water.
Choose a level area if possible. A slight slope can work, but you may need to level the frame or terrace the bed so water does not run to one end. Avoid spots under large trees because roots will compete for water and nutrients, and shade may reduce yields. Also avoid low areas where water pools after rain.
Step 2: Decide on Raised Bed Dimensions
The most beginner-friendly raised garden bed size is 4 feet wide by 8 feet long. This size is large enough to grow plenty of vegetables but narrow enough that most adults can reach the middle from either side without stepping into the soil. If the bed will sit against a fence or wall, keep it about 2 to 3 feet wide so you can reach everything from one side.
Recommended Width
A raised bed should usually be no wider than 4 feet if you can access both sides. For children, wheelchair users, or gardeners with limited reach, 30 to 36 inches may be better. The goal is simple: you should be able to plant, weed, harvest, and gently lecture your tomatoes without climbing into the bed.
Recommended Height
A bed 10 to 12 inches deep works well for many vegetables if it is open to healthy soil underneath. Leafy greens and shallow-rooted crops can grow in shallower beds, while tomatoes, peppers, squash, carrots, and potatoes appreciate more depth. If you are building on concrete, asphalt, compacted subsoil, or another hard surface, aim for at least 12 inches, and 18 to 24 inches is even better for larger crops.
Recommended Pathways
If you build more than one raised bed, leave at least 2 to 3 feet between beds. Wider paths are better if you use a wheelbarrow, garden cart, walker, or wheelchair. Mulch the paths with wood chips, straw, gravel, or another permeable material to reduce weeds and mud.
Step 3: Pick Safe, Durable Materials
Wood is the classic choice for a DIY raised garden bed because it is easy to cut, easy to assemble, and usually affordable. Cedar, redwood, cypress, black locust, oak, and other naturally rot-resistant woods last longer than untreated pine. However, untreated pine or fir can still work if you accept that it may need replacing after several seasons.
Modern pressure-treated lumber is sometimes used for raised beds, but gardeners should choose products labeled for ground contact and follow current safety recommendations. Avoid old chromated copper arsenate-treated wood, often called CCA-treated wood, especially if you do not know the wood’s history. Also avoid railroad ties because they may be treated with creosote, which does not belong near edible crops.
Non-wood options include galvanized steel kits, concrete blocks, brick, stone, and recycled plastic lumber. Metal beds are tidy and long-lasting, though they may heat up in hot climates. Concrete blocks are sturdy and modular, but they make the bed wider and heavier. Recycled plastic boards resist rot, but they can be more expensive. Choose the material that fits your budget, climate, style, and comfort level.
Step 4: Gather Tools and Supplies
For a basic 4-by-8-foot wooden raised bed, you will need the following:
- Two 2-by-10 or 2-by-12 boards, 8 feet long
- Two 2-by-10 or 2-by-12 boards, 4 feet long
- Four corner posts, such as 4-by-4 lumber cut to bed height
- Exterior-grade screws, usually 3 inches long
- Drill or impact driver
- Tape measure
- Carpenter’s square
- Level
- Shovel or garden fork
- Cardboard or newspaper for smothering weeds
- Hardware cloth if burrowing pests are a problem
- Topsoil, compost, and other raised bed soil ingredients
You can modify the lumber size based on what is available. For example, stacking two layers of 2-by-6 boards creates a bed about 11 inches high. A single layer of 2-by-12 boards creates a simple, sturdy bed with fewer seams.
Step 5: Prepare the Ground
Mark the bed location with stakes, string, flour, or a garden hose. Remove large weeds, rocks, and debris. If the area is covered with grass, you do not always need to dig out the sod. A layer of plain cardboard or several layers of newspaper can smother grass and weeds while decomposing over time. Overlap the edges so persistent weeds do not find a tiny doorway and move in like they pay rent.
If your native soil is compacted and safe to grow in, loosen the top 6 to 12 inches with a garden fork before placing the frame. This improves drainage and helps plant roots move between the raised bed mix and the soil below. If you are concerned about lead, heavy metals, or other contaminants, use a physical barrier and fill the bed with clean imported soil and compost.
If voles, gophers, or moles are common in your area, place hardware cloth under the bed before filling it. Use galvanized hardware cloth with small openings, not flimsy chicken wire. Chicken wire has the emotional energy of protection, but underground pests may disagree.
Step 6: Build the Frame
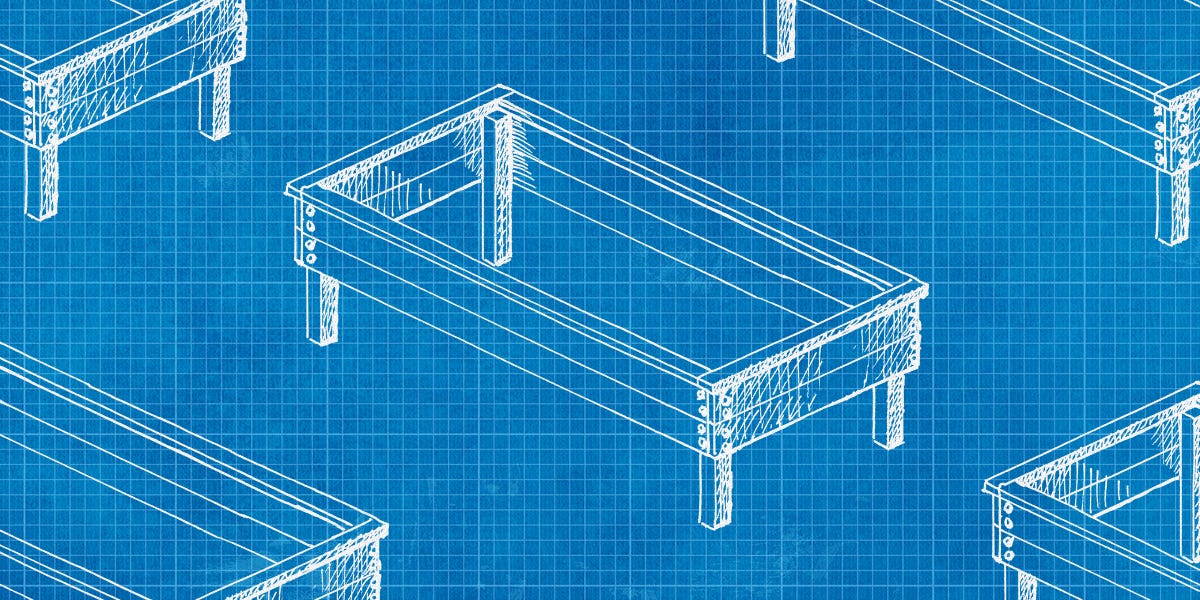
Set the boards on a flat surface near the garden site. Arrange them into a rectangle, placing the shorter boards inside or outside the long boards consistently. Use a carpenter’s square to check the corners. Attach each corner with exterior screws driven through the side boards into the corner posts. Use at least two screws per board end, and three is better for taller beds.
Move the assembled frame into place. Check that it is level from side to side and end to end. If one corner sits high, remove soil underneath it. If one corner sits low, add soil or gravel beneath it and tamp gently. A level bed helps water distribute evenly instead of turning one end into a swamp and the other into a desert documentary.
For beds longer than 8 feet, add side supports or cross braces to prevent the boards from bowing outward after the soil is added. Soil is heavier than it looks, especially when wet. It has the personality of a quiet weightlifter.
Step 7: Fill the Raised Bed with the Right Soil Mix
The soil mix is the heart of a raised bed garden. Do not fill the entire bed with heavy clay, pure compost, or cheap bagged topsoil that turns into a brick after the first rain. A good raised bed soil mix should hold moisture, drain well, support roots, and provide nutrients.
A reliable starting blend is about 60 to 70 percent quality topsoil and 30 to 40 percent finished compost or other well-decomposed organic matter. Some gardeners add coarse sand, perlite, pine bark fines, or coconut coir to improve texture, especially in deeper beds or container-style beds. If using purchased bulk soil, ask for a vegetable garden or raised bed mix from a reputable supplier.
Avoid fresh manure because it may contain pathogens, weed seeds, or excess salts and nitrogen. Use aged or fully composted manure only. Also avoid filling deep beds with logs, branches, and unfinished woody material unless you understand how hugelkultur-style beds work; decomposing wood can temporarily tie up nitrogen and may cause settling.
After filling, water the bed thoroughly. Soil will settle, often more than you expect. Add more mix until the soil level sits a couple of inches below the top edge. This lip helps hold mulch and water in place.
Step 8: Add Irrigation and Mulch
Raised beds often drain faster than in-ground gardens, which is wonderful during rainy weeks and less wonderful during a heat wave. Drip irrigation or soaker hoses are excellent choices because they deliver water directly to the soil and keep leaves drier, which may reduce disease pressure.
Water deeply rather than sprinkling lightly every day. Check moisture by pushing a finger or trowel a few inches into the soil. If only the surface is wet, keep watering. Plants need moisture where the roots are, not just a spa treatment for the top half inch.
Add 1 to 2 inches of mulch around plants after seedlings are established. Straw, shredded leaves, compost, untreated grass clippings, or fine wood chips can help conserve moisture and suppress weeds. Do not use grass clippings from lawns recently treated with herbicides.
Step 9: Plant Smart
Raised beds are ideal for intensive planting because you do not need wide walking rows inside the bed. Instead, plant in blocks, grids, or staggered rows. This helps shade the soil, reduce weeds, and increase harvests from a small space.
Place tall crops such as tomatoes, pole beans, peas, and trellised cucumbers on the north side of the bed when possible so they do not shade shorter plants. Use trellises to grow vertically and save room. Pair quick crops like radishes and lettuce with slower crops like peppers or tomatoes. By the time the big plants need more space, the quick crops may already be harvested.
Rotate crop families when you can. For example, avoid planting tomatoes, peppers, eggplants, and potatoes in the same bed year after year. Rotation helps reduce disease buildup and balances nutrient demand. In a small garden, rotation does not need to be perfect, but even a simple plan is better than making your tomatoes live in the same apartment forever.
Step 10: Maintain the Bed Season After Season
At the end of each growing season, remove diseased plant debris and compost healthy material. Top off the bed with compost because organic matter breaks down and soil settles. A yearly layer of compost keeps the bed productive without constant rebuilding.
Test your soil every few years. A soil test can show pH, phosphorus, potassium, organic matter, and fertilizer needs. Most vegetables grow well in slightly acidic to neutral soil, often around pH 6.0 to 7.0. Guessing with fertilizer can lead to too much of one nutrient and not enough of another. Plants are dramatic, but they appreciate science.
Check wooden beds yearly for rot, loose screws, bowing sides, and pest damage. Tighten hardware, replace failing boards, and refresh pathways. If you use metal beds, check for sharp edges. If you use concrete blocks, make sure they remain level and stable.
Common Raised Garden Bed Mistakes to Avoid
Making the Bed Too Wide
If you cannot reach the middle, you will step into the bed. Once you step into the bed, the soil compacts. Once the soil compacts, the plants get annoyed. Keep the width reachable.
Using Poor Soil
Cheap fill dirt may save money at first, but it can drain poorly, contain weed seeds, or lack nutrients. Invest in a balanced raised bed soil mix and finished compost.
Skipping Water Planning
Raised beds dry out faster than in-ground beds. Install drip irrigation, use mulch, and place beds near water.
Ignoring Material Safety
Do not use railroad ties or unknown salvaged treated wood for food gardens. Choose safe, durable materials, especially when growing vegetables and herbs.
Overcrowding Plants
Intensive planting is useful, but crowding is not the same as efficiency. Plants still need airflow, sunlight, and root space. Follow spacing guidelines, then adjust based on experience.
Experience Notes: What Building a Raised Garden Bed Teaches You
One of the first lessons from building a raised garden bed is that “level enough” is not always level enough. A bed that looks fine when empty can reveal every little slope after you water it. If one side keeps drying out while the other side stays soggy, the frame may not be level. Taking an extra 15 minutes to level the bed before filling it can save a whole season of uneven watering.
Another practical lesson is that soil volume is always more than you think. A 4-by-8-foot bed that is 12 inches deep needs about 32 cubic feet of soil mix. That is not “a few bags.” That is a small soil event. Buying in bulk may be cheaper for larger beds, but bagged mixes are convenient for small projects. Either way, calculate before shopping so you do not find yourself standing in the garden center doing suspicious math on your phone.
It is also worth learning that compost quality matters. Good compost smells earthy, not sour or rotten. It should look dark and crumbly, with no obvious food scraps or large undecomposed chunks. Poor compost can bring weed seeds, salts, or inconsistent nutrients. If you find a reliable compost source, treat it like a good mechanic or a favorite taco place: remember it, support it, and tell only your nicest friends.
Watering is another area where experience quickly improves results. New gardeners often water too lightly. The surface looks damp, but roots several inches down remain dry. In a raised bed, especially during hot weather, it is better to water slowly and deeply. A drip line under mulch is one of the simplest upgrades you can make. It saves time, reduces splashing, and helps keep moisture consistent.
Plant spacing becomes more intuitive after one season. The tiny tomato transplant that looks lonely in May may become a leafy empire by July. Zucchini, meanwhile, can behave like it is auditioning for a jungle documentary. Give large plants enough space, and use trellises for climbing crops. Vertical gardening is the raised bed builder’s secret weapon because it turns limited square footage into productive growing space.
You will also learn that paths matter almost as much as beds. Muddy, weedy paths make gardening feel like a chore. Mulched paths make the garden cleaner, safer, and more inviting. If you plan to use a wheelbarrow, make paths wide enough from the beginning. Future you, carrying compost on a hot afternoon, will be deeply grateful.
Finally, raised bed gardening teaches patience. The first year is productive, but the bed often improves over time as compost, roots, worms, and microbes build better soil structure. Each season gives you information: what grew well, what struggled, what needed more sun, what needed a trellis, and what you planted too much of because seed packets are charming little liars. Keep notes, adjust, and enjoy the process. A raised bed is not just a box of soil. It is a small, living experiment that pays you back in herbs, vegetables, flowers, and the quiet satisfaction of eating something you grew yourself.
Conclusion
Learning how to build a raised garden bed is one of the most useful home gardening skills you can develop. Start with a sunny, level location. Keep the bed narrow enough to reach across. Choose safe, durable materials. Prepare the ground, build a sturdy frame, fill it with a balanced soil and compost mix, and water it well. With thoughtful planting and simple maintenance, your raised bed can produce fresh food, reduce garden frustration, and make your yard look impressively organized.
Whether you build one small herb bed near the kitchen or a full backyard vegetable garden, the same principles apply: good sun, good soil, good drainage, and easy access. Do those things well, and your plants will reward you. They may not send a thank-you card, but the tomatoes will speak for them.