
Some weeks are for meal prep, inbox cleanup, and pretending that one mysterious cable in the junk drawer still has a purpose. But this week? This week is for tables. Coffee tables, dining tables, side tables, console tables, patio tables, thrift-store tables, hand-me-down tables, and that one table in the garage currently holding three paint cans, a lonely screwdriver, and the emotional weight of unfinished projects.
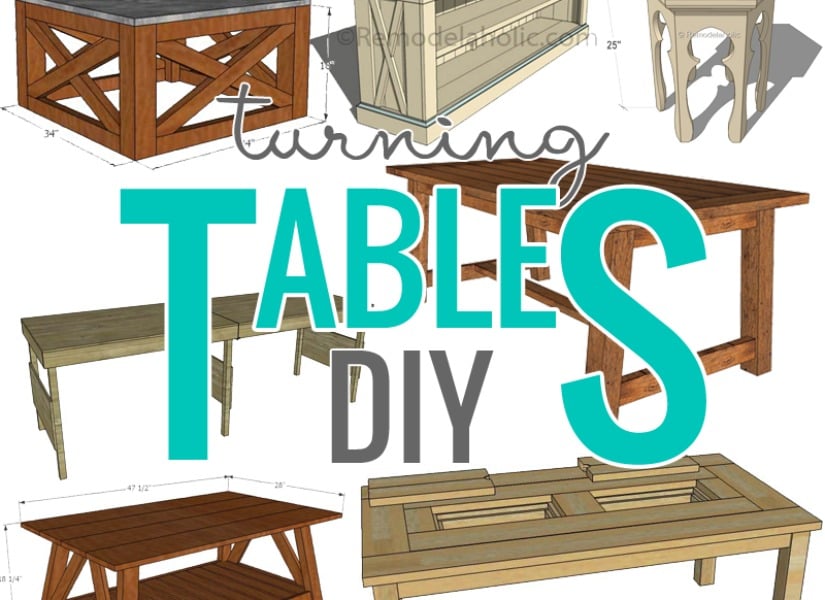
Welcome to It’s Turning Tables DIY Week!, a full celebration of table makeovers, furniture refinishing, creative upcycling, and beginner-friendly woodworking ideas. Tables are some of the most rewarding DIY projects because they are useful, visible, and surprisingly forgiving. A chair has to support your entire body without drama. A cabinet has doors that must line up like disciplined soldiers. But a table? A table says, “Give me a flat top, steady legs, and maybe a cute finish, and we’re good.”
Whether you want to refinish an old dining table, build a simple outdoor table, paint a thrifted side table, or turn scrap wood into a conversation piece, this guide will help you plan your project with confidence. We will cover design ideas, tools, finishes, mistakes to avoid, and the practical steps that separate a charming DIY table from a wobbly monument to regret.
Why DIY Tables Are Having a Moment
DIY table projects fit perfectly into the way people are decorating now: personal, budget-conscious, sustainable, and a little bit rebellious against showroom sameness. A table is not just a surface. It is where laptops overheat, toddlers color outside the lines, friends argue over board games, and someone always puts a wet glass directly on the wood despite the coaster being two inches away.
Buying a brand-new table can be expensive, especially if you want solid wood, custom sizing, or a finish that does not look like it was chosen by a committee of beige enthusiasts. DIY gives you more control. You can choose the exact stain, paint color, height, shape, legs, hardware, and level of rustic charm. You can also rescue furniture from thrift stores, estate sales, online marketplaces, or your own basement.
The best part is that table makeovers scale beautifully. A beginner can repaint a small side table in a weekend. A more confident DIYer can sand and refinish a dining table. A serious maker can build a live-edge table, tile a patio tabletop, or create a custom console table for an awkward hallway. There is a table project for every skill level, every budget, and every person who has ever said, “I could fix that,” while standing in a thrift store with dangerous optimism.
Start With the Right Table
Before you grab sandpaper and start emotionally bonding with a power tool, inspect the table carefully. A successful DIY table makeover begins with choosing a piece worth saving. Look for solid construction, stable joints, and a shape that works for your space. Cosmetic problems are usually manageable. Structural problems can become expensive, frustrating, and oddly personal.
What Makes a Table Worth Refinishing?
A good candidate usually has “good bones.” That means the table is sturdy, the legs are secure, the top is not severely warped, and the basic size and style fit your home. Scratches, faded finish, outdated stain, chipped paint, and minor dents are all fixable. Loose screws, missing hardware, and small cracks can often be repaired. Severe water damage, deep rot, active pests, or major veneer lifting may be a sign to step away gracefully.
Solid wood tables are generally the easiest to refinish because you can sand them more aggressively. Veneer can still be beautiful, but it requires a lighter touch because the top wood layer may be thin. Laminate and particleboard are better suited for painting than staining. If you are not sure what you have, check the underside, edges, and any chipped areas. The table will usually reveal its secrets if you look closely enough. Furniture is dramatic like that.
Choose Your DIY Table Project Style
One of the most exciting parts of Turning Tables DIY Week is deciding what kind of transformation your table deserves. Not every table needs a full strip-and-refinish situation. Sometimes the smartest makeover is simple: clean it, tighten the hardware, paint the base, and leave the top alone. Other times, the table is begging for a complete glow-up.
1. The Classic Refinished Wood Table
This is the timeless approach: remove the old finish, sand the surface, apply stain, and seal it with a durable topcoat. It is ideal for dining tables, coffee tables, and desks where the wood grain is worth showing off. A natural wood finish works especially well in farmhouse, modern rustic, Scandinavian, traditional, and transitional spaces.
2. The Painted Base and Stained Top
This is a favorite for dining tables because it balances personality and durability. The tabletop stays wood-toned, which hides daily wear better than many painted surfaces, while the base gets a fresh color. White, black, navy, sage, cream, charcoal, and deep green are all strong options. This look says, “I am stylish,” but also, “I understand spaghetti sauce happens.”
3. The Bold Painted Table
A fully painted table can become a focal point, especially in a breakfast nook, playroom, craft room, or entryway. Chalk-style paint, enamel paint, and furniture paint can all work depending on the finish you want. The secret is preparation. Clean thoroughly, scuff sand, prime when needed, and allow the paint to cure before putting the table back into heavy service.
4. The Tiled Tabletop
A tiled tabletop is a smart solution for outdoor tables, damaged tops, or anyone who wants pattern and texture. You can use ceramic tile, mosaic tile, stone tile, or even peel-and-stick tile for low-impact decorative projects. For outdoor tables, choose weather-appropriate materials and grout. For indoor accent tables, you can get more playful with color and pattern.
5. The Repurposed Table
Repurposing is where things get fun. An old door can become a dining table. A dresser can become a kitchen island. A metal base can get a new wood top. A broken patio table can become a tiled garden table. Repurposed furniture adds character because it carries a story. Sometimes that story is elegant. Sometimes the story is, “I found this beside the road and now it looks expensive.” Both are valid.
Tools and Supplies for Turning Tables DIY Week
You do not need a professional workshop to makeover a table, but you do need the right basics. The project determines the full list, but most table DIYs require cleaning supplies, sandpaper, protective gear, a finish, and patience. Patience is not sold in the paint aisle, unfortunately.
Basic Supplies
- Dish soap, warm water, microfiber cloths, and tack cloth
- Screwdriver or drill for removing hardware and tightening joints
- Wood filler for small dents, chips, and holes
- Sandpaper in multiple grits, such as 80, 120, 150, 220, and 320
- Orbital sander for large flat surfaces
- Paintbrushes, foam brushes, rollers, or lint-free cloths
- Primer, stain, paint, polyurethane, polycrylic, varnish, or oil finish
- Drop cloth, painter’s tape, gloves, eye protection, and a dust mask
If you are refinishing a large dining table, an orbital sander can save hours. If you are working on curved legs, carved details, or small edges, hand sanding gives you more control. For many DIYers, the best setup is a combination: power tools for the big flat areas and hand tools for the fussy bits that seem designed specifically to test your character.
How to Refinish a Table Step by Step
A table makeover does not have to be complicated, but it does need order. Skipping steps is tempting, especially when the table already looks “pretty clean.” Do not trust pretty clean. Pretty clean is how dust, grease, and mystery residue sneak into your finish and cause problems later.
Step 1: Clean the Table Thoroughly
Start with a full cleaning. Remove dust, sticky spots, wax buildup, food residue, and anything else the table has collected during its service to humanity. Use mild soap and water, then dry the piece completely. For thrifted or curbside finds, inspect carefully for odors, pests, and hidden damage before bringing the table into your living space.
Step 2: Remove Hardware and Make Repairs
If the table has drawers, leaves, brackets, or removable hardware, take those parts off before sanding or painting. Tighten loose screws and repair small cracks with wood glue or filler. If a leg wobbles, fix the wobble now. A beautiful finish cannot compensate for a table that dances every time someone reaches for the mashed potatoes.
Step 3: Sand the Surface
Sanding creates a smooth surface and helps new stain, paint, or topcoat adhere properly. For a full refinish, you may need to begin with a coarser grit to remove the existing finish, then move gradually to finer grits. For a light refresh, scuff sanding with fine-grit paper may be enough. Always sand with the grain when possible, and avoid pressing too hard with an orbital sander. Let the tool do the work. It has one job and no emails to answer.
Step 4: Remove Dust
After sanding, remove every bit of dust. Vacuum the surface, wipe it down, and use a tack cloth before finishing. Dust is the glitter of woodworking: once it appears, it wants to be part of everything. Do not let it become a permanent feature under your topcoat.
Step 5: Apply Paint or Stain
If staining, test the color on an inconspicuous area or scrap wood when possible. Different wood species absorb stain differently, and the color on the can is more of a polite suggestion than a binding contract. Apply stain with the grain, wipe away excess, and allow it to dry according to the product directions.
If painting, use primer when the surface is glossy, stained, laminate, dark, or prone to bleed-through. Apply thin coats rather than one thick coat. Thick paint may seem efficient, but it often leads to drips, brush marks, and a finish that looks like it was frosted by a nervous cake decorator.
Step 6: Seal the Table
Tables work hard, so they need protection. Dining tables, coffee tables, and desks benefit from a durable clear coat. Water-based polyurethane or polycrylic is popular for indoor projects because it dries relatively clear and is easier to clean up. Oil-based polyurethane can offer strong durability, though it may amber over time and has a stronger odor. For heavy-use tabletops, multiple thin coats are better than one thick coat. Light sanding between coats helps create a smoother finish.
Smart Design Ideas for DIY Tables
The finish is only one part of the transformation. Small design choices can completely change the feel of a table. If the top is beautiful but the legs are boring, swap the legs. If the table is too plain, add trim, corner brackets, stencil details, or a lower shelf. If the color is almost right but not quite, layer finishes for depth.
Add New Legs
Changing table legs is one of the fastest ways to shift style. Hairpin legs create a midcentury or industrial look. Chunky turned legs feel farmhouse or traditional. Straight tapered legs look modern and clean. Metal legs can make a wood top feel more contemporary. Just make sure the new legs are the right height and strong enough for the tabletop.
Try a Two-Tone Finish
A two-tone table can look custom without requiring advanced skills. Pair a natural wood top with a painted base, or combine a dark stained top with light legs. For a softer look, use warm white, greige, muted blue, or sage green. For drama, go black, espresso, navy, or deep forest green.
Use Stencils or Inlays
Stencils can add pattern to small tables, especially entry tables, craft tables, and accent pieces. Keep the design restrained if the table already has interesting wood grain or ornate legs. If the table is simple, a geometric stencil, border detail, or painted checkerboard top can make it feel intentional rather than accidental.
Upgrade the Function
A DIY table can do more than look nice. Add casters to a worktable, a lower shelf to a coffee table, hooks under an entry table, or storage baskets beneath a console table. A narrow table behind a sofa can hold lamps and charging cords. A small round table can become a plant stand. A folding table can become a craft station. Function is the difference between “cute project” and “why did we not do this sooner?”
Common DIY Table Mistakes to Avoid
Every DIYer makes mistakes. The goal is to avoid the expensive, sticky, sanding-for-three-days kind. The most common table makeover problems usually come from rushing prep, choosing the wrong finish, or using the table before the coating has cured.
Mistake 1: Skipping the Cleaning Step
Paint and stain do not bond well to grease, wax, or grime. Even if a table looks clean, give it a proper wash before sanding or finishing. Kitchen tables especially collect oils that can interfere with adhesion.
Mistake 2: Over-Sanding Veneer
Veneer can be refinished, but it requires caution. Sand too aggressively and you may burn through the thin wood layer. Use lighter pressure, finer grits, and patience. When in doubt, choose a painted finish rather than trying to force a deep stain makeover on fragile veneer.
Mistake 3: Applying Thick Coats
Thick coats of paint, stain, or polyurethane can create runs, wrinkles, bubbles, and uneven curing. Thin coats take longer in the moment but save time later. DIY wisdom often comes down to this: the shortcut is usually longer.
Mistake 4: Ignoring Cure Time
Dry and cured are not the same thing. A finish can feel dry to the touch but still be soft underneath. Give tabletops enough time before placing heavy objects, hot dishes, placemats, or decorative trays on them. Your future self will thank you, preferably while not sanding out a vase-shaped ring.
Safety and Ventilation Matter
DIY table projects are fun, but sanding dust, chemical strippers, stains, and finishes deserve respect. Work in a well-ventilated area, wear protective gear, and follow product instructions. If you are using oil-based products, solvents, or spray finishes, ventilation becomes even more important. Store oily rags safely because some finishing products can create a fire risk if rags are balled up and left in a pile.
For family homes, also think about stability. A table should be steady, level, and appropriate for the way it will be used. If you build or modify a tall console, shelving table, or storage-heavy piece, consider whether it needs additional anchoring or safety measures. Beautiful furniture should not behave like a stunt performer.
Budget-Friendly DIY Table Ideas
Turning Tables DIY Week does not require a luxury budget. In fact, some of the best table projects begin with the cheapest finds. A $20 thrifted side table, a scratched coffee table from Facebook Marketplace, or a forgotten family table can become a standout piece with basic supplies and a clear plan.
Project Idea: The Weekend Side Table
Clean the table, lightly sand it, fill dents, prime if needed, and paint it in a bold color. Add a small stencil or updated knob if it has a drawer. This is a perfect beginner project because the surface area is manageable and the stakes are low. If the first color looks wrong, repaint it. Side tables are basically the rehearsal stage of furniture DIY.
Project Idea: The Dining Table Refresh
For a dining table with a worn top but sturdy base, sand the tabletop down to fresh wood, stain it in a warm natural tone, and paint the base. Seal the top with several thin coats of durable finish. This gives the table a modern yet practical update and works well for families who actually use the dining table instead of treating it like a museum exhibit.
Project Idea: The Outdoor Patio Rescue
If you have a metal patio table frame with a damaged top, consider replacing the top with sealed wood slats, tile, or a weather-resistant panel. Outdoor projects need materials that can handle sun, moisture, and temperature changes. Use exterior-rated products and check the frame for rust before investing time in the makeover.
Project Idea: The Console Table Build
A simple console table can be made from basic lumber, pocket screws, and a stain or paint finish. It is a great project for narrow spaces like hallways, behind sofas, or entryways. Keep the design simple: four legs, a top, side supports, and maybe a lower shelf. The finished piece can look custom without requiring advanced joinery.
How to Style Your Finished DIY Table
Once the table is finished, styling should enhance the piece rather than bury it. A newly refinished wood table does not need seventeen objects on top shouting for attention. Let the surface breathe. Use a tray, a vase, a stack of books, a lamp, or a small plant. For dining tables, keep centerpieces low enough for conversation. Nobody wants to discuss weekend plans through a floral arrangement the size of a shrub.
Consider contrast. A rustic wood table looks great with smooth ceramics or modern metal accents. A sleek painted table can benefit from woven baskets, linen runners, or natural greenery. A tiled table may only need simple styling because the pattern already brings energy.
Extra Experience: What Turning Tables DIY Week Teaches You
There is something oddly satisfying about working on a table. Maybe it is because tables are so honest. They do not hide behind complicated mechanisms or secret compartments. They stand there, flat and useful, waiting for someone to care enough to make them better. During Turning Tables DIY Week, the biggest lesson is that transformation rarely begins with confidence. It usually begins with curiosity, a slightly unrealistic plan, and the sentence, “How hard could it be?”
The first experience many DIYers have with table makeovers is sanding. Sanding looks simple until you are thirty minutes in, covered in dust, and questioning every life choice that led to this moment. But sanding also teaches patience. You learn that rushing leaves swirl marks. You learn that corners need handwork. You learn that the old finish does not owe you cooperation. Then, slowly, fresh wood appears beneath the scratches, and suddenly the project feels possible again.
Another valuable experience is learning how much prep affects the final result. Cleaning, repairing, taping, testing stain, and waiting between coats may not feel glamorous, but they are the quiet heroes of DIY furniture. A rushed table makeover can look good for a week and then start peeling, chipping, or collecting mysterious tacky spots. A well-prepped table lasts longer and feels better to use. The difference is not magic. It is process.
DIY table projects also teach decision-making. You may begin with one vision and change direction halfway through. Maybe the wood grain is too pretty to paint. Maybe the stain turns orange and needs adjusting. Maybe the legs look dated, but the top is perfect. Flexibility is part of the craft. The best DIYers are not people who never make mistakes. They are people who know how to recover creatively when the project says, “Surprise!”
There is also a confidence boost that comes from using something you made or restored. When guests compliment the table, you get to say, “Thanks, I did it myself,” with casual modesty while secretly launching a parade in your mind. Even a small side table can change how you see your home. Suddenly, furniture is not fixed and final. It is editable. A scratched top becomes potential. A dated base becomes a design opportunity. A thrifted find becomes a weekend adventure.
Perhaps the most practical experience is learning what your household actually needs. A coffee table may need a tougher topcoat because people put mugs, remotes, feet, snacks, and occasionally entire dinner plates on it. A craft table may need storage more than elegance. A dining table may need rounded edges, wipeable finishes, and a color that forgives crumbs. DIY lets you design for real life, not catalog life. Catalog life has one ceramic bowl and no mail pile. Real life has chargers, homework, keys, and someone asking where the tape is.
Turning Tables DIY Week is also a reminder that sustainability can be creative rather than preachy. Reusing a table keeps furniture out of the waste stream and reduces the need to buy new. But it also gives your home something original. Mass-produced furniture can be beautiful, but a DIY table has fingerprints, decisions, and a bit of personality built in. It becomes part of your home’s story instead of just another item delivered in a box with one missing screw.
Finally, table DIY teaches the joy of completion. Many home projects are huge, expensive, and disruptive. A table is manageable. You can see progress quickly. You can finish it, style it, and use it. That sense of completion matters. It builds momentum for the next project, whether that is a bench, a bookshelf, a nightstand, or the terrifying cabinet makeover you have been emotionally avoiding.
Conclusion: Let the Tables Turn
It’s Turning Tables DIY Week! is more than a clever phrase. It is an invitation to see ordinary furniture differently. That scratched dining table might become the warm centerpiece of your home. That thrifted side table might become a bold accent. That broken patio table might become a tiled outdoor beauty. With smart prep, realistic planning, and the right finish, a DIY table project can be affordable, useful, and genuinely fun.
The best table makeovers are not perfect. They are personal. They fit your space, your habits, your budget, and your style. So clean the surface, tighten the legs, choose your finish, and give that table another chapter. The table has been holding your coffee for years. It deserves a little attention.
Note: This article is based on established DIY furniture refinishing, table makeover, woodworking, painting, staining, sealing, and home-improvement best practices from reputable U.S. home, design, safety, and DIY resources.