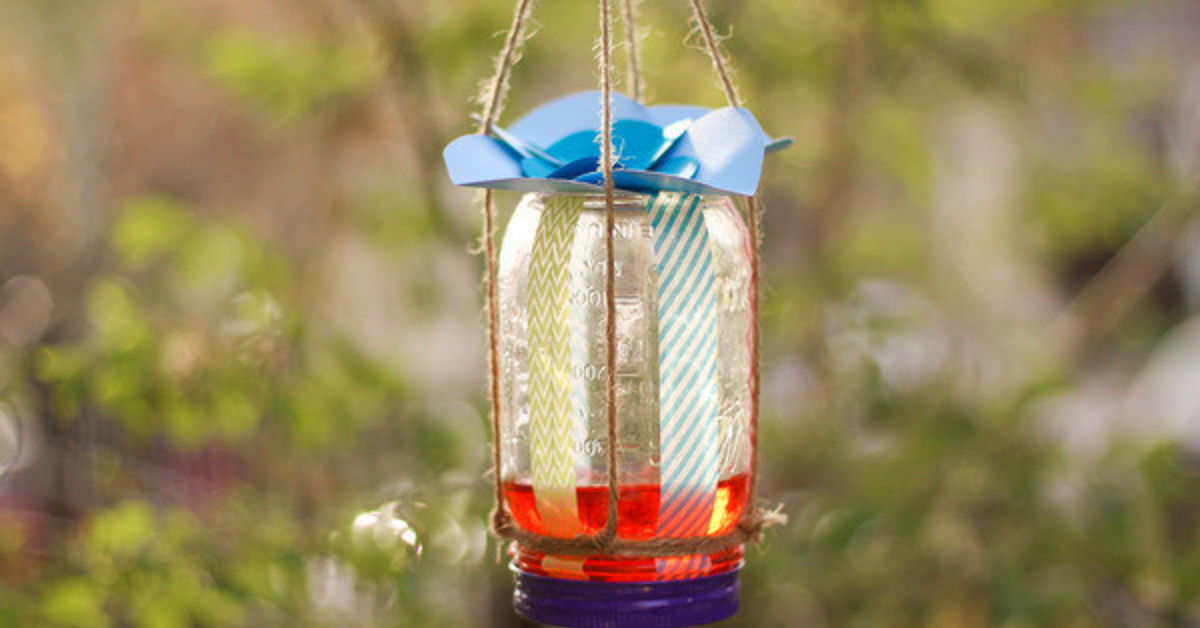

A butterfly feeder is one of those garden projects that looks charming, costs very little, and makes you feel like you have opened a tiny outdoor café for creatures wearing stained-glass wings. Better still, you can make one with a Mason jar, a sponge, and a few simple supplies you may already have at home.
This DIY Mason jar butterfly feeder is easy enough for a weekend craft session and practical enough to hang near a flower bed, patio, balcony garden, or pollinator border. The goal is not to replace real flowersnothing beats a garden full of nectar-rich bloomsbut to create an occasional supplemental feeding station and a fun way to observe visiting butterflies up close.
Why Make a Mason Jar Butterfly Feeder?
Butterflies are not just decorative confetti with wings. Adult butterflies commonly visit flowers for nectar, while some species are also drawn to soft, overripe fruit and mineral-rich moisture. A simple feeder can provide a small, accessible food source during warm weather, especially when paired with flowers that bloom at different times of the season.
A Mason jar is ideal because it is sturdy, reusable, easy to clean, and transparent enough for you to see when the liquid level is getting low. The sponge acts as a wick, slowly presenting the sugar-water mixture without creating a deep pool where insects could become trapped. It is a clever little system, even if it looks like something a fairy godmother built after one too many craft-store coupons.
What You Need for This DIY Butterfly Feeder
- One clean Mason jar or similar glass jar with a metal lid and ring
- A new, plain sponge or natural sea sponge
- White granulated sugar
- Clean water
- Twine, cotton cord, or garden string
- A small artificial flower, waterproof paper flower, or colorful craft decoration
- Scissors
- A small nail and hammer for the lid hole
- Optional: a washer, key ring, or small hook for easier hanging
Choose a sponge that has not been treated with cleaning chemicals, fragrance, antibacterial additives, or soap. The safest option is a brand-new, plain kitchen sponge or an untreated natural sea sponge.
How to Make a DIY Butterfly Feeder Out of a Mason Jar in 6 Easy Steps
Step 1: Wash the Jar and Gather Your Supplies
Start with a thoroughly washed Mason jar, lid, and ring. Rinse everything well so there is no soap residue left behind. Wash the sponge in plain water too, then squeeze it dry. Butterflies are looking for a snack, not a surprise lemon-scented degreasing treatment.
Lay your supplies on a flat work surface before you begin. This makes the project easier and keeps the process from turning into a backyard scavenger hunt halfway through.
Step 2: Make a Small Hole in the Lid
Remove the lid from the jar. Have an adult handle the hammer-and-nail portion of the project, especially if children are helping. Create one small hole near the center of the lid. The opening should be only large enough for a narrow strip of sponge to fit snugly through it.
If the hole has sharp edges, gently press them flat or cover the area around the opening with a smooth layer of tape on the inside of the lid. The sponge needs to sit securely so the feeder does not leak like a tiny, upside-down syrup fountain.
Step 3: Cut and Insert the Sponge Wick
Cut a sponge strip about 1 to 2 inches long and narrow enough to pass through the lid opening. Thread it through the hole so a small amount of sponge sits inside the jar and a larger portion remains outside.
The outside section should be long enough for butterflies to land on and sip from, but not so large that it drips constantly. Aim for a snug fit. Test it later with plain water before you add the feeder mixture. A properly fitted sponge should stay damp rather than pour liquid onto every ant within a three-block radius.
Step 4: Mix the Butterfly Feeder Nectar
For a simple butterfly feeder recipe, mix 9 parts water with 1 part white granulated sugar. Warm the water just enough to dissolve the sugar, then let the mixture cool completely before pouring it into the jar.
Keep the recipe plain. Do not add food coloring, flavored syrup, artificial sweeteners, honey, or anything marketed as “natural energy magic.” White sugar and water are all you need for this simple feeder. Make only a small batch so it stays fresh and easy to replace.
Step 5: Fill, Seal, and Test the Feeder
Pour the cooled sugar-water mixture into the Mason jar, leaving a little space at the top. Screw on the lid and ring tightly. Turn the jar upside down over a sink or bowl and watch the sponge.
The wick should slowly become damp, but it should not drip steadily. If it leaks, use a slightly larger sponge piece or adjust the strip so it fits more tightly in the lid. Once the wick stays moist without dripping, your feeder is ready for its big debut.
Step 6: Add a Hanger and Place It in the Garden
Tie twine securely around the jar neck. For extra stability, create a simple hanging net by tying several equal lengths of twine around the neck, bringing them down around the jar, and knotting them together beneath the base. Add a loop at the top for hanging.
Attach a colorful artificial flower near the sponge if you like. The decoration is not the food source, but a bright flower shape can make the feeder easier to notice. Hang the jar upright-side-down from a branch, shepherd’s hook, porch beam, or sturdy garden hanger.
Where to Hang a Butterfly Feeder for the Best Results
Butterflies prefer warm, bright locations, so place the feeder in a sunny area that gets gentle morning or midday light. Avoid hanging it in strong wind, because a swinging Mason jar is not exactly a five-star dining experience for an insect trying to land delicately.
Good locations include near coneflowers, asters, zinnias, lantana, bee balm, milkweed, black-eyed Susans, phlox, salvia, or other butterfly-friendly flowers suited to your region. Keep the feeder away from busy doors, outdoor grills, pesticide-treated lawns, and places where pets may knock it down.
Hang it at a height where you can easily remove it for cleaning. About 4 to 5 feet above the ground is usually convenient, visible, and far less likely to become a squirrel-operated amusement ride.
How to Keep Your Mason Jar Butterfly Feeder Clean
Cleaning matters. Sugar water can ferment, grow mold, attract ants, or turn into a science experiment nobody asked for. Empty and rinse the feeder every few days, and clean it more often during very hot weather.
Wash the jar, lid, ring, and sponge with hot water and mild soap, then rinse thoroughly. Replace the sponge whenever it looks worn, discolored, stiff, or impossible to clean. Never top off old liquid with new liquid. Dump the old mixture, wash the feeder, and refill it with a fresh batch.
Check the feeder after rainstorms too. If water has diluted the mixture or soaked the outside of the sponge, clean and refill it. Keeping the feeder fresh is one of the easiest ways to make it useful rather than merely decorative.
Common Butterfly Feeder Problems and Easy Fixes
The Feeder Is Leaking
A dripping feeder usually means the sponge opening is too loose. Use a thicker sponge strip, reposition the wick, or make sure the lid is screwed on tightly. Test with water before using sugar water again.
Ants Found the Feeder First
Ants are impressive little employees, but they were not invited to run the butterfly buffet. Move the feeder away from branches, fences, or railings that create an easy ant highway. Keep the jar exterior clean, wipe away drips, and consider hanging it from a smooth metal hook.
No Butterflies Are Visiting
Give it time. Butterflies may take days or weeks to notice a new feeder, and they may prefer nearby flowers when natural nectar is abundant. Improve your odds by planting a variety of blooms, offering shallow water with damp sand or pebbles, and avoiding pesticides.
Bees, Wasps, or Flies Are Visiting Too
This can happen because many insects are attracted to sugar water. Keep the feeder clean, use only a small exposed sponge surface, and place it near butterfly-friendly plants rather than directly beside outdoor dining areas. A feeder should support wildlife, not become the neighborhood’s busiest insect food court.
Make the Feeder Part of a Real Butterfly Garden
A feeder can be fun, but the most helpful thing you can do for butterflies is build habitat. Adult butterflies need nectar-rich flowers, while caterpillars depend on specific host plants. Monarch caterpillars, for example, need milkweed. Black swallowtail caterpillars often use parsley, dill, fennel, and related plants.
Choose plants that bloom from spring through fall so butterflies can find food throughout the season. Add flat stones where they can warm themselves in the sun, leave a small shallow muddy area for puddling, and keep some leaf litter or plant stems in quiet corners for shelter.
Most importantly, skip routine insecticide use. A garden cannot be truly butterfly-friendly if it offers a sugar feeder on one side and chemicals that harm caterpillars and pollinators on the other. Think of your yard as a tiny neighborhood: flowers are the grocery stores, host plants are the nurseries, shelter is the housing, and your Mason jar feeder is the cheerful café on the corner.
Frequently Asked Questions About DIY Butterfly Feeders
Can I use a plastic jar instead of a Mason jar?
You can, but glass Mason jars are sturdier, easier to wash, and less likely to fade or crack in sunlight. A small recycled glass jar with a metal lid also works well.
Can I use fruit instead of sugar water?
Yes. Some butterflies are attracted to soft, overripe fruit such as banana, orange, melon, or berries. Place fruit on a shallow dish rather than inside the Mason jar feeder, and replace it often before it becomes moldy or attracts unwanted pests.
Should I leave the feeder out all year?
Use it during warm periods when butterflies are active in your area. Remove, clean, and store it when temperatures drop or butterfly activity slows for the season.
Experience Notes: What Usually Happens After You Hang the Feeder
The first experience many people have with a DIY butterfly feeder is waiting. You hang the jar, step back proudly, and expect a monarch to arrive within thirty seconds wearing a tiny top hat. Usually, nothing happens right away. The garden continues doing garden things. A leaf moves. A bee passes by. The feeder looks adorable, but the butterflies have not yet received the grand opening announcement.
That is normal. Butterflies rely heavily on the bigger picture around them. A feeder near bare grass and a concrete patio may get little interest, while the same feeder beside zinnias, milkweed, and flowering herbs has a much better chance. The jar is not a magical butterfly magnet. It is more like a supporting actor in a pollinator-friendly landscape.
Once visitors do arrive, the most exciting part is how easy it becomes to notice small details. You may see a butterfly land with its wings partly open, pause, uncurl its proboscis, and feed from the damp sponge. You may also discover that different insects have very different personalities. Some butterflies seem cautious and flutter around the feeder several times before landing. Others show up, sip quickly, and leave as though they have an urgent appointment across the yard.
You may also learn that your feeder attracts more than butterflies. Bees, flies, and ants are curious creatures with excellent timing. This is not necessarily a failure. It is simply evidence that sugar water is popular. The trick is to keep the feeder clean, prevent dripping, and place it in a garden area rather than beside your picnic table. Nobody wants a butterfly project to become a surprise insect convention during lunch.
Another useful experience is learning how weather changes feeder activity. On bright, warm, calm days, butterflies are far more likely to visit than during rain, high wind, or chilly conditions. Morning sun can be especially helpful because butterflies often seek warmth before becoming more active. If the jar swings wildly in the breeze, relocate it to a more sheltered place near a fence, shrub, or garden structure.
The best long-term result is not simply seeing one butterfly drink from the sponge. It is noticing that your garden feels more alive. When you add flowers, host plants, shallow water, sunny rocks, and a clean feeder, you create reasons for butterflies to visit, rest, feed, and possibly reproduce nearby. The Mason jar becomes a conversation starter, a small science lesson, and a cheerful reminder that wildlife support does not always require a giant yard or a giant budget.
Conclusion
Making a DIY butterfly feeder out of a Mason jar is a simple project with a big personality. In six easy steps, you can turn an ordinary jar into a reusable garden feature that helps you observe butterflies while adding a handmade touch to your outdoor space.
Keep the feeder clean, use fresh sugar water, hang it in a sunny and sheltered location, and surround it with real butterfly habitat. Your backyard may not become a butterfly ballroom overnight, but with patience, flowers, and a little Mason jar magic, it can become a much more welcoming place for wings.