
There are two kinds of people in this world: people who see a cute wooden riser in a home décor store and toss it into the cart, and people who flip the price tag over, gasp dramatically, and whisper, “I could make that.” If you are proudly in the second group, welcome. Your craft table is about to become a tiny furniture factorywithout a saw, drill, sander, garage, or mysterious uncle named Gary who owns every tool known to mankind.
DIY wood risers are one of the easiest low-cost home décor projects you can make. They add height, texture, warmth, and that “I casually live inside a magazine spread” feeling to kitchen counters, coffee tables, bathroom vanities, shelves, mantels, and seasonal displays. The best part? A beautiful no-tools wood riser can be made with craft wood, wood rounds, small blocks, pre-cut boards, wooden beads, glue, paint, stain, wax, and a little patience. No power tools required. No woodworking degree. No sawdust tornado.
This guide walks you through how to make budget-friendly DIY wood risers using simple materials, clever shortcuts, and beginner-friendly finishing techniques. Whether you want a farmhouse riser for your kitchen sink, a rustic display stand for candles, a small wooden pedestal for plants, or a cute decorative tray riser for seasonal styling, this project gives you big design payoff for very little money.
What Is a DIY Wood Riser?
A wood riser is a small raised platform used to lift, organize, or display items. Think of it as a tiny stage for your décor. A candle looks nice on a table. A candle on a wood riser suddenly looks intentional, curated, and possibly like it belongs in a cozy lifestyle photoshoot involving linen napkins and a mug of something cinnamon-adjacent.
Wood risers are popular because they solve a simple design problem: flat surfaces can look boring when everything sits at the same level. Adding height creates layers. Layers create interest. Interest makes a room feel styled instead of randomly assembled during a caffeine-powered cleaning spree.
Common Uses for Wood Risers
You can use a DIY wood riser almost anywhere in the home. In the kitchen, it can lift soap dispensers, spice jars, oil bottles, small plants, or a coffee station setup. In the bathroom, it can hold hand soap, lotion, rolled washcloths, perfume bottles, or a candle. On a coffee table, it can anchor a vase, books, beads, and seasonal objects. On a dining table, it can become a centerpiece base. On a shelf, it can raise smaller items so they do not visually disappear behind larger pieces.
Wood risers are also helpful for small-space decorating because they add vertical dimension without requiring more surface area. Translation: your countertop gets personality without becoming a clutter convention.
Why Make a Low-Cost No-Tools Wood Riser?
Store-bought wood risers are charming, but they can be surprisingly expensive for what is essentially a small board with feet. That is not an insult; that is geometry wearing a cute hat. When you make your own, you control the size, color, finish, shape, and style. You also avoid paying premium prices for something you can create in less than an afternoon.
A no-tools approach is especially useful for renters, beginners, apartment dwellers, college students, and anyone who does not want to buy equipment for one small project. Instead of cutting lumber yourself, you can use pre-cut craft wood, wood plaques, wood rounds, small cutting boards, unfinished trays, scrap blocks, wood candle cups, toy blocks, drawer knobs, beads, or even chunky wood rings as riser feet.
Budget Benefits
Depending on what you already own, a DIY wood riser can cost just a few dollars. Craft stores, dollar stores, hardware stores, thrift shops, and even your own junk drawer can provide most of the supplies. A small wood plaque plus four wooden beads can become a charming riser. A thrifted cutting board and four craft blocks can become a farmhouse-style stand. A plain wood round can become a modern pedestal with a little paint and glue.
The secret is to shop by shape, not by label. A “wooden craft plaque” may be cheaper than a “decorative riser top.” Wooden candle cups may be cheaper than furniture feet. A small unfinished tray may need only feet and paint. When you stop looking for the exact item and start looking for the right components, the project gets much more affordable.
Materials You Can Use for a No-Tools DIY Wood Riser
The beauty of this project is flexibility. You can make it rustic, modern, cottage-style, farmhouse, boho, coastal, vintage, minimalist, or “I had ten minutes and a glue bottle.” All are valid.
For the Riser Top
Choose one flat piece for the top of your riser. Good options include a pre-cut wood plaque, small wood round, rectangular craft board, unfinished cutting board, small wood tray, scrap board with safe edges, thick plywood square, wood slice, or bamboo board. Make sure the top is flat enough to hold décor safely and thick enough to support the feet underneath.
If the wood feels rough, use a sanding sponge or sandpaper. A sanding sponge is not technically a power tool, and it will not judge you if your arms get tired after thirty seconds. Smooth the edges and top lightly, always moving with the grain when possible. This helps paint, stain, or wax go on more evenly.
For the Feet
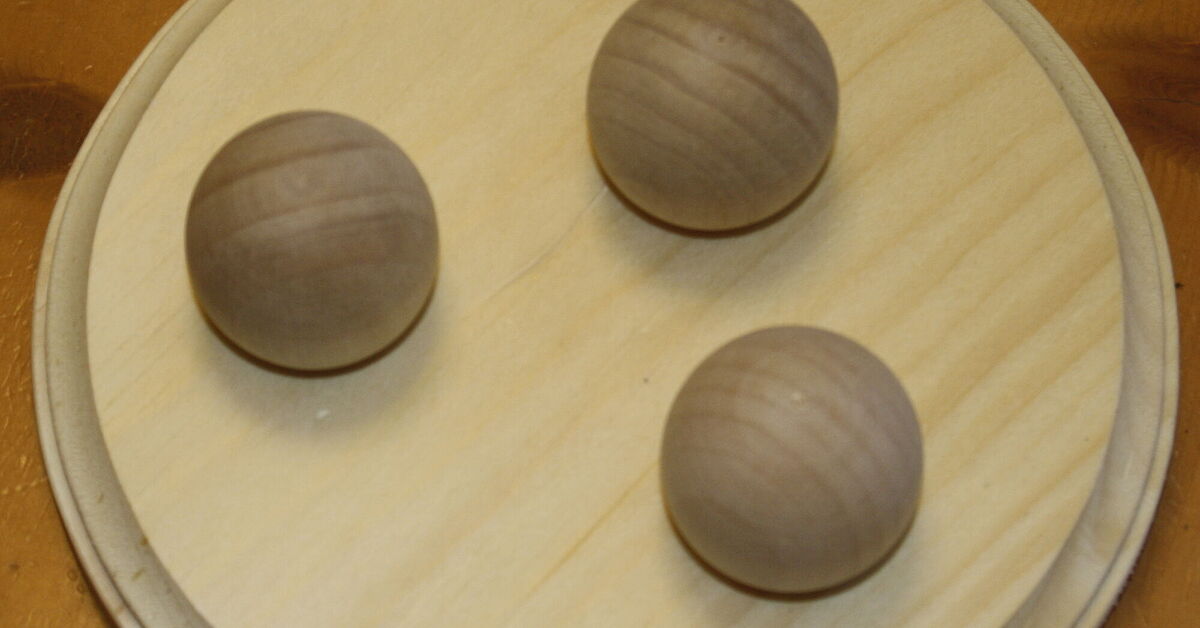
Riser feet can be made from small wood blocks, square craft cubes, wooden beads, split wood balls, chunky drawer knobs, wood candle cups, mini wooden spools, short dowel caps, or small pieces from dollar-store craft kits. Four feet work well for most square or rectangular risers. Three feet can work on round risers and often prevent wobbling if the surface is slightly uneven.
For a chunkier farmhouse look, use square blocks or candle cups. For a soft cottage look, use rounded beads or bun feet. For a clean modern look, use simple wood cubes painted the same color as the top. For a rustic look, use uneven wood slices or stained blocks.
Adhesive Options
Wood glue is the most reliable choice for wood-to-wood contact. It creates a strong bond when the surfaces fit together well and have time to dry. A strong craft glue can also work for lightweight decorative risers. Hot glue is fast, but it is better for temporary or very lightweight displays because it may not hold up well under heat, weight, or long-term use.
If you use wood glue, apply a small, even amount to each foot. Too much glue can slide around like a toddler in socks on a hardwood floor. Press the feet into place, wipe away squeeze-out with a damp cloth, and let the riser dry according to the glue label. If you do not own clamps, stack a few heavy books on top while it dries. Choose books you do not mind possibly decorating with a tiny glue fingerprint. Ask me how I know.
How to Make a Low Cost No-Tools DIY Wood Riser
This simple method works for most decorative wood risers. It requires no cutting, drilling, nailing, or power sanding. The finished piece is ideal for decorative use on counters, shelves, tables, and vanities.
Step 1: Choose Your Riser Top
Pick a pre-cut wood piece in the shape you like. For a kitchen riser, a rectangular board or mini cutting board looks practical and stylish. For a candle display, a round wood plaque feels balanced. For a bathroom tray, a small unfinished wood tray is useful because the raised edges help keep bottles from tipping.
Before moving forward, test your layout. Place the items you plan to display on the board. If everything fits with a little breathing room, you have the right size. If the soap bottle hangs off the edge like it is contemplating a dramatic exit, go bigger.
Step 2: Lightly Sand Rough Spots
Even pre-cut craft wood can have rough edges. Use fine sandpaper or a sanding sponge to smooth the top, sides, corners, and feet. You do not need to sand aggressively. The goal is to remove splinters and create a smoother finish for paint or stain.
If you plan to stain the riser, sanding matters more because stain can highlight scratches, glue spots, and uneven grain. If you plan to paint it, sanding is still helpful, but paint is more forgiving. Paint is basically the concealer of the DIY world.
Step 3: Mark the Foot Placement
Turn the top piece upside down. Place the feet where you want them before adding glue. For a rectangular riser, set the feet near the corners but not too close to the edge. A half-inch to one inch inward usually looks balanced. For a round riser, try three evenly spaced feet in a triangle shape or four feet in a square layout.
Use a pencil to mark the spots. This small step prevents the classic craft disaster where one foot ends up drifting sideways and your riser looks like it recently survived a minor earthquake.
Step 4: Glue the Feet
Add wood glue or strong craft glue to the top of each foot. Press each foot firmly into place. Wipe away excess glue right away. If the feet are small or rounded, hold them for a moment until they stop sliding. Then place the riser upside down on a flat surface while it dries.
To add gentle pressure without clamps, place wax paper or parchment paper over the feet and set a heavy book or small box on top. Let the glue cure fully. Dry-to-touch is not the same as fully cured. This is not the moment to test gravity with your favorite ceramic vase.
Step 5: Paint, Stain, or Wax
Once the glue is dry, finish the riser. For a natural look, use a wood stain or tinted wax. For a farmhouse style, paint it white, black, sage green, cream, or warm gray, then lightly distress the edges. For a modern style, use matte black, natural wood, or a clean neutral. For a vintage look, layer paint colors and sand lightly in spots so the base color peeks through.
If using stain, apply it with a cloth or brush, wipe away excess, and let it dry. If using paint, apply thin coats rather than one thick coat. Thick paint can look gloopy, which is a technical design term meaning “oops.” For extra protection, especially in a kitchen or bathroom, add a clear topcoat after the color dries.
Design Ideas for DIY Wood Risers
Once you understand the basic method, you can customize endlessly. The riser can be simple and understated, or it can become the main character of your vignette.
Farmhouse Wood Riser
Use a rectangular wood plaque, four chunky block feet, dark walnut stain, and a dry-brushed white paint finish. Lightly sand the edges after painting for a worn look. Style it with a small crock, faux greenery, a candle, and wood beads.
Modern Minimalist Riser
Use a round wood disc with three simple cube feet. Paint everything matte black or leave the top natural and paint only the feet. Style it with a white vase, a sculptural candle, or a small plant. Keep the display simple so the shape stands out.
Cottage-Style Riser
Choose a small oval plaque or scalloped-edge craft board. Add rounded bead feet and paint the whole piece soft cream, pale blue, sage, or dusty rose. Add tiny hand-painted details along the edge, such as dots, checks, stripes, or little floral accents.
Kitchen Sink Riser
Use a small tray or cutting board as the top. Add sturdy feet and seal the finish well. Place dish soap, hand soap, a scrub brush, and a mini plant on top. This keeps the sink area organized and makes everyday items look less like clutter and more like décor with a job.
Seasonal Display Riser
Make a neutral riser you can use all year. In spring, style it with faux tulips and pastel eggs. In summer, add lemons and greenery. In fall, use mini pumpkins and amber glass. In winter, add bottlebrush trees, bells, pinecones, or candles. One riser, four seasons, zero storage guilt.
Safety and Practical Tips
A DIY wood riser is usually meant for decorative use, not heavy-duty lifting. Do not use a glued craft riser as a step stool, appliance stand, plant stand for a giant ceramic pot, or support for anything fragile and expensive unless you built it for that purpose with stronger joinery.
Keep the riser stable by choosing feet of equal height. Test it on a flat surface before styling. If it wobbles, add small felt pads underneath one or more feet. Felt pads also protect tables and countertops from scratches. For bathroom and kitchen use, seal the wood to help resist moisture. Wood and standing water are not best friends; they are polite neighbors at best.
Also remember that stain, paint, wax, and topcoat need proper ventilation. Work in a well-ventilated area and follow product directions. If the riser will be near food, do not place unwrapped food directly on a painted or stained surface unless the finish is labeled food-safe. Use a plate, napkin, or liner instead.
Cost-Saving Tips for Beginners
Start by checking what you already own. Old cutting boards, scrap wood, thrifted trays, leftover paint, unused drawer knobs, wood beads, and craft scraps can all become riser materials. Next, browse discount bins at craft stores. Unfinished wood pieces are often seasonal, and seasonal shapes go on sale quickly. A heart-shaped plaque after Valentine’s Day or a round ornament blank after Christmas may become a beautiful riser top with a little imagination.
Buy small containers of paint or stain if you only need enough for one project. Sample paint pots, acrylic craft paint, stain pens, and small wax tins can be more budget-friendly than full-size cans. For a rustic look, you can even use watered-down brown paint as a faux stain. It will not behave exactly like real stain, but it can give raw wood a warm aged tone.
Another smart trick is to make risers in sets. If you already have glue, paint, and sandpaper out, make two or three risers in different sizes. A small, medium, and large riser can be used together for layered displays or separated throughout the house. This makes your supplies go further and gives your décor a more collected look.
Common Mistakes to Avoid
The first mistake is using too much glue. More glue does not always mean more strength. It often means sliding pieces, long drying time, and visible residue that resists stain. Use enough to cover the contact area, but wipe away the excess immediately.
The second mistake is painting before the glue cures. If the feet shift while the paint is wet, you may end up with crooked legs and colorful fingerprints. Let the glue dry first, then decorate.
The third mistake is ignoring balance. A riser with tiny feet placed too close together may tip when décor is added. Spread the feet outward enough to support the top. If you plan to display taller items, use a wider base.
The fourth mistake is skipping the finish in wet areas. A raw wood riser near a sink may stain or warp over time. A clear protective coat helps the piece last longer and makes it easier to wipe clean.
How to Style Your DIY Wood Riser Like a Pro
Styling a wood riser is simple when you use the rule of three: combine one tall item, one medium item, and one small item. For example, use a small vase, a candle, and a bead garland. Or try a soap dispenser, a scrub brush, and a tiny plant. The mix of heights makes the display feel natural.
Texture also matters. Wood pairs beautifully with ceramic, glass, metal, linen, greenery, stone, and woven materials. If your riser is rustic, add something smooth like glass or ceramic. If your riser is sleek and modern, add a plant or textured candle to soften it.
Leave some empty space. A riser does not need to hold every tiny object that ever wandered into your home. Negative space helps the arrangement breathe. Think of it as giving your décor a little personal space, which honestly, we all need.
of Real-Life Experience: What Making DIY Wood Risers Teaches You
The first thing you learn when making low-cost, no-tools DIY wood risers is that simple projects are often the most satisfying. There is something wonderfully rewarding about taking a plain wood circle, four little blocks, and a bottle of glue and turning them into something that looks like it came from a boutique. It feels a bit like cheating, but in the best possible way.
One of the biggest experiences beginners have with this project is realizing that perfection is not required. A tiny uneven edge, a slightly darker patch of stain, or a paint brush mark does not ruin the riser. In fact, those small details often make it look handmade in a warm, charming way. The goal is not factory-level precision. The goal is a useful, attractive piece that adds personality to your home.
Another lesson is that drying time matters more than enthusiasm. Many DIYers, especially excited ones, want to flip the riser over, style it, photograph it, and declare victory within fifteen minutes. Unfortunately, glue has its own schedule. If you move the riser too soon, the feet can shift, leaving you with a wobbly little creature instead of a stylish display stand. Waiting overnight may feel dramatic, but it often produces a stronger result.
You also learn quickly that the finish changes everything. Raw craft wood can look plain at first, but paint, stain, wax, or even a light whitewash can completely transform it. A dark stain makes a riser feel rustic and rich. White paint makes it farmhouse-friendly. Black paint makes it modern. Sage green or muted blue gives it cottage charm. The same base shape can become five different styles depending on the finish.
Experience also teaches you to think practically. A bathroom riser needs a sealed finish because water splashes happen. A kitchen sink riser should be easy to wipe. A coffee table riser can be more decorative because it will not face soap drips, toothpaste splatter, or the mysterious sticky spot that appears near the sink even when nobody admits responsibility.
One surprisingly useful discovery is how much better everyday items look when grouped on a riser. Dish soap suddenly looks intentional. A candle and plant look cozy instead of random. Perfume bottles look elegant. Even a small jar of cotton swabs can look fancy enough to make you wonder whether your bathroom has been underachieving this whole time.
The project also builds confidence. Many people avoid DIY because they assume it requires tools, measurements, noise, and a level of bravery usually reserved for assembling complicated furniture. A no-tools wood riser proves that home projects can be approachable. You can start small, make something useful, and learn basic concepts like balance, adhesion, sanding, sealing, and styling without feeling overwhelmed.
Finally, making your own riser changes how you shop. Instead of seeing a plain wood plaque, you see a future centerpiece. Instead of passing by wooden beads, you see feet. Instead of ignoring a thrifted tray, you imagine it raised, painted, and styled with greenery. That is the real magic of DIY: it trains your eye to see potential. And once that happens, no clearance bin is safe.
Conclusion
Low cost no-tools DIY wood risers are proof that beautiful home décor does not have to be expensive, complicated, or powered by a garage full of equipment. With a pre-cut wood top, simple feet, good glue, a little sanding, and your favorite finish, you can create a custom riser that adds height, warmth, and style to almost any room.
Whether you use it beside the kitchen sink, on a bathroom vanity, in a coffee table display, or as part of a seasonal centerpiece, a handmade wood riser brings charm and function together in one tiny raised platform. It is beginner-friendly, budget-friendly, renter-friendly, and delightfully customizable. Best of all, every time someone asks where you bought it, you get to smile casually and say, “Oh, I made that.” Try not to look too powerful.