
Building a compost pile is one of the easiest ways to turn kitchen scraps, yard waste, and “why is there so much cardboard in my life?” into rich, crumbly, garden-loving compost. It is recycling with a shovel, science with leaves, and a quiet little rebellion against sending perfectly useful organic material to the landfill.
The good news: you do not need a farm, a chemistry degree, or a suspiciously expensive gadget shaped like a spaceship. A simple backyard compost pile can work beautifully when you understand four basic ingredients: browns, greens, air, and water. The microbes do most of the work. You are mainly their snack manager.
This guide explains how to build a compost pile in 14 practical steps, including what to add, what to avoid, how to layer materials, how often to turn the pile, and how to know when your compost is finished. Whether you want better garden soil, fewer trash bags, or a reason to feel smug while peeling carrots, composting is a smart place to start.
What Is a Compost Pile?
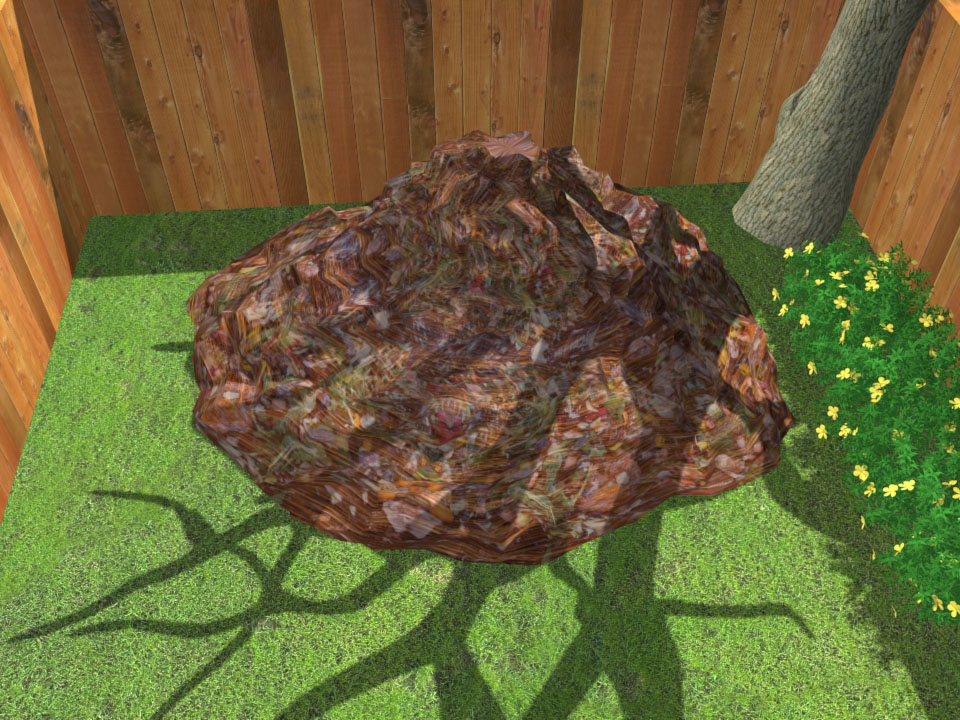
A compost pile is a controlled heap of organic materials that break down into compost, a dark, earthy soil amendment. Compost improves soil structure, helps sandy soil hold water, helps clay soil drain better, and feeds the living ecosystem beneath your plants. Think of it as a spa treatment for tired dirt.
In a healthy compost pile, microorganisms such as bacteria and fungi break down plant materials. Larger creatures like worms, beetles, sowbugs, and other decomposers may join later, especially as the pile cools. When the process goes well, the pile smells earthy, not rotten, and gradually shrinks into a rich, crumbly material gardeners lovingly call “black gold.” Gardeners are dramatic, but in this case, they have a point.
How to Build a Compost Pile: 14 Steps
1. Choose the Right Location
Pick a spot that is convenient but not in the way. A good compost area is close enough to your kitchen or garden that you will actually use it, but not so close to your patio that guests ask, “Is that part of the landscaping?”
Choose a level area with decent drainage. Partial shade is helpful because it keeps the pile from drying out too quickly in hot weather, while still allowing enough warmth for decomposition. Avoid placing the pile directly against wooden fences, sheds, or house siding, since moisture can cause problems over time.
2. Decide Whether You Want an Open Pile or a Bin
You can compost in a simple open pile, a homemade bin, a wire enclosure, a wooden three-bin system, or a purchased compost bin. An open pile is easy and cheap, but it may look a little wild. A bin keeps things neater, helps contain materials, and can make your yard look less like raccoons are running a farmers market.
If you have a small yard, a bin is usually the better choice. If you have more space and lots of leaves, an open pile can work perfectly well. The compost does not care whether it lives in a designer bin or a humble heap. Microbes are not judging your curb appeal.
3. Aim for the Right Size
For fast composting, size matters. A pile around 3 feet wide, 3 feet deep, and 3 feet tall is often considered a practical minimum for a hot compost pile. This size helps the center hold heat while still allowing air to move through the pile.
A pile that is too small may decompose slowly because it cannot hold heat. A pile that is too large can become compacted, heavy, and short on oxygen. If your compost pile is the size of a small haystack, congratulations on your enthusiasmbut you may need to divide it into sections.
4. Gather Brown Materials
Brown materials are carbon-rich ingredients. They give microbes energy, create structure, and absorb excess moisture. Common browns include dry leaves, straw, shredded cardboard, small twigs, wood chips, sawdust from untreated wood, shredded newspaper, paper towel rolls, and dry plant stalks.
The best browns are chopped, shredded, or broken into smaller pieces. A whole cardboard box will eventually decompose, but it may take a long time and spend several months looking like it is trying to become a fossil. Shred cardboard, crunch dry leaves, and cut woody stems into shorter pieces when possible.
5. Gather Green Materials
Green materials are nitrogen-rich ingredients that help microbes grow and reproduce. Examples include fruit and vegetable scraps, coffee grounds, tea leaves, fresh grass clippings, fresh plant trimmings, spent flowers, and young weeds without seed heads.
Greens are powerful. Too few greens and your pile may sit there like a lazy leaf mattress. Too many greens and the pile can become wet, slimy, and smelly. Balance is the whole game. Composting is not picky, but it does appreciate manners.
6. Know What Not to Compost
For a backyard compost pile, avoid meat, fish, bones, dairy products, oils, grease, pet waste from cats or dogs, diseased plants, glossy paper, plastic-coated cardboard, treated wood, and weeds loaded with mature seeds. These materials can attract pests, create odor, spread disease, or introduce unwanted chemicals.
Eggshells can be composted, but crush them first so they break down more easily. Citrus peels and onion scraps are acceptable in moderate amounts, but do not add huge piles of them at once. Your compost pile should not smell like a salad bar that lost a legal battle.
7. Start with a Coarse Bottom Layer
Begin your pile with a base layer of coarse brown material such as small sticks, twigs, straw, or dry plant stems. This layer helps air enter from the bottom and improves drainage. It also prevents the pile from becoming a soggy pancake, which is bad for compost and breakfast alike.
Keep the base loose rather than packed down. Compost needs oxygen because the most efficient decomposers are aerobic organisms. When oxygen disappears, anaerobic conditions can take over, often producing unpleasant odors. In plain English: air keeps the pile from becoming a stink factory.
8. Add Browns and Greens in Layers
After the base layer, alternate browns and greens. A useful backyard rule is to add about two to three parts brown materials for every one part green material by volume. This does not have to be exact. Composting is more like cooking soup than baking a wedding cake.
For example, add a layer of dry leaves, then a thinner layer of fruit and vegetable scraps, then more dry leaves or shredded cardboard. Cover fresh food scraps with browns each time you add them. This simple habit helps reduce flies, odors, and unwanted animal visitors.
9. Moisten the Pile as You Build
Compost needs moisture, but not a swimming pool. The ideal pile feels like a wrung-out sponge: damp throughout, but not dripping. If you squeeze a handful and only a drop or two comes out, you are in the right neighborhood.
If the pile is too dry, decomposition slows down because microbes need water to function. If it is too wet, air spaces fill with water and the pile may smell sour or rotten. Add water as you build dry layers, especially during hot or windy weather. If rain is turning your pile into compost soup, cover it loosely with a tarp while still allowing airflow.
10. Mix or Turn the Pile
Turning a compost pile adds oxygen, redistributes moisture, and moves outer materials toward the warmer center. Use a garden fork, shovel, or compost aerator. For faster compost, turn the pile every one to two weeks. For slower compost, turn it whenever you remember and feel noble.
You do not have to turn a compost pile constantly. A slow pile will still break down over time, especially if it has a decent balance of materials. Turning simply speeds the process. If your pile is cold, compacted, or smelly, turning is often the first fix.
11. Watch the Temperature
A hot compost pile may warm noticeably in the center. In active piles, temperatures can climb high enough to speed decomposition and help reduce some weed seeds and plant pathogens. A compost thermometer is useful but not required. You can also carefully open the center of the pile and feel whether it is warm.
If the pile does not heat up, it may be too small, too dry, too low in nitrogen, or short on oxygen. Add more greens, moisten dry areas, increase pile size, or turn the material to bring in air. If the pile smells bad, add more browns and turn it. Compost troubleshooting is mostly detective work, except the suspects are banana peels.
12. Keep Adding Materials Correctly
As you collect kitchen scraps, bury them in the center of the pile and cover them with browns. This helps them break down faster and keeps pests away. Avoid tossing food scraps on top like decorative confetti. Flies love that. Your neighbors may not.
Keep a small container of dry leaves, shredded cardboard, or straw near the compost area. Every time you add greens, toss in a handful or two of browns. This one habit solves many beginner compost problems before they begin.
13. Let the Compost Cure
Eventually, the pile will shrink, cool, and become darker. When most materials are no longer recognizable, stop adding fresh scraps and let the compost cure. Curing allows the remaining decomposition to finish and makes the compost more stable for garden use.
If you keep adding fresh scraps forever, you will always have a pile that is partly finished and partly full of yesterday’s potato peels. Many gardeners use two piles or bins: one active pile for new materials and one curing pile for nearly finished compost.
14. Harvest and Use Finished Compost
Finished compost is dark brown, crumbly, and earthy-smelling. It should not smell rotten, sour, or like mystery leftovers. Some small bits of wood or eggshell may remain; you can screen them out and toss them back into the next pile.
Use finished compost as a soil amendment in vegetable gardens, flower beds, raised beds, and around trees and shrubs. Mix it into garden soil before planting, spread it as a thin topdressing, or add it to potting mixes in modest amounts. Compost improves soil, but it is not usually a complete fertilizer, so heavy-feeding plants may still need additional nutrients.
Best Materials for a Compost Pile
Brown Materials
- Dry leaves
- Straw or hay without weed seeds
- Shredded cardboard
- Non-glossy newspaper
- Small twigs and chipped branches
- Untreated sawdust in small amounts
- Dry plant stems
Green Materials
- Fruit and vegetable scraps
- Coffee grounds and paper filters
- Tea leaves and tea bags without plastic mesh
- Fresh grass clippings
- Fresh garden trimmings
- Spent flowers
- Young weeds before they go to seed
Common Compost Pile Problems and Easy Fixes
The Pile Smells Bad
A smelly compost pile is usually too wet, too compacted, or too heavy on greens. Add dry browns such as leaves, straw, or shredded cardboard. Then turn the pile to add oxygen. The smell should improve quickly.
The Pile Is Too Dry
If your pile looks dusty and decomposition has slowed, water it gradually while turning. Dry browns can shed water at first, so mix as you moisten. Aim for damp, not drenched.
The Pile Is Not Breaking Down
Slow compost may need more nitrogen, moisture, or air. Add fresh greens, water the pile if dry, and turn it. Also check particle size. Large branches, whole leaves, and big cardboard pieces take longer to break down.
The Pile Attracts Pests
Do not add meat, dairy, grease, or oily foods. Bury fruit and vegetable scraps in the center and cover them with browns. A secure bin can also help if wildlife is a regular problem in your area.
Hot Composting vs. Cold Composting
Hot composting is faster and requires more attention. You build a pile with enough volume, balance browns and greens carefully, keep moisture right, and turn regularly. When managed well, hot compost can finish in a few months.
Cold composting is slower and easier. You add materials as they become available and let time do the work. It may take six months to a year or more, depending on weather, materials, pile size, and turning frequency. Cold composting is perfect for people who want compost but do not want their weekend schedule controlled by decomposing lettuce.
Seasonal Tips for Building a Compost Pile
Spring
Spring is a great time to start a pile because yard cleanup provides plenty of browns and greens. Mix old leaves with fresh grass clippings, garden trimmings, and kitchen scraps. Watch moisture as temperatures rise.
Summer
Summer compost piles can dry out quickly. Check moisture often and add water when turning. Cover food scraps with browns to discourage flies. Grass clippings are useful, but add them in thin layers so they do not mat together.
Fall
Fall leaves are composting treasure. Save extra dry leaves in bags or a separate pile so you have browns available all year. Shredded leaves break down faster and are easier to mix with kitchen scraps.
Winter
Composting slows in cold weather, but it does not have to stop completely. Keep adding kitchen scraps and cover them with browns. The pile may wake up again when temperatures rise. Compost is patient. It has no calendar app.
Practical Experiences: What Building a Compost Pile Teaches You
The first thing most beginners learn is that composting is forgiving. You may start with a perfect plan, a tidy bin, and a heroic belief that every layer will be measured like a science fair project. Then real life happens. Someone dumps a bowl of watermelon rinds on top. The grass clippings arrive all at once. The cardboard pile grows faster than your motivation. And somehow, with a few adjustments, the compost still works.
One useful experience is learning to keep browns nearby. Many new composters have plenty of greens from kitchen scraps but not enough dry carbon material to balance them. The result can be a wet pile that smells less like a forest floor and more like regret. A simple fix is to store a bag of dry leaves, shredded paper, or torn cardboard beside the pile. Every time you add food scraps, add browns. This tiny routine makes the whole system easier.
Another lesson is that smaller pieces really do matter. Whole leaves can form mats. Long stems can stay visible for months. Big chunks of cardboard may sit in the pile looking proud of themselves. Chopping, shredding, or crushing materials gives microbes more surface area to work on. You do not need perfection, but breaking materials down before adding them can noticeably speed the process.
Moisture is also something you learn by feel. At first, “wrung-out sponge” may sound vague. After a few weeks, it becomes obvious. A dry pile looks dusty and inactive. A soggy pile feels heavy and smells stale. A healthy pile feels damp, loose, and alive. Once you understand that texture, compost maintenance becomes much easier.
Turning the pile teaches patience and timing. If you turn too often, you may disturb the heating process. If you never turn, the pile may still compost, but more slowly. A good rhythm is to turn when the pile cools, smells off, looks compacted, or needs mixing. Some gardeners turn weekly; others turn monthly. Both can succeed. The compost pile is not looking for a personal trainer, just occasional help.
You also learn that composting changes how you see “waste.” Vegetable peels become future tomatoes. Leaves become soil structure. Coffee grounds become microbial breakfast. Cardboard becomes carbon. Once you build a compost pile, it becomes harder to throw organic material away without thinking, “Wait, could this be dirt later?” That is when you know composting has entered your personality.
Finally, building a compost pile teaches you to observe. A good composter notices smell, moisture, heat, insects, texture, and time. The pile gives clues. Sour smell? Add browns and air. Too dry? Add water. Not heating? Add greens or build more volume. Still chunky? Give it more time. Composting is not magic, but it often feels magical because the transformation is so complete: scraps go in, soil-like goodness comes out, and your garden quietly applauds.
Conclusion
Learning how to build a compost pile is simple once you understand the basic formula: mix browns and greens, keep the pile damp but not soggy, let air in, and give microbes time to work. You can manage an active hot pile for faster results or take the slower cold-composting route. Either way, you are turning everyday organic material into something useful, healthy, and wonderfully earthy.
Start with a practical location, collect the right materials, avoid the wrong ones, and keep a stash of browns nearby. With a little attention, your compost pile will become one of the most productive corners of your yard. It may not look glamorous, but neither does cookie dough before it becomes cookies. Trust the process.