
If your living room has a fireplace, congratulations: you already own the star of the room. If that star currently looks like it has been trapped in 1997 under a layer of soot, brass, and questionable tile choices, even better. A DIY fireplace makeover is one of the smartest ways to refresh a room without tearing down walls or selling a kidney to pay a contractor.
The best part is that a beautiful fireplace update does not always require a full renovation. Sometimes it is paint. Sometimes it is tile. Sometimes it is a chunky new mantel that suddenly makes the whole space look custom. And sometimes it is just finally removing the decor choices that made your hearth look like a seasonal clearance aisle. Whatever route you choose, the goal is the same: turn an outdated focal point into one that feels intentional, stylish, and safe.
This guide walks through what actually works, what tends to go wrong, and how to create a DIY fireplace makeover update that looks polished, lasts longer, and still feels like home.
Why a Fireplace Makeover Makes Such a Big Impact
A fireplace naturally pulls the eye. It anchors furniture, frames artwork, and sets the tone for the whole room. So when the surround is dark, chipped, overly ornate, or simply tired, the entire room can feel older than it is. On the flip side, a refreshed fireplace surround can make the space feel brighter, cleaner, and far more expensive than it actually was.
This is why even modest updates can work so well. Paint can lighten heavy brick. Whitewash can soften an orange-red tone without erasing all of the original character. New tile can replace a busy border with something cleaner and more current. A wood beam mantel can add warmth and balance. Done together, these moves create the kind of before-and-after transformation that makes people say, “Wait, is this the same room?”
Start with the Unsexy Stuff First
Every gorgeous fireplace makeover begins with a deeply unglamorous phase: inspection, cleaning, and prep. Not thrilling, but neither is watching fresh paint peel because soot and dust were still hanging out on the brick like unwanted party guests.
Figure Out Whether It Is Functional or Decorative
If your fireplace actually burns wood or gas, treat it with more respect than a decorative faux hearth. Working fireplaces need proper clearances, ventilation, and materials that can handle heat. Before you change the surround, paint near the opening, install a mantel, or update metal parts, check your fireplace manufacturer’s guidance and local code requirements. If there is any question about safety, a professional inspection is money well spent.
If the fireplace is nonworking, you get more creative freedom. You can style the firebox with stacked logs, candles, lanterns, books, or even plants. Suddenly the “dead” fireplace becomes an architectural feature instead of a weird dark hole in the wall.
Check the Surface Before You Buy Anything
Look closely at the brick, stone, tile, grout, mortar, hearth, and mantel. Are there cracks? Loose material? Crumbling mortar? Old paint that is flaking? A tile project needs a stable surface underneath. A paint job needs a clean, sound base. A makeover is not a magic trick. It cannot hide a substrate that is already giving up on life.
Respect the Age of the House
If you live in an older home, especially one built before 1978, do not casually sand, scrape, or demo painted surfaces without thinking about lead-safe practices. This matters even on projects that seem “small.” When in doubt, pause the makeover heroics and handle testing and prep the right way.
The Best DIY Fireplace Makeover Ideas That Actually Work
1. Paint the Brick for a Fast, Budget-Friendly Update
A painted brick fireplace remains popular for a reason: it is dramatic, affordable, and surprisingly beginner-friendly when done properly. White is classic because it brightens a room and plays nicely with almost any design style. Soft greige, warm gray, charcoal, and muted green are also strong choices if you want something a little less “farmhouse reboot” and a little more layered.
Painting works especially well when the original brick feels too orange, too dark, or too visually busy. It can also help older millwork and built-ins feel connected when they are painted in a related tone.
That said, painting brick is a commitment. Once you do it, going back to raw brick is not a cute weekend reversal. So test colors, look at them in morning and evening light, and decide whether you want full coverage or something softer.
2. Whitewash for a Lighter Touch
If you love the texture of brick but not the color, whitewashing can be a sweet middle ground. It mutes the tone while letting some of the natural variation show through. The final look is softer, more relaxed, and often more timeless than a solid painted finish.
This approach works beautifully in cottages, traditional homes, modern farmhouse spaces, and rooms that need warmth without visual heaviness. It also has the nice advantage of looking intentionally imperfect, which is wonderful news for anyone whose brushwork is more “enthusiastic” than “professional.”
3. Tile the Surround for a More Custom Look
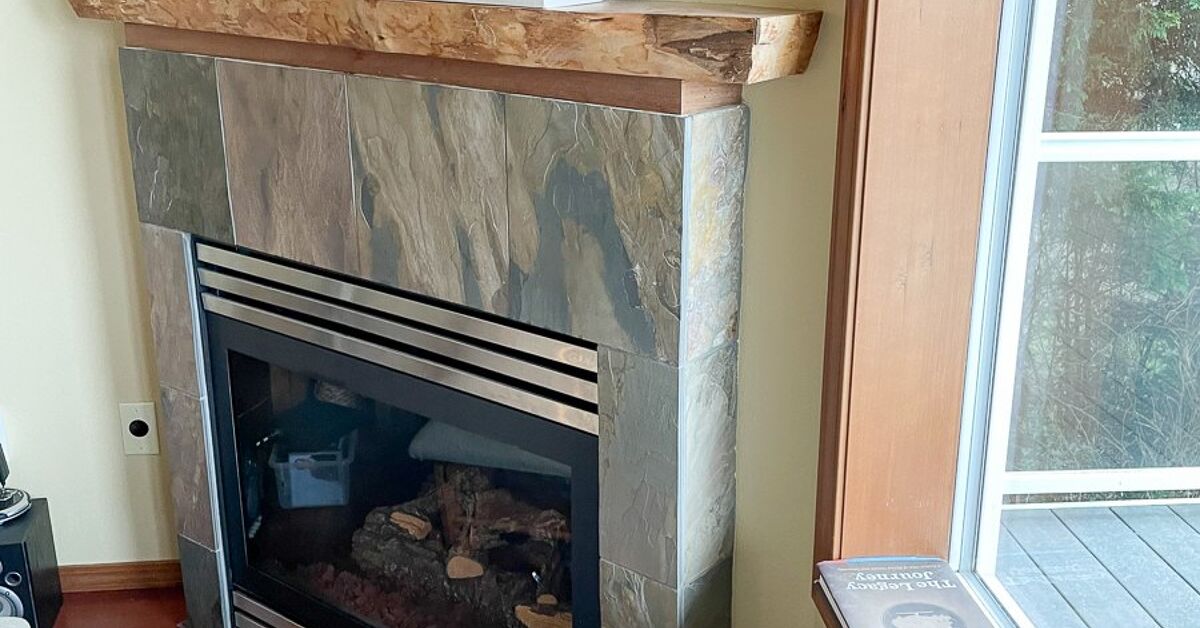
If the existing surround is dated but structurally sound, new tile can change everything. Subway tile is dependable. Zellige-inspired tile adds movement. Marble mosaics look refined. Matte black tile feels crisp and modern. Porcelain that mimics stone gives you a high-end look with less maintenance drama.
For a strong result, think about scale. Small, busy tile can feel cluttered on a small fireplace. Oversized tile can look stunning, but only if the proportions suit the room. Dry-layout planning matters here. So does making sure the surface beneath the tile is stable and properly prepared. New tile deserves better than being stuck onto peeling paint and wishful thinking.
4. Upgrade the Mantel
Sometimes the makeover magic is not in the brick at all. It is in the mantel. A chunky beam-style mantel can add warmth and structure. A clean-lined painted mantel can modernize a traditional firebox. An ornate vintage-inspired mantel can dress up a simple fireplace and make it feel more architectural.
The secret is choosing a mantel that fits the style of your room instead of fighting with it. Rustic wood with sleek minimal furniture can work if the contrast feels deliberate. A traditional mantel with formal stone or tile can look elegant. Randomly mixing styles because the shelf was on sale is where things get dicey.
5. Color-Drench the Whole Fireplace Wall
One of the most stylish trends in recent fireplace updates is to paint the fireplace, mantel, trim, and sometimes even the wall in the same color family. This creates a more integrated look and lets texture do the talking. It is dramatic without being fussy. It is also a clever way to make an awkward fireplace feel purposeful rather than visually disconnected.
Use this move when you want the fireplace to blend with the room in a sophisticated way instead of shouting, “Look at me, I am brick and I have opinions.”
How to Prep for a Fireplace Makeover the Right Way
Clean Like You Mean It
Brick and masonry hold dust, soot, and residue like it is their full-time job. Use a stiff brush, vacuum thoroughly, and clean according to the material. Let everything dry completely before priming or painting. Skipping proper cleaning is one of the fastest ways to sabotage a makeover.
Repair Before You Decorate
Patch small chips. Repoint damaged mortar if needed. Tighten anything loose. Replace broken tile. If the firebox, hearth, or surround has obvious wear, address it before moving forward. Decorative updates always look better on a surface that is actually sound.
Use the Right Paint in the Right Place
This is where many DIY projects go off the rails. The surround is not the same as the firebox. Brick is not the same as metal. A product that works for the outer face of the fireplace may be wrong for metal screens or areas exposed to much higher heat. In general, use products intended for the specific material and location, and do not assume one can of paint should handle every surface just because it has a dramatic label.
For most exterior brick surround projects, proper primer and quality topcoat are the heroes. For certain metal accessories, high-heat paint may make sense. For surfaces directly exposed to flame or extreme heat, follow manufacturer instructions instead of improvising with confidence and a podcast in the background.
Design Tips That Make a DIY Fireplace Look Professional
Keep the Palette Tight
The prettiest fireplace updates usually avoid too many competing finishes. Choose two or three key materials or colors and repeat them elsewhere in the room. If your fireplace has warm wood, bring that tone into frames, shelving, or furniture legs. If you use black tile or a black firebox, repeat black in lighting or hardware.
Let Texture Do the Heavy Lifting
Brick, stone, tile, wood, plaster, and metal already bring visual interest. That means your styling can be simpler. A fireplace does not need to wear every accessory it has ever met. A mirror, art, candlesticks, a few books, and maybe a plant are often enough.
Style the Hearth with Restraint
Yes, the mantel is fun. No, it does not need a tiny army of objects. Too much decor can make a newly updated fireplace look smaller and busier. Leave some breathing room. Let the makeover be visible.
Mistakes to Avoid During a DIY Fireplace Update
Mistake one: choosing paint before choosing a direction. Decide whether you want bright, moody, rustic, traditional, or modern before you buy anything.
Mistake two: forgetting heat and safety. Beauty is nice. Not setting your living room up for trouble is nicer.
Mistake three: tiling over unstable surfaces. If the base is compromised, the pretty tile will eventually tell on you.
Mistake four: making the fireplace trendier than the rest of the room. A makeover should elevate the space, not look like it wandered in from a different zip code.
Mistake five: rushing the finish. Masonry, primer, grout, paint, and sealers all need proper drying time. A patient DIYer is an attractive DIYer.
A Simple Budget Plan for a Beautiful Fireplace Makeover
If you want the most impact for the least money, start here:
Low-Cost Update
Deep clean the fireplace, paint the surround or whitewash the brick, repaint the mantel, and restyle with one larger piece of art and a few balanced accessories.
Mid-Range Update
Paint or whitewash the brick, add a new mantel, replace dated screen hardware, and update the hearth or surround with fresh tile.
Higher-End DIY-Lite Update
Reface the surround, add stone veneer or premium tile, integrate custom trim or built-ins, and finish with layered lighting and coordinated decor.
The smartest approach is usually phased. Do the safety and prep first. Then choose one major visual change, such as paint or tile. Then add the finish work. Trying to do every idea at once is how budgets explode and enthusiasm mysteriously vanishes by Sunday afternoon.
Final Thoughts on Creating a Beautiful DIY Fireplace Makeover Update
A beautiful DIY fireplace makeover update is not about copying the exact same white brick-and-beam combo you saw online eleven times before breakfast. It is about making your fireplace feel intentional, fresh, and connected to the way you actually live.
For some homes, that means keeping the brick texture and softening the color. For others, it means going bold with paint, adding clean tile, or finally replacing that mantel that has been doing absolutely nothing for the room since the Clinton administration. The winning makeover balances style with function, charm with restraint, and creativity with good prep.
Do that, and your fireplace will stop being the thing you apologize for and start being the thing everyone notices first.
Real-Life Experience: What a DIY Fireplace Makeover Actually Feels Like
There is a very specific emotional arc to a fireplace makeover, and it usually begins with confidence. You stand in front of the old hearth on a Friday night, coffee in hand, telling yourself this will be “a simple weekend refresh.” The fireplace looks a little dark, a little dated, maybe a little too orange. You imagine a couple coats of paint, a cute new mirror, and suddenly your living room turns into the kind of space people pin to mood boards. This is the optimism stage. Enjoy it. It is lovely.
Then Saturday arrives, and reality comes in wearing old clothes and carrying a shop vacuum. You start cleaning and realize the fireplace has apparently been storing a decade of soot, dust, and mystery grit in every crevice. The brick eats your first round of primer like it has not had a drink in years. The tape does not line up as neatly as it did in your head. At some point you sit cross-legged on the floor, stare at the mantel, and wonder why wood trim can have so many tiny corners. This is the humbling stage.
But then something magical happens. The first real coat goes on. The brick starts looking intentional instead of tired. The room gets brighter. The fireplace stops feeling like a leftover feature and starts acting like the centerpiece it always wanted to be. Even if the project is not finished yet, you can see the direction. That moment is what keeps DIY people coming back for more. It is equal parts progress, relief, and mild superiority over your former decorating choices.
The styling stage is where the project becomes personal. You try a mirror. Then art. Then both. You put a vase on the mantel, remove it, add candlesticks, remove one, step back, tilt your head, and make small adjustments like you are directing a very dramatic photo shoot for inanimate objects. This part is fun because the hard work is mostly done, and the room finally starts telling you what it wants. Some fireplaces want rustic wood and old books. Some want crisp black accents and clean lines. Some want a plant and a little peace and quiet.
The best part comes a few days later, when you walk into the room without thinking about the project and suddenly notice how different it feels. The fireplace no longer drags the room down. It anchors it. The sofa looks better next to it. The coffee table makes more sense. Even the lighting seems improved, though you technically did not touch the lighting. A good fireplace makeover has that effect. It quietly upgrades everything around it.
And yes, you will also remember the mess, the extra store run, and the moment you got paint on your sleeve. That is part of the charm. A DIY fireplace makeover is rarely perfect, but when it is done with care, the result feels warmer than something bought in a showroom. It looks updated, but it also carries the memory of making it yourself. That is what turns a home project into a real update: not just a prettier fireplace, but a space that feels more like yours.
SEO Tags