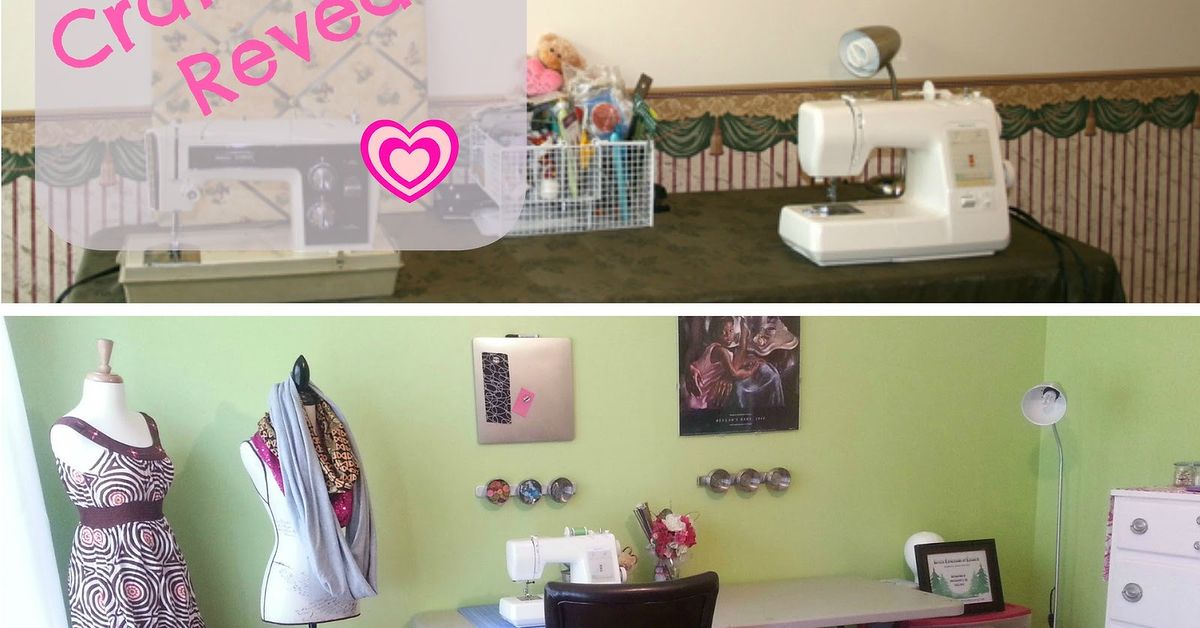

Your living room had a good run. It hosted movie nights, holiday visitors, and at least one mysterious pile of laundry that claimed to be “in progress.” But perhaps it is time for that underused room to become something more personal: a cheerful, hardworking craft room where paper scraps, paint brushes, fabric, and big ideas can finally stop living in random closets.
A craft room makeover does not require a television-show budget, a degree in interior design, or the ability to organize glitter without becoming emotionally attached to it. The goal is simpler: create a space that supports the way you actually make things. Whether you sew quilts, paint miniatures, scrapbook, make jewelry, cut vinyl, knit, or rotate through hobbies like a creative buffet, converting a living room into a craft room can give your supplies a proper home and make it easier to start projects instead of hunting for scissors.
This guide walks through how to transform a living room into a functional, organized, and inspiring craft room without turning it into a fluorescent storage warehouse. Think studio energy, not supply closet energy.
Start With a Craft Room Plan, Not a Shopping Cart
The fastest way to spend too much money is to buy bins before knowing what needs to go in them. Before you purchase shelves, carts, cabinets, or one of those suspiciously expensive acrylic organizers that makes paper clips look like luxury jewelry, pause and assess the room.
Measure the Living Room and Map the Traffic Flow
Measure the length and width of the room, windows, doors, outlets, closets, and any vents or radiators. Make a rough floor plan on paper or with a simple room-planning app. You do not need architect-level drawings; a sketch with accurate measurements is enough to prevent the classic “why is the desk blocking the door?” surprise.
Keep pathways open, especially if the former living room is near an entryway, hallway, or frequently used bathroom. A craft room should feel creative, not like an obstacle course designed by a very determined scrapbooker. Consumer Reports notes that excessive clutter can become a tripping hazard, so clear walkways are not merely attractive; they are practical.
Decide What Kind of Crafting Happens Here
A sewing room has different needs from a painting studio. A Cricut-focused workspace needs power access and material storage. A jewelry maker needs small compartments and bright task lighting. A paper crafter may need broad flat storage for cardstock and a clear cutting surface.
Write down your top three craft activities and the supplies each one uses most often. Then organize the room around those activities. This is far more useful than arranging everything by what happens to look cute in a clear jar.
Choose Whether the Room Is Private, Shared, or Guest-Friendly
If the converted living room is still visible from the front door or used occasionally by visitors, include more closed storage, furniture-like cabinets, and a foldaway work surface. If it is your private creative headquarters, you can be more playful with open shelving, pegboards, supply displays, and a table large enough to support a full-blown craft tornado.
Create Zones That Make Crafting Easier
The most effective craft room organization ideas divide the room into simple zones. Better Homes & Gardens highlights the value of assigning areas for specific activities, while vertical storage helps keep the floor from becoming a supply landfill.
The Main Work Zone
Your primary worktable is the heart of the craft room. Choose the largest surface the room can comfortably handle. A big table gives you room to spread out fabric, lay out scrapbook pages, organize paint, or abandon a project for three days without needing to pack it away like a guilty secret.
A dining table, sturdy desk, folding worktable, or kitchen island can all work well. House Beautiful recommends prioritizing a generous desk or table because creative projects often need more surface area than people expect.
For a flexible setup, place the table in the center of the room with open walking space around it. For a smaller living room, push a desk against a wall and use a rolling cart as portable extra workspace.
The Supply Zone
Store everyday items within arm’s reach of the main work zone. This is where drawers, shallow cabinets, pegboards, wall rails, and rolling carts earn their keep. The Spruce recommends sorting art supplies by type, color, or frequency of use, which helps you find what you need without opening seven containers and briefly questioning every life choice you have made.
Keep frequently used tools close by: scissors, rulers, glue, paint brushes, cutting mats, pencils, adhesive, thread, or heat tools. Less-used supplies can live in cabinets, closets, labeled bins, or higher shelves.
The Project Parking Zone
Every crafter needs a place for unfinished projects. This is not failure; it is creative incubation. Use a rolling cart, lidded project box, shallow drawer, or dedicated shelf for works in progress. Store each project with its materials, notes, and tools so you can return to it without starting a scavenger hunt.
A three-tier cart is especially useful because it can move beside your table while you work and roll away when the room needs to look tidy again. Professional organizers often recommend rolling carts for supplies because they add flexible storage without demanding permanent floor space.
The Inspiration Zone
Reserve one small area for ideas, not supplies. Add a bulletin board, magnetic board, framed prints, color swatches, sketches, postcards, or photos of projects you want to try. A craft room should not look like a retail aisle. A little inspiration helps the room feel like yours.
Declutter Before You Organize
It is tempting to skip directly to matching containers, but storage cannot solve an inventory problem. Pull every craft item into one visible area and sort it into categories: paper, fabric, tools, paints, adhesives, yarn, seasonal materials, unfinished projects, and “why do I own twelve half-empty bottles of glitter glue?”
Make four piles: keep, donate, recycle, and toss. Dried-out markers, old paint, duplicate tools, warped paper, and mystery supplies that no longer fit your hobbies do not deserve premium shelf space. Real Simple’s room-by-room decluttering approach emphasizes completing one area fully before moving forward, which can keep the process from becoming overwhelming.
Once you know what you are keeping, organize by use rather than by random container size. Store sewing notions together, painting supplies together, and paper-cutting tools together. Grouping similar items makes it easier to see what you own and prevents duplicate purchases.
Use Storage That Looks Good in a Former Living Room
A converted living room does not have to look like a stockroom. The trick is combining practical storage with pieces that feel like furniture.
Mix Open Storage and Closed Storage
Open shelves are perfect for beautiful supplies: colorful yarn, paint jars, ribbons, neatly stacked paper, and baskets. Closed cabinets are better for visual chaos, extra inventory, glue guns, packaging, and the supplies that refuse to pose nicely for the camera.
HGTV recommends using boxes, baskets, jars, shelves, and cabinets to sort craft materials, while Home Depot suggests clear containers and labels to make supplies easy to identify.
A good rule is simple: display what inspires you; hide what distracts you.
Use Vertical Space Like It Pays Rent
Walls are valuable in a craft room. Install floating shelves, pegboards, wall-mounted bins, hooks, magnetic strips, or rail systems. Pegboards work especially well for scissors, rulers, punches, brushes, small baskets, and frequently used tools. They keep items visible and accessible without crowding the desk.
Martha Stewart and The Spruce both recommend clear storage, color-coding, and vertical organization to help creative areas stay useful instead of becoming cluttered.
For a former living room, paint the pegboard the same color as the wall or choose a coordinating accent color. That small detail helps it feel intentional rather than like a workshop escaped into your home.
Use Furniture With Secret Storage Powers
Bookcases, dressers, buffets, media consoles, and hutches can become excellent craft storage. A former entertainment console can hold cutting machines, paper trimmers, and baskets. A dining hutch can store fabric, paint, and specialty tools. A dresser can hold vinyl, patterns, stamps, or sewing accessories.
House Beautiful suggests that a dresser, bookshelf, closet, or bin system can all handle craft storage in smaller spaces.
Do not underestimate closets, either. A closet can become a mini supply pantry with adjustable shelves, bins, and a narrow tabletop. If your living room has a closet, congratulations: you have inherited a tiny craft-room assistant.
Make Lighting, Power, and Comfort Part of the Makeover
Crafting under dim lighting is how a blue thread becomes “maybe navy?” and a tiny bead becomes a permanent resident of the carpet. Good lighting matters.
Layer Your Lighting
Use general room lighting plus task lighting at the worktable. A bright adjustable desk lamp is useful for detailed tasks such as sewing, painting, jewelry making, and cutting. Position the lamp so your hand does not create a shadow over your work surface.
Natural light is wonderful, but do not rely on it alone. Add adjustable blinds or curtains if sunlight creates glare on screens, fades fabric, or makes you feel like you are crafting inside a greenhouse.
Plan Electrical Access Before Moving Furniture
Consider every item that needs power: sewing machine, cutting machine, heat press, glue gun, printer, lamp, tablet charger, or music speaker. Place workstations near outlets whenever possible. Avoid running extension cords across walkways, and do not overload power strips.
For major changes, such as adding outlets or modifying wiring, hire a qualified electrician. Your craft room should be full of creative sparks, not electrical ones.
Ventilate Paint, Glue, and Other Strong-Smelling Supplies
If you use paint, adhesives, resin, stains, sprays, or other chemical products, make ventilation a serious part of the craft room makeover. The U.S. Environmental Protection Agency advises using plenty of fresh air, such as open windows and extra fans, when painting, remodeling, or using products that may release volatile organic compounds.
Store products according to their labels, keep them away from children and pets, and use a separate ventilated work area for messy or strong-smelling projects when possible.
Choose a Style That Makes You Want to Create
Once the functional pieces are in place, add personality. A craft room can be calm and neutral, bold and colorful, vintage-inspired, modern, cottage-style, or delightfully mismatched. There is no rule saying a creative room must be beige, although beige has had a long and successful career in being beige.
Choose one or two base colors for walls, furniture, or storage bins. Then use supplies as part of the decor. A rainbow of yarn, stacked paper, colorful paint bottles, and neatly arranged fabric can become artwork when displayed with intention.
Use a washable rug or durable floor covering if your crafts are messy. Add a comfortable chair, a small speaker, and a basket for project scraps. These details make the space inviting enough that you will actually use it.
Craft Room Makeover Budget Ideas
Weekend Refresh: Low-Budget Craft Room
Paint the walls, declutter supplies, add labels, repurpose a bookshelf, and use jars or baskets you already own. A folding table and inexpensive rolling cart can provide a solid starter setup.
Mid-Range Living Room Conversion
Add a large worktable, wall shelves, drawer units, pegboards, updated lighting, and a few matching storage cabinets. This option creates a more polished craft studio without requiring construction.
Full Craft Studio Makeover
Consider built-in cabinets, custom countertops, upgraded electrical outlets, a dedicated cutting station, wall-mounted storage, and durable flooring. This level works best for serious hobbyists, small business owners, or anyone whose craft supplies have achieved population density.
Common Craft Room Makeover Mistakes to Avoid
- Buying storage before sorting supplies.
- Choosing a tiny desk for large projects.
- Using only open shelving and creating constant visual clutter.
- Forgetting task lighting and nearby outlets.
- Storing every supply within reach instead of prioritizing frequently used items.
- Skipping a designated space for unfinished projects.
- Making the room so perfect that you become afraid to use it.
Real-Life Experiences: What a Living Room-to-Craft Room Makeover Feels Like
The biggest surprise in a craft room makeover is often not the storage. It is the emotional shift. A former living room can feel generic because it is designed for everybody: guests, relatives, movie nights, scrolling, snacks, and occasionally a nap that was “definitely not a nap.” When you turn that room into a craft space, it becomes a room with a job that reflects you.
At first, the process can feel messy. The living room may look worse before it looks better because every supply comes out of hiding. You discover three pairs of scissors, seven rolls of tape, craft paper from a holiday project five years ago, and a hot glue gun that has been missing since the previous administration. That stage is normal. It is the moment when the room stops pretending to be tidy and starts becoming useful.
Many people find that a central worktable changes their creative habits almost immediately. Instead of crafting at the kitchen counter and cleaning up before dinner, they can leave a project out and come back to it later. A half-finished card, quilt block, painted canvas, or bead project no longer becomes an inconvenience. It becomes an invitation waiting on the table.
Another common experience is realizing that visibility matters. When supplies are hidden too deeply, people forget they own them. Clear containers, labels, open shelves, and pegboards make it easier to see materials and use them. At the same time, too much visible storage can make a room feel busy. The sweet spot is usually a mix: attractive supplies on display, practical clutter tucked away.
There is also a learning curve with organization. The first system is rarely the final system. A drawer that seems perfect for paints may later become better for fabric. A rolling cart that starts as a paper station may eventually become the “current project emergency vehicle.” That is not a failure. A good craft room evolves with your hobbies.
The most satisfying part usually comes a few weeks after the makeover, when the room has been used enough to feel real. There may be scraps on the floor, a cup of pencils on the table, and a few projects waiting their turn. But there is also a sense of ease. You know where things belong. You can start creating without rearranging the whole house. The room no longer asks, “Where should I put this?” It says, “Go make something.”
That is the true success of a living room-to-craft room transformation. It is not about having magazine-perfect shelves or color-coordinated glue sticks. It is about making creativity easier to begin, easier to continue, and much harder to postpone.