
If you’ve ever priced a solid wood dining room table and quietly backed away like, “Nope, my wallet isn’t ready for this relationship,” a salvage pallet table might be your new DIY soulmate. With a few free (or very cheap) pallets, some basic tools, and a weekend of elbow grease, you can build a gorgeous rustic table that looks like it came from a trendy farmhouse catalog instead of the back of a delivery truck.
This guide walks you through how to turn old shipping pallets into a sturdy, stylish dining room table, inspired by the kind of clever projects you see on Hometalk and other DIY sites. We’ll cover everything from choosing safe pallets to building the frame, assembling the tabletop, and finishing it so it’s ready for family dinners, game nights, and the occasional “we should really use coasters” talk.
Why Build a Dining Room Table from Salvage Pallets?
Budget-friendly, but not “cheap”
New hardwood dining tables can run into the hundreds or thousands of dollars. Pallet wood, on the other hand, is often free from local hardware stores, warehouses, or small businesses if you ask nicely. Many DIY tutorials show complete pallet dining tables built with just a handful of purchased items like screws, legs, or sealer, dramatically cutting costs compared to buying a new table.
Rustic character you can’t fake
Pallet boards are usually a mix of species and tones, with knots, nail holes, and weathered grain. When you sand and finish them, you get a naturally varied, reclaimed-wood look that would be expensive to recreate with new lumber. Many DIYers intentionally keep some imperfections visible for that “I paid extra for this rustic charm” vibe.
Upcycling that actually makes a difference
Pallets are often used once and then tossed or left to rot. Turning them into durable furniture keeps wood out of landfills and reduces demand for newly milled lumber. It’s a small but satisfying sustainability win every time you sit down to dinner at a table you rescued from the waste stream.
Safety First: Choosing the Right Pallets
Before you start prying boards and inhaling sawdust like it’s a new fragrance line, you need to make sure your pallets are safe to bring indoorsespecially to a table where food will be served.
Look for the IPPC stamp
Most pallets used in international shipping are stamped with an IPPC (International Plant Protection Convention) logo and a code that tells you how they were treated. This stamp usually includes a two-letter country code, a number identifying the producer, and a treatment code such as HT, KD, or MB.
- HT (Heat Treated): Heated to kill pests without chemicals. Generally considered safe for furniture and garden projects.
- KD (Kiln Dried): Dried in a kiln to reduce moisture, also safe for DIY use.
- MB (Methyl Bromide): Fumigated with a toxic pesticide. Avoid these completely for indoor or food-related projects.
If there’s no stamp, or the pallet is heavily stained, smells off, or looks like it’s lived a hard life in a mystery warehouse, skip it. There are plenty of clean pallets out there, and your lungs and liver will thank you.
Inspect the boards
Check for rot, deep cracks, excessive warping, or hidden nails sticking out. You want boards that are structurally sound, even if they’re a little rough-looking. Those cosmetic flaws can be sanded or embraced as character; structural damage is a different story.
Planning Your Salvage Pallet Dining Table
Choose your size and style
Think about how many people you want to seat and how much space you actually havebecause as fun as an eight-foot farmhouse table sounds, it’s less fun when you can’t open the dining room door all the way.
- For four people: A tabletop around 48–60 inches long by 30–36 inches wide works well.
- For six people: Aim for 72 inches long and about 36–40 inches wide.
- For eight people: Around 84–96 inches long if your room can handle it.
Most DIY pallet dining tables follow a simple rectangular design with a wood frame (“apron”) and straight legs or a trestle base. You can go very rustic with chunky legs, or more modern with slim metal hairpin legs or square steel tubing.
Gather your tools and materials
Your exact list will vary based on your design, but many successful pallet dining table builds use a similar lineup:
- 3–4 clean, safe pallets
- 2×4 or 2×6 boards for the internal frame and any cross supports
- Table legs or lumber to build your own (4 legs or 2 pedestal bases)
- Wood screws (2–3 inches), wood glue, and a drill/driver
- Circular saw or miter saw, plus a jigsaw if you’re doing fancy cuts
- Orbital sander and sandpaper (80, 120, 220 grits)
- Wood filler (optional) for knot holes and big gaps
- Stain, clear sealer, or paint (food-safe topcoat for the surface)
Plenty of DIY tutorials show that you can get this done with basic handheld toolsno giant workshop or professional-grade equipment requiredthough power tools definitely speed things up.
Step-by-Step: Building a Dining Room Table from Salvage Pallets
Step 1: Break down the pallets
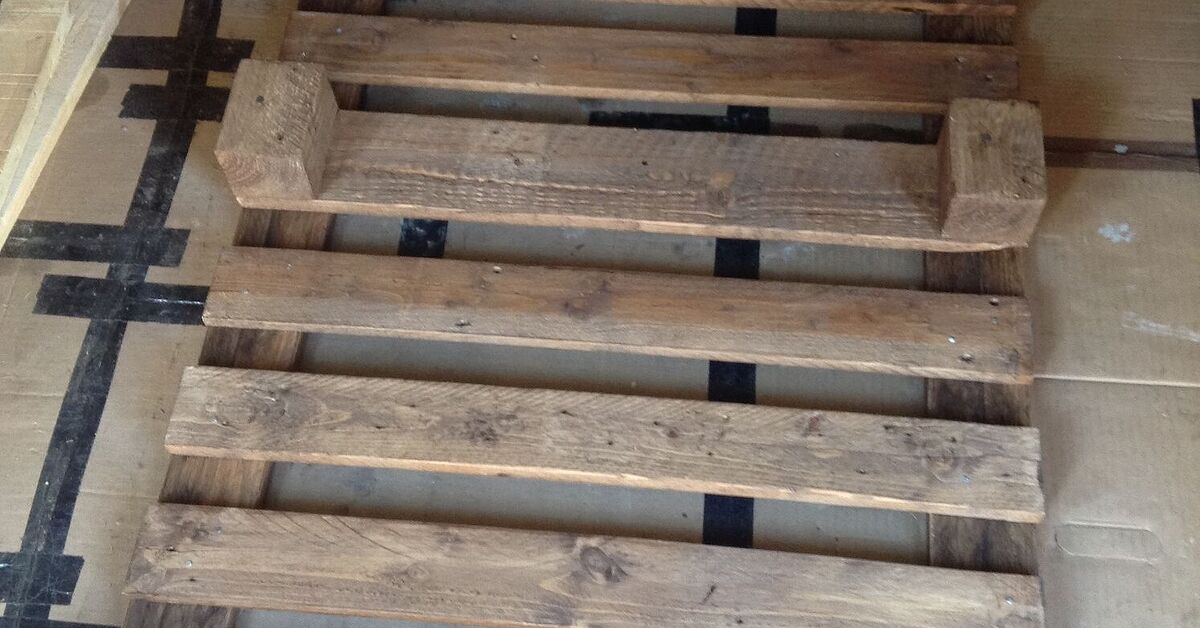
Disassembling pallets is the least glamorous part of the project, but it’s where the magic (and the swearing) starts. Many DIYers use a reciprocating saw to cut through the nails at each joint, which keeps the boards intact and saves time versus prying every nail out. Others use a pallet buster tool or a pry bar and hammer. Whichever method you choose, take your time and protect your eyes and hands.
Once you’ve freed the boards, remove or punch down any remaining nails so they won’t murder your sander later.
Step 2: Prepare and sort the boards
Lay out all your boards and sort them roughly by thickness, width, and color. This makes it easier to create a balanced, visually pleasing tabletop later. Trim off ragged ends, then sand each piece lightly to remove surface dirt and splinters. Don’t worry about getting everything perfectly smooth yetthis is just the “let’s not get a tetanus shot today” phase.
Step 3: Build the frame (apron)
The frame is the skeleton that keeps your table from wobbling like a baby giraffe on roller skates. Cut your 2×4s to form a rectangle slightly smaller than your final tabletop dimensions so the top overhangs the sides by about an inch.
For example, a 72 × 36 inch tabletop might use a 68 × 32 inch frame. Screw the 2×4s together with wood glue and 2–3 inch screws. Add at least one or two cross supports along the length of the frame, especially for longer tables, to prevent sagging over time.
Step 4: Attach the legs or base
If you’re using pre-made legs, follow the manufacturer’s instructions and attach them to the frame corners. For DIY wooden legs, you can:
- Use thick 4×4 posts for a classic farmhouse look.
- Build box-style legs from pallet boards for a more industrial vibe.
- Create two pedestal bases under each end, which also leaves more room for chairs along the sides.
Attach the legs securely using screws and glue, and make sure the frame sits level before you move on. Small adjustments now will save you from a wobbly, drink-spilling nightmare later.
Step 5: Lay out and attach the tabletop
Now for the fun part: designing the top. Lay your pallet boards across the frame in your chosen patternstraight planks, herringbone, chevron, or even a patchwork of mixed widths. Play around with color and grain variation until you like the way it looks.
Once you’re happy, flip the boards over in small sections, apply wood glue where they’ll contact the frame, then screw them down from underneath. That way, you avoid visible screw heads on the top surface. If your boards are thinner, consider backing the entire tabletop with a sheet of plywood first, then gluing and nailing the pallet boards on top for extra strength.
Step 6: Fill gaps, sand, and smooth
Unless you scored absolutely perfect boards (in which case, congratulations, you’ve won the pallet lottery), you’ll probably have small gaps, knots, and uneven spots. Decide how rustic you want to be:
- Super rustic: Leave most gaps and imperfections. Just make sure there are no splinters that’ll snag sleeves or scratch plates.
- Family-friendly: Use wood filler on large gaps and cracks so crumbs don’t vanish forever into the table.
- Smooth and refined: Fill generously, sand aggressively, and aim for a near-furniture-store finish.
Sand the tabletop starting with 80-grit paper to level everything out, then move up through 120 and 220 grits for a smooth, touchable surface. Wipe off dust between grits with a damp cloth or tack cloth so you’re not just grinding dust into the grain.
Step 7: Stain, paint, and seal
This is where your table really transforms. Popular finishing options for pallet dining tables include:
- Warm stain + clear topcoat: Highlights the mixed pallet woods and gives that cozy farmhouse look.
- Two-tone finish: Stained top with painted base (white, black, navy, or sage green are classics).
- Weathered or whitewashed: Great for coastal or cottage-style dining rooms.
Use a food-safe, durable clear coat for the final finishlike a water-based polyurethane or a hardwax oil suitable for table surfaces. Apply multiple thin coats, sanding very lightly in between if needed, to create a spill-resistant surface that can handle hot plates, coffee mugs, and the occasional “oops, I forgot a coaster.”
Styling and Using Your Salvage Pallet Dining Table
Once your table is cured and ready for action, it becomes the star of the dining room. Because pallet wood has so much personality, you can style it in different ways depending on your taste:
- Farmhouse cozy: Pair with simple ladder-back chairs, a linen runner, and a vase of greenery.
- Industrial modern: Add metal chairs, black flatware, and exposed bulb lighting.
- Eclectic boho: Mix mismatched chairs, colorful cushions, and layered textiles.
The best part? Every time someone compliments your table, you get to say, “Thanks, it used to be a bunch of pallets,” and watch their jaw drop a little.
Maintenance Tips for Your Pallet Dining Table
A well-built salvage pallet table can last for years, but like any wood furniture, it appreciates a little love.
- Wipe up spills promptly so liquids don’t soak into the grain.
- Use placemats or trivets for very hot dishes.
- Clean with a slightly damp cloth and mild soap; avoid harsh chemical cleaners.
- Refresh the finish every few years with a light sanding and a new coat of sealer if the surface starts to look tired.
Because pallet wood varies in hardness, some boards may show dings and scratches faster than othersbut that patina is part of the charm and tells the story of all the meals shared around your DIY creation.
Real-World Experiences with Salvage Pallet Dining Tables
DIYers who have built pallet dining tables often report the same three reactions: “That was more work than I expected,” “I can’t believe how good it looks,” and “I’m already planning my next pallet project.” Here are some experience-based lessons that can help you get there with fewer headaches.
The learning curve is realbut worth it
For many people, a pallet dining table is their first big furniture build. The combination of disassembly, layout, framing, and finishing can feel intimidating at first. But because pallet wood is inexpensive and often scrap-bound anyway, it’s also very forgiving. If you miscut a board or crack a piece, you can usually swap it out without derailing the whole project. Many first-time builders say their confidence in using saws, drills, and sanders jumped dramatically after this one build.
Disassembly takes longer than Pinterest suggests
In photos, people seem to go from full pallet to finished table in three cute steps. In reality, pulling apart pallets can easily take a few hours, especially if the boards are nailed aggressively or the wood is old and dry. Builders who use a reciprocating saw to cut through nails at the joints tend to move faster and save more boards than those trying to pry every nail out intact. Planning for this “hidden” time up front makes the rest of the build more enjoyable.
Layout and color balance matter more than perfection
One thing that surprises people is how different pallet boards look once they’re stained. Some go warm and honey-colored, others shift gray or reddish, and a few might hold onto their original weathered tone. DIYers who take the time to loosely arrange their boards and even test stain on a few scraps usually get the most cohesive, intentional-looking finishes. It’s less about perfect symmetry and more about balancing light and dark tones across the tabletop.
Rustic doesn’t have to mean rough
Another common experience: the first test dinner reveals that forks catch on tiny splinters, or crumbs disappear into gaps that seem to go to another dimension. Builders who go back for a second sanding pass, add filler where needed, and apply an extra coat of sealer end up much happier with daily use. A rustic table can absolutely be smooth and comfortableyou’re going for “old barn wood,” not “portable splinter factory.”
It becomes a conversation piece (and a bragging right)
Owners of pallet dining tables almost always mention the reactions they get from guests. People love the idea that something destined for the trash was turned into a centerpiece of the home. It often sparks conversations about upcycling, creative reuse, and “Hey, what else could we build?” That kind of story makes the table feel more meaningful than a generic piece ordered online.
You start seeing pallets everywhere
Once you’ve built one big project from pallets, you will never look at a stack of them behind a store the same way again. Many DIYers say that after finishing a salvage pallet dining table, they immediately start planning side tables, benches, shelves, and even headboards with leftover boards. The table becomes the gateway project that opens up a whole new world of low-cost, high-impact DIY furniture.
In the end, a dining room table made from salvage pallets is more than just a place to put plates. It’s proof that with some time, patience, and creativity, you can turn humble materials into something beautiful and functional. Every dent, knot, and reclaimed board tells a storystarting with the day you decided to build it yourself.