
Picture this: the turkey is resting, the pies are cooling, and your family is
about five minutes away from bursting through the front door. Your house
smells amazing… but your fireplace mantel still looks like “random stuff
I parked here in July.”
Enter the hero of last-minute, budget-friendly holiday decor: the humble
mason jar. With a few craft supplies and a bit of creativity, you can turn
ordinary jars into a glowing Thanksgiving mantel display that looks like it
came straight from a cozy home decor magazine – or that little corner of
Hometalk you’ve pinned 40 times.
DIY bloggers, crafters, and home decor pros across the U.S. love mason jar
crafts for fall and Thanksgiving, using them as painted vases, luminaries,
thankful jars, and mini centerpieces.
The best part? You don’t need fancy tools or advanced skills. If you can hold
a paintbrush and a glue gun without gluing yourself to the table, you’re
already qualified.
In this guide, you’ll learn how to create an easy DIY Thanksgiving mantle
mason jar decoration inspired by popular Hometalk-style projects: think warm
candlelight, fall foliage, and a little farmhouse charm. We’ll walk through
supplies, step-by-step instructions, styling ideas, and real-life tips to
help your mantel look intentionally festive – not accidentally cluttered.
Why Mason Jars Belong on Your Thanksgiving Mantel
Mason jars have become the unofficial mascot of DIY fall decor. There’s a
reason they keep showing up in Pinterest boards and Thanksgiving craft
roundups:
- They’re inexpensive and easy to find. You can buy them
new, thrift them, or reuse old pasta sauce and jam jars. - They’re endlessly customizable. Paint, burlap, twine,
tissue paper, vinyl decals, and faux leaves all stick beautifully to glass
with basic craft glue or Mod Podge. - They work with multiple decor styles. Farmhouse, boho,
minimalist, traditional – a mason jar can dress for any theme with the
right colors and textures. - They’re kid-friendly crafts. Many tutorials use tissue
paper, faux leaves, and LED candles so kids can help create jars without
dealing with open flames. - They glow beautifully. When you drop in a tealight or
LED string lights, the glass amplifies the cozy, golden light that makes
Thanksgiving feel magical.
On a mantel, mason jars behave like mini spotlights, pulling together
garlands, pumpkins, and artwork into one cohesive, warm display. Think of
them as the “glow glue” holding your Thanksgiving decor together.
Supplies You’ll Need for a Hometalk-Style Mason Jar Mantel
You can customize your project, but here’s a solid starting list:
- 4–8 mason jars (quart or pint size, plus a few smaller
jars if you want height variation) - Acrylic, chalk, or spray paint in fall shades like
cream, mustard, burnt orange, and deep brown - Foam brushes or small craft brushes
- Mod Podge or clear-drying craft glue
- Fake or real fall leaves, pressed leaves, or leaf
stickers - Burlap, twine, or ribbon in fall colors
- Filler materials: dried beans, popcorn kernels, rice,
pea gravel, nuts, acorns, or faux berries - Tealights or LED candles (recommended for safety)
- Hot glue gun and glue sticks
- Optional: vinyl decals, letter stickers, or a cutting
machine to create words like “THANKFUL” or “GIVE THANKS”
You don’t need everything on this list. The charm of Thanksgiving mason jar
decor is that you can mix what you already have with a few low-cost
additions and still get a stunning mantel.
Step-by-Step: Classic Thanksgiving Mason Jar Mantel Display
1. Clean and Prep Your Jars
Start by removing any labels. Soak the jars in warm, soapy water; stubborn
adhesive can be rubbed off with a bit of oil or an adhesive remover. Dry
thoroughly so your paint and glue properly adhere to the glass.
2. Add Color with Paint or Leaf Decoupage
Decide on your base look. Two popular approaches from fall craft tutorials
are painted jars and leaf-decoupaged luminaries.
Option A: Painted Mason Jars
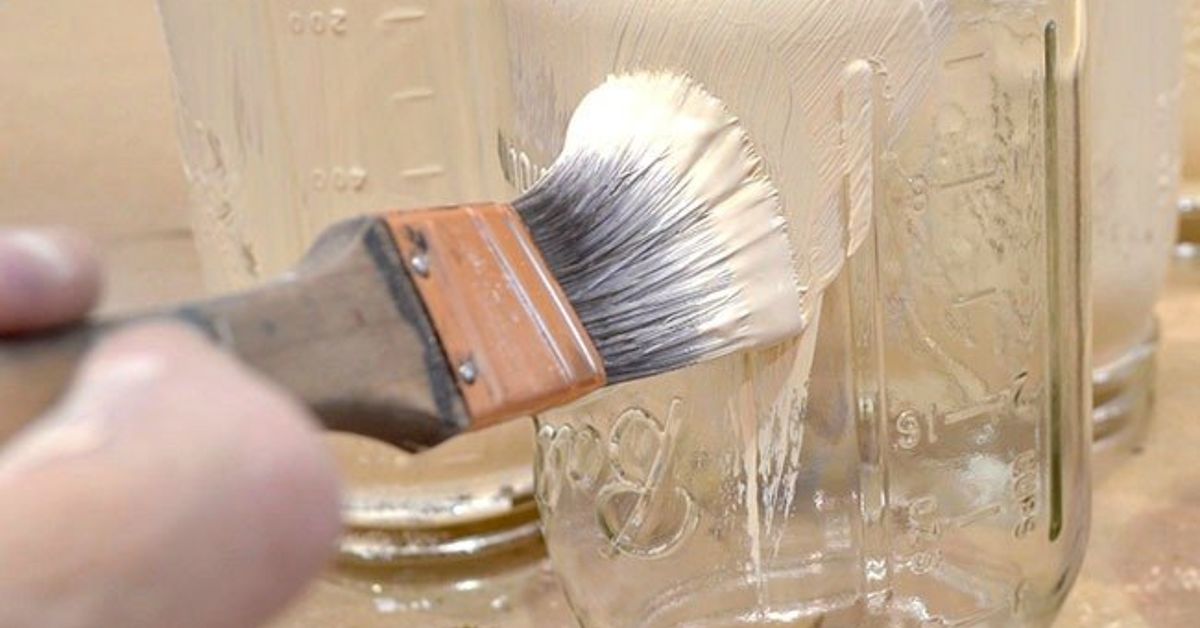
- Apply a thin coat of acrylic or chalk paint to the outside of each jar.
Don’t worry if the first coat looks streaky – the second coat will even
things out. - Let the jars dry, then add a second coat. For a rustic look, lightly
sand raised areas (like the logo or measurements) so a bit of glass peeks
through. - Wrap the neck of each jar with twine or ribbon, tying a bow in front.
Option B: Leaf Luminary Jars
- Brush a thin layer of Mod Podge on the outside of the jar.
- Press faux or pressed leaves onto the glue, smoothing them to avoid
bubbles. - Seal with another thin layer of Mod Podge on top. When the glue dries,
the leaves will glow beautifully when lit from within.
You can mix both styles across your mantel: a couple of painted jars, a
couple of leaf luminaries, all in coordinating colors.
3. Create a Cozy Candle Effect
Once the jars are decorated, it’s time to add light. There are several safe,
pretty ways to do this:
- Pour a layer of popcorn kernels, dried beans, or pea gravel into the
bottom of the jar and nestle a tealight or LED candle on top. - Use short pillar candles in wider jars for a chunkier look (be sure to
place them on a heat-safe tray or plate on the mantel). - Drop in a short strand of LED fairy lights and hide the battery pack
behind the jars or under a garland.
If you have kids, pets, or a low mantel, LED lights are almost always the
best choice. Several family craft tutorials now recommend flameless candles
specifically for Thanksgiving mason jar luminaries.
4. Fill with Natural Textures
For that layered, magazine-ready look, add a few natural elements:
- Nuts in the shell (hazelnuts, walnuts, acorns)
- Mini pinecones or faux berries
- Small faux pumpkins, wheat stalks, or dried grasses
You can layer these inside the jars around your candles, or scatter them
across the mantel between jars. The mix of glass, metal, and natural
textures keeps the display interesting without feeling fussy.
5. Arrange the Jars on the Mantel
Start by clearing off the mantel and giving yourself a blank canvas. Then:
- Create a focal point in the center – perhaps a mirror,
framed art, or a “Give Thanks” sign. - Cluster jars in odd numbers (groups of three or five)
on either side of the focal point. Design pros often rely on odd-number
groupings to feel balanced but not rigid. - Vary the heights with cake stands, stacked books, or
wood slices so the jars don’t sit in a perfect straight line. - Add garlands of eucalyptus, faux leaves, or beads along
the front edge of the mantel to visually connect the jars.
Step back periodically and snap a quick photo on your phone. It’s easier to
see gaps, crowded spots, or uneven lighting in a picture than in real time.
Design Ideas to Match Your Thanksgiving Style
Farmhouse “Thankful” Mason Jars
Many Thanksgiving mason jar projects spell out a word like “THANKFUL” or
“GIVE THANKS,” with one letter painted or stenciled onto each jar.
Line them across your mantel with mini pumpkins and a burlap garland. Keep
the color palette warm and muted: ivory, tan, and soft pumpkin orange.
Boho Mantel with Textured Jars
If your style leans boho, think more texture and fewer words: macramé
garlands, feathers, and pampas grass. Craft and decor guides suggest pairing
neutral jar colors with woven elements and earthy metals for a laid-back,
layered look.
Wrap your jars with bits of lace, macramé cord, or thin leather and fill
them with dried grasses instead of candles. The result feels Thanksgiving,
but not overly theme-y.
Kid-Friendly Thankful Jars
Family-oriented blogs often recommend turning mason jars into “thankful”
or “gratitude” jars for Thanksgiving.
Place one jar on each end of the mantel with a stack of paper leaves and
pens nearby. Throughout the day, guests can jot down what they’re thankful
for and slip the notes inside.
At dessert time, read the notes aloud. The jars become both decor and a
sweet tradition – and the kids will love contributing to something on
“grown-up” display.
Styling Your Whole Thanksgiving Mantel Around the Jars
Your mason jars are the stars, but they’ll really shine when you give them a
thoughtful supporting cast.
- Add a wreath or large artwork. Mantel styling guides
frequently start with a big central piece, such as a fall wreath or framed
print, to anchor the arrangement. - Layer garlands. Drape faux eucalyptus, fall leaves, or
bead garlands across the mantel so they weave behind and in front of the
jars. - Introduce pumpkins and gourds. Mix real and faux
pumpkins in various sizes to fill in gaps and echo your jar colors.
Designers often recommend sticking to a tight palette (for example,
creams and soft oranges) for a polished look. - Play with symmetry. You don’t have to mirror every
element, but keeping jars generally balanced left and right makes the
display feel intentional rather than random.
The goal is to create a mantel that feels full and cozy, but still has some
breathing room. If every inch is covered, your beautiful jars won’t have a
chance to stand out.
Safety and Practical Tips for Mason Jar Mantel Decor
A warm glow is lovely; a scorched mantel, not so much. Keep these basics in
mind:
- Choose LED candles if your jars sit under a TV, near
stockings, or within tail-wagging range. Many kid-focused craft guides
treat flameless candles as the default for fall jar luminaries. - Use heat-safe bases like ceramic trays or metal
chargers if you do use real candles. - Leave space above the flame. Don’t stuff jars so full
of filler that the flame sits near the rim or decorations. - Blow out real candles before you leave the room or turn
in for the night.
A little caution ensures your mantel looks curated and cozy – not like a
reenactment of the Great Chicago Fire.
Troubleshooting: Quick Fixes for Common Mason Jar Decor Problems
“My Jars Look Streaky or Patchy”
Add a second or third thin coat of paint rather than one thick coat. You can
also lightly sand and distress the jars for a “meant to be rustic” finish
instead of chasing perfection.
“The Mantel Looks Cluttered”
Remove one or two elements (usually the smallest ones), then group items
more intentionally. Larger, simpler pieces and repeated colors immediately
calm the look.
“The Light is Too Dim”
Switch to brighter LED candles or tuck a strand of fairy lights behind the
jars. Reflection off the glass will make everything appear brighter without
adding more objects.
Conclusion: A Mantel That Glows with Gratitude
An easy DIY Thanksgiving mantle mason jar decoration is one of those rare
projects that checks every box: affordable, forgiving, cozy, and
customizable. With a handful of jars, some paint or leaves, and a few
candles, you can transform your fireplace into the glowing heart of your
holiday gathering.
Whether you’re leaning into farmhouse style with “THANKFUL” jars, going
boho with textured neutrals, or creating kid-made luminaries and gratitude
jars, the process is as meaningful as the finished look. Turn on some music,
pour a mug of something warm, and let the jars do their magic – your guests
will feel the love the moment they walk in.
Real-Life Experiences: Lessons from a DIY Thanksgiving Mason Jar Mantel
The first time I tried a full mason jar mantel for Thanksgiving, I made just
about every classic DIY mistake – and accidentally discovered tricks I still
use today.
I started with good intentions and an overstuffed craft bin. I had orange
paint, gold glitter, burlap, three kinds of twine, faux leaves, and enough
candles to signal passing aircraft. My plan was simple: paint a few jars,
pop in candles, look amazing. Reality: by my third jar, the paint was
leaving streaks, my fingers were covered in Mod Podge, and one jar somehow
glued itself to a grocery ad.
Here’s what I learned very quickly: less is more, but layers
matter. When I stepped back from the mantel the first time, the
jars all looked like they were yelling for attention. Each one had a
different color, ribbon, and leaf placement. It felt chaotic rather than
cozy.
So I stripped it back to basics. I chose just three colors for the jars:
cream, soft pumpkin, and a moody brown. I used the same twine on all of
them and limited myself to one leaf style per jar. Suddenly everything
started to make sense. The jars looked like they belonged to the same
family instead of random extras from different craft tutorials.
Another surprising lesson: height is magic on a mantel.
Once I started setting some jars on small stacks of books and a couple of
wood slices, the whole display instantly looked more professional. The
staggered heights created gentle movement for the eye to follow, and the
light hit the jars differently at each level. It felt intentional, not
accidental.
There was also the Great Candle Incident. I lit real tealights in every jar,
admired my handiwork, and about ten minutes later realized the room felt
oddly warm. The candles had heated up the jars, and some twine bows were
looking a little too toasted for comfort. Thankfully nothing scorched, but
that was the day I joined Team LED forever – especially for mantels under a
TV or near curious kids and pets.
One of my favorite parts of the project, though, came from an unplanned
moment. I put a simple “thankful jar” on one side of the mantel with paper
leaves and a pen nearby. Throughout the day, people walked by and scribbled
little notes. After dinner, we read them out loud – serious, funny, and
everything in between. That single jar turned a pretty mantel into a
memory.
Now, each year, I tweak the colors or add a new detail – maybe macramé one
year, metallic accents the next – but the basic mason jar concept remains.
It’s fast, flexible, and forgiving. Even if a jar gets chipped or a ribbon
frays, it just reads as rustic charm. And every time guests walk in and say,
“Wow, your mantel looks amazing,” I smile, knowing it all started with a few
glass jars and a willingness to get a little messy.
If you’re on the fence about trying a DIY Thanksgiving mason jar mantel,
consider this your sign. Start with a few jars, keep your palette simple,
and let the glow do the heavy lifting. You might just find yourself starting
a new tradition – one that looks beautiful in photos and feels even better
in person.