
Bleach has ruined many shirts by accident, but here is the plot twist: with a little planning, that same tiny splash of chaos can become a custom design. Learning how to bleach a shirt with your own designs is one of the easiest ways to turn a plain dark tee into something bold, artsy, and very “I meant to do that.”
This DIY method is often called bleach art, bleach stenciling, reverse tie-dye, or bleach shirt design. Instead of adding color to fabric, you remove color from selected areas. The result can look like a vintage band tee, a cosmic galaxy print, a clean stencil graphic, or a handmade streetwear piece that cost almost nothing but looks suspiciously boutique.
Before you grab the nearest bottle of bleach and start misting like a craft wizard, pause for a tiny safety sermon. Bleach is useful, but it is still a strong chemical. Work in a well-ventilated area, wear gloves, protect your eyes, and never mix bleach with vinegar, ammonia, rubbing alcohol, hydrogen peroxide, or any other cleaner. For shirt design, bleach should be diluted only with water.
What Is Bleach Shirt Designing?
Bleach shirt designing is a fabric customization technique that uses diluted chlorine bleach to lighten or remove dye from colored fabric. Dark shirts usually give the most dramatic results because the contrast is stronger. Black shirts may turn orange, rust, tan, gray, or cream depending on the dye used by the manufacturer. Navy can fade toward red-brown or pale blue. Burgundy may shift to peach. The surprise is part of the fun, assuming you enjoy suspense that does not involve your bank account.
You can create designs with stencils, painter’s tape, vinyl decals, freezer paper, rubber bands, spray bottles, bleach pens, brushes, or even controlled drips. The design appears where bleach touches the fabric. Areas protected by a stencil or barrier stay darker.
Best Shirts for Bleach Designs
The best shirt for bleach art is usually a dark cotton T-shirt. Cotton absorbs the bleach solution well and reacts more predictably than many synthetic fabrics. Cotton-polyester blends can work, but they may bleach more slowly or unevenly. That can look cool if you want a smoky, vintage finish, but it may be frustrating if your goal is a crisp design.
Choose These Fabrics
- 100% cotton T-shirts
- Cotton-rich blends
- Dark-colored shirts such as black, navy, charcoal, forest green, or burgundy
- Prewashed shirts with no heavy fabric finish
Avoid These Fabrics
- Wool, silk, mohair, leather, or suede
- Spandex-heavy shirts or stretchy activewear
- Delicate knits
- Expensive shirts you are emotionally attached to
- Anything labeled “do not bleach”
Always check the care label. A plain triangle usually means bleach may be used, while a crossed-out triangle means do not bleach. If the label allows only non-chlorine bleach, skip chlorine bleach for this project. You can still make a great custom shirt using fabric paint, heat-transfer vinyl, or tie-dye instead.
Supplies You Need
You do not need a professional craft studio to bleach a shirt. You do need a safe setup and a few basic tools. The kitchen table can work, but only if you protect it well. Bleach and “beloved wooden table” are not friends.
Basic Supplies
- Dark cotton shirt
- Household chlorine bleach
- Water
- Spray bottle, squeeze bottle, foam brush, or bleach pen
- Rubber gloves
- Safety glasses or protective eyewear
- Plastic table cover, trash bags, or cardboard
- Cardboard insert for inside the shirt
- Painter’s tape, freezer paper, adhesive vinyl, or stencil material
- Paper towels or old rags
- Bucket or sink for rinsing
- Laundry detergent
How to Prepare Your Shirt
Step 1: Prewash and Dry the Shirt
Wash and dry the shirt before bleaching. New shirts may contain sizing, softeners, or finishing chemicals that can block the bleach from reacting evenly. Prewashing also helps reduce shrinking later. Do not use fabric softener before bleaching because it may coat the fibers.
Step 2: Test a Hidden Area
Before you commit to a full design, test the bleach solution on an inside seam or hidden hem. Apply a tiny drop, wait a few minutes, rinse, and let it dry. This tells you what color the shirt will turn and whether the fabric can handle the process. If the test spot weakens, holes appear, or the color looks tragic, choose another shirt.
Step 3: Set Up a Safe Work Area
Work outside, in a garage with the door open, or near open windows with good airflow. Cover your surface with plastic. Put a piece of cardboard inside the shirt so bleach does not soak through to the back unless that is part of your design. Wear gloves and old clothes. Bleach does not care that those pants were your “nice casual” pants.
How to Mix Bleach for Shirt Designs
A good beginner mixture is one part bleach to three or four parts water. For a stronger effect, some crafters use one part bleach to two parts water. Start weaker if you are new. You can always add more bleach, but you cannot politely ask a hole to become fabric again.
Pour water into the spray bottle first, then add bleach. Label the bottle clearly. Do not reuse that bottle later for plants, hair mist, homemade room spray, or any other innocent activity. Once it has held bleach, it is a bleach bottle.
Design Ideas for Bleaching a Shirt
1. Stencil Bleach Shirt
A stencil bleach shirt is perfect if you want a clear graphic such as a moon, flower, skull, mountain, quote, logo-style shape, or geometric pattern. You can cut a stencil from freezer paper, adhesive vinyl, cardstock, or plastic stencil sheets. Adhesive vinyl gives the crispest edges because it sticks directly to the fabric. Freezer paper is also popular because the shiny side can be lightly ironed onto cotton, helping it stay in place.
Place the stencil on the shirt and press down all edges. Lightly mist bleach over the exposed fabric. Use several gentle sprays instead of one aggressive blast. Heavy spraying can cause puddles, bleeding, and blurry edges. Let the color develop, then rinse when you like the result.
2. Reverse Tie-Dye Shirt
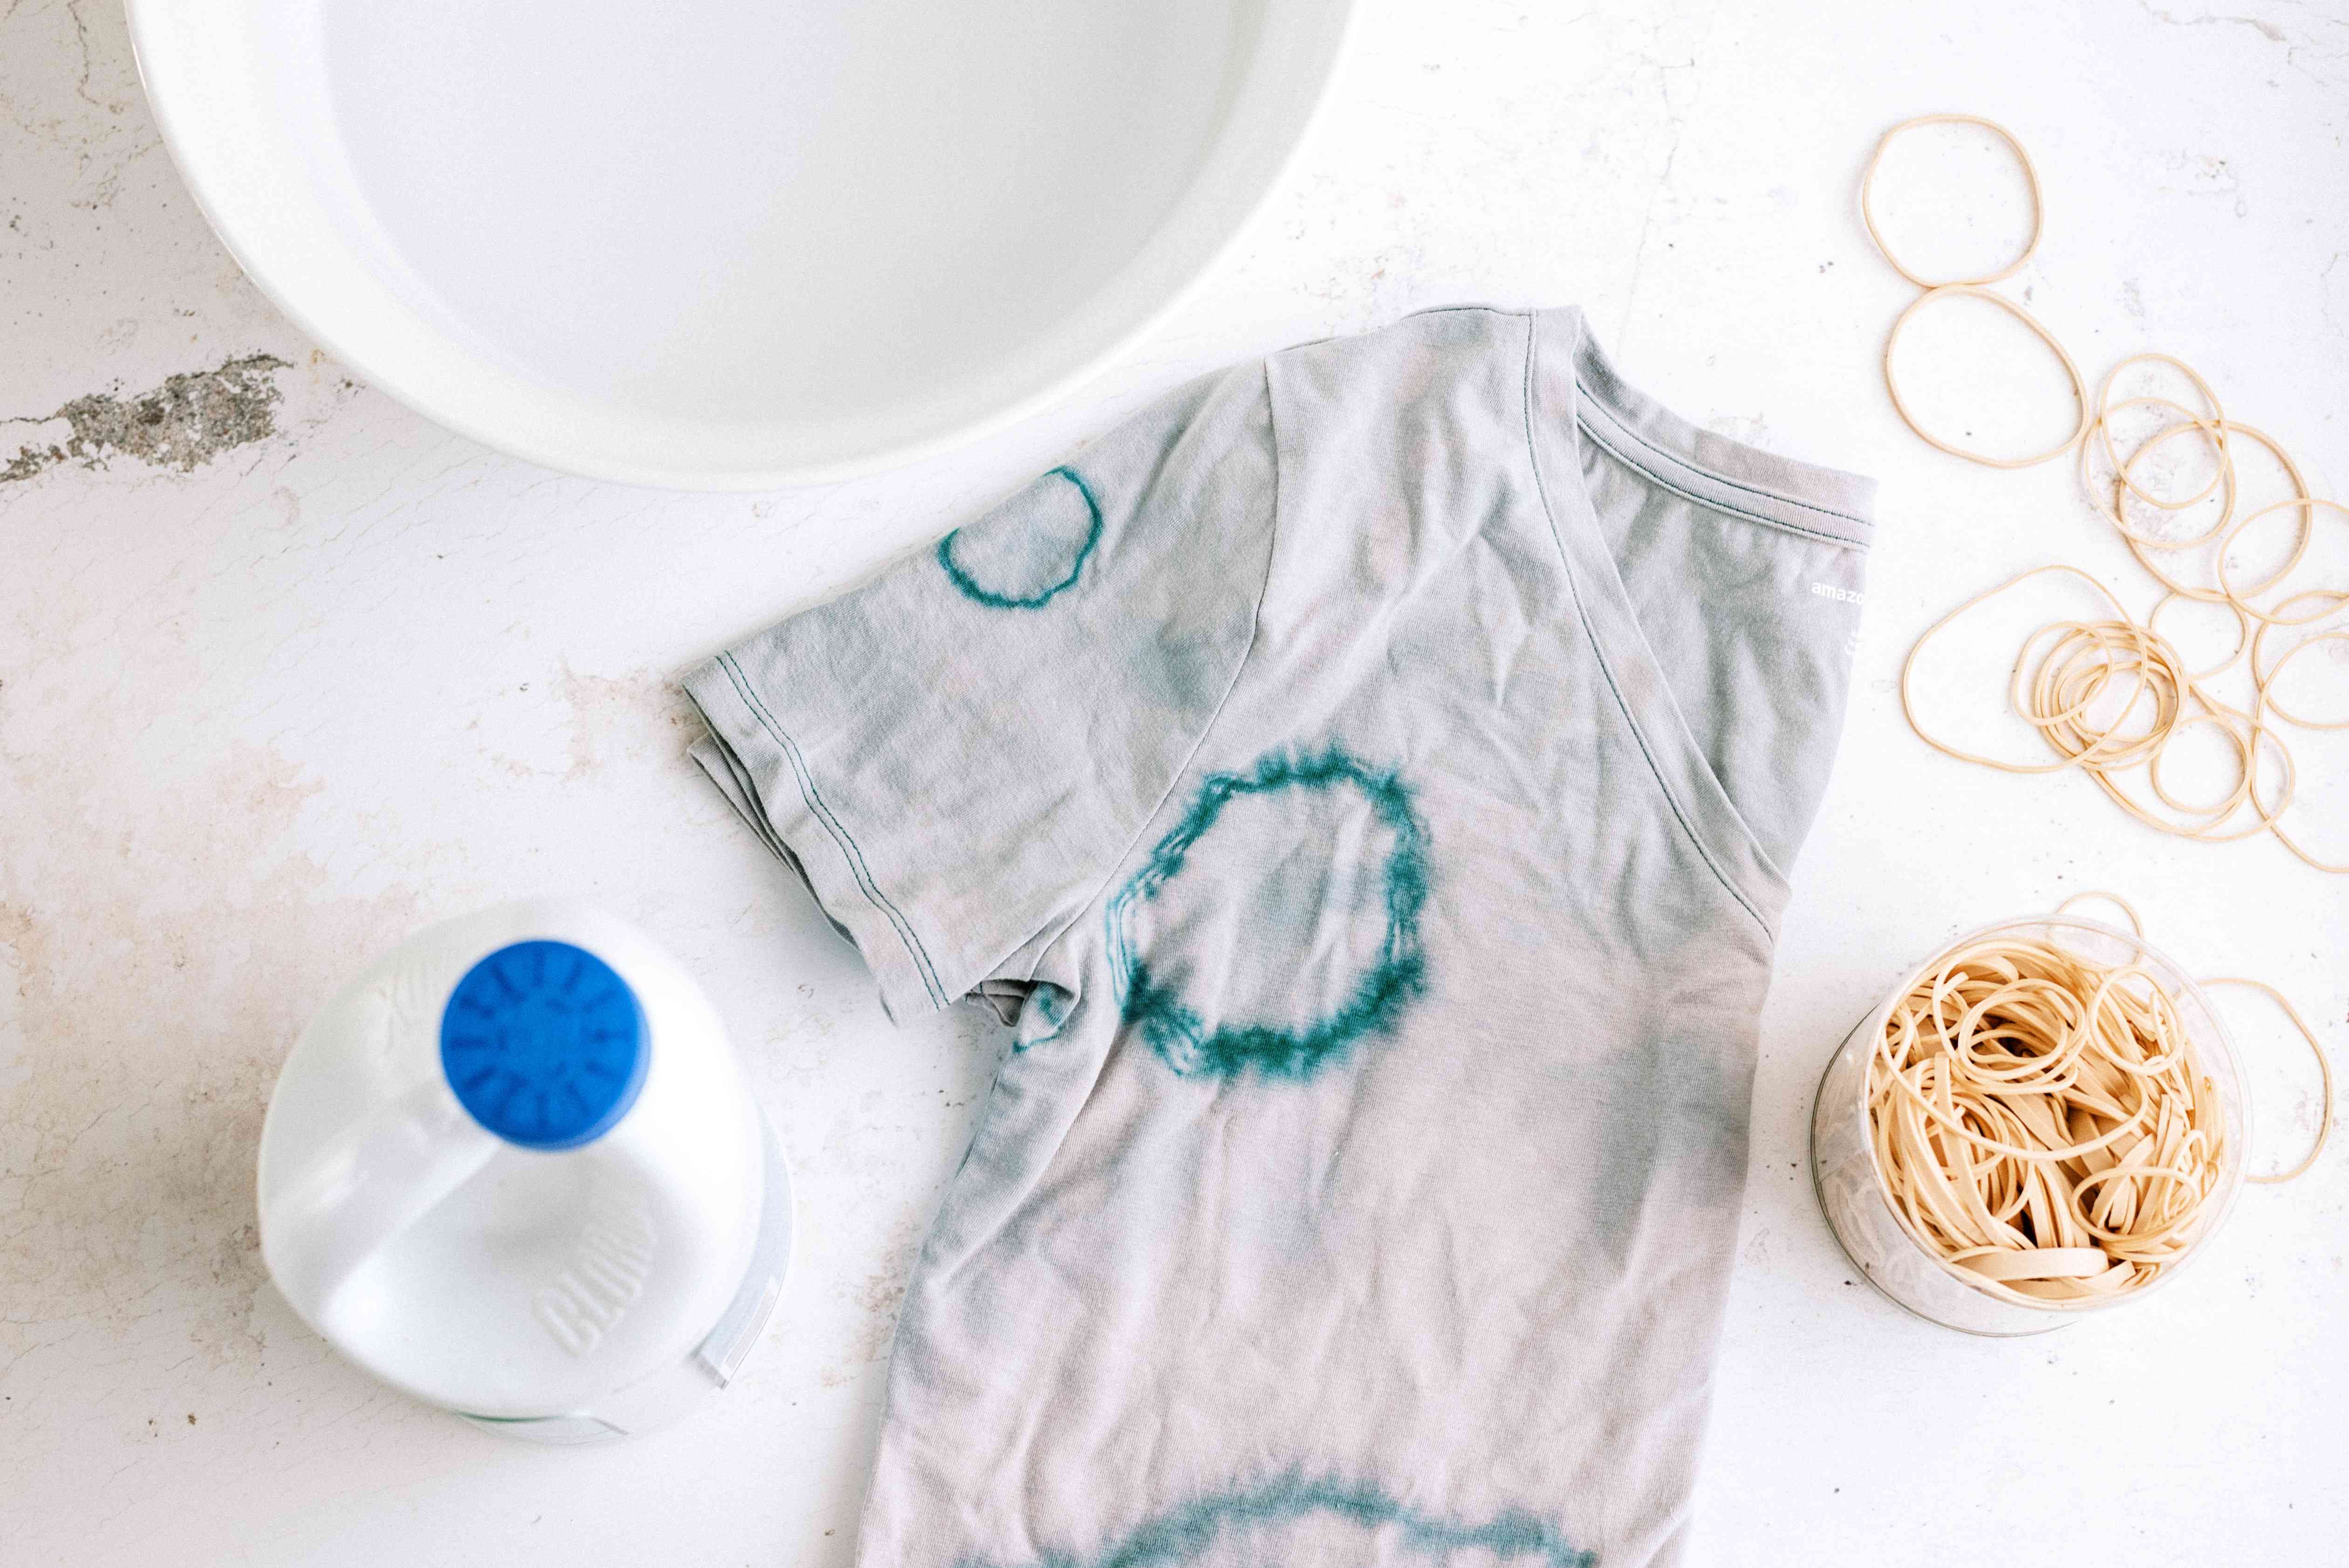
Reverse tie-dye is the bleach version of traditional tie-dye. Instead of adding bright dye to a white shirt, you remove color from a dark shirt. Twist, crumple, spiral, fold, or bind the shirt with rubber bands. Apply diluted bleach to selected areas, then watch the color shift. Most shirts begin changing within a few minutes, but some need longer.
For a spiral design, pinch the center of the shirt and twist until the fabric forms a flat swirl. Secure it with rubber bands like pizza slices. Spray or squeeze bleach onto the sections. For a crumple design, scrunch the shirt randomly and apply bleach to the top folds. The result is organic, moody, and wonderfully forgiving.
3. Painter’s Tape Patterns
Painter’s tape is excellent for stripes, grids, lightning bolts, frames, sunbursts, and abstract shapes. Press the tape firmly so bleach cannot sneak underneath. Spray lightly, wait for the fabric to lighten, then rinse before removing or after removing depending on how sharp you want the lines. This method is beginner-friendly and makes you feel oddly powerful for someone holding office tape.
4. Brush-On Bleach Art
If you want a hand-drawn look, use a foam brush or old paintbrush. Dip lightly into diluted bleach and paint directly onto the shirt. This works for flames, clouds, waves, lettering, stars, and sketchy illustrations. Keep the brush from getting too wet or the bleach may spread beyond your lines. Practice on a scrap shirt first if you are trying detailed lettering.
5. Bleach Pen Lettering
A bleach pen can create controlled lines, dots, and handwritten words. It is great for small details, but it can also produce thicker raised lines that need careful rinsing. Do not let bleach gel sit too long because concentrated bleach can weaken fabric. Once the lettering reaches the color you want, rinse thoroughly.
Step-by-Step: How to Bleach a Shirt With Your Own Designs
Step 1: Pick Your Design
Choose a design that suits your skill level. Simple shapes work best for beginners. Think stars, hearts, initials, lightning bolts, checkerboards, botanical silhouettes, music-inspired graphics, or a simple phrase. Highly detailed designs can work, but tiny stencil pieces may lift or blur when sprayed.
Step 2: Place Cardboard Inside the Shirt
Slide cardboard between the front and back layers. Smooth the shirt flat. Wrinkles can create accidental lines, which may look artistic or may look like the shirt slept badly.
Step 3: Apply Your Stencil or Pattern
Attach your stencil, tape, vinyl, or freezer paper to the shirt. Make sure all edges are sealed. If you are doing tie-dye, fold and bind the shirt with rubber bands instead.
Step 4: Spray or Apply Bleach
Use a light hand. Mist from about 8 to 12 inches away for a soft faded look. Spray closer for stronger contrast, but be careful because too much liquid can spread. If brushing bleach, blot excess from the brush before touching the fabric.
Step 5: Watch the Color Change
Bleach shirt designs usually develop within 1 to 10 minutes, although some fabrics take longer. Keep your eyes on the shirt the entire time. The fabric may continue lightening after you first notice a change, so rinse a little earlier than your dream color if you are unsure.
Step 6: Rinse Thoroughly
When the design looks right, rinse the shirt under cold running water until the water runs clear. Remove stencils, tape, or rubber bands carefully. Avoid splashing. Keep gloves on during this step.
Step 7: Wash Separately
Wash the shirt by itself with detergent. Use a normal or gentle cycle depending on the fabric. Do not wash it with your favorite jeans, towels, or anything you would mourn. Dry according to the care label, or air-dry if you want to be extra gentle.
How Long Should Bleach Sit on a Shirt?
Most bleach shirt designs need only a few minutes. A light mist may show results quickly, while thicker fabric or a weaker bleach mixture may take longer. As a general rule, do not leave bleach sitting on fabric longer than necessary. Extended contact can weaken fibers and create holes over time.
If the shirt is not lightening after 10 to 15 minutes, the fabric dye may be resistant, the bleach may be old, or the material may contain synthetic fibers that react slowly. It is better to rinse and try another shirt than keep soaking the same one until it becomes a decorative napkin.
Common Mistakes to Avoid
Using Too Much Bleach
More bleach does not always mean a better design. Oversaturating the fabric can blur your stencil, create harsh patches, and damage fibers. Start light and build gradually.
Skipping the Test Spot
A black shirt does not always bleach to white. It may turn orange, yellow, red, beige, or gray. Test first so you are not surprised when your “cool moon design” becomes “spicy nacho moon.”
Working Indoors Without Ventilation
Bleach fumes can irritate your eyes, nose, throat, and lungs. Always work with fresh air. If the smell feels strong, step away and improve ventilation.
Mixing Bleach With Other Chemicals
Never mix bleach with vinegar, ammonia, alcohol, peroxide, toilet cleaner, stain remover, or random mystery liquids from under the sink. Dangerous gases can form. For this project, bleach plus water is the only mixture you need.
Using Delicate or Stretchy Fabric
Chlorine bleach is not friendly to wool, silk, spandex, leather, or delicate specialty fabrics. Stick with sturdy cotton shirts for the best results.
Tips for Better Bleach Shirt Designs
Use Fresh Bleach
Old bleach loses strength over time. If your shirt is not reacting, the bleach may be past its prime. Use fresh household bleach for more predictable results.
Try a Spray Test on Paper First
Before spraying the shirt, test the spray bottle on cardboard or paper. Some bottles mist beautifully; others spit like an angry llama. A fine mist gives a softer look, while a stream creates spots and splatters.
Layer the Design
You can create depth by spraying lightly, waiting, moving the stencil, and spraying again. This works beautifully for stars, leaves, clouds, and galaxy effects. Keep each layer light so the fabric does not become overworked.
Protect the Back of the Shirt
Unless you want a two-sided design, always use cardboard inside the shirt. Bleach can soak through quickly, especially on thinner cotton.
Finish With Fabric Paint or Dye
After the shirt is washed and dried, you can add fabric paint, embroidery, patches, or traditional tie-dye over the bleached areas. Bleach creates the base; your imagination gets to do the victory lap.
Creative Design Examples
Galaxy Bleach Shirt
Start with a black shirt. Lightly mist random areas with diluted bleach. Add tiny splatters by flicking a toothbrush dipped in the solution. After washing and drying, add white fabric paint dots for stars. The finished shirt looks cosmic without requiring you to understand astrophysics.
Botanical Silhouette Shirt
Place real leaves or cut paper leaf shapes on the shirt. Mist around them. When you remove the leaves, the protected areas remain dark while the background lightens. This creates a clean nature-inspired design.
Vintage Band-Style Shirt
Use adhesive vinyl letters or a bold stencil. Spray lightly around the design, then add a few random splatters. The result looks worn-in and edgy, like you definitely discovered the band before everyone else.
Checkerboard or Stripe Shirt
Use painter’s tape to block off geometric sections. Spray carefully and peel after rinsing. This design is simple, modern, and great for sleeves, pockets, or the lower hem of oversized shirts.
How to Care for a Bleached Shirt
Once your custom bleach shirt is finished, wash it with similar colors. Turn it inside out to reduce friction. Use mild detergent and avoid repeated bleaching. Dry on low heat or air-dry to help preserve the fabric. Bleached areas may be slightly weaker than untouched fabric, so gentle care keeps the shirt wearable longer.
Extra Experience: Lessons From Making Custom Bleach Shirts
The first thing you learn from making bleach shirts is that fabric has a personality. Some shirts cooperate like polite craft students. Others behave like they were raised by raccoons. Two black cotton shirts from different brands can bleach into completely different colors. One may turn a warm caramel shade in three minutes, while another slowly shifts to gray after ten minutes and acts like it is doing you a favor.
That is why testing is not just a safety step; it is a creative preview. A tiny test spot can save you from building an entire design around a color result you do not actually like. If the test turns orange, lean into flame graphics, desert sunsets, pumpkins, tigers, or retro lettering. If it turns cream, try moons, flowers, celestial designs, or vintage typography. If it turns gray, go for smoke, clouds, stone textures, or minimalist patterns.
Another hard-earned lesson is that sharp designs require patience. When using stencils, the biggest mistake is spraying too much too fast. A heavy blast makes bleach creep under the edges, especially on soft cotton. The design may still look cool, but it will not be crisp. The best approach is to spray lightly, wait, then spray again only if needed. Think of it like seasoning soup. You can add more salt, but removing it involves regret and possibly takeout.
Freezer paper is a budget-friendly hero for DIY shirt design. Draw or print your design, cut it out, place the shiny side down, and gently iron it onto the shirt. It will not stick like permanent vinyl, but it usually holds well enough for a light mist. For tiny details, adhesive vinyl is better. If you have a cutting machine, vinyl stencils make detailed bleach designs much easier. If you do not, a craft knife and a steady hand still work.
Spray bottles also matter more than beginners expect. A fine-mist bottle creates soft gradients and faded edges. A cheap bottle with a harsh stream creates dots, streaks, and splash marks. Those effects can be useful for galaxy shirts or grunge designs, but they are not ideal for clean stencil work. Test the bottle before spraying the shirt. This five-second habit prevents many dramatic craft-table speeches.
Timing is another skill. The shirt often looks darker when wet, and the bleached area may become more noticeable after washing and drying. If you wait until the design looks extremely bright while still wet, you may end up with a harsher result than planned. Rinse when the color is slightly lighter than halfway to your goal. After a few projects, you will develop an eye for it.
For reverse tie-dye, imperfect folds are not failures. They are texture. Crumple patterns, spirals, and accordion folds all create movement. If one area looks too blank after rinsing, you can dry the shirt and do a second light bleach layer later. Layering is one of the best ways to make a shirt look intentional instead of accidental.
The final experience tip is simple: start with thrifted shirts or old shirts before moving to new blanks. Bleach design is easy, but it is still partly experimental. Practice helps you learn how much spray to use, how your stencil behaves, how long your fabric takes to change, and what colors you like best. Once you understand those basics, you can create custom shirts for gifts, events, small shops, family reunions, band merch, or your own closet.
And yes, people will ask where you bought it. You can say, “I made it,” and then enjoy the tiny dramatic pause that follows. That pause is one of the best parts of DIY.
Conclusion
Bleaching a shirt with your own designs is a fun, affordable, and surprisingly stylish way to personalize clothing. With a dark cotton shirt, diluted bleach, a good stencil or folding technique, and proper safety habits, you can create everything from crisp graphic tees to dreamy reverse tie-dye patterns. The key is to test first, work in a ventilated area, use a light hand, rinse thoroughly, and wash the shirt separately before wearing.
Whether you want a galaxy shirt, botanical silhouette, vintage-style graphic, or bold abstract pattern, bleach shirt design gives you room to experiment. It is simple enough for beginners but flexible enough for serious crafters. Just remember: bleach is a tool, not a toy. Treat it with respect, and it will help you turn an ordinary shirt into wearable art.