
Sweet potatoes are already the overachievers of the vegetable drawer: naturally sweet, colorful, filling, and somehow just as comfortable in a cozy casserole as they are in a hiking snack bag. But when you dehydrate sweet potatoes, they become something even more useful: lightweight, shelf-friendly, meal-prep-ready pieces of golden goodness that can be turned into chips, backpacking meals, soups, stews, breakfast hashes, dog treats, or emergency pantry staples.
Learning how to dehydrate sweet potatoes is not difficult, but it does reward patience. This is not a “throw slices on a tray and hope for the best” situation. Sweet potatoes are dense, starchy, and moisture-rich, which means they need even slicing, proper pretreatment, enough airflow, and a complete cool-down before storage. Do it right, and you get chewy slices, crisp chips, or rehydratable pieces that taste like fall packed itself into a jar. Do it wrong, and you may end up with leathery orange coins that refuse to dry or, worse, trap moisture in storage. Nobody wants a science experiment in the pantry unless it is clearly labeled “seventh-grade volcano.”
This guide breaks the process into 14 practical steps, with clear tips for choosing sweet potatoes, cutting them correctly, blanching, dehydrating, testing for doneness, storing, and using them later. Whether you are preserving a garden harvest, preparing camping meals, reducing food waste, or simply trying to stop your sweet potatoes from sprouting little alien antennas on the counter, this method will help you do it safely and confidently.
Why Dehydrate Sweet Potatoes?
Dehydrating removes moisture from food so bacteria, yeasts, and molds have a much harder time growing. The result is compact, lightweight food that takes up less space than fresh produce, freezes nothing, and does not require canning jars or pressure processing. Sweet potatoes are especially useful because they are naturally flavorful and versatile. You can dry them as slices, strips, shreds, cubes, or cooked mash spread into a leather-like sheet.
For home cooks, dehydrated sweet potatoes are excellent for soups, lentil stews, curries, casseroles, trail meals, and quick side dishes. For snack lovers, thin slices can become chewy or crisp sweet potato chips. For backpackers, dried sweet potatoes offer carbohydrates, color, and comfort without hauling around heavy fresh vegetables. For budget-minded kitchens, dehydration lets you buy sweet potatoes on sale and preserve them before they soften, wrinkle, or become a botanical research project.
What You Need Before You Start
You do not need a commercial kitchen to dehydrate sweet potatoes, but the right tools make the job easier. A food dehydrator is the most reliable option because it controls heat and airflow. An oven can work if it can hold a low temperature, ideally around 140°F, and if you can create enough air circulation. A mandoline slicer, sharp knife, cutting board, vegetable peeler, large pot, colander, clean towels, and airtight storage jars or bags will also help.
The most important rule is consistency. Pieces of the same thickness dry at the same pace. Random chunks dry like a group project: one person finishes early, someone else does nothing, and the whole thing takes longer than expected.
How to Dehydrate Sweet Potatoes: 14 Steps
Step 1: Choose Fresh, Firm Sweet Potatoes
Start with sweet potatoes that feel firm, heavy for their size, and free from mold, soft spots, deep cracks, or shriveled ends. Small to medium sweet potatoes are often easier to slice evenly and may be less fibrous than oversized ones. Orange-fleshed varieties are popular because they dry into a naturally sweet, colorful product, but white or purple sweet potatoes can also be dehydrated.
Avoid using sweet potatoes that smell musty or have wet, sunken patches. Dehydration preserves quality; it does not magically rescue produce that is already waving a tiny white flag.
Step 2: Wash Thoroughly
Scrub each sweet potato under cool running water to remove soil. Root vegetables grow underground, which is charming in theory and gritty in practice. Use a clean vegetable brush, especially if the skins have dirt tucked into grooves. Even if you plan to peel them, washing first helps prevent transferring surface dirt from the skin to the flesh as you cut.
Step 3: Peel for Best Texture
Peeling is recommended for a smoother finished texture and more even drying. Sweet potato skins can become tough and chewy after dehydration, especially on thicker slices. Use a vegetable peeler and remove any blemished areas with the tip of a knife.
If you love rustic snacks and your sweet potatoes are very clean, you can test a small batch with the peel on. However, for long-term storage and recipe use, peeled sweet potatoes usually give the most predictable result.
Step 4: Decide on the Final Use
Before cutting, decide how you want to use the dried sweet potatoes. For snack chips, cut thin rounds. For soups and stews, dice or slice small pieces. For camping meals, thin strips or small cubes rehydrate faster. For powder, dry cooked mash or very thin slices until brittle, then grind them.
This one decision saves time later. A thick cube meant for stew will not behave like a crisp chip, and a paper-thin chip will not rehydrate like a hearty chunk. Sweet potatoes are flexible, but they are not mind readers.
Step 5: Slice Evenly
Cut sweet potatoes into 1/8-inch slices for faster drying or 1/4-inch strips for a more substantial texture. A mandoline makes uniform slices easier, but a sharp knife works if you take your time. The goal is even thickness from edge to edge.
Thin slices may dry into crisp chips, while thicker strips tend to become leathery or chewy. If pieces are too thick, the outside may dry before the center has released enough moisture. That can lead to poor storage quality, so resist the urge to cut chunky “just one bite” pieces unless you plan to rehydrate them soon.
Step 6: Blanch the Pieces
Blanching is a key step for sweet potatoes. It helps slow enzyme activity, improves color, supports better texture, and helps the pieces dry more evenly. Water blanch slices or strips for about 5 to 6 minutes, or steam blanch for about 6 to 8 minutes. They should soften slightly but not turn into mash.
Think of blanching as giving the sweet potatoes a quick warm-up before the dehydration marathon. You are not cooking them fully; you are preparing them to dry properly.
Step 7: Cool Quickly and Drain Well
After blanching, transfer the sweet potato pieces to cold water to stop the cooking. Drain them thoroughly in a colander, then spread them on clean towels and pat dry. Removing surface moisture speeds drying and helps prevent sticky patches on dehydrator trays.
Do not skip draining. Wet pieces add extra time, and extra time can make you question your life choices somewhere around hour nine.
Step 8: Arrange in a Single Layer
Place the sweet potato pieces on dehydrator trays in a single layer. Leave a little space between pieces so air can move around them. Overlapping slices trap moisture and dry unevenly. If you are making small cubes or shreds, use mesh liners to prevent pieces from falling through the trays.
Good airflow is the difference between a successful batch and a tray of stubborn orange coasters. Keep it loose, tidy, and uncrowded.
Step 9: Set the Dehydrator to 140°F
Set your dehydrator to 140°F. This temperature is commonly recommended for vegetables because it is warm enough to remove moisture efficiently but not so hot that the outside hardens while the inside stays damp. If your dehydrator has hot spots, rotate trays during drying.
For oven drying, use the lowest setting available, ideally 140°F to 150°F. Prop the oven door open slightly if your appliance allows it safely, and use convection if available. Oven drying generally takes longer than a dehydrator because airflow is less efficient.
Step 10: Dry for 8 to 12 Hours
Sweet potatoes usually take 8 to 12 hours in a dehydrator, depending on thickness, moisture content, humidity, tray load, and machine design. Thin slices may finish earlier, while thicker strips can take longer. Oven batches may take up to twice as long.
Begin checking around the 7- or 8-hour mark. Do not judge doneness while pieces are hot, because warm food often feels softer than it will after cooling. Let a few test pieces cool for several minutes before deciding whether the batch is finished.
Step 11: Test for Doneness
Properly dried sweet potato slices should feel dry and leathery or brittle, depending on thickness. They should not feel moist, sticky, or cool in the center. Thinner chips may snap, while thicker strips may bend without releasing moisture. If you squeeze a cooled piece and see moisture, return the batch to the dehydrator.
When in doubt, dry a little longer. Under-drying is the fastest way to ruin a stored batch. Over-drying may make pieces tougher, but under-drying can invite spoilage. The pantry prefers boring safety over dramatic surprises.
Step 12: Condition the Dried Sweet Potatoes
Conditioning helps equalize any remaining moisture among the pieces. Place cooled dried sweet potatoes loosely in a clean glass jar, filling it about two-thirds full. Seal the jar and shake it once a day for about a week. Check for condensation or pieces sticking together.
If moisture appears inside the jar, return the sweet potatoes to the dehydrator. Conditioning is especially useful when pieces vary slightly in size or when you are drying in humid weather.
Step 13: Store in Airtight Containers
Once fully dry and conditioned, store sweet potatoes in airtight jars, vacuum-sealed bags, or moisture-proof food storage containers. Keep them in a cool, dark, dry place. Label each container with the date and cut style, such as “sweet potato slices” or “sweet potato strips.”
For best quality, use dehydrated sweet potatoes within 6 to 12 months. They may remain safe longer if dried and stored properly, but flavor, color, and texture are best when they are not forgotten behind the rice until the next presidential administration.
Step 14: Rehydrate and Use
To rehydrate dried sweet potato pieces, combine 1 cup of dried sweet potatoes with about 1 1/2 cups of water and let them soak for about 30 minutes. You can also add dried pieces directly to soups, stews, beans, chili, or curry and simmer until tender. For breakfast, rehydrate small cubes and pan-cook them with onions, peppers, and eggs. For a cozy side dish, simmer dried slices until soft, then mash with butter, cinnamon, and a pinch of salt.
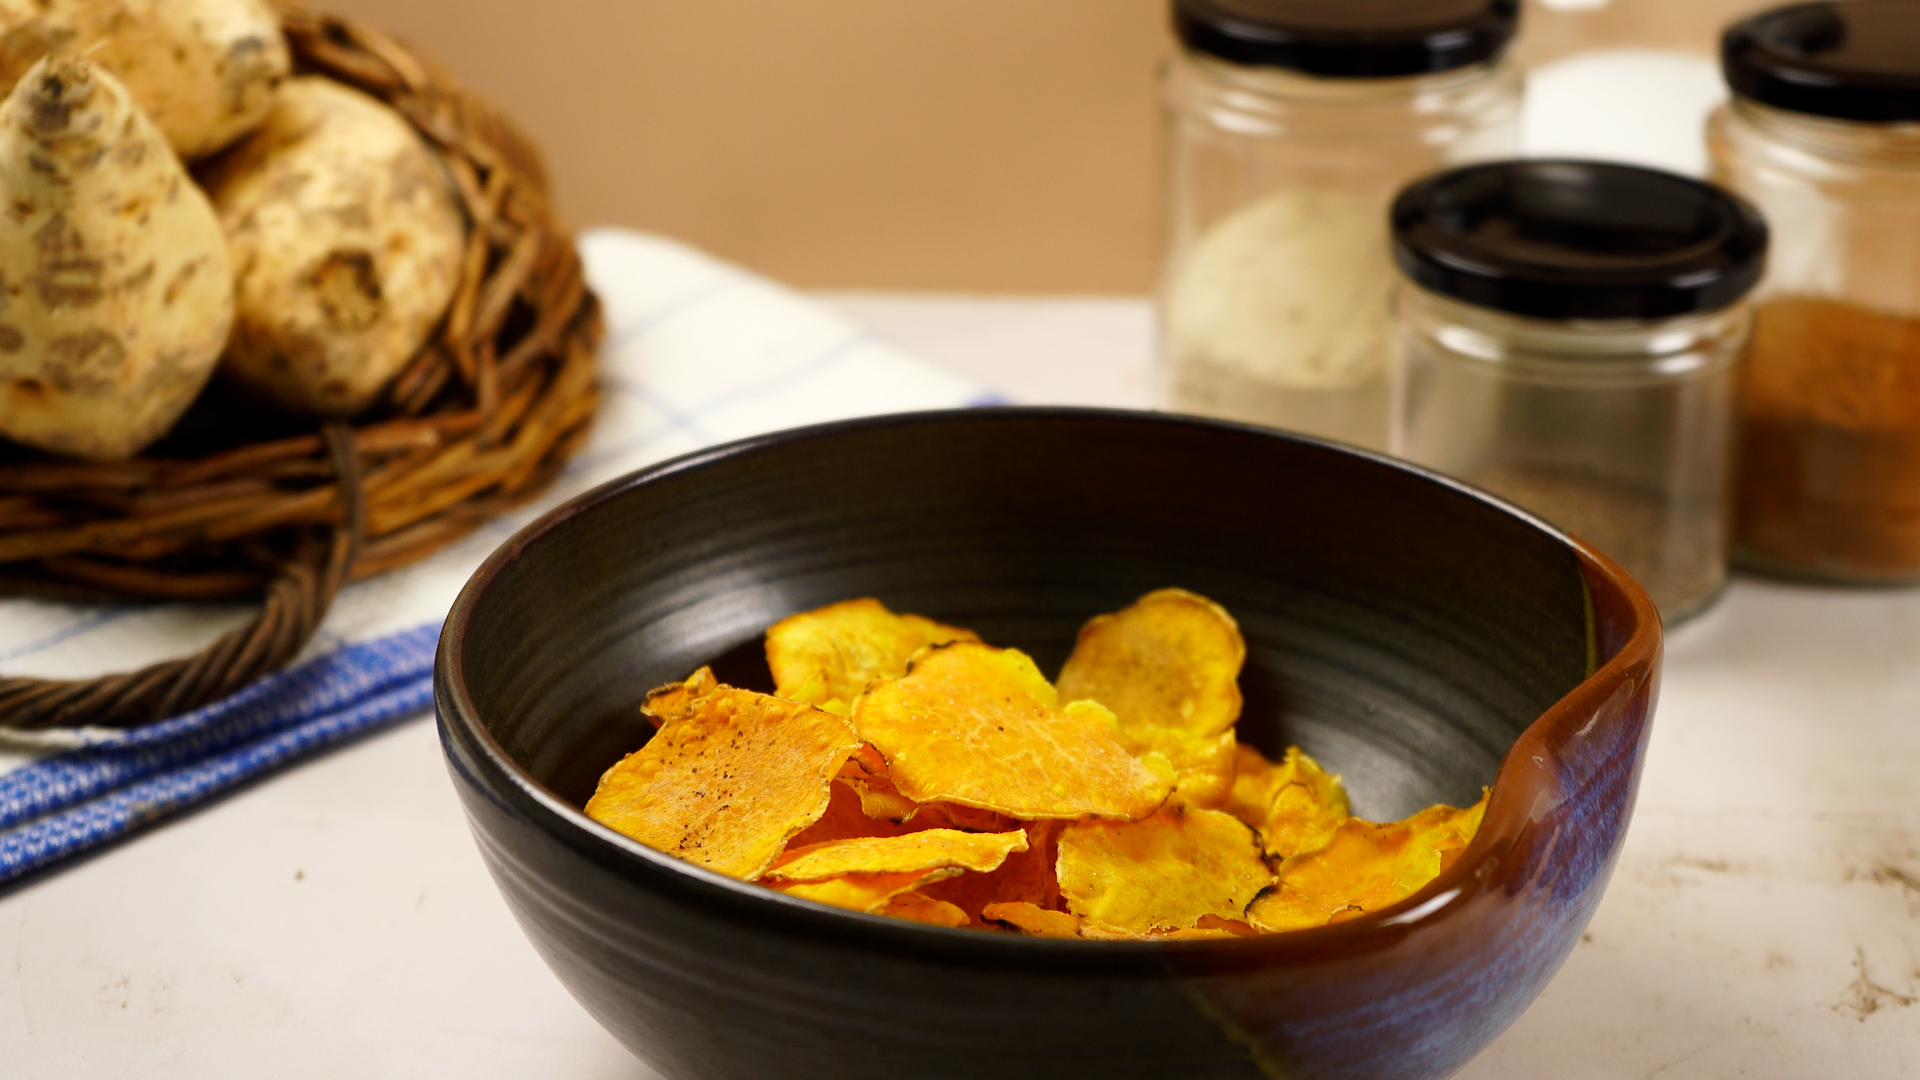
If you made crispy chips, enjoy them as snacks, but remember that homemade dehydrated chips may not have the same oily crunch as fried chips. They are more earthy, chewy-crisp, and naturally sweet. In other words, they taste like a vegetable trying its best to be a snackand honestly, it does a pretty good job.
Flavor Ideas for Dehydrated Sweet Potatoes
Plain dehydrated sweet potatoes are the most versatile because they can go sweet or savory later. However, if you are making snacks, seasoning before drying can be fun. Toss blanched and drained slices lightly with cinnamon for a simple sweet version. For savory chips, try smoked paprika, garlic powder, onion powder, black pepper, or a tiny pinch of cayenne. Keep oil to a minimum, because excess fat can shorten storage life and create off flavors over time.
For a holiday-style snack, sprinkle slices with cinnamon, nutmeg, and a touch of maple sugar. For a smoky trail mix ingredient, use smoked paprika and a little sea salt. For soup-ready pieces, leave them unseasoned so they blend into any recipe.
Common Mistakes to Avoid
Cutting Pieces Too Thick
Thick pieces take much longer to dry and may stay moist in the center. Keep slices around 1/8 inch or strips around 1/4 inch for better results.
Skipping Blanching
Raw sweet potatoes can dry unevenly and may have poorer color and texture. Blanching is a small step that makes a noticeable difference.
Overcrowding the Trays
Dehydrators need airflow. If pieces overlap, they steam instead of dry. Give them space and rotate trays if needed.
Storing Before Fully Cool
Warm dried food can create condensation in storage containers. Always cool completely before sealing.
Ignoring Humidity
Drying takes longer on humid days. If your kitchen feels like a sauna wearing a sweater, expect the dehydrator to need extra time.
How to Use Dehydrated Sweet Potatoes
Dehydrated sweet potatoes are more than pantry decoration. Add dried cubes to vegetable soup, black bean chili, chicken stew, coconut curry, lentils, or rice pilaf. Grind brittle pieces into sweet potato powder and stir it into pancake batter, bread dough, smoothies, oatmeal, or homemade pasta. Rehydrate slices and layer them into casseroles. Use seasoned chips in lunch boxes, road trip snack bags, or trail mix.
For backpacking meals, pair dried sweet potatoes with instant rice, dehydrated beans, dried greens, powdered coconut milk, and curry spices. At camp, add hot water, wait, and enjoy a meal that tastes far better than anything called “survival ration.”
Experience Notes: What I Learned From Dehydrating Sweet Potatoes at Home
The first thing you notice when dehydrating sweet potatoes is that they are not in a hurry. Apples dry with cheerful cooperation. Herbs dry if you look at them sternly. Sweet potatoes, on the other hand, behave like they have a meeting scheduled for tomorrow and no interest in arriving early. That is why slicing matters so much. In practice, the difference between 1/8 inch and “close enough” can be several hours of drying time.
One of the best experiences comes from using a mandoline slicer. The slices look uniform, dry more evenly, and make the finished batch feel professional. The downside is that mandolines are extremely sharp, so using the hand guard is not optional. A sharp knife also works, especially for strips, but it takes more patience. If you are doing a large batch, consistency becomes more important than speed.
Blanching also feels like an annoying extra step until you compare batches. Unblanched sweet potatoes can turn darker, dry with a raw-starchy flavor, and sometimes rehydrate with a less pleasant texture. Blanched pieces look brighter and behave better in soups and stews. The trick is to blanch long enough to slightly soften the pieces but not so long that they crumble. A gentle simmer is better than an aggressive boil that tosses slices around like laundry in a storm.
Another practical lesson: do not season every tray the same way. A mixed batch is more useful. Leave at least half plain for cooking, then season one tray with cinnamon and another with smoked paprika or garlic powder. Later, you will be grateful. Plain dried sweet potatoes can go into curry, chili, oatmeal, bread, soup, or hash. Cinnamon slices are delicious, but they are not exactly welcome in black bean stew unless your stew has decided to become dessert.
Drying time is also more flexible than beginners expect. A recipe may say 8 to 12 hours, but your actual time depends on humidity, slice thickness, dehydrator model, tray crowding, and how much water the sweet potatoes contain. Some batches finish in one afternoon. Others seem to be auditioning for a slow-motion documentary. The best habit is to check texture, not the clock. Cool a few pieces, bend or snap them, and look for hidden moisture.
Storage is where many beginners get too excited. Freshly dried sweet potatoes smell wonderful, and it is tempting to seal them immediately. Waiting matters. Let them cool fully, then condition them in jars for several days. Shake the jars and watch for moisture. This step gives you confidence before the batch disappears into the pantry. If you see condensation, the dehydrator gets an encore performance.
The most satisfying use is adding dried sweet potato pieces to soup. They plump up beautifully and bring mild sweetness that balances smoky, spicy, or earthy flavors. They are also excellent in camping meals because they weigh very little and make a simple pot of rice and beans taste more complete. Sweet potato powder is another underrated trick. Grind fully brittle pieces and add the powder to pancake batter, muffins, or oatmeal for color and subtle sweetness.
After a few batches, dehydrating sweet potatoes becomes less of a recipe and more of a kitchen rhythm: wash, peel, slice, blanch, dry, cool, condition, store. It is simple, but it feels satisfyingly old-school, like you have outsmarted waste, saved money, and made your pantry more useful in one orange-colored afternoon.
Conclusion
Dehydrating sweet potatoes is a smart, practical way to preserve one of the most versatile vegetables in the kitchen. With clean produce, even slices, proper blanching, steady low heat, good airflow, and careful storage, you can turn fresh sweet potatoes into lightweight ingredients for snacks, soups, camping meals, powders, and quick side dishes. The process is not complicated, but it does ask for patience and attention to detail. Slice evenly, dry thoroughly, condition before storage, and your sweet potatoes will reward you with months of convenient, naturally sweet flavor.
Whether you are preserving a fall harvest, building a backpacking pantry, or rescuing a sale bag from a mushy countertop ending, these 14 steps give you a reliable method. Sweet potatoes may be humble, but once dehydrated, they become pantry goldcompact, colorful, and ready for everything from chili night to trail lunch.