
Learning how to draw a silhouette is one of the fastest ways to make your art look bold, mysterious, and surprisingly polished. A silhouette is simple in theory: a dark shape against a lighter background. But like many “simple” art techniques, it has a sneaky little trickster side. Draw the outline too stiffly, and your subject looks like cardboard. Ignore the negative space, and your graceful dancer becomes a confused potato with legs. Fill the shape unevenly, and suddenly the drama has left the building.
The good news? Silhouette drawing is extremely beginner-friendly. You do not need a giant studio, a museum-grade easel, or a pencil blessed by Leonardo da Vinci. You need a subject, a light source or reference image, a basic understanding of outline and contrast, and enough patience not to rush the edges. Whether you want to draw a person in profile, a cat on a windowsill, a tree at sunset, or a romantic skyline, silhouettes teach you how to see shape before detail.
In this guide, you will learn how to draw a silhouette in six clear steps. We will cover choosing a strong subject, setting up your reference, sketching the outline, refining the contour, filling the shape, and adding background details that make the final artwork pop. By the end, you will know how to create silhouette art that looks intentional, clean, and full of personalityeven if the subject has no eyes, no shading, and absolutely zero interest in smiling for the portrait.
What Is a Silhouette in Art?
A silhouette is a solid shape, usually dark or black, shown against a lighter background. The interior of the shape typically has little or no detail, so the viewer understands the subject mainly through its outer edge. That edge is everything. It tells us whether we are looking at a person, a bird, a flower, a horse, a city skyline, or your houseplant pretending it is thriving.
Historically, silhouette portraits became popular because they were quicker and more affordable than painted portraits. Before everyone had a phone camera and twenty-seven selfies from the same angle, a cut-paper silhouette could capture a person’s profile in a simple, elegant way. Today, silhouette drawing is used in fine art, illustration, photography, logo design, tattoo concepts, wall art, greeting cards, and beginner drawing lessons.
Silhouette art works because the human brain is excellent at recognizing shapes. A tiny curve of a nose, the tilt of a hat, the arch of a cat’s back, or the branching pattern of a tree can say more than a page of details. That is why drawing silhouettes is such useful practice: it trains you to focus on the big visual statement first.
Materials You Need to Draw a Silhouette
You can draw a silhouette with very basic tools. For a traditional drawing, gather white drawing paper, a pencil, an eraser, a black marker or brush pen, and optionally black paint, ink, charcoal, or colored pencils. If you are working digitally, use any drawing app with layers, a hard brush, and an opacity setting. For tracing from a photo, you may use tracing paper, a printed image, a lightbox, or a bright window.
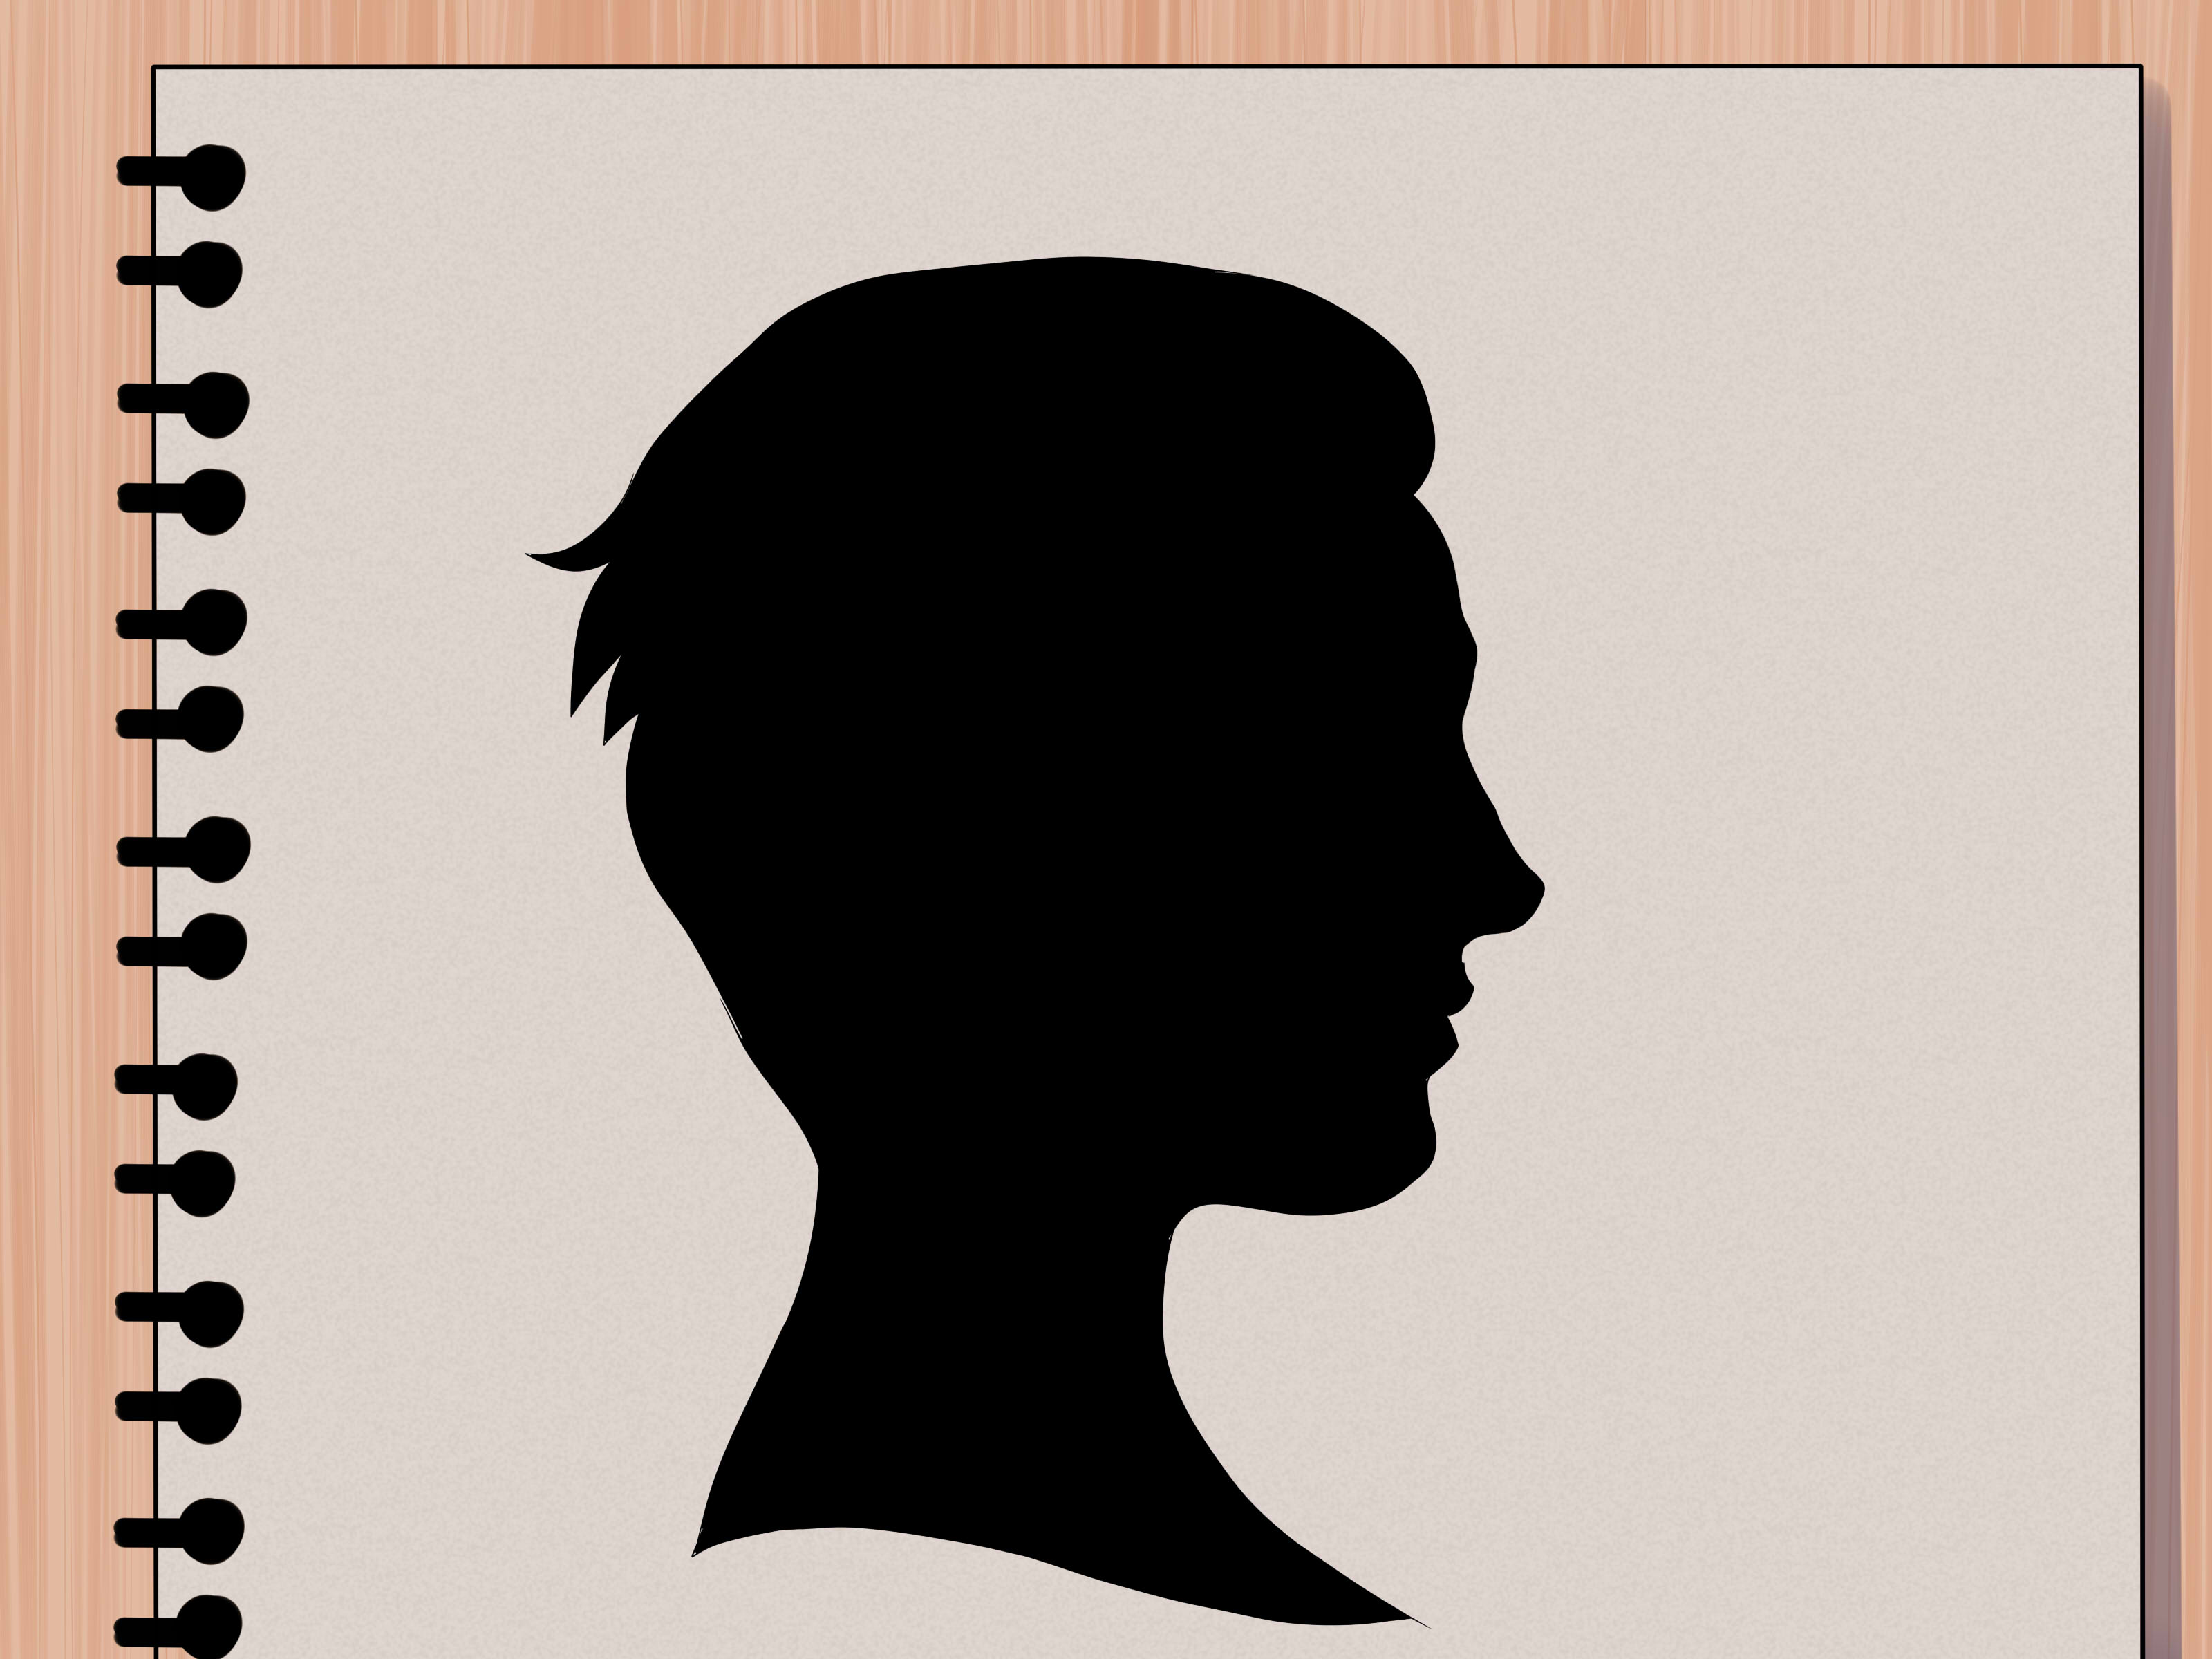
The most important material is not the pen. It is the reference. A good reference makes silhouette drawing much easier. Look for a subject with a clear outline and recognizable pose. Side views usually work better than front views because they show distinctive features. For example, a side profile of a face reveals the forehead, nose, lips, chin, and neck. A front-facing head often becomes a dark oval, which is accurate but about as exciting as a dinner plate.
How to Draw a Silhouette: 6 Steps
Step 1: Choose a Subject With a Strong Outline
The first step in drawing a silhouette is choosing a subject that can be recognized by its outer shape alone. Ask yourself: “If I filled this entire thing with black, would people still know what it is?” If the answer is yes, you are on the right track. If the answer is “maybe, if they squint and believe in me,” choose a clearer subject.
Great beginner subjects include human profiles, pets, birds, trees, flowers, bicycles, dancers, mountains, houses, and city skylines. A person standing with arms slightly away from the body will read better than someone standing stiffly with arms glued to their sides. A dog with pointy ears may be easier to recognize than a fluffy dog curled into a circle. A tree with visible branches will look more interesting than a plain trunk with a blob on top.
Think of the outline as the subject’s signature. A cowboy hat, a ponytail, a long beak, a guitar neck, or a curved tail can make the silhouette instantly recognizable. Small details on the edge matter more than details inside the shape. Since the inside will be dark, the outside has to do the storytelling.
Step 2: Set Up Your Light or Reference Image
If you are drawing from life, place your subject in front of a strong light source so the outline becomes easy to see. A lamp, window, sunset, or bright wall can help create contrast. For a classic profile silhouette, seat the person sideways and shine a light from one side so their shadow or outline appears clearly on a nearby surface. Keep the pose still, because nobody wants to chase a moving nose around the paper.
If you are drawing from a photo, choose an image where the subject stands out from the background. High contrast is your friend. A dark figure against a bright sky is easier to simplify than a person wearing gray in front of a gray wall while holding a gray umbrella. Digital artists can increase contrast or reduce the image to black and white before sketching. Traditional artists can print the photo and lightly trace the main outline.
Before drawing, study the negative space around the subject. Negative space is the empty area around and between forms. In silhouette drawing, negative space helps you check proportions. Look at the shape between the chin and chest, the gap between branches, the space between a dancer’s arms and torso, or the opening under a chair. These spaces act like little truth-tellers. If they look wrong, your silhouette probably needs adjustment.
Step 3: Lightly Sketch the Basic Shape
Start with a light pencil sketch. Do not press hard yet. The first sketch is not a royal decree; it is a friendly suggestion. Block in the subject using simple shapes. A head might begin as an oval. A body might be a rectangle or tapered shape. A tree might start as a trunk line and large canopy mass. A bird might begin with a teardrop body, a small circle for the head, and triangles for the beak and tail.
At this stage, focus on proportion. How tall is the subject compared with its width? Where is the widest part? Does the head tilt? Is the pose balanced? For a face in profile, notice the relationship between forehead, nose, lips, chin, and neck. Avoid drawing each feature as a separate decoration. Instead, connect them into one flowing outer contour.
Use large, simple lines before small details. Beginners often rush to draw eyelashes, hair strands, buttons, or tiny leaves. But in silhouette art, interior details usually disappear. The stronger approach is to design the whole shape first. Think “graphic design,” not “every hair on the family dog.” Your future self will thank you.
Step 4: Refine the Contour and Make It Recognizable
Now refine the outline. This is where your silhouette becomes expressive. A contour line is the line that defines the edge or boundary of a form. In silhouette drawing, the contour is the star of the show, the supporting cast, and possibly the entire production crew.
Slow down and sharpen the parts that help viewers identify the subject. For a human profile, refine the forehead, bridge of the nose, nostril, lips, chin, jawline, hair shape, and neck. You do not need to exaggerate wildly, but the features should be clear. For an animal, focus on ears, snout, tail, legs, and posture. For a tree, vary the branch thickness and create natural, uneven edges. Nature rarely draws perfect lollipops unless it is having a very strange day.
Use negative space again as a checking tool. Look at the empty shapes around your subject. Are the spaces between legs too narrow? Is the gap under the arm clear? Does the bird’s beak project enough? Is the tree branch pattern interesting? Turning the paper upside down can help you see the drawing as abstract shapes instead of named objects. This trick is excellent because it temporarily silences the bossy part of your brain that says, “I know what a cat looks like,” while drawing something that looks suspiciously like a slipper.
Step 5: Fill the Silhouette With Solid Color
Once the outline is refined, fill the silhouette with solid black or another dark color. Use a brush pen, marker, ink, paint, charcoal, or a digital brush. The goal is an even, clean fill. If you are using marker, work slowly and overlap strokes slightly so you do not leave streaks. If you are using paint, let one layer dry before adding another. If you are working digitally, create a new layer under your outline and fill the shape with a dark value.
Black is traditional, but it is not your only option. Deep navy, dark brown, forest green, burgundy, or purple can create a stylish effect. The key is contrast. Your silhouette should stand clearly apart from the background. A dark shape on a light background is the classic approach, but you can also reverse it with a light silhouette on a dark background for a moonlit or dreamy look.
Pay special attention to the edges while filling. Clean edges make a silhouette look professional. Ragged edges may work for trees, fur, smoke, or torn paper effects, but accidental wobble on a face profile can make the person look like they lost a disagreement with a stapler. Use a smaller brush or pen for tight areas such as eyelashes, leaves, hair wisps, or tiny architectural details.
Step 6: Add a Background, Details, or Final Polish
A silhouette can be complete as a plain black shape on white paper, but a thoughtful background can make it more dramatic. Try a sunset gradient behind a landscape, a pale moon behind a wolf, a window shape behind a cat, or a soft watercolor wash behind a portrait. Keep the background simple enough that it does not compete with the silhouette.
For a classic portrait, mount the silhouette on cream paper or place it inside an oval frame. For a modern look, use a square layout with lots of clean white space. For a storybook feel, add small stars, clouds, hills, or distant trees. For a city skyline, add a glowing sky and maybe a few lit windows by leaving tiny white rectangles unfilled or adding them later with a white gel pen.
Final polish includes erasing pencil marks, smoothing uneven fills, correcting edges, and checking the overall composition. Step back from the drawing. Does it read clearly from a distance? Can you identify the subject in two seconds? Does the pose feel alive? If yes, congratulations: your silhouette has survived the art test and may now appear dramatically at sunset.
Beginner Tips for Better Silhouette Drawing
Use the “Two-Second Test”
Show your silhouette to someone for two seconds and ask what they see. If they can identify it quickly, the shape is working. If they hesitate, the outline may need stronger clues. A bird may need a clearer beak. A person may need a more distinct profile. A dancer may need more separation between limbs.
Avoid Flat, Boring Poses
Silhouettes love action. A jumping figure, a tilted head, a reaching arm, a curved cat, or windblown hair will usually look more interesting than a straight, front-facing pose. When details disappear, gesture becomes more important. Think of the pose as body language in black ink.
Exaggerate Carefully
Small exaggerations can make a silhouette clearer. You might slightly sharpen a nose, lift a ponytail, widen a branch gap, or separate fingers. Do not overdo it unless you want a cartoon effect. The goal is recognition, not turning Grandpa into a weather vane.
Practice With Everyday Objects
Before drawing people, practice with mugs, scissors, leaves, keys, shoes, lamps, or plants. Put the object near a window and sketch only the outside shape. This builds confidence and trains your eye to notice edges instead of internal details.
Common Mistakes When Drawing a Silhouette
One common mistake is adding too much interior detail. A silhouette is powerful because it is simplified. If you add eyes, cheekbones, shirt patterns, and every strand of hair, you are no longer drawing a true silhouette; you are drawing a dark portrait that needs a vacation.
Another mistake is choosing a weak angle. Front-facing faces, animals curled into balls, or cluttered objects can become unreadable when filled in. Side views and clear poses usually work better. If your subject looks confusing, rotate it, change the pose, or choose a different reference.
A third mistake is ignoring the edge quality. The outline should match the subject. A metal lamp may have crisp edges. A pine tree may have jagged edges. A person’s hair may have soft, irregular contours. Varying the edge makes the silhouette feel more natural and less like it was cut from a suspiciously nervous stencil.
Creative Silhouette Drawing Ideas
Once you understand the basic process, try different silhouette projects. Draw a family member’s profile and frame it as a handmade gift. Create a pet silhouette from a side-view photo. Draw a forest scene with deer, birds, and layered trees. Make a Halloween silhouette with a haunted house, bats, and a moon. Create a romantic couple silhouette against a sunset. Draw a child reading under a tree, with the branches forming a natural frame.
You can also combine silhouette drawing with watercolor, collage, digital gradients, or cut paper. Try painting a loose sunset first, then adding a black silhouette after the background dries. Or cut your silhouette from black paper and glue it onto patterned scrapbook paper. Digital artists can experiment with textured brushes, glowing backgrounds, or vector-style shapes.
For SEO-friendly craft blogs, classroom projects, and art tutorials, silhouette drawing is a fantastic topic because it works for beginners, kids, hobbyists, and experienced artists. It connects to contour drawing, negative space, contrast, composition, portrait art, and storytelling. In other words, it is simple enough for a first project but deep enough that you can keep improving for years.
Personal Experience: What Drawing Silhouettes Teaches You
The first time many beginners try silhouette drawing, they expect it to be easy because there is no shading. Then reality strolls in, wearing tap shoes. Without shading, color, or facial details, every tiny decision about the outline becomes more important. A nose that is too short changes the whole face. A hand that blends into the body disappears. A tree branch that is too thick looks like a fork. Silhouette drawing teaches you very quickly that “simple” does not mean “careless.”
One of the most useful experiences is learning to stop drawing what you think is there and start drawing what you actually see. For example, when drawing a profile, beginners often draw a symbolic nose, symbolic lips, and symbolic chin. But real profiles are full of subtle angles. The bridge of the nose may slope softly. The upper lip may project more than expected. The chin may tuck inward or push forward. When you trace the true outline, the portrait becomes more personal and less generic.
Silhouettes also build patience. Filling a shape with black seems like the easy part, but clean filling takes control. If you rush, marker streaks appear. If you press too hard, the paper may pill. If you use watery paint, it may bleed past the edge like it has somewhere urgent to be. Over time, you learn to outline first, fill from the edges inward, rotate the paper when needed, and let layers dry. These small habits improve all kinds of drawing and painting.
Another lesson is the power of negative space. When drawing a chair, for instance, the spaces between the legs may be more helpful than the legs themselves. When drawing a person with hands on hips, the triangular spaces between arms and torso make the pose readable. When drawing a tree, the sky holes between branches create rhythm. Paying attention to these empty spaces feels strange at first, but it is one of the fastest ways to improve accuracy.
Silhouette drawing is also wonderfully forgiving. If a shaded portrait goes wrong, you may spend an hour trying to rescue one cheekbone. With a silhouette, you can simplify. You can smooth an awkward line, adjust a curve, or turn a mistake into a design choice. Accidentally made the hair bigger? Congratulations, it is windy now. Extended the branch too far? Add a bird. Smudged the background? That is atmosphere. Art is partly skill and partly confidently pretending the raccoon-shaped ink blot was planned.
For beginners, the best practice routine is to draw several small silhouettes instead of one giant masterpiece. Try six tiny studies on one page: a leaf, a mug, a bird, a face profile, a tree, and a cat. Spend five to ten minutes on each. This removes pressure and helps you compare shapes. You will quickly notice which subjects read clearly and which need better angles. Small studies are like artistic push-ups, except less sweaty and more likely to involve coffee.
Over time, silhouettes improve your sense of composition. You begin to notice whether a shape sits too low on the page, whether the background feels empty, whether the subject needs more breathing room, or whether the focal point is clear. Because the design is reduced to light and dark, composition problems become easier to spot. That is why many illustrators and painters use thumbnail silhouettes before creating finished work. If the image works as a small black-and-white shape, it has a strong foundation.
The most satisfying part of drawing silhouettes is how quickly they communicate mood. A lone figure under a moon can feel quiet. A bird taking flight can feel hopeful. A child holding a balloon can feel playful. A crooked house with bats can feel spooky before you add a single window. Silhouettes prove that art does not always need more detail to say more. Sometimes the missing details invite the viewer to imagine the story.
Conclusion
Drawing a silhouette is a practical, beautiful way to strengthen your art skills. It teaches you to see the subject as a whole, focus on contour, use negative space, create contrast, and simplify details without losing meaning. The six steps are easy to remember: choose a strong subject, set up your reference, sketch the basic shape, refine the contour, fill the silhouette, and polish the background or final design.
Whether you are making a profile portrait, a pet keepsake, a dramatic landscape, or a quick sketchbook study, silhouette drawing helps you create artwork that is bold and readable. Start with simple subjects, keep your edges clean, and let the shape do the talking. After all, a good silhouette can tell a whole story without saying a wordwhich is more than we can say for some group chats.