
A squeaky floor has a special talent: it waits until midnight, right when the house is quiet, and then announces your snack run like a tiny wooden trumpet. The good news? Most floor squeaks are not mysterious, supernatural, or expensive. They usually happen because two parts of the floor system are moving and rubbing togetherfloorboards, nails, subfloor panels, joists, or fasteners that have loosened over time.
Learning how to fix a squeaky floor quickly starts with one simple idea: stop the movement, stop the noise. Sometimes that means sprinkling powdered graphite between hardwood boards. Sometimes it means driving a screw into a joist. Sometimes it means crawling under the floor with a shim, construction adhesive, and the confidence of a person who has watched exactly three home-repair videos and is now “basically a contractor.”
This guide explains fast DIY fixes for hardwood, carpeted, laminate, and subfloor-related squeaks. You will learn how to find the squeak, choose the right repair, avoid common mistakes, and know when a noisy floor is just annoyingor when it is asking for professional help.
Why Floors Squeak in the First Place
A floor squeak is usually friction. Something moves when you step on it, and that movement creates sound. The most common causes include loose floorboards, nails rubbing against wood, subfloor panels separating from joists, gaps between framing members, seasonal humidity changes, or old fasteners that no longer hold tightly.
Wood floors are especially chatty because wood expands and contracts with changes in moisture. In dry months, boards can shrink and leave tiny gaps. In humid months, boards can swell and press against each other. Either way, your floor may start performing its one-board orchestra.
Common causes of squeaky floors
The usual suspects include:
- Loose nails or screws: Fasteners can move slightly as weight presses down on the floor.
- Subfloor movement: The plywood or OSB subfloor may flex against the joists below.
- Gaps between joists and subfloor: Even a small gap can create a squeak when the floor moves.
- Hardwood boards rubbing together: Tongue-and-groove flooring may creak where boards meet.
- Seasonal humidity changes: Wood naturally expands and shrinks as indoor moisture levels change.
- Poor installation: Missing adhesive, incorrect fastener spacing, or inadequate expansion gaps can create noise later.
- Wear and age: Older homes often develop squeaks as materials settle and loosen.
Before You Fix It: Find the Exact Squeak
Do not attack the whole room with screws like a panicked woodpecker. First, locate the exact noisy spot. Walk slowly over the area and listen carefully. Press with your heel, then your toe. Mark the squeaky spot with painter’s tape.
If you have access from below, such as an unfinished basement or crawl space, ask someone to walk above while you watch the subfloor from underneath. Look for movement, gaps, loose nails, or areas where the subfloor lifts slightly from the joist. A flashlight helps. So does patience. So does not bumping your head on plumbing.
Quick squeak diagnosis checklist
- Does the sound come from one board or a wider area?
- Does it happen only in winter or all year?
- Is the floor solid, or does it feel soft or bouncy?
- Can you access the underside from a basement or crawl space?
- Is the floor hardwood, carpet, laminate, tile, or vinyl?
If the floor feels spongy, sagging, or suddenly much louder than before, pause the DIY mission and consider calling a flooring professional or contractor. Squeaks are usually harmless, but softness or sagging can point to subfloor damage, moisture problems, or structural issues.
Fast Fix #1: Use Powder on Squeaky Hardwood Floors
This is the easiest quick fix for squeaky hardwood floors. If the squeak comes from boards rubbing against each other, a dry lubricant can reduce friction. Powdered graphite is a popular choice because it slips into small cracks and stays dry. Talcum powder or baby powder can also work in some cases, though graphite is usually better for long-term lubrication.
How to do it
- Locate the squeaky joint between the boards.
- Sprinkle a small amount of powdered graphite or talcum powder over the crack.
- Use a soft brush or cloth to work the powder into the seam.
- Step on the area several times to help the powder settle deeper.
- Wipe away the excess with a slightly damp cloth.
This method is quick, cheap, and does not require drilling. It is best for minor squeaks caused by surface-level friction. It will not fix a loose subfloor or a gap under the floor, but it is a great first move before reaching for tools.
Fast Fix #2: Drive a Trim Screw Through Hardwood
If a hardwood board is loose, a carefully placed screw can pull it tight to the subfloor. The trick is to use the right screw and hide the repair. A trim-head screw or specialty breakaway screw can secure the board with minimal visual impact.
How to do it
- Find the squeaky board and mark the noisy spot.
- Drill a small pilot hole to avoid splitting the wood.
- Drive a trim screw through the board into the subfloor or joist below.
- Set the screw head slightly below the wood surface.
- Fill the small hole with color-matched wood filler.
This fix works well when one board moves underfoot. Be careful with finished hardwood floors. If you are not confident matching filler or placing screws cleanly, test in a hidden area or use a specialty squeak repair kit designed for finished flooring.
Fast Fix #3: Fix Squeaky Carpeted Floors From Above
Carpet makes squeaks tricky because the noisy subfloor is hiding under a fluffy disguise. Fortunately, specialty squeaky floor repair kits are made for this exact situation. These kits usually include a joist-finding screw, a depth-control fixture, and scored screws designed to snap off below the carpet surface.
How to do it
- Walk over the carpet and mark the squeaky area with painter’s tape.
- Locate the nearest joist using a joist-finding screw or stud finder that works through flooring.
- Place the kit’s tripod or depth-control fixture over the joist.
- Drive the scored screw through the carpet, pad, subfloor, and into the joist.
- Use the fixture to snap off the screw head below the carpet surface.
The goal is to pull the subfloor tight to the joist without leaving a screw head sticking up like a tiny medieval trap. Done correctly, the repair is hidden by the carpet and the squeak disappears.
Fast Fix #4: Shim the Gap From Below
If you can access the floor from below, shimming is one of the best ways to stop a squeak caused by a gap between the subfloor and joist. A wood shim fills the gap so the subfloor no longer moves when someone walks above.
How to do it
- Have someone walk above while you watch from below.
- Find the gap where the subfloor moves against the joist.
- Add a small amount of wood glue or construction adhesive to a thin shim.
- Gently slide the shim into the gap.
- Do not force it. The shim should fill the space, not lift the floor.
The biggest mistake is hammering the shim too hard. If you wedge it in aggressively, you can raise the floor above or create a new bump. Think “snug,” not “demolition derby.”
Fast Fix #5: Use Construction Adhesive Along the Joist
For longer gaps between a joist and subfloor, construction adhesive can help. Apply a bead of adhesive where the subfloor meets the joist. Once cured, it helps bond the pieces together and reduces movement.
This works best from below in an unfinished basement or crawl space. Use adhesive rated for subfloors or construction framing, and make sure the area is dry and clean before applying it. If the floor has moisture damage, adhesive alone is not the answer. That is like putting a bandage on a leaky boat and calling yourself a captain.
Fast Fix #6: Add a Wood Block or Cleat
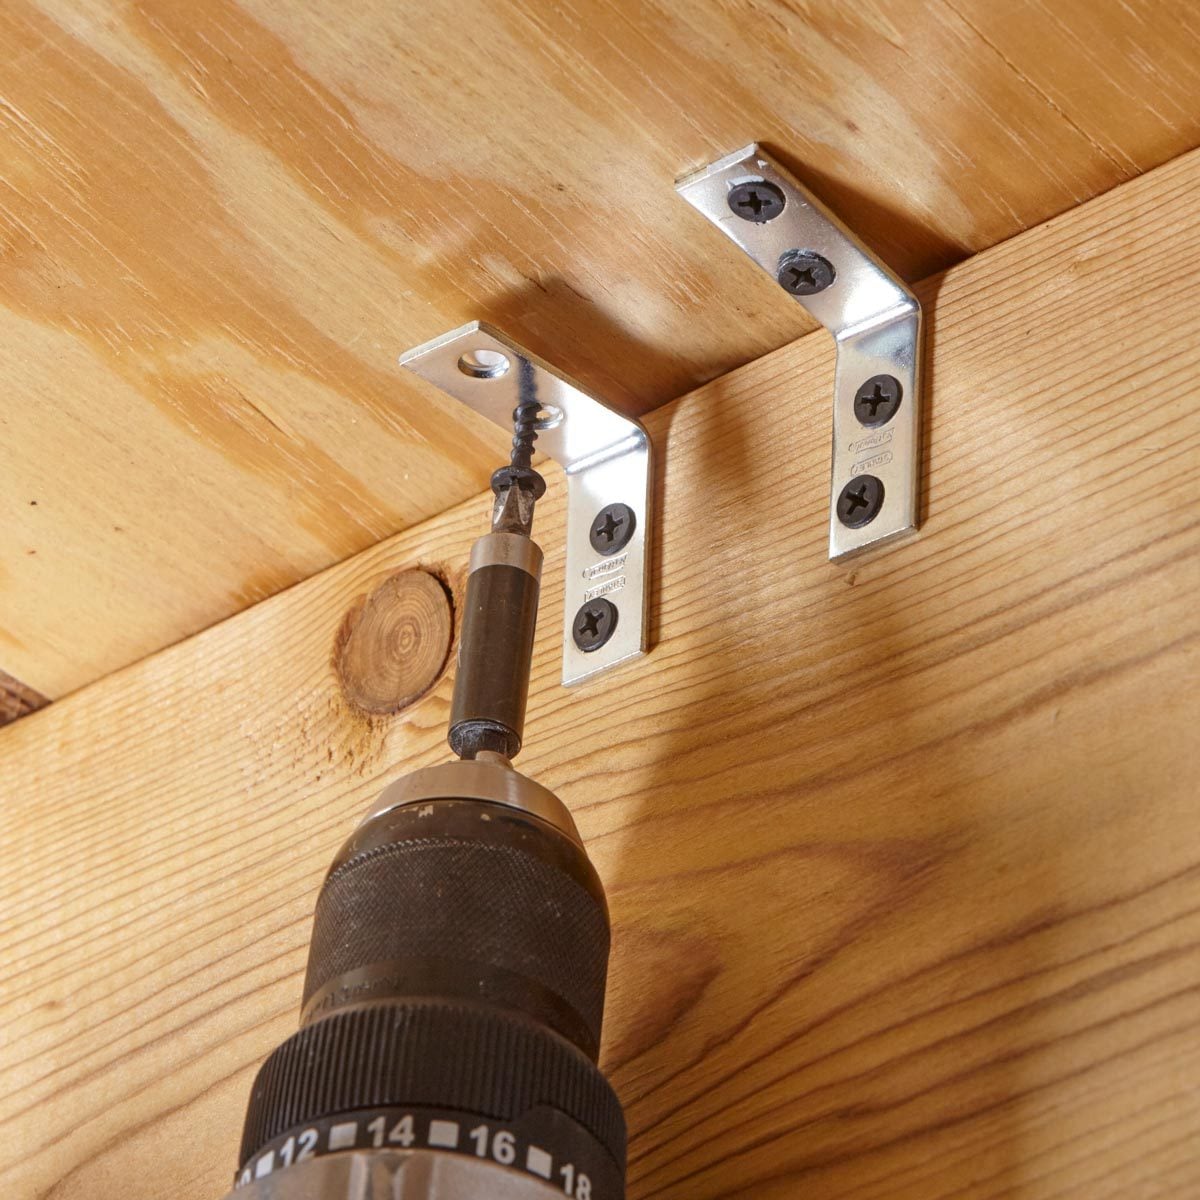
When the subfloor needs more support, a wood block or cleat can be attached along the joist. This gives the subfloor more bearing surface and reduces flexing.
How to do it
- Cut a short piece of 2×4 lumber or use a wood cleat.
- Apply construction adhesive to the top edge.
- Press it tightly against the joist and underside of the subfloor.
- Screw it into the joist.
- Let the adhesive cure fully before judging the final result.
This is a stronger repair than powder or a single screw. It is useful when the squeak is caused by movement along a wider section of subfloor.
Fast Fix #7: Control Indoor Humidity
If your floor squeaks mainly during certain seasons, humidity may be the boss fight. Wood reacts to indoor moisture. In dry air, boards shrink and gaps appear. In humid air, boards swell and may press together.
For dry winter squeaks, a humidifier can help reduce shrinkage. For humid summer squeaks, a dehumidifier or better air conditioning control may help. The goal is not to turn your house into a rainforest or desert. The goal is stable indoor humidity so the floor is not constantly expanding and contracting.
What About Laminate, Vinyl, or Tile Floors?
Laminate and vinyl floors can squeak when the subfloor underneath moves, when the floor was installed too tightly against walls, or when underlayment shifts. Floating floors need room to expand. If they are pinched under trim, cabinets, or transitions, they may click, creak, or squeak.
Tile floors are different. If tile squeaks, cracks, or sounds hollow, the issue may involve loose underlayment, cracked grout, or movement in the subfloor. Do not simply drive screws through tile unless you enjoy turning a small problem into an expensive mosaic of regret. Tile-related squeaks often deserve a professional look.
Best Tools and Materials for Quick Floor Squeak Repair
You do not need a garage full of tools. For most squeaky floor repairs, a small kit can handle the job.
- Painter’s tape for marking squeaks
- Flashlight for inspecting from below
- Drill and driver bits
- Trim-head screws or flooring screws
- Specialty squeaky floor repair kit for carpet
- Powdered graphite or talcum powder
- Wood shims
- Construction adhesive
- Wood filler for finished floors
- Stud finder or joist-finding screw
- Knee pads, because knees have opinions
Common Mistakes to Avoid
The fastest repair is not always the best repair. Avoid these common squeaky floor mistakes:
- Using too many screws: Random screws can damage flooring and still miss the joist.
- Forcing shims too far: This can lift the floor and create a hump.
- Ignoring moisture: If water damage caused the squeak, fix the moisture source first.
- Using oily lubricants on wood: Some products can stain finished floors.
- Skipping pilot holes: Hardwood can split if screws are driven without preparation.
- Assuming every squeak is harmless: A soft, sagging, or worsening floor needs closer inspection.
When to Call a Professional
Call a flooring contractor, carpenter, or qualified handyman if the floor feels weak, slopes noticeably, has visible water damage, or squeaks across a large area. Also call a pro if the repair involves tile, structural framing, joist damage, or a finished floor you do not want to risk damaging.
Most small squeaks are DIY-friendly. But if your floor feels like a trampoline, smells musty, or has cracks in nearby walls or ceilings, the problem may be bigger than a loose board.
Quick Examples: Which Fix Should You Choose?
Example 1: One squeaky hardwood board near the hallway
Start with powdered graphite between the boards. If the board still moves, use a trim-head screw and wood filler.
Example 2: Carpeted bedroom squeaks in one spot
Use a squeaky floor repair kit from above. Find the joist, drive the scored screw, snap the head, and enjoy silent midnight walking.
Example 3: Squeak above an unfinished basement
Inspect from below. If you see a gap between the joist and subfloor, use a glued shim. For a longer gap, add construction adhesive or a support cleat.
Example 4: Floor squeaks only in winter
Try stabilizing indoor humidity before drilling. Seasonal shrinkage may be the main cause.
of Real-World Experience: What Actually Works Fast
In real homes, squeaky floors rarely behave like perfect textbook examples. One squeak might be fixed with a sprinkle of powder in five minutes. Another may send you crawling through a basement with a flashlight, trying to determine whether the noise is coming from the floor, the joist, or your own knees cracking in protest.
The fastest successful approach is to start simple. For visible hardwood floors, powder is worth trying first because it is low-risk and inexpensive. Many homeowners hear a squeak and immediately imagine ripping up flooring, but if the noise is just board-on-board friction, dry lubricant may quiet it enough to make the room livable again. The key is working the powder into the seam. Do not just dust the floor like you are seasoning a steak. Brush it into the crack, step on the boards, and repeat.
For carpeted floors, the most practical quick fix is usually a specialty repair kit. Regular screws can leave dangerous heads under the carpet or twist carpet fibers around the drill bit. A kit designed for squeaky carpeted floors solves that problem by using scored screws that snap below the surface. The first screw may feel intimidating, but once you locate the joist, the process is straightforward. The hardest part is often finding the joist accurately. Tap, test, and do not be afraid to move a couple of inches if the screw misses solid wood.
When there is access from below, the repair becomes more satisfying because you can actually see the problem. A small gap between the joist and subfloor can make a surprisingly loud squeak. Sliding in a glued shim often works beautifully, but gentle pressure matters. Overdriving a shim can push the floor upward. A good rule is this: if you are swinging the hammer like you are ringing a carnival bell, you are doing too much.
Construction adhesive is helpful for longer gaps, but it is not instant magic. It needs time to cure. If the squeak improves but does not vanish immediately, give the adhesive time before adding more repairs. For wide movement, a wood cleat or blocking can make the floor feel tighter and quieter.
One overlooked experience: seasonal squeaks may not need aggressive repair. If a floor gets noisy every dry winter and quiets down in spring, humidity control may be smarter than adding screws everywhere. A humidifier can reduce gaps caused by shrinkage, while a dehumidifier can help during sticky months when swelling creates pressure.
The best advice is to match the fix to the cause. Powder reduces friction. Screws stop movement from above. Shims and adhesive stop movement from below. Humidity control reduces seasonal wood movement. If you choose based on the actual source of the sound, fixing a squeaky floor quickly becomes much less mysteriousand much less dramatic.
Conclusion
A squeaky floor may be annoying, but it is usually fixable without tearing the house apart. Start by locating the exact noise. Try powder for minor hardwood squeaks, use a repair kit for carpeted floors, secure loose boards with trim screws, or fix subfloor gaps from below with shims, adhesive, or blocking. Keep indoor humidity stable, avoid forcing repairs, and call a professional if the floor feels soft, sagging, wet, or structurally questionable.
In short: stop the movement, and you stop the squeak. Your floor gets quieter, your midnight snack missions get stealthier, and your house finally stops sounding like it is commenting on every step you take.