
A round wooden serving tray is one of those wonderfully practical pr carry coffee and pastries, organize candles on a dining table, hold cocktail glasses during a party, or rescue an ottoman from becoming a dangerously wobbly snack station.
This beginner-friendly woodworking project uses a simple wooden panel, two handles, basic cutting tools, and a protective finish. The finished tray can look rustic, modern, farmhouse-inspired, or elegantly minimal depending on the wood, hardware, and stain you choose.
The design in this guide produces a tray approximately 16 to 18 inches in diameter. That size is large enough to be useful but still comfortable to carry. You can adjust the measurements after understanding the basic process. Woodworking is flexible that way. Unlike baking, it usually will not punish you for adding half an inch.
Why Make a Round Wooden Serving Tray?
Store-bought trays are easy to find, but making one allows you to control every design detail. You can match the stain to your dining table, select handles that coordinate with your cabinet hardware, engrave a family name, or paint a pattern that would never survive a corporate product-development meeting.
A DIY round wooden serving tray is also an excellent introductory project because it teaches several useful woodworking skills:
- Drawing and cutting a consistent circle
- Controlling a jigsaw along a curved line
- Smoothing end grain and rounded edges
- Measuring symmetrical hardware placement
- Drilling pilot holes without splitting wood
- Applying stain and a protective clear finish
The project usually requires only a few hours of active work, although stain, paint, and protective coatings need additional drying and curing time.
Materials and Tools
Materials
- One 16- to 18-inch square wood panel, approximately 3/4 inch thick
- Two cabinet pulls, drawer handles, or leather strap handles
- Screws sized for the handles and wood thickness
- Wood filler, if needed
- 120-, 150-, and 220-grit sandpaper
- Wood stain, paint, or decorative finish
- Clear protective topcoat or food-contact-appropriate finish
- Lint-free cloths or foam brushes
- Painter’s tape
- Four small felt pads or rubber feet, optional
Tools
- Measuring tape or ruler
- Pencil
- Compass, string-and-pencil setup, or round template
- Jigsaw with a fine-tooth wood-cutting blade
- Drill and drill bits
- Clamps
- Random orbital sander, optional
- Router with a round-over bit, optional
- Safety glasses, hearing protection, and a dust mask
Choosing the Best Wood for a Serving Tray
A solid edge-glued panel is one of the easiest materials for this project. These panels are already flat, relatively smooth, and wide enough to cut into a tray without joining multiple boards yourself.
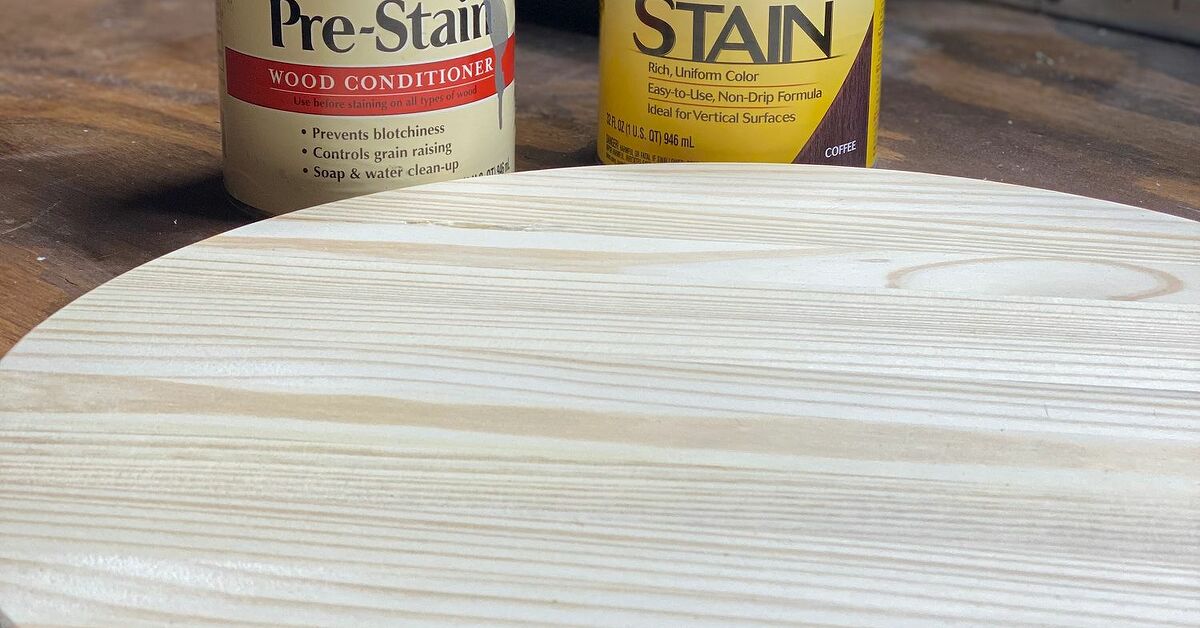
Pine is affordable, lightweight, and easy to cut. Its grain can absorb stain unevenly, so a pre-stain wood conditioner may help prevent dark patches. Poplar has a smoother, more consistent texture and works especially well for painted trays. Oak offers dramatic grain and excellent durability, although it is heavier and takes more effort to sand.
Maple creates a clean, contemporary appearance, while walnut provides a rich natural color that may not need stain at all. Quality plywood can also work, but the exposed layered edge should be covered with edge banding or intentionally incorporated into the design.
Avoid warped, cracked, or construction-grade boards. Also be cautious with reclaimed wood of unknown origin. Old lumber may contain embedded nails, chemical treatments, lead paint, or mysterious substances best left in the mystery category.
How to Make a DIY Round Wooden Serving Tray
Step 1: Determine the Tray Diameter
For a versatile household tray, choose a finished diameter between 16 and 18 inches. A 16-inch tray is easier to carry and store, while an 18-inch tray offers more room for plates, glasses, and decorative arrangements.
Place the wood panel on a stable work surface. Measure its width and height, then mark the center. Double-check these measurements because every later step depends on that center point.
Step 2: Draw the Circle
A large compass is the simplest layout tool. Set it to half the desired tray diameter, place its point on the center mark, and draw the circle.
You can also make a homemade compass using string. Tie one end around a pencil and secure the other end at the center mark with a small nail or pushpin. Keep the string tight while moving the pencil around the board.
Another option is tracing a round tabletop, planter saucer, or manufactured wooden circle. Whatever method you use, inspect the line from several angles. A lopsided circle may be charming in pottery, but it is less charming when three coffee cups begin migrating toward one side.
Step 3: Secure the Wood
Place the panel on a workbench with part of the cutting line extending beyond the edge. Clamp it firmly. The wood should not vibrate, shift, or bounce while you cut.
Never hold the board in one hand while operating the jigsaw with the other. Reposition the panel and clamps as necessary so the blade always has open space underneath it.
Step 4: Cut the Round Tray
Install a sharp, fine-tooth blade designed for curved cuts in wood. A narrow blade turns more easily than a wide, aggressive demolition blade. Check that the jigsaw base is square to the blade before beginning.
Start near the outer edge of the board and guide the jigsaw gradually toward the circle. Cut slightly outside the pencil line, leaving approximately 1/16 inch of extra material for sanding.
Move slowly and let the blade do the work. Forcing the saw can cause the blade to bend, producing an edge that is square at the top but angled underneath. Keep the jigsaw base flat against the wood throughout the cut.
When you reach an uncomfortable angle, stop the tool, wait for the blade to stop moving, and reposition the workpiece. Trying to perform an elaborate workshop pirouette while holding a running jigsaw is not an advanced technique.
Step 5: Refine the Circular Shape
After cutting, place the tray on a flat surface and examine the perimeter. Pencil a light correction line over any bumps or flat spots.
Begin smoothing the edge with 80- or 120-grit sandpaper, depending on how much material must be removed. A random orbital sander can handle the flat faces, but the edge is usually easier to refine with a sanding block or sanding sponge.
For a highly precise circle, use a router and circle-cutting jig instead of relying entirely on the jigsaw. A router can produce a cleaner and more consistent perimeter, but the jigsaw-and-sanding method is perfectly suitable for most beginner projects.
Step 6: Soften the Edges
Sharp edges are uncomfortable to carry and more likely to dent or splinter. Round them over with sandpaper by making consistent passes around the top and bottom perimeter.
For a more polished profile, use a router fitted with a 1/8- or 1/4-inch round-over bit. Test the bit depth on scrap wood before routing the tray. Move steadily and avoid pausing in one spot, which can create a dip or burn mark.
Step 7: Sand the Entire Tray
Sand the top and bottom faces with 120-grit paper to remove tool marks and surface imperfections. Continue with 150 grit, then finish with 220 grit. Sand in the direction of the grain whenever possible.
Do not skip directly from rough paper to very fine paper. Each grit removes the scratches left by the previous grit. Skipping several stages can leave marks that remain invisible until stain announces them dramatically.
Remove all dust with a vacuum and lint-free cloth. Avoid soaking the unfinished tray with water because excess moisture can raise the grain or encourage warping.
Step 8: Plan the Handle Placement
Position one handle on each side of the tray. The handles should be directly opposite each other and equally spaced from the edge.
For most 16- to 18-inch trays, placing the center of each handle approximately 1 1/2 to 2 inches from the perimeter works well. However, hardware dimensions vary, so test the grip before drilling.
Apply strips of painter’s tape where the handles will sit. Mark the hole positions on the tape, then measure between the marks to confirm symmetry. The tape makes pencil lines easier to see and can help reduce surface scratching.
Step 9: Drill Pilot Holes
Select a drill bit slightly smaller than the screw diameter. Drill straight pilot holes at each marked location. Place scrap wood beneath the tray to reduce tear-out as the bit exits the bottom.
Check the screw length before installation. It must extend far enough to engage the handle securely without protruding through the hardware or creating an uncomfortable bump.
If the screw heads will be visible underneath, countersink the holes slightly so the heads sit flush with the surface. Do not install the handles permanently until the finishing process is complete.
Step 10: Add Color or Decorative Details
Leave the wood natural for a simple Scandinavian-style tray, or apply stain to emphasize the grain. Test stain on a scrap from the same board whenever possible. The sample shown on a store display rarely predicts exactly how a particular piece of wood will react.
Apply stain with a clean cloth or brush, following the grain. Allow it to penetrate for the time recommended by the manufacturer, then remove the excess. Leaving a thick puddle of stain on the surface does not create a richer color; it generally creates a sticky object that collects fingerprints.
For painted designs, consider a solid color, checkerboard pattern, sunburst, border stripe, stencil, or color-blocked section. You can also use a wood-burning tool to add initials, botanical details, or a simple geometric border.
Step 11: Apply a Protective Finish
A serving tray needs protection from condensation, coffee splashes, fingerprints, and ordinary wear. Choose a finish based on how the tray will be used.
A film-forming finish such as polyurethane offers strong resistance to moisture and stains. Water-based formulas generally preserve the wood’s natural color, while oil-based products often add warmth. Apply several thin coats rather than one heavy coat.
Lightly sand between coats with fine sandpaper when directed by the product instructions. Remove every trace of dust before recoating. Allow the finish to dry and fully cure according to its label before placing food, dishes, or hot beverages on the tray.
If unwrapped food will touch the wood directly, select a product specifically intended for that use and follow its application and curing instructions. A serving tray is not automatically a cutting board, so do not chop food on a decorative film finish.
Step 12: Install the Handles and Feet
Once the finish has fully cured, align the handles with the pilot holes and install the screws. Tighten them evenly, but stop when the hardware is secure. Excessive force can strip the hole, crack the wood, or damage the handle.
Add small felt pads or rubber feet to the bottom. They protect furniture, keep screw heads from touching the table, and make the tray feel more finished. Rubber feet also reduce sliding on smooth countertops.
Design Ideas for a Custom Round Serving Tray
Modern Minimalist Tray
Use maple or birch, apply a clear matte finish, and add simple black metal handles. Keep the surface undecorated so the wood grain becomes the design.
Rustic Farmhouse Tray
Choose pine, apply a medium-brown stain, and lightly distress selected areas after the stain dries. Complete the look with dark iron-style handles.
Two-Tone Painted Tray
Stain the bottom and paint a contrasting border around the edge. A muted green, navy blue, cream, or charcoal border can make an inexpensive wood panel look surprisingly refined.
Leather-Handled Tray
Replace rigid pulls with thick leather straps secured by decorative bolts. Confirm that the leather is strong enough to support the loaded tray and that all fasteners are firmly attached.
Personalized Gift Tray
Add a monogram, wedding date, family name, or short phrase before applying the clear finish. Pair the tray with mugs, specialty coffee, or cocktail ingredients for a handmade housewarming gift.
Common DIY Serving Tray Mistakes
Cutting Directly on the Pencil Line
A jigsaw rarely produces a flawless finished edge. Leaving a small amount of material outside the line gives you room to correct the shape during sanding.
Using the Wrong Blade
A coarse blade cuts quickly but can leave chipped edges and resist tight curves. Use a sharp fine-tooth blade designed for clean curved cuts.
Rushing the Sanding Process
Sanding determines whether the project looks handmade in the best sense or homemade in the emergency-school-project sense. Work through the grit sequence and inspect the surface under angled light.
Installing Uneven Handles
Even a small difference in handle placement is noticeable on a round tray. Measure from the center and perimeter rather than guessing by eye.
Using the Tray Before the Finish Cures
A coating may feel dry long before it reaches full hardness. Early use can leave rings, dents, cloudy areas, or impressions from cups and plates.
How to Clean and Maintain the Finished Tray
Wipe spills promptly with a soft, damp cloth. Use a small amount of mild dish soap when necessary, then dry the tray immediately. Do not soak it in a sink or place it in a dishwasher.
Avoid setting cookware directly from the oven or stovetop onto the wood. Use a trivet because intense heat can discolor or soften many decorative finishes.
Check the handle screws periodically and tighten them if they begin to loosen. If the surface becomes scratched after years of use, clean it, sand it lightly, and apply a compatible maintenance coat.
Experiences and Lessons From Making a DIY Round Wooden Serving Tray
The first lesson this project teaches is that drawing a circle is much easier than cutting one. My original pencil line looked wonderfully precise. The first jigsaw pass looked as though the circle had experienced mild turbulence. That was not a disaster, however, because I had deliberately cut outside the line. Ten minutes of patient edge sanding transformed an uneven cut into a smooth, convincing circle.
Clamping also made a larger difference than expected. During an early attempt, I used only one clamp and assumed the weight of the panel would keep it steady. Instead, the wood vibrated whenever the blade approached the unsupported side. The cut became rougher, the saw became harder to steer, and the entire workbench sounded like it was protesting. Using two clamps and repositioning them around the circle created a cleaner cut and made the tool feel much easier to control.
Another important discovery involved handle placement. I initially centered the handles visually, stepped back, and decided everything looked perfect. Measuring revealed that one handle was nearly half an inch closer to the edge. On a rectangular project, that difference might hide quietly. On a round tray, it seemed to wave from across the room. Painter’s tape, a centerline, and repeated measurements solved the problem before any permanent holes were drilled.
The finishing stage required the most patience. After applying stain, the tray looked complete enough to use, and the temptation to install the hardware immediately was strong. Waiting for the stain to dry and adding multiple thin protective coats produced a noticeably smoother, more durable surface. Thin coats also avoided the drips and soft spots that can develop when too much finish is applied at once.
I also learned that the bottom deserves as much attention as the top. Rough patches underneath are easy to overlook until someone lifts the tray or slides it across a polished table. Sanding both faces, countersinking the screw heads, and adding felt pads made the project feel like a finished household object rather than a decorative disk with handles attached.
The choice of hardware changed the personality of the tray more than the stain did. Matte-black handles created a modern farmhouse look, brass pulls made the same wood feel more formal, and leather straps produced a casual handcrafted style. Temporarily placing different handles on the unfinished tray helped identify the best combination before drilling.
In daily use, the 17-inch size proved especially practical. It could hold two mugs, a small coffee press, and a plate of pastries without feeling overcrowded. It was also light enough to carry comfortably. A larger tray would provide more capacity, but every extra inch increases weight and makes the handles more important.
Most importantly, the project showed that visible imperfections do not always reduce the appeal of handmade work. A slight variation in the grain, a gently softened edge, or a subtle difference in stain color can give the tray character. The goal is not to reproduce a factory-made object. The goal is to create something attractive, sturdy, and useful enough that people ask where it came fromand enjoy the answer.
Conclusion
Making a DIY round wooden serving tray is a manageable project that delivers both practical value and plenty of creative freedom. The essential process is straightforward: lay out an accurate circle, cut just outside the line, refine the edge, sand carefully, position the handles symmetrically, and protect the wood with an appropriate finish.
The project can be completed with basic tools, yet it teaches techniques that apply to larger woodworking builds. Once you have mastered the basic version, you can experiment with contrasting wood strips, carved details, painted patterns, resin accents, custom engraving, or more advanced router-cut circles.
Whether it carries morning coffee or spends most of its life organizing candles on a table, your handmade wooden tray will be useful, personal, and considerably more interesting than another mass-produced rectangle.