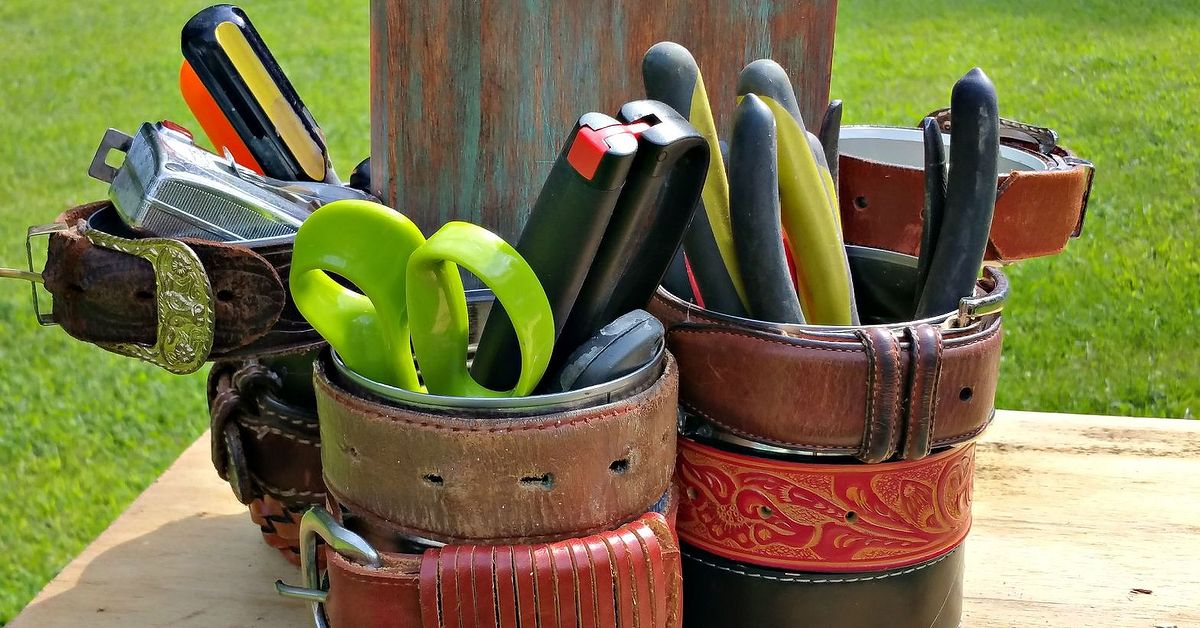

Some of the best organizing projects begin with objects that appear to have reached the end of their useful lives. An old cutting board has retired from chopping onions, several empty tin cans are waiting for recycling day, and a worn leather belt has not fit anyone since low-rise jeans first became a questionable idea. Put them together, however, and you can create a surprisingly gorgeous DIY tool caddy.
This project turns ordinary household leftovers into a portable organizer for paintbrushes, screwdrivers, garden tools, craft supplies, kitchen utensils, or whatever else currently wanders around your workspace without adult supervision. The cutting board forms the sturdy center and carrying handle, while the cans create individual storage compartments on both sides.
Better still, you do not need advanced woodworking skills or an expensive workshop. Careful measuring, basic hand tools, a little paint, and a willingness to rescue materials from the recycling bin are enough. The result is practical, customizable, inexpensive, and attractive enough to display rather than hide in a cabinet.
Why This Upcycled Tool Caddy Works So Well
A good organizer should do more than hold objects. It should make those objects easier to find, carry, and return to their proper places. This tin can tool caddy succeeds because its simple design solves several common storage problems at once.
The vertical cutting board separates the containers into two balanced groups and provides a ready-made handle. The cans keep small tools upright instead of allowing them to pile together in a drawer. Their open tops make supplies visible, while the compact footprint fits easily on a workbench, desk, potting table, or kitchen counter.
The project is also highly adaptable. A small board with four cans can organize markers and scissors. A larger board with six deep cans can carry gardening tools. Matching paint creates a polished look, while distressed finishes, leather straps, labels, or stenciled numbers can push the design toward farmhouse, industrial, vintage, or modern decor.
Similar upcycling projects use cans attached to wooden boards because the combination is lightweight, durable, and easy to personalize. Tool-caddy plans also emphasize balanced layouts and secure fastening so a portable organizer remains stable when loaded.
Materials and Tools You Will Need
Main Materials
- One wooden cutting board with a handle or hanging hole
- Four to six clean tin cans of similar size
- Short pan-head wood screws
- Small metal washers
- Metal primer
- Spray paint or brush-on paint suitable for metal
- Wood stain, furniture paint, or clear protective finish
- Optional leather belt, cabinet pull, rope, or wooden handle
- Optional felt pads for the bottom
- Optional labels, stencils, decorative paper, fabric, or twine
Tools
- Drill or power screwdriver
- Small drill bit for metal
- Small drill bit for pilot holes in wood
- Awl and hammer, if you prefer punching the can holes
- Sandpaper in medium and fine grits
- Metal file or deburring tool
- Tape measure or ruler
- Pencil or removable marker
- Clamps
- Safety glasses and work gloves
- Drop cloth or cardboard for painting
Choose the Right Cutting Board and Cans
The cutting board is the backbone of the project, so begin with one that is straight, solid, and free from major cracks. A board with a built-in handle is ideal because it makes the finished caddy easy to carry. A paddle-shaped board also adds character and gives the organizer the charming look of a flea-market find that secretly knows exactly what it is doing.
Wood is generally easier to drill and refinish than glass, stone, or thin plastic. A board roughly 12 to 16 inches tall usually provides room for two or three cans on each side, although the ideal dimensions depend on the cans you have collected.
Select cans with matching diameters if you want a symmetrical design. Vegetable, bean, tomato, and soup cans are often useful because they are deep enough to hold hand tools. Shorter cans work well for crayons, clips, chalk, screws, or sewing supplies.
Before committing to the layout, stand the cans beside the board. Make sure the board extends high enough above them to provide a comfortable grip. There should be enough space for your fingers without scraping against the rims or bumping into the tools stored inside.
How to Make the Tool Caddy Step by Step
Step 1: Clean and Inspect the Tin Cans
Remove the labels and adhesive residue from every can. Warm soapy water usually loosens paper labels, while a small amount of rubbing alcohol or adhesive remover can help with stubborn glue. Wash the cans thoroughly, rinse them, and allow them to dry completely.
Inspect each inner rim carefully. Some can openers leave a sharp metal ring that can cut fingers or snag fabric. Smooth rough areas with a metal file or deburring tool. If a rim remains dangerously sharp, recycle that can and choose another. This is an organizer, not a tiny circular saw disguised as home decor.
Wear gloves while handling unfinished metal and safety glasses when drilling, punching, sanding, or filing. Work on a stable surface and clamp materials whenever possible. Eye protection is particularly important when an activity may release flying metal or wood particles.
Step 2: Prepare the Cutting Board
Wash or wipe the board to remove grease and dirt, then let it dry. If it has a glossy coating, scratches, or knife marks, sand the surface until it feels even. Begin with medium-grit sandpaper where necessary and finish with a finer grit, always sanding in the direction of the wood grain.
Round any uncomfortable corners and soften the edges around the handle. Remove all sanding dust with a vacuum, soft brush, or clean lint-free cloth. A smooth, dust-free surface accepts stain and paint more evenly than a dirty one.
Wood-finishing guidance generally recommends starting with clean, dry wood, sanding with the grain, and thoroughly removing dust before applying stain or a protective coating.
Step 3: Test the Layout
Place the cutting board flat on your work surface and arrange the cans along both sides. Two cans per side create a compact caddy, while three per side provide more storage. Keep the bottom edges of the cans level so the finished organizer sits evenly.
Leave a narrow gap between neighboring cans. This prevents them from rubbing together and gives you room to paint, clean, or remove them later. Check the balance by temporarily taping the empty cans in place and lifting the board by its handle.
If one side feels heavier, adjust the spacing or number of cans. Remember that the finished caddy will become significantly heavier after you add tools. Symmetry is attractive, but practical balance matters more than winning a geometric beauty contest.
Step 4: Mark and Drill the Cans
Each can needs at least one attachment point near its upper half. Two screws per can provide greater stability, especially when the organizer will hold heavy screwdrivers or garden tools.
Mark the hole positions from inside the can. Place the can on a scrap wood block so the metal is supported. Use an awl and hammer to make a small starter dent, or drill slowly with a bit designed for metal. Do not hold the can in your hand while drilling.
After drilling, inspect both sides of the hole. Remove sharp burrs with a file. The opening only needs to be large enough for the screw shaft; an oversized hole can weaken the attachment.
Step 5: Mark Pilot Holes on the Board
Return the cans to their planned positions. Insert a pencil or marker through each drilled hole to transfer its location to the cutting board. Number the cans and their positions with removable tape if their spacing differs.
Drill shallow pilot holes at the marks. Pilot holes reduce the chance that a screw will split the board and make it easier to keep the cans aligned. Use a bit slightly narrower than the screw shaft, and take care not to drill completely through the board unless your fastening method requires it.
Step 6: Paint or Stain the Components
It is much easier to finish the cans and board before assembling them. For the metal, lightly scuff glossy surfaces with fine sandpaper, remove dust, and wipe away grease. Apply a primer formulated for metal, followed by several light coats of paint.
Thin coats usually produce a smoother finish than one enthusiastic, dripping coat. Follow the drying and recoating times printed on the product label. Spray outdoors or in a well-ventilated location over a drop cloth, and use appropriate protective equipment.
Proper metal preparation commonly includes cleaning, removing loose rust, lightly abrading the surface, priming, and applying light coats so the finish adheres more reliably.
Finish the cutting board with stain for a warm rustic appearance, furniture paint for stronger color, or a clear coating to preserve the natural wood. Paint both faces and the edges when possible. Sealing all exposed sides helps the piece look intentional rather than like a cutting board that lost an argument with four soup cans.
Step 7: Add a Decorative Handle
If the cutting board already has a comfortable handle, you can leave it unchanged. For extra personality, wrap the grip with leather, jute rope, or fabric. Another option is to attach a short section of an old belt through the board’s hanging hole.
A small cabinet pull can also be installed near the top. Make sure any added handle is firmly attached and comfortable under the expected weight. Decorative details should support the design, not become the point where the entire caddy dramatically separates from your hand.
Step 8: Attach the Cans
Once all finishes have cured, place the cans against the board and align the holes. Insert a washer under each screw head to spread pressure across the thin metal. Drive the screws into the pilot holes until the cans are secure.
Do not overtighten. Too much pressure can crush or distort a can wall. Tighten only until the washer sits firmly against the metal and the can no longer moves.
For lightweight craft storage, a compatible construction adhesive may provide extra support, but screws are generally preferable for a caddy that will be carried. Adhesive manufacturers commonly advise using clean, dry surfaces and holding the materials securely while the bond develops. Choose a product specifically labeled for both wood and metal, and follow its instructions rather than improvising a chemistry experiment.
Step 9: Protect the Bottom
Add felt pads, rubber bumpers, or a narrow wooden strip beneath the caddy. These protect countertops and furniture from scratches while reducing sliding. Pads are especially useful if the screw heads or can edges extend below the board.
Set the empty caddy on a flat surface and press gently on each corner. If it rocks, adjust the pads until all contact points are even.
Step 10: Load and Test the Caddy
Begin with lightweight supplies and lift the organizer slowly. Watch for movement around the screws, flexing metal, or an uncomfortable handle. Heavier tools should be distributed evenly across both sides, with the tallest items placed closest to the center board.
Do not overload the cans with heavy hammers, large wrenches, or power tools. This design is best for hand tools, brushes, markers, utensils, and similar objects. A charming upcycled caddy should organize the workshop, not attempt to bench-press it.
Gorgeous Finishing Ideas
Farmhouse Style
Paint the cans soft white, cream, sage, or muted blue. Stain the cutting board walnut brown, lightly distress the edges, and add small number labels. A worn leather handle completes the relaxed farmhouse appearance.
Modern Industrial Style
Use matte black cans with a natural or dark-stained board. Add black screws and washers for a coordinated finish. Simple white labels make the compartments easy to identify without softening the industrial look.
Colorful Craft-Room Style
Paint every can a different cheerful color and leave the board natural. Use vinyl lettering to label compartments for markers, brushes, scissors, glue sticks, and rulers. This version is particularly useful for children’s art supplies, provided all metal edges have been made completely safe.
Vintage Workshop Style
Choose deep red, navy, forest green, or aged copper paint. Add stenciled numbers, vintage-inspired typography, or faux enamel labels. Rub a small amount of dark wax along raised areas to create an aged effect without allowing real rust to take over the decorating department.
Useful Ways to Put the Finished Caddy to Work
- Workshop organizer: Store screwdrivers, pliers, pencils, measuring tapes, brushes, and small hand tools.
- Garden caddy: Carry pruners, plant labels, gloves, twine, seed packets, and narrow hand trowels.
- Craft organizer: Separate paintbrushes, markers, scissors, rulers, glue sticks, and decorative tools.
- Kitchen utensil holder: Organize wooden spoons, spatulas, napkins, and flatware for casual gatherings.
- Cleaning caddy: Hold brushes, cloths, gloves, and small bottles that fit securely.
- Office supply station: Create compartments for pens, highlighters, charging cables, clips, and scissors.
- Party serving caddy: Carry disposable utensils, straws, napkins, and condiment packets.
Common Mistakes to Avoid
Ignoring Sharp Rims
Never assume a can edge is safe because it looks smooth. Run a cloth around the rim before using your fingers; if the fabric snags, the edge needs more filing or a protective trim.
Painting Over Grease
Food residue, label adhesive, and skin oils can prevent paint from bonding. Clean the cans thoroughly and allow them to dry before priming.
Skipping Pilot Holes
Driving screws directly into an older cutting board can cause splitting. Small pilot holes improve control and reduce stress on the wood.
Using Screws That Are Too Long
Measure the board thickness before selecting hardware. Screw points should not emerge from the opposite face and create a sharp surprise.
Handling Paint Too Soon
Paint may feel dry on the surface before it has fully hardened. Assemble the project according to the coating manufacturer’s cure-time instructions to avoid fingerprints, dents, and stuck-together parts.
Loading One Side More Heavily
An uneven load causes the caddy to tilt while being carried. Divide heavy items between both sides and keep them close to the center.
What Building This Caddy Is Like in Real Life
The appealing part of this project is that it looks almost absurdly simple: find cans, find a board, introduce them with screws, and accept compliments. In practice, the build is still beginner-friendly, but a few small decisions make the difference between a polished organizer and something that resembles emergency garage storage.
The first practical lesson is to collect the cans before choosing the final layout. Cans that seem identical on a pantry shelf may differ slightly in height, diameter, or rim shape. Those differences become obvious when they are lined up against a straight board. Arranging every component on a table before drilling prevents the mildly heartbreaking discovery that the final can hangs half an inch lower than its neighbors.
Removing labels also tends to require more patience than expected. Some slide off after soaking, while others behave as though the manufacturer used adhesive developed for spacecraft. Scraping gently, cleaning the residue, and allowing the metal to dry completely may take longer than the actual assembly. That time is worthwhile because leftover adhesive can create bumps beneath the paint.
The most satisfying stage is usually the dry fit. Once the cans are taped around the cutting board, the project suddenly stops looking like recycling and begins looking like an intentional piece of storage. This is the best moment to pick up the board, check finger clearance, and imagine where tall tools will sit. Adjusting the arrangement now is much easier than explaining later why the handle can only be gripped with two fingers and unreasonable optimism.
Drilling the metal is often the stage that makes new DIYers nervous. The key is support and control. A can placed over scrap wood and held securely behaves far better than one allowed to roll across a workbench. A starter dent keeps the bit from wandering, and slow pressure produces a cleaner opening. Afterward, filing the tiny burrs feels like a minor task, but it greatly improves the safety and finish of the caddy.
Painting introduces another common learning moment: light coats really are better. The temptation to cover everything in one pass is strong, especially when the first coat looks thin. Heavy spraying, however, creates runs around the curved can walls. Several restrained passes produce a smoother finish and preserve details around the rims and screw holes.
Assembly is where earlier measuring pays off. When the pilot holes align, attaching the cans takes only a few minutes. Washers make the screw connections look cleaner and help prevent the screw heads from pulling through the thin metal. Tightening slowly also keeps the cans round.
The final test should happen before the caddy is filled completely. Add a few tools to each side, lift it, and listen for movement. If a can shifts, tighten its screw slightly or add a second attachment point. If the handle feels rough, sand or wrap it before regular use.
Once finished, the caddy tends to become more useful than originally planned. A workshop version may migrate to the garden during planting season. A craft organizer may become a party utensil carrier for the weekend. Because the compartments are open and portable, the design adapts easily instead of becoming another container that hides clutter behind a lid.
The broader experience is a reminder that successful upcycling is not simply about keeping an item out of the trash. The best projects give old materials a new function that is genuinely convenient. A cutting board and several cans may not look promising on their own, but with careful preparation and a cohesive finish, they become storage worth keeping in plain sight.
Conclusion
Making a gorgeous tool caddy from tin cans and a cutting board is an approachable way to combine organization, creativity, and upcycling. The design requires only basic tools, yet it can be adapted for workshops, kitchens, gardens, offices, and craft rooms.
The most important steps are also the simplest: smooth every metal edge, prepare the surfaces properly, measure the layout before drilling, use secure hardware, and allow the finish to cure. Once those details are handled, color, labels, handles, and decorative accents can transform recycled materials into a personalized organizer.
It may begin as a handful of empty cans and a forgotten board, but the finished project delivers something far more useful: portable storage with character, history, and absolutely no mysterious drawer full of runaway screwdrivers.
SEO Tags
Note: Use only clean cans with completely smooth rims, wear suitable eye and hand protection during drilling and filing, and follow all safety and curing instructions supplied with your tools, adhesives, paints, and finishes.