
There are sofas, and then there are sofas that look like they were designed by a genius who asked, “What if a cloud went to design school?” The Mario Bellini Camaleonda sofa belongs firmly in the second category. Plush, modular, low-slung, and famously quilted, it has become one of the most recognizable pieces in modern furniture design. The original is a luxury icon, but if your budget is more “weekend DIY warrior” than “Italian design collector,” a foam-based Camaleonda-inspired sofa replica can give you the vibe without requiring you to sell your car, your houseplant collection, or your emotional support coffee machine.
This guide walks you through how to make a Mario Bellini Camaleonda sofa replica out of foam for personal use, decor styling, studio staging, or a creative home project. The goal is not to counterfeit the original or slap a designer name on a DIY piece. Instead, think of this as a Camaleonda-inspired modular foam sofa: soft square cushions, deep tufting, chunky proportions, and that relaxed lounge look that says, “Yes, I read design magazines, but I also nap aggressively.”
What Makes the Camaleonda Sofa So Iconic?
The Camaleonda was designed by Mario Bellini for B&B Italia in 1970, and its name blends ideas of adaptability and wave-like movement. The sofa became famous because it was not just a couch; it was a flexible seating system. Its large square modules could be rearranged, connected, separated, and styled in multiple layouts. The design is instantly recognizable because of its deep capitonné-style tufting, rounded blocky cushions, low profile, and cozy “marshmallow grid” appearance.
The real Camaleonda uses engineered internal structures, shaped polyurethane padding, upholstery covers, hooks, rings, cables, and precise manufacturing. Your DIY version will be simpler, lighter, and less technical. However, by understanding the main visual elementssquare modules, rounded foam edges, grid tufting, thick upholstery, and modular arrangementyou can create a convincing inspired sofa for a lounge, bedroom, content studio, or reading nook.
Before You Start: Replica vs. Inspired DIY
Let’s be clear: this project is best described as a Camaleonda-inspired foam sofa, not an authentic reproduction. Do not sell it as a Mario Bellini original, do not attach fake labels, and do not market it as a B&B Italia product. That is not “DIY”; that is asking for legal drama with a side of bad karma.
For personal use, though, you can borrow design cues: the modular format, soft sculptural look, deep buttoned grid, and cloud-like proportions. This approach lets you enjoy a designer-inspired aesthetic while keeping the project honest, creative, and budget-conscious.
Materials You Will Need
For a basic two-seat foam Camaleonda-style sofa, plan on building two large seat modules, two backrest modules, and optional side arm modules. You can expand the sofa later by adding more blocks. That is the beauty of modular design: it grows with your space, your ambition, and your ability to ignore laundry.
Core Materials
- High-density upholstery foam for seat modules
- Medium-density foam for backrests and arms
- Polyester batting or dacron wrap
- Upholstery fabric, velvet, boucle, corduroy, canvas, or heavy linen blend
- Heavy-duty upholstery thread
- Long upholstery needle
- Fabric-covered buttons or large tufting buttons
- Spray adhesive suitable for foam and fabric
- Hook-and-loop strips, upholstery clips, or hidden straps for modular connection
- Non-slip furniture gripper pads for the bottom
Tools
- Electric carving knife or foam saw
- Sharp scissors or rotary cutter
- Measuring tape
- Marker
- Large ruler or straight edge
- Sewing machine capable of handling upholstery fabric
- Staple gun if using internal plywood support panels
- Protective gloves and a well-ventilated workspace
Choosing the Right Foam
Foam choice matters. Use foam that is too soft and your sofa will collapse like a pancake under emotional pressure. Use foam that is too hard and you will have built a stylish brick. For seat cushions, look for high-density upholstery foam with medium-firm support. Density affects durability, while ILD, or indentation load deflection, affects firmness. In simple terms: density tells you how long the foam may last, and ILD tells you how firm it feels when you sit on it.
For a DIY sofa, a seat foam around 4 to 6 inches thick can work well, especially if layered. A practical build might use a firmer base layer with a softer top layer. For example, you could use 4 inches of firm upholstery foam topped with 1 or 2 inches of softer foam, then wrap everything in polyester batting. This creates a cushion that feels supportive but still has the rounded, pillowy look associated with a Camaleonda-style design.
For backrests and arms, you can use slightly softer foam because those pieces support less direct body weight. If you want a more structured sofa, add thin plywood or MDF panels inside the base of each module, then wrap the foam around them. This makes the piece feel more furniture-like and less like a pile of very expensive camping pads.
Planning the Module Dimensions
The original Camaleonda is known for its generous square modules. For a home DIY version, you can scale the dimensions to fit your room. A popular beginner-friendly size is around 34 to 36 inches wide by 34 to 36 inches deep per seat module, with a height of 6 to 8 inches for the seat cushion. Backrests can be 34 to 36 inches wide, 10 to 14 inches thick, and 18 to 24 inches high, depending on how lounge-like you want the sofa to feel.
Example Two-Seat Layout
- Two seat modules: 36 inches wide x 36 inches deep x 7 inches thick
- Two backrest modules: 36 inches wide x 12 inches thick x 22 inches high
- Two optional arm modules: 12 inches wide x 36 inches deep x 22 inches high
This layout creates a compact but cozy sofa. If you want a larger sectional, add more 36-inch seat modules and arrange them in an L-shape. For small apartments, reduce the seat size to 30 inches square. The trick is keeping the modules square or nearly square so the design still feels balanced.
Step 1: Sketch Your Sofa Layout
Before cutting anything, sketch your sofa from the top and front. Decide how many modules you want, where the backs will go, and whether you want arms. A Camaleonda-inspired sofa looks best when it feels low, chunky, and relaxed. Avoid thin cushions or tall narrow backs, which can make the sofa look more like office waiting-room furniture than Italian lounge fantasy.
Mark each module with a letter: Seat A, Seat B, Back A, Back B, Left Arm, Right Arm. This prevents confusion later when your floor is covered in foam rectangles and you begin questioning every life choice that led you here.
Step 2: Cut the Foam Blocks
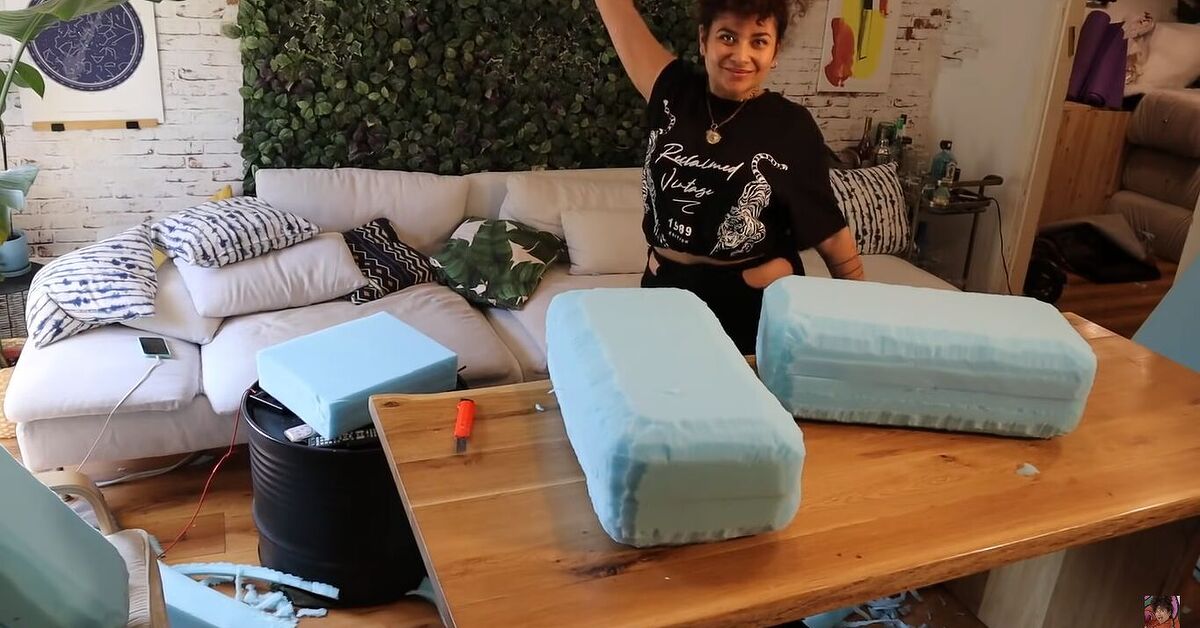
Measure twice, cut once, and do not eyeball it unless you enjoy chaos. Use a marker and straight edge to draw clean cut lines on the foam. An electric carving knife is one of the easiest tools for cutting upholstery foam at home because it slices through thick foam more smoothly than regular scissors or a utility knife.
Cut slowly and keep the blade vertical. If the foam is thick, ask another person to help guide the cut safely. For rounded edges, lightly shave the corners after the main block is cut. The original Camaleonda has soft, bulbous edges rather than sharp boxy corners, so rounding your foam is one of the easiest ways to make the finished sofa look more authentic.
Step 3: Build Layered Cushions
For each seat module, glue your foam layers together using spray adhesive made for foam. Apply adhesive lightly and evenly, wait until it becomes tacky according to the product instructions, then press the layers together. Do not soak the foam. Too much adhesive can create stiff spots and a smell that makes your living room feel like a hardware store having a nervous breakdown.
A good seat cushion formula is firm foam on the bottom, softer foam on top, and batting around the outside. The batting smooths edges, fills out the cover, and gives the module that plump, upholstered finish. Wrap the batting around the cushion and secure it with a light mist of adhesive or a few hand stitches.
Step 4: Create the Signature Tufted Grid
The deep tufted grid is the detail that makes the Camaleonda-inspired look instantly recognizable. For a 36-inch square seat module, divide the top into a 3-by-3 grid. Mark button points at the intersections or at the center of each square, depending on the look you prefer. The classic effect is deep, soft depressions that create rounded pillow-like squares.
Use a long upholstery needle and strong thread to pull fabric-covered buttons down through the cushion. You may need to create channels through the foam using a metal rod or upholstery needle before tufting. Pull the thread firmly but not so tightly that the cushion looks strangled. You want “luxury lounge,” not “foam cube wearing a corset.”
Tufting Tip
Test tufting on a scrap piece before working on the final cushion. Different fabrics behave differently. Velvet and boucle hide small mistakes beautifully. Smooth linen and thin fabric are less forgiving and may display every wrinkle like a tiny billboard of regret.
Step 5: Sew the Cushion Covers
Each module needs a fitted cover. The simplest method is to sew a box cushion cover with top, bottom, and side panels. Add seam allowance, usually around 1/2 inch to 3/4 inch. Include a zipper or hidden opening on the back or bottom so you can remove the cover later for cleaning or repairs.
Choose upholstery fabric with enough strength to handle sitting, shifting, and daily use. Boucle gives a trendy designer look. Velvet feels dramatic and soft. Corduroy adds texture and hides wear. Canvas is budget-friendly and easier to sew, though it may look more casual.
If your fabric has a nap or directional texture, make sure every piece runs the same direction. Otherwise, your sofa may look like it has mood swings depending on the angle of the light.
Step 6: Upholster the Backrests and Arms
Backrests and arms can be made from thick foam blocks or from foam wrapped around a thin support panel. A support panel gives the backrest more stability, especially if people will lean against it often. Cover each back and arm module with batting, then sew fitted covers using the same fabric as the seats.
You can tuft the backs as well for a more complete Camaleonda-inspired design. A 2-by-3 grid works nicely on a backrest. If you want a simpler beginner version, tuft only the seat modules and leave the backs smooth. The sofa will still look sculptural, but the project will be much easier.
Step 7: Connect the Modules
The original Camaleonda uses a clever system of cables, hooks, and rings to connect modules. For a DIY foam sofa, you can create a simpler hidden connection system. Heavy-duty hook-and-loop strips work well for lightweight modules. Upholstery straps with buckles can also be sewn to the underside of each cushion. Another option is to add small metal D-rings to fabric tabs and connect them underneath with short straps.
The goal is to keep the modules from drifting apart when someone sits down. Without connectors, your sofa may slowly migrate across the room like a herd of upholstered turtles.
Step 8: Add a Non-Slip Base
Because foam modules are lightweight, they can slide on hardwood, tile, or polished concrete. Add non-slip furniture pads or rug gripper material to the bottom of each module. If you built the cushions with plywood bases, you can attach small low-profile glides or rubber feet. Keep the feet subtle; the Camaleonda look is low and grounded, not tall and leggy.
Step 9: Style Your DIY Camaleonda-Inspired Sofa
Once your modules are assembled, style the sofa with restraint. The sofa itself is already a statement piece. Pair it with a low coffee table, textured rug, large floor lamp, and maybe one dramatic throw pillow. Avoid overloading it with tiny cushions. A Camaleonda-style sofa wants to be seen, not buried under a pillow avalanche.
Neutral colors such as cream, beige, chocolate, taupe, charcoal, and olive green work beautifully. If you want a bolder look, try rust velvet, deep blue corduroy, or mustard boucle. The modular shape handles color well because the form is already playful.
Cost Estimate
The cost depends on foam quality, fabric choice, and the number of modules. A small two-seat DIY foam sofa may cost a few hundred dollars if you shop carefully. Premium upholstery foam, boucle fabric, heavy-duty zippers, and professional tools can raise the price quickly. Still, the DIY version is usually far less expensive than buying an authentic designer sofa.
Budget Breakdown
- Foam: moderate to high cost depending on density and thickness
- Fabric: varies widely by material and yardage
- Batting: affordable and highly recommended
- Thread, zippers, buttons, adhesive: small but important expenses
- Tools: optional if you already own a sewing machine and cutting tools
Common Mistakes to Avoid
Using Thin Foam
Thin foam will not give you the chunky lounge effect. Use thick foam layers to create volume and comfort.
Skipping Batting
Batting makes cushions look fuller and smoother. Without it, covers may appear loose, flat, or wrinkled.
Choosing Weak Fabric
Decorative fabric is not always upholstery fabric. Choose material designed to handle friction and body weight.
Over-Tightening the Tufting
Deep tufting is beautiful, but pulling too hard can distort the foam. Aim for soft depressions, not violent craters.
Forgetting Modular Connectors
Loose modules are annoying. Add hidden straps, hook-and-loop strips, or clips so the sofa stays together.
Cleaning and Maintenance
Removable covers are your best friend. Add zippers whenever possible so you can clean, repair, or replace fabric later. Vacuum the sofa regularly using a brush attachment. For stains, follow the cleaning code for your fabric. Some upholstery fabrics tolerate water-based cleaners, while others require solvent-based cleaning. Test any cleaner on a hidden area first.
Rotate the modules occasionally so wear is distributed evenly. If one cushion becomes softer over time, move it to a less-used spot. That is another advantage of modular furniture: it lets you rearrange not only the layout but also the workload.
of Real-World Experience: What Making a Foam Camaleonda-Inspired Sofa Teaches You
Making a Mario Bellini Camaleonda sofa replica out of foam sounds glamorous at the beginning. You imagine yourself casually sewing beautiful boucle covers while sunlight pours through the window and your coffee stays magically warm. Then reality arrives wearing sweatpants. Foam is bulky. Fabric shifts. Tufting takes patience. Your measuring tape disappears every six minutes. Still, the project is surprisingly satisfying because each stage teaches you something useful about furniture, design, and your personal tolerance for repetitive hand sewing.
The first big lesson is that foam quality changes everything. Cheap foam may look fine when it arrives, but once you sit on it, the difference becomes obvious. A good cushion pushes back gently. A weak cushion gives up immediately and makes a soundless apology. If you are building a sofa for real use, spend more on the seat foam and save money elsewhere. You can choose a simpler fabric, reuse tools, or make fewer modules at first, but the seat foam is the heart of the project.
The second lesson is that rounded edges make the sofa look expensive. Sharp foam blocks look homemade in the wrong way, like a school theater prop waiting for opening night. Slightly shaving the corners and wrapping everything in batting creates a softer silhouette. Even before the fabric goes on, the modules begin to look intentional rather than accidental.
The third lesson is that tufting is both the hero and the villain. It creates the iconic look, but it demands patience. Marking the grid carefully is essential. If one button is off, the whole cushion can look cross-eyed. The best approach is to mark everything with chalk, step back, check the spacing, and only then start sewing. A long upholstery needle helps, but the real secret is consistency. Pull every button to a similar depth. Tie knots securely. Reinforce the back side if needed. Take breaks before your hands start writing angry emails to your brain.
The fourth lesson is that fabric choice affects both style and difficulty. Boucle looks fantastic, hides small sewing imperfections, and gives the sofa that fashionable gallery-apartment feel. However, it can be thick and fuzzy to sew. Velvet is dramatic but directional, meaning the nap must run the same way on every panel. Canvas is easier but more casual. If this is your first large upholstery project, choose a forgiving fabric with texture. Your future self will thank you, possibly with snacks.
The fifth lesson is that modular connectors are not optional. At first, you may think heavy foam blocks will stay in place. They will not. People sit, shift, lean, flop, and perform the ancient human ritual known as “getting comfortable.” Without connectors, the modules separate. Hidden straps, hook-and-loop strips, or underside clips make the sofa feel like one piece while preserving the modular look.
Finally, this project teaches you to respect the original design. The Camaleonda looks simple, but its simplicity is engineered. Translating that idea into foam shows how much thought goes into proportion, comfort, materials, and details. Your DIY version may not be perfect, but it can be beautiful, functional, and full of personality. And when someone asks where you got it, you can proudly say, “I made it,” which is a very elegant way of saying, “I fought foam and won.”
Conclusion
Learning how to make a Mario Bellini Camaleonda sofa replica out of foam is part furniture project, part design study, and part upper-body workout. The key is to focus on the features that define the look: oversized square modules, soft rounded edges, deep tufting, textured upholstery, and flexible arrangement. With quality foam, careful measuring, strong fabric, and patient tufting, you can create a stylish Camaleonda-inspired sofa that feels cozy, modern, and personal.
This DIY project is not about copying a luxury piece dishonestly. It is about understanding why the design works and translating that inspiration into something you can build, use, and enjoy. Start with two modules if you are new to upholstery. Add more later as your confidence grows. Before long, your living room may have a custom modular lounge that looks like it belongs in a design magazinejust with more personality and probably a few hidden thread knots.