
If you have ever thrown a paper airplane across the room and thought, “Nice flight, but I want more drama,” you are in the right place. A paper airplane launcher is one of those gloriously simple DIY projects that turns an ordinary sheet of paper into a mini engineering experiment. It is cheap, fun, surprisingly educational, and just chaotic enough to make everyone in the room want “one more try.”
In this guide, you will learn how to make a paper airplane launcher with easy household materials, how to improve its performance, and how to troubleshoot flights that end with a spectacular nose dive into your houseplant. Whether you are building this for a STEM activity, a rainy-day craft session, or just because launching things is deeply satisfying, this tutorial will help you do it well.
Why Make a Paper Airplane Launcher?
A launcher gives your paper airplane a faster, more consistent start than a hand toss. That matters because paper airplanes are picky little divas. A weak launch makes them flop. An awkward launch makes them spiral. A launcher helps you control the starting force better, which means you can test different airplane designs more fairly.
It also turns the project from a simple paper-folding craft into a real DIY engineering challenge. You are not just making a plane. You are building a system: a launcher, a flight path, and a repeatable way to test what works best. That is where the magic happens.
What You Need
- 1 sheet of printer paper for the airplane
- 1 cardboard rectangle, about 10 x 14 inches, for the base
- 2 pencils, wooden dowels, or craft sticks
- 1 large rubber band
- 1 small paper clip
- Tape
- Scissors
- Ruler
- Optional: glue, binder clips, extra cardboard, markers for decoration
If you want the absolute simplest version, you can make a handheld launcher with just a pencil, a rubber band, and a paper clip. If you want something sturdier and easier to test repeatedly, build the cardboard base version below.
How the Launcher Works
Before we build, here is the science in plain English. When you stretch a rubber band, you store energy in it. When you let go, that energy turns into motion and pushes the paper airplane forward. In other words, your launcher is a tiny catapult for things that look like office supplies with ambition.
Once the plane is in the air, four forces matter: lift, weight, thrust, and drag. Your launcher mainly helps with thrust at the beginning. After launch, the plane still needs a good design, balanced folds, and a stable center of gravity if you want it to glide instead of performing an emergency landing on your shoe.
How to Fold a Good Test Airplane
You can use almost any paper airplane design, but start with a simple dart or glider made from standard printer paper. The key is consistency. If you test five launcher setups with five wildly different planes, your results will be about as useful as a weather forecast written by a goldfish.
Tips for a solid test airplane
- Make crisp, even folds
- Match the wings carefully so both sides are symmetrical
- Use standard 8.5 x 11 inch printer paper for your first tests
- Keep decorations light so you do not change the weight too much
For launchers, slightly sturdier planes usually perform better than floppy ones. If your plane bends too easily during launch, reinforce the center crease with a small piece of tape.
How to Make a Simple Paper Airplane Launcher
Step 1: Make the base
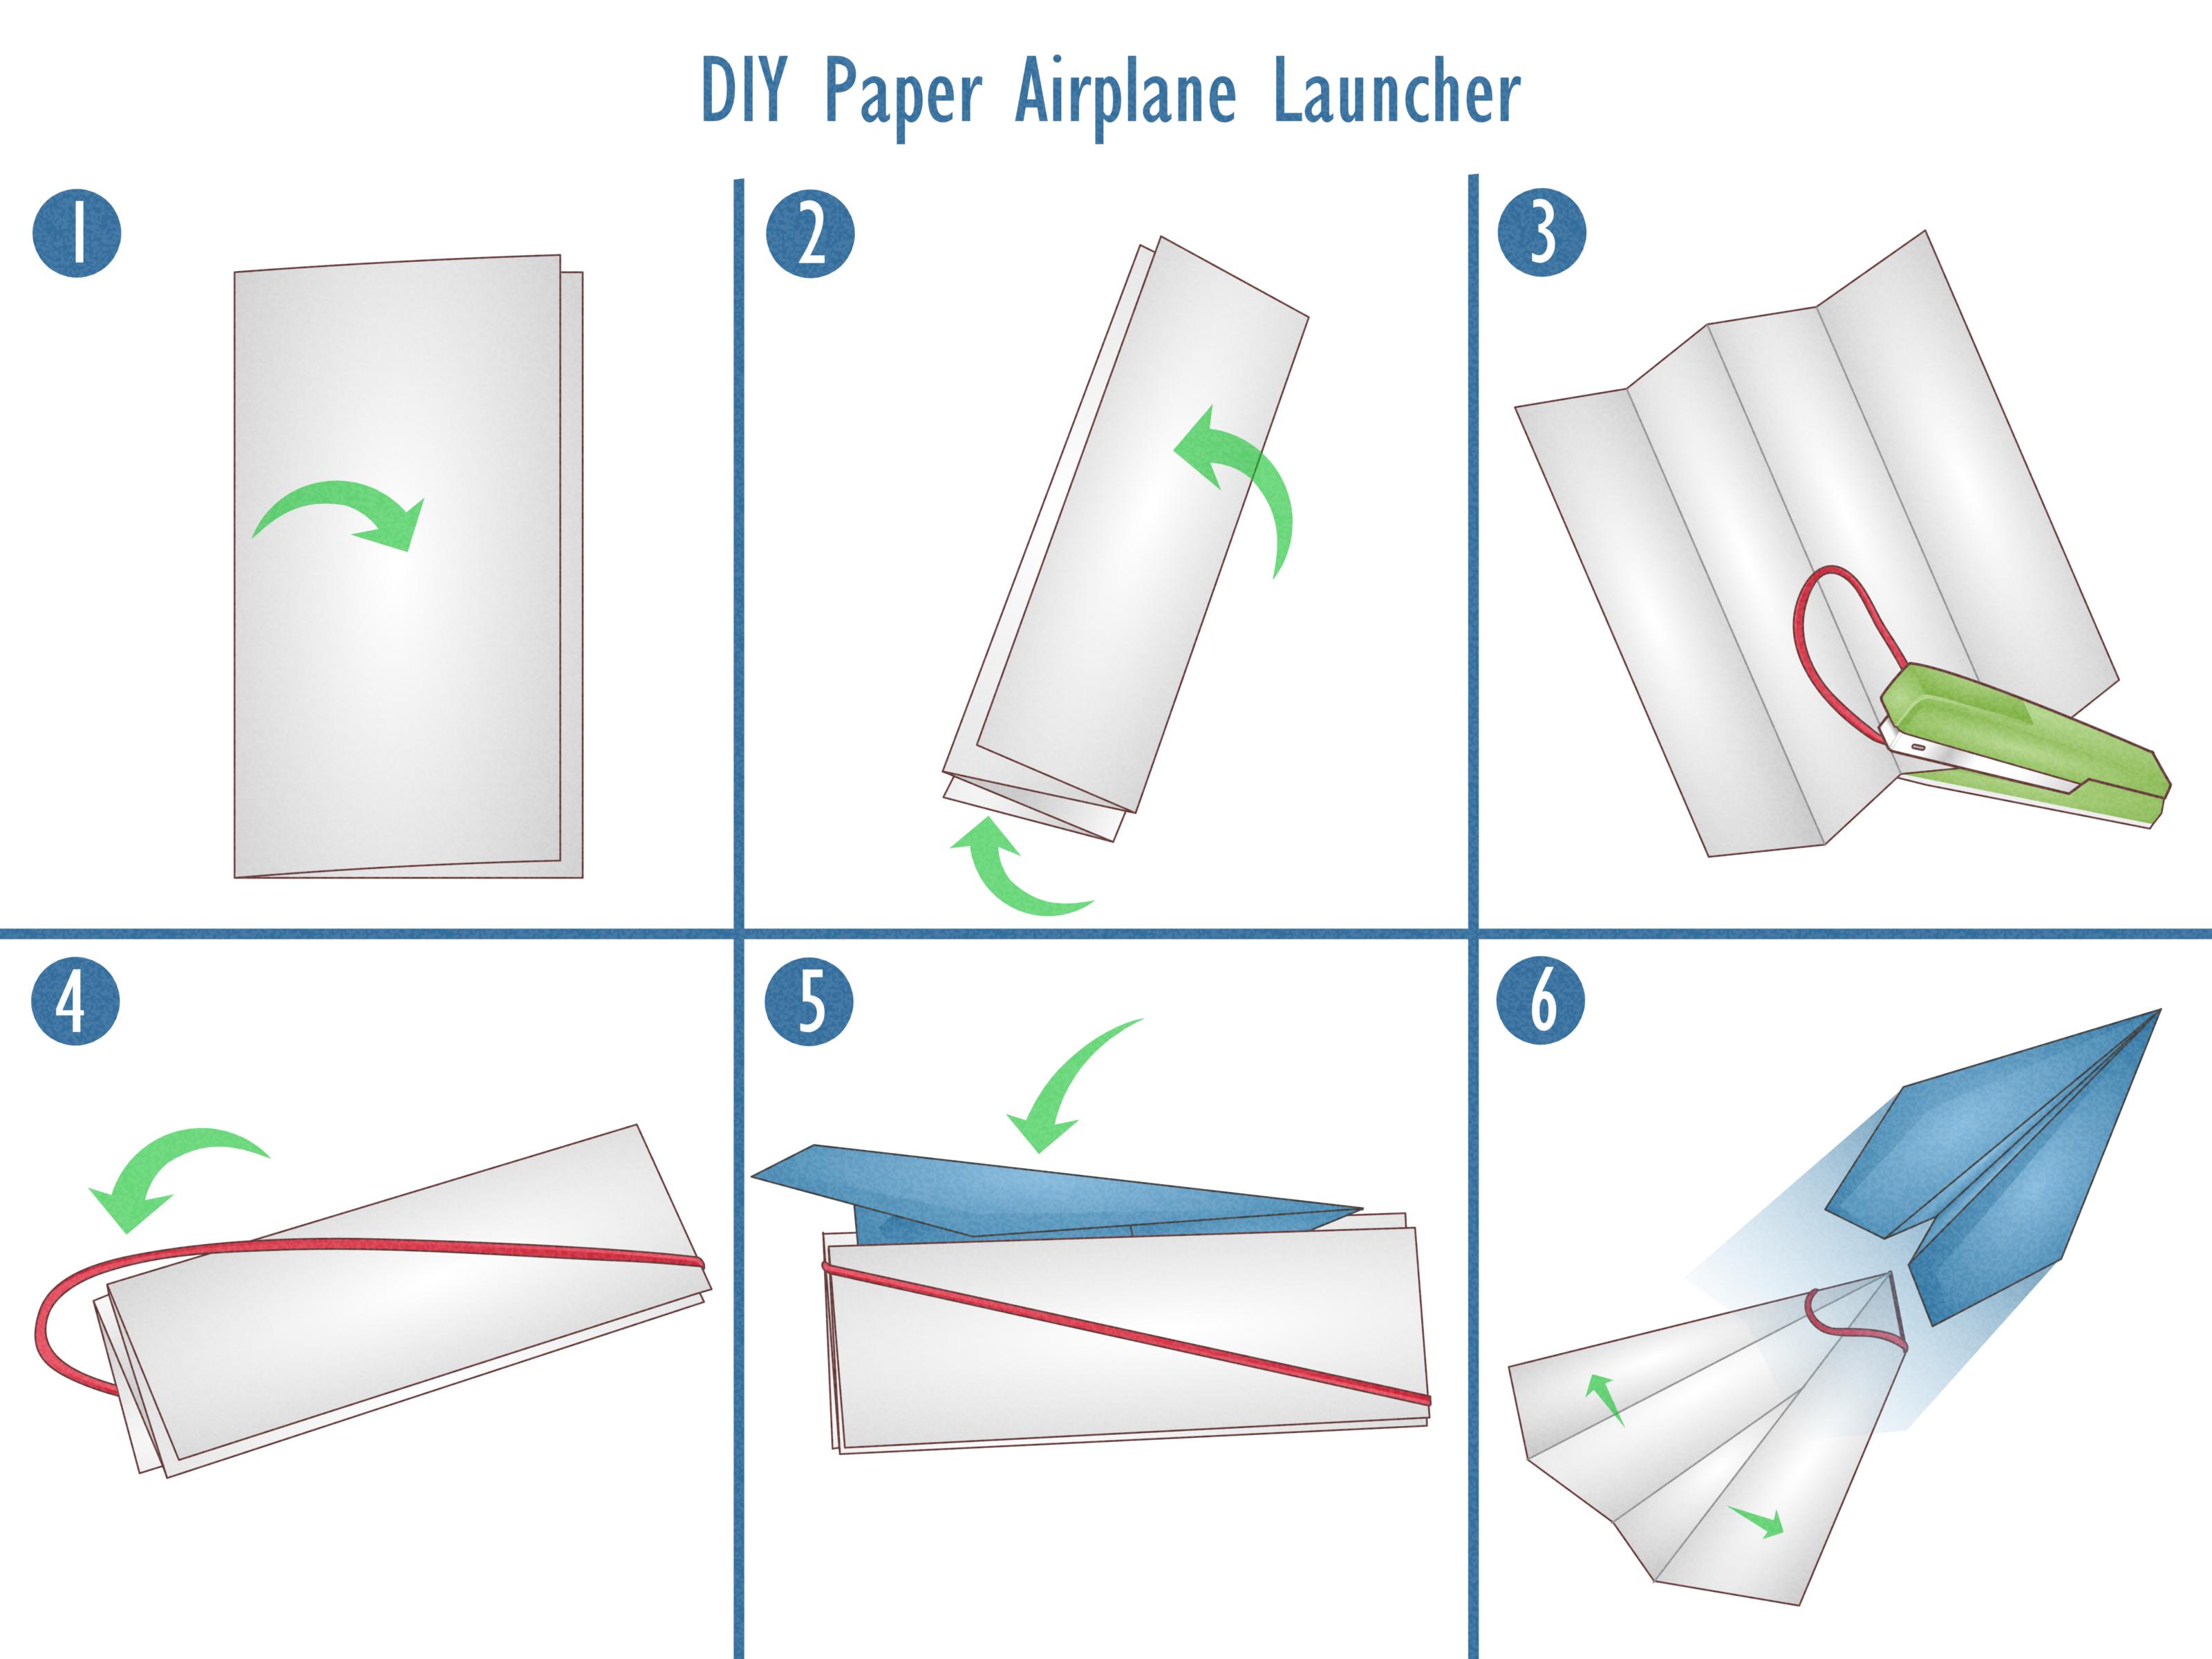
Lay your cardboard flat on a table. This will be the base of your launcher. Tape two pencils parallel to each other on the cardboard, about 1 to 1.5 inches apart. These pencils act like guide rails and help the plane launch in a straighter line.
Leave enough room at the back of the cardboard so you can attach the rubber band. At the front, leave open space for the plane to glide off smoothly.
Step 2: Add the rubber band
Stretch the rubber band across the back ends of the two pencils so it sits in the channel between them. Tape the ends down firmly. If the tape alone feels weak, wrap the band once around each pencil and then tape it. The goal is to create a centered launch band that pulls straight forward.
You do not want the band too loose or too tight. Too loose and the plane barely moves. Too tight and your launcher may twist, collapse, or send your airplane into orbit without filing a flight plan.
Step 3: Add a hook to the airplane
Clip a small paper clip to the underside of the airplane near the nose. This gives the rubber band a place to catch. Make sure the paper clip is secure and centered. If it sits crooked, the launch will be crooked too.
If you do not want to use a paper clip, you can make a small loop of tape on the underside of the plane, but a paper clip is usually sturdier and more reliable.
Step 4: Launch it
Hook the rubber band onto the paper clip under the nose of the plane. Pull the plane back gently through the guide rails. Keep the plane level or aim it slightly upward. Then release.
That is it. You have a working paper airplane launcher.
How to Make It Better
The first version does not need to be perfect. In fact, it probably will not be. That is part of the fun. Good launcher design is all about testing and improving.
Upgrade 1: Build taller side supports
If your plane snags on the base, add small folded cardboard walls or craft-stick supports on each side to keep the launch path clear. This can help the rubber band stay centered and reduce wobble.
Upgrade 2: Add an adjustable angle
Slide a rolled-up piece of cardboard or an eraser under the front of the launcher to change the launch angle. A slight upward tilt often helps, but too much can make the plane stall and lose speed fast.
Upgrade 3: Strengthen the frame
If the launcher flexes when you pull the rubber band back, reinforce the base with a second layer of cardboard. A stable launcher gives more repeatable results.
Upgrade 4: Mark pull-back distances
Use a ruler and mark one-inch increments on the base. This lets you test launches from the same distance each time. That is especially useful for science projects, classroom experiments, or backyard competitions where someone is definitely going to accuse someone else of “pulling it back farther.”
Best Launching Tips
- Start with a gentle pull-back instead of maximum force
- Launch in an open indoor space or a calm outdoor area
- Test one variable at a time: angle, airplane design, rubber band size, or pull-back distance
- Measure flight distance from the front of the launcher to where the plane lands
- Repeat each test several times and compare the average distance
One of the smartest things you can do is change only one factor at a time. If you switch the plane design, launch angle, rubber band tension, and paper type all at once, you will have no idea which change actually helped.
Troubleshooting Common Problems
The plane nose-dives immediately
Your launch angle may be too low, the plane may be too front-heavy, or the rubber band may be adding too much force for that airplane design. Try a gentler launch or slightly bend the back edges of the wings up.
The plane shoots upward and then drops hard
This usually means the angle is too high or the plane is generating too much drag. Lower the launch angle and check that the wings are even.
The plane turns left or right
Look for uneven folds, a crooked paper clip, or a launcher that is not centered. Even tiny misalignments can affect flight.
The rubber band slips off
Secure it more firmly to the launcher. Wrap before taping if needed. You want tension without wobble.
The plane gets stuck on the launcher
Clear more space around the flight path. The airplane should not rub against the base, tape edges, or side supports during launch.
Fun Experiments to Try
1. Test different airplane designs
Try a dart-style plane versus a wide-wing glider. One may fly faster while the other stays in the air longer.
2. Compare paper types
Use printer paper, recycled paper, or slightly heavier paper. Heavier paper may launch more cleanly, but it can also change glide performance.
3. Change the center of gravity
Add a tiny paper clip to the nose or move weight slightly forward or back. Small changes can affect stability a lot.
4. Experiment with launch angle
Try level, slightly upward, and a bit steeper. Record which one gives the best distance and the smoothest flight.
5. Build a competition
Create categories like farthest flight, straightest flight, longest airtime, or best-looking plane. Suddenly you are not just crafting. You are hosting a tiny air show for office supplies.
Safety Tips
This is a gentle DIY project, but basic safety still matters. Do not launch airplanes at faces, pets, lamps, televisions, or anyone holding a cup of coffee they clearly value. Use scissors carefully, and if younger kids are building the launcher, an adult should help with cutting and setup.
Also, test in a clear area. A paper airplane launcher is harmless until it meets a ceiling fan with confidence.
Why This Makes a Great STEM Project
A paper airplane launcher combines hands-on making with real science concepts. You can explore stored energy, motion, drag, lift, thrust, stability, and design iteration without spending much money. It also teaches a skill that matters in every engineering field: testing, observing, and improving.
That is why this project works so well for classrooms, homeschool activities, family game nights, scout meetings, and science fair practice. It is simple enough for beginners and flexible enough for endless upgrades.
Final Thoughts
If you want a DIY project that is cheap, educational, and weirdly addictive, a paper airplane launcher is hard to beat. It takes ordinary materials, adds a little creativity, and turns your living room, classroom, or hallway into a mini flight lab.
Start simple. Test often. Tweak one thing at a time. And remember: every great launcher begins with one rubber band, one paper airplane, and one person saying, “Okay, but what if we make it fly even farther?”
Real-World Experiences and Lessons Learned from Building Paper Airplane Launchers
One of the most interesting things about making a paper airplane launcher is how quickly a “tiny craft project” turns into a full-blown experiment. The first time many people build one, they assume the strongest rubber band and the hardest launch will automatically create the best flight. Then reality shows up, usually in the form of a paper airplane that shoots upward like it has big dreams and immediately crashes into a curtain rod.
In practice, the best launches often come from balance rather than brute force. A moderate pull-back, a straight release path, and a well-folded airplane usually beat a wild, overpowered launch. That is one of the biggest lessons builders learn: more force is not always better. Paper airplanes are lightweight, and when you give them too much speed without stability, they become dramatic instead of graceful.
Another common experience is discovering that the launcher matters just as much as the plane. A flimsy base bends under tension, the rubber band shifts off-center, and suddenly every flight hooks left like the airplane has made a personal decision. Once builders reinforce the base, center the band, and create a smoother launch path, the flights improve right away. This is often the moment when the project starts to feel less like random luck and more like real engineering.
People also learn that tiny adjustments can create huge differences. A paper clip moved a fraction of an inch, a wing tip bent slightly upward, or a launch angle changed just a little can completely change the result. That makes the activity especially rewarding, because every test gives immediate feedback. You do not need expensive tools or advanced software. You can see the effect instantly with your own eyes, usually followed by someone saying, “Wait, do that exact same thing again.”
Classrooms and family groups often find that this project naturally encourages teamwork. One person folds planes, another measures distances, another tracks results, and someone inevitably becomes the self-appointed flight announcer. Because the project is simple, people of different ages can participate without feeling lost. Younger kids enjoy the launching. Older students get interested in the testing and design improvements. Adults pretend they are “just helping” and then become suspiciously competitive.
Perhaps the best experience of all is how this project makes failure useful. A short flight, a crooked launch, or a hard crash is not the end of the activity. It is the data. That mindset is what makes the launcher so valuable. It teaches patience, observation, and improvement in a way that feels playful instead of stressful. By the end, you do not just have a paper airplane launcher. You have a better understanding of how design choices affect performance, plus a strong urge to build version two.