
A handmade baby quilt looks like the sort of project that requires years of sewing wisdom, a studio full of mysterious rulers, and at least one grandmother who knows how to thread a bobbin by instinct. Fortunately, none of that is required.
This easy baby quilt uses basic five-inch squares, straight seams, simple machine quilting, and beginner-friendly binding. The finished quilt measures approximately 36 by 45 inches, making it useful for supervised floor play, nursery decoration, stroller outings, photo sessions, and cuddling with an awake caregiver.
The design is forgiving, colorful, and easy to customize. Better yet, the small size keeps the project manageable. You can learn every major stage of quiltmaking without wrestling a queen-size blanket through a domestic sewing machine like an alligator in a pillowcase.
Why This Is a Good First Quilt
A simple patchwork baby quilt is one of the best beginner quilting projects because it teaches the complete process: selecting fabric, cutting pieces, sewing an accurate seam, pressing rows, assembling a quilt sandwich, quilting the layers, and adding binding.
Unlike patterns involving triangles, curves, or intricate points, this design relies entirely on squares. Slightly imperfect corners tend to disappear into the overall patchwork, especially after the quilt is washed and develops that soft, gently crinkled texture people love.
You can make the top with two packs of precut five-inch charm squares or cut your own squares from coordinating quilting cotton. Precuts save time, while cutting from yardage gives you more control over the color palette. Both methods work beautifully.
Finished Size and Layout
This tutorial uses 80 squares arranged in ten rows of eight squares. Each square begins at 5 inches and finishes at approximately 4½ inches after the seam allowances are sewn.
- Squares across: 8
- Rows down: 10
- Finished quilt top: Approximately 36 × 45 inches
- Recommended skill level: Beginner
- Estimated active sewing time: One relaxed weekend
The dimensions do not need to be treated like federal law. You can make a square quilt with eight rows of eight squares or create a longer version by adding two more rows. Just remember that changing the top size also changes the amount of backing, batting, and binding required.
Materials for an Easy Baby Quilt
Fabric and batting
- 80 five-inch fabric squares, or two standard charm packs
- 1½ yards of backing fabric
- One crib-size piece of low-loft quilt batting
- ⅜ yard of binding fabric
- Coordinating all-purpose or cotton quilting thread
Basic tools
- Sewing machine with a reliable straight stitch
- New universal or quilting needle
- Rotary cutter, acrylic ruler, and self-healing cutting mat
- Iron and ironing surface
- Safety pins or temporary quilt-basting spray
- Fabric clips or straight pins
- Walking foot, if available
- Seam ripper, also known as the tiny sword of accountability
A walking foot is helpful because it feeds the top and bottom layers more evenly during machine quilting. It is not essential, however. Sew slowly, smooth the quilt frequently, and avoid pulling it through the machine.
Choosing Fabric That Works Well
Quilting cotton is the easiest fabric for a first baby quilt. It is stable, widely available, easy to press, and less likely to stretch while you sew. Choose prints with a mixture of light, medium, and dark values so the patchwork has contrast.
A simple formula is to select one main print, two or three supporting prints, several small-scale patterns, and a few solids. Colors do not need to match perfectly. They simply need to look as though they would willingly sit together at lunch.
Avoid beads, buttons, pom-poms, loose ribbons, or other detachable decorations on a baby quilt. They complicate washing and may become hazards if they come loose.
When using yardage, either prewash all the fabric or leave all of it unwashed. Mixing prewashed and unwashed materials can lead to uneven shrinkage. Precut charm squares are generally best used without prewashing because their small edges can fray significantly.
How To Make an Easy Baby Quilt Step by Step
Step 1: Prepare the fabric
Press wrinkled fabric before cutting. If you are starting with yardage, trim one edge square and cut five-inch strips. Rotate the strips and cut them into five-inch squares.
Accuracy matters, but perfection is not required. The important thing is consistency. Eighty squares that are all slightly under 5 inches will behave better than a collection ranging from 4⅞ to 5¼ inches.
Step 2: Arrange the quilt layout
Lay the squares on a clean floor, design wall, bed, or large table in ten rows of eight. Spread similar colors and repeated prints throughout the layout. Take a photo before moving anything; that picture will become your map when the squares mysteriously develop opinions about where they belong.
Look at the layout from a distance. If one area appears unusually dark or crowded, swap a few squares until the design feels balanced.
Step 3: Sew the squares into rows
Beginning with the first row, place the first two squares right sides together. Align the edges and sew with a consistent ¼-inch seam allowance. Add the next square to the second square and continue until all eight pieces form one row.
Repeat for the remaining nine rows. Chain piecing can speed up this stage: feed several pairs through the machine one after another without cutting the thread between them. This saves thread and reduces the number of times you need to stop and start.
Step 4: Press the seams
Press the seams in the first row toward the right. Press the seams in the second row toward the left. Continue alternating directions for all ten rows.
Alternating the seam direction allows the seam allowances to nest together when adjacent rows are joined. This helps the square intersections line up without requiring heroic levels of pinning.
Press rather than aggressively sliding the iron back and forth. Excessive movement can stretch the fabric and distort the rows.
Step 5: Join the rows
Place rows one and two right sides together. Match the vertical seams, feeling with your fingers to make sure the nested seam allowances meet. Pin or clip at each intersection, then sew the rows together with a ¼-inch seam.
Add the remaining rows in order. After the entire quilt top is assembled, press the horizontal seams in one direction or press them open if the intersections feel bulky.
Measure the top through the center in both directions. Do not panic if the measurement is not precisely 36 by 45 inches. Fabric has personality. As long as the top lies reasonably flat and the edges are close to straight, you are ready to continue.
Step 6: Prepare the quilt backing
Cut the backing so it extends at least 2 to 3 inches beyond the quilt top on every side. For this project, a piece approximately 42 by 51 inches provides a comfortable margin.
Press the backing thoroughly. A wrinkle trapped in the quilt sandwich can become a permanent pleat, which is not the kind of surprise anyone wants after finishing several hours of quilting.
Step 7: Make and baste the quilt sandwich
Lay the backing right side down on a clean, flat surface. Tape the edges lightly to the floor or table without stretching the fabric. Place the batting on top, followed by the quilt top right side up.
Smooth each layer from the center toward the edges. Secure the layers with curved safety pins placed roughly 4 to 6 inches apart, or use temporary basting spray according to the manufacturer’s instructions.
Check the back before quilting. It should be smooth, with no folds or puckers hiding underneath.
Step 8: Quilt the layers
For a beginner, straight-line quilting is the simplest option. Attach a walking foot if you have one and lengthen the stitch slightly to approximately 2.8 to 3.2 millimeters.
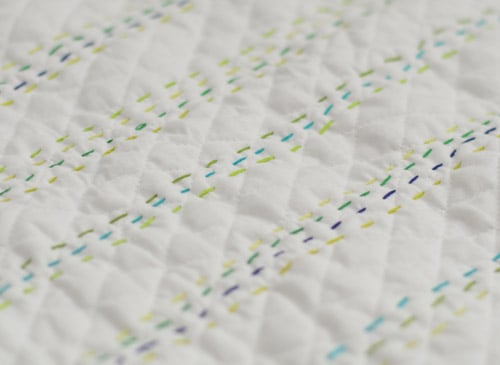
Start near the center and sew toward an outer edge. Continue quilting parallel lines across the project, smoothing the layers as you work. You can stitch directly along the patchwork seams, known as stitching in the ditch, or sew about ¼ inch away from each seam for a clean grid effect.
Check the batting package for the maximum recommended spacing between quilting lines. Different battings require different amounts of stitching to remain stable after washing.
Roll or loosely fold the portion of the quilt that must pass through the machine’s throat. Support the quilt on the table so its weight does not drag against the needle.
Step 9: Square and trim the quilt
After quilting, lay the project flat and trim away the excess backing and batting. Use the patchwork seams and a long ruler as guides. Work carefully around each corner so the quilt remains rectangular.
Do not attempt to correct every tiny irregularity by repeatedly trimming the edges. That path leads to a very square potholder.
Step 10: Make the binding
Cut five strips of binding fabric, each 2½ inches wide across the width of the fabric. Join the strips end to end with diagonal seams. Trim each joining seam to ¼ inch and press it open.
Fold the long binding strip in half lengthwise with the wrong sides together and press. You now have double-fold binding with two raw edges on one side and a folded edge on the other.
Step 11: Attach the binding
Beginning near the middle of one side, align the raw binding edges with the raw quilt edge. Leave an unsewn tail of about 8 inches. Sew with a ¼-inch seam allowance.
When you reach a corner, stop ¼ inch before the edge. Remove the quilt from the machine, fold the binding upward at a 45-degree angle, and then fold it straight down along the next side. Resume sewing from the edge. This creates a tidy mitered corner.
Continue around the quilt, join the binding ends, and finish the remaining opening. Fold the binding over the quilt edge to the back. Secure it with clips.
Hand-stitch the folded edge to the backing for a traditional finish, or machine-stitch it for speed and durability. A baby quilt is likely to visit the washing machine frequently, so strong construction is more valuable than invisible stitches.
Step 12: Wash and inspect the finished quilt
Wash the quilt on a gentle cycle with mild detergent and dry it on low heat. Washing removes handling residue, softens the materials, and creates the classic quilted texture.
After drying, inspect the binding, corners, and quilting lines. Repair any loose stitches before gifting or using the quilt.
Common Beginner Problems and Simple Fixes
The corners do not match
Check your seam allowance and pressing direction. Nesting seams usually improves alignment. Pin directly through the seam intersection when greater precision is needed. A few imperfect corners will not ruin the quilt; babies are famously relaxed quilt judges.
The rows look curved
This often happens when fabric is pulled while sewing or the seams are pressed too aggressively. Let the feed dogs move the fabric naturally. Use a ruler to check each row before joining it to the next.
The backing develops puckers
Puckers usually result from incomplete basting or fabric that was not smoothed before quilting. Baste more closely, begin quilting near the center, and check the back regularly.
The quilting stitches are uneven
Install a fresh needle, rethread the machine, and test the tension on a fabric-and-batting sample. Support the quilt’s weight and maintain a steady sewing speed rather than racing through the easy sections and crawling through bulky seams.
The binding looks wavy
Avoid stretching the binding as you attach it. Keep the raw edges aligned and let the machine feed the layers. If one section becomes badly distorted, remove those stitches and resew it rather than hoping the washing machine possesses advanced tailoring skills.
Ways to Personalize the Quilt
Once you understand the basic construction, the same baby quilt tutorial can produce many different styles. Use black, white, and warm neutrals for a modern nursery. Combine floral prints and soft solids for a traditional look. Novelty fabrics featuring animals, vehicles, stars, or storybook characters make the quilt playful without requiring complicated piecing.
You can also embroider a name or date on one square before assembling the top. Keep embellishment flat, secure, and washable. A fabric label sewn firmly to the back can include the maker’s name, recipient’s name, date, and a short message.
Important Baby Quilt Safety Note
A handmade quilt is a thoughtful baby gift, but loose quilts and blankets should not be placed in an infant’s crib, bassinet, or other sleep area. Current American safe-sleep guidance recommends keeping quilts, blankets, pillows, toys, and other soft objects out of the baby’s sleep space.
During infancy, use the quilt for supervised tummy time, floor play, nursery display, photographs, or cuddling while an adult is awake and attentive. The child can enjoy it more independently when older and developmentally ready.
Conclusion
Learning how to make an easy baby quilt is less about producing flawless patchwork and more about completing each stage with care. Start with stable quilting cotton, use an accurate ¼-inch seam, press each row, baste the layers thoroughly, and choose uncomplicated straight-line quilting.
The final quilt will be useful, washable, and completely unique. It may contain a slightly crooked seam or one corner that refuses to behave. Those details do not make it less handmade; they are the evidence.
Practical Experience: What Beginners Learn From Making a Baby Quilt
The first lesson most beginners discover is that fabric selection feels more complicated in the store than it does in the finished quilt. Surrounded by hundreds of prints, it is easy to spend an hour wondering whether two shades of blue are compatible. Once those fabrics are cut into small squares and distributed across a patchwork layout, minor color differences usually create depth rather than conflict. A useful approach is to choose one favorite print and build around it instead of trying to make every fabric equally important.
The cutting stage also teaches that careful preparation saves more time than fast sewing. A square that is accurately cut will move through the machine without argument. A crooked square demands adjustments at every later step. Beginners often want to begin stitching immediately because sewing feels like the “real” work, but pressing the fabric, checking the ruler, and replacing a dull rotary blade can prevent an impressive collection of future problems.
Another common experience is the moment when the individual rows finally become a complete quilt top. Before that point, the project may look like organized laundry. Once the final row is attached and the top is spread across a table, the pattern suddenly makes sense. That transformation is one reason small patchwork quilts are so satisfying: progress is visible, and each completed row creates momentum.
Basting is often the least glamorous part of the process, yet it has an enormous effect on the result. Beginners sometimes use only a handful of pins because the layers appear cooperative while lying flat. The quilt becomes less cooperative when it is rolled, turned, and pushed through a sewing machine. Close, even basting prevents the backing from shifting and saves the discouragement of finding a large fold after the quilting is finished. Spending an extra fifteen minutes at this stage is usually a very good bargain.
Machine quilting introduces another valuable lesson: slower is often faster. Pulling the quilt or sewing at maximum speed tends to produce short stitches, long stitches, puckers, and tired shoulders. Supporting the quilt on a table, pausing to smooth the layers, and working from the center outward creates a cleaner result with less frustration. Straight lines do not need to be perfectly straight to look attractive. Once the entire grid is complete, small variations blend into the overall texture.
Binding is the stage that many new quilters fear most. The long strip seems unruly, and the first mitered corner may resemble experimental architecture. By the fourth corner, however, the sequence begins to feel logical: stop, fold up, fold down, and continue. Machine-finishing the binding is perfectly appropriate for a frequently washed baby quilt. Durability should take priority over demonstrating that you can hand-sew while watching three seasons of television.
The final wash is often the most rewarding moment. Minor unevenness relaxes, the batting settles, and the surface becomes soft and dimensional. A quilt that looked slightly stiff on the sewing table begins to look like an object meant to be used. This is also when beginners realize that handmade does not mean fragile. With secure seams, sufficient quilting, and properly attached binding, a baby quilt can withstand repeated washing and years of family life.
Most importantly, an easy baby quilt teaches that quilting is a sequence of manageable tasks. No single step is especially mysterious. Cut squares, sew rows, join rows, layer fabrics, quilt lines, and cover the edges. Completing one small quilt builds enough confidence to attempt larger projects, new block designs, or more adventurous fabrics. The baby receives a useful handmade gift, and the maker receives a new skillwhich is a fairly impressive return on eighty little squares.
Note: Before gifting the quilt, include care instructions and remind the recipient that loose quilts should remain outside an infant’s sleep area. Encourage supervised use until the child is old enough to use the quilt safely.