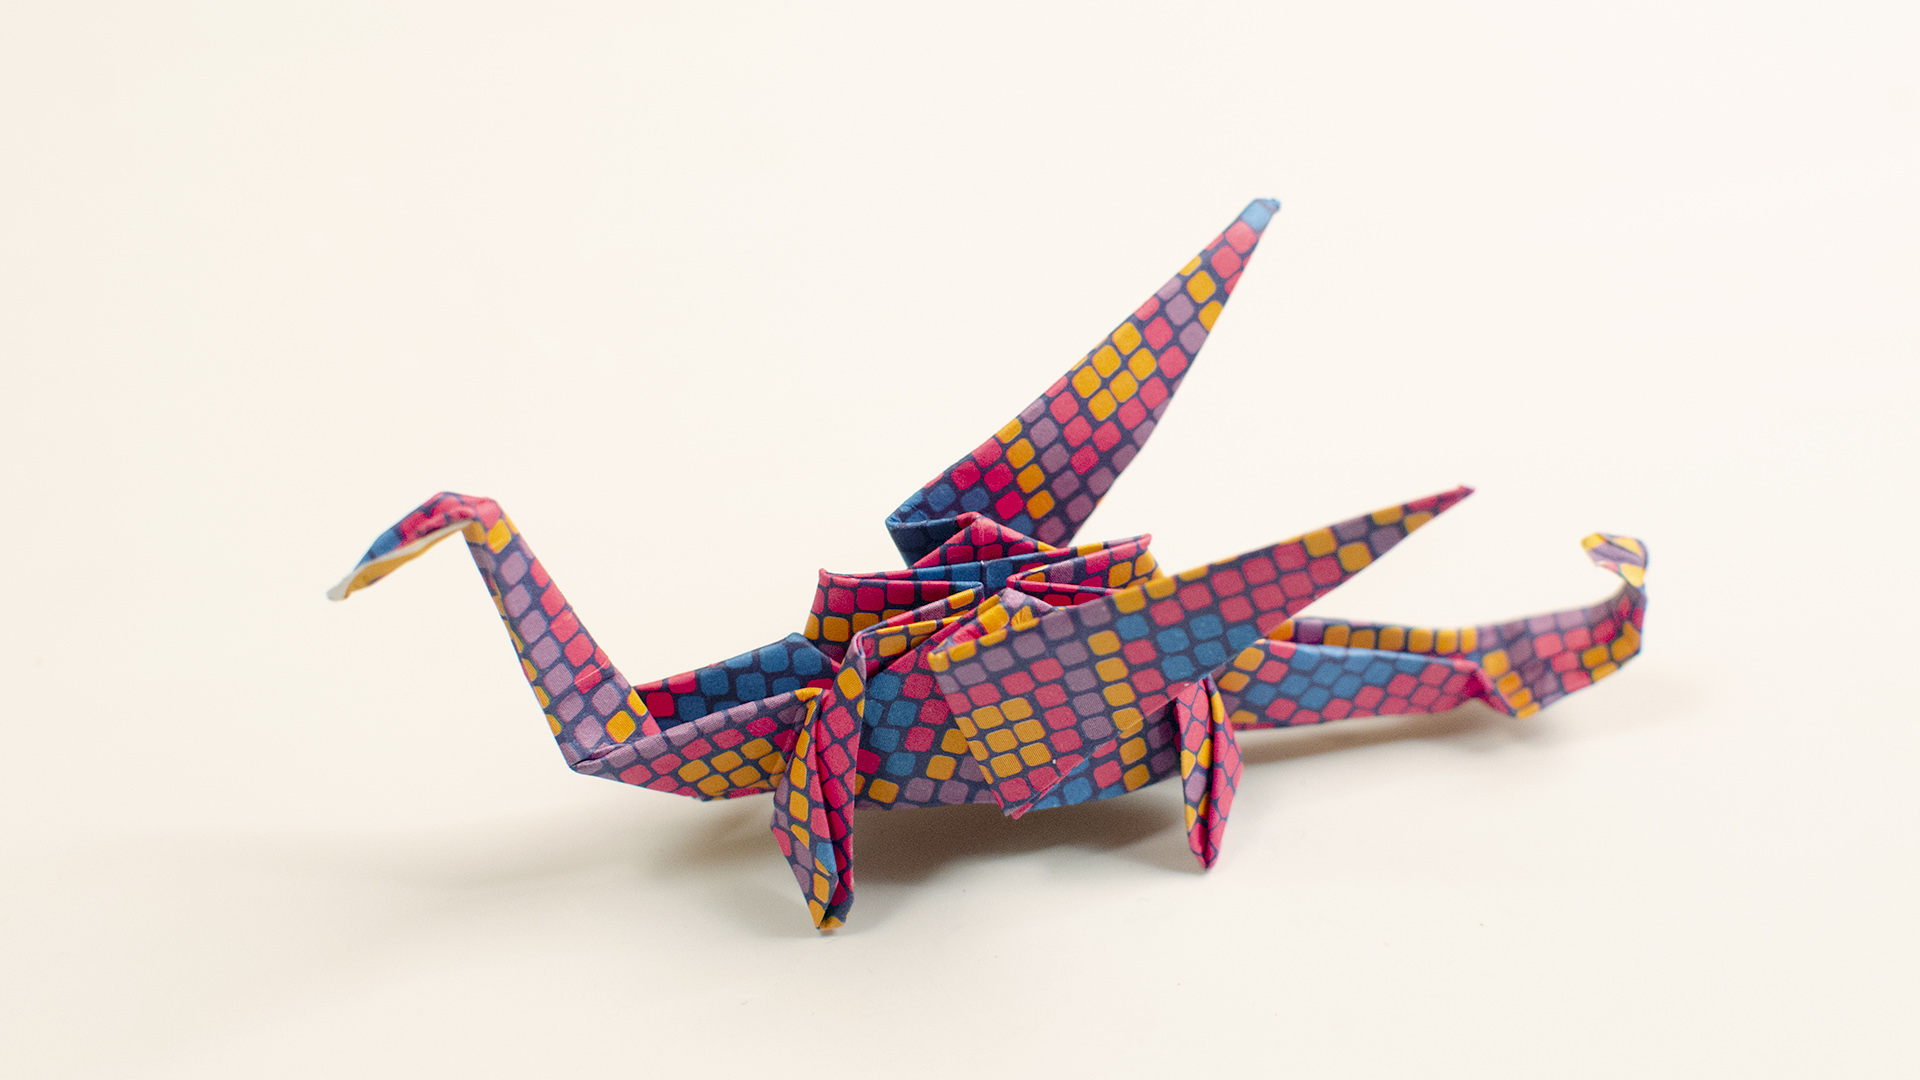

Learning how to make an origami dragon is one of those craft projects that sounds wildly ambitious at first. A dragon? From one square of paper? No glue, no scissors, no tiny medieval blacksmith? Surprisingly, yes. With the right folds, a flat sheet can become a fierce little paper creature with wings, a tail, a neck, a head, and enough personality to guard your desk from boring office supplies.
This guide is written for beginners who already know that paper has two sides and for intermediate folders who want a clean, display-worthy dragon without needing a wizard robe or a 47-page crease pattern. We will use a beginner-friendly bird-base approach, similar to the foundation used in classic origami models like the crane, then shape it into a dragon with thoughtful reverse folds, wing shaping, and a few finishing tricks.
By the end, you will know what paper to choose, which folds matter most, how to avoid the classic “my dragon looks like a tired chicken” problem, and how to customize your origami dragon so it looks more heroic than confused.
What Is an Origami Dragon?
An origami dragon is a folded paper model designed to represent a mythical dragon using traditional origami techniques. Unlike a simple paper airplane or fortune teller, a dragon usually includes multiple shaped sections: a head, neck, wings, body, legs, and tail. That makes it more detailed, but not impossible.
There are many types of paper dragons. Some are very easy and use just a few folds. Others are advanced models with horns, claws, scales, layered wings, and enough complexity to make your coffee go cold. This tutorial focuses on an easy origami dragon that still looks impressive. It is not the most complex dragon in the kingdom, but it has attitude, and that counts.
Materials You Need
1. One Square Sheet of Paper
Start with one square sheet of origami paper. A 6-by-6-inch sheet works, but if this is your first dragon, use a larger square such as 8-by-8 inches or 10-by-10 inches. Larger paper gives your fingers more room to work and makes tiny folds less dramatic.
2. Recommended Paper Types
Traditional kami paper is a great choice because it is thin, crisp, and easy to fold. Tant paper gives a slightly sturdier feel and comes in rich colors. Foil-backed paper can hold sharp details beautifully, especially for wings and tails, but it can also show mistakes more clearly. For your first attempt, regular origami paper or lightweight printer paper cut into a square is perfectly fine.
3. A Flat Folding Surface
Use a clean table, desk, or cutting mat. Folding on a bed may feel cozy, but it turns precise creasing into a wrestling match with a blanket. Your dragon deserves better.
4. Optional Creasing Tool
A bone folder, ruler edge, or even the back of a spoon can help sharpen creases. Use gentle pressure. Origami is paper folding, not paper interrogation.
Basic Origami Folds to Know First
Valley Fold
A valley fold bends the paper toward you, creating a crease that dips downward like a valley. This is one of the most common folds in origami.
Mountain Fold
A mountain fold bends the paper away from you, forming a raised ridge. If a valley fold says “come here,” a mountain fold says “I am majestic and slightly distant.”
Squash Fold
A squash fold opens a flap and flattens it into a new shape. It is often used when creating square bases, bird bases, and other classic origami structures.
Inside Reverse Fold
An inside reverse fold tucks a point inward along existing creases. This is especially important for shaping a dragon’s head, neck, and tail.
Bird Base
The bird base is a traditional origami foundation used for cranes and many animal models. Our paper dragon begins with a similar structure because it naturally creates long points that can become wings, necks, and tails.
How to Make an Origami Dragon Step by Step
Step 1: Start With the Colored Side Down
Place your square paper on the table with the colored side facing down. Position it like a diamond, with one corner pointing toward you. Fold the paper in half diagonally from bottom corner to top corner. Crease well, then unfold.
Step 2: Make the Second Diagonal Crease
Fold the paper diagonally in the opposite direction, corner to corner. Crease firmly and unfold again. You should now have an “X” crease pattern across the paper.
Step 3: Flip and Fold Horizontally
Turn the paper over so the colored side faces up. Fold it in half from left to right, crease, and unfold. Then fold it in half from top to bottom, crease, and unfold. These creases prepare the paper to collapse neatly.
Step 4: Collapse Into a Square Base
Bring the left and right corners inward while guiding the top corner down to meet the bottom corner. The paper should collapse into a small square or diamond shape. Flatten it carefully. This is your square base, the first important milestone. Congratulations: your paper has officially entered dragon training.
Step 5: Turn the Square Into a Bird Base
Place the square base so the open flaps point downward. Fold the lower left and lower right edges of the top layer toward the center crease, forming a kite shape. Fold the top triangle down over those flaps, crease, then unfold all three folds.
Now lift the bottom corner of the top layer upward. As you lift, the side edges should fold inward along the creases you just made. Flatten the shape into a long diamond. Flip the paper over and repeat on the other side. You now have a bird base.
Step 6: Choose the Dragon’s Front and Back
Look at the four long points of the bird base. Two will become wings, one will become the neck and head, and one will become the tail. Decide which point you want facing forward. If your paper has a color gradient or pattern, choose the most attractive side for the top of the dragon.
Step 7: Shape the Neck
Take one long narrow point and fold it upward at an angle using an inside reverse fold. This creates the dragon’s neck. Aim for a proud, rising angle, not a sad droop. A dragon should look like it has plans, even if those plans involve sitting on your bookshelf.
Step 8: Form the Head
At the tip of the neck, make a smaller inside reverse fold downward or forward to form the head. You can make the head sharp and angular for a classic dragon look, or fold a tiny point upward to suggest a snout. If you are feeling brave, add two tiny horn folds, but do not worry if your first dragon is horn-free. Many respectable dragons are minimalist.
Step 9: Shape the Tail
Take the opposite long point and fold it backward or upward using another inside reverse fold. This becomes the tail. A slightly raised tail gives the model energy and balance. You can also make a small crimp fold near the tip for a curved tail effect.
Step 10: Fold the Wings Down
The two wide side flaps become wings. Fold each wing downward at an angle from the upper body. Crease firmly. Then open the wings slightly so they stand away from the body. For a dramatic look, fold the lower edge of each wing upward to create a layered, bat-like shape.
Step 11: Add Wing Details
To make the wings look more dragon-like, add one or two small pleats along each wing. These folds create the impression of wing bones. Keep the pleats light; too many can make the paper bulky. Remember, this is origami, not laundry day.
Step 12: Create the Legs
Depending on your base, small lower flaps may be available near the body. Fold these downward and outward to suggest legs. If your version does not have obvious leg flaps, you can still shape the lower body slightly by pinching the sides inward. The goal is not anatomical perfection. The goal is “recognizably dragon,” not “paper veterinarian approved.”
Step 13: Adjust the Body
Gently press the central body so it becomes three-dimensional. Do not crush it flat. A slight puff gives the dragon a stronger silhouette and helps it stand. If your model keeps collapsing, sharpen the base creases and open the wings a little wider for balance.
Step 14: Final Shaping
Now refine the details. Raise the neck. Angle the head. Spread the wings. Curve the tail. Pinch the wing tips. This final shaping stage is where an ordinary folded model becomes a tiny mythical beast with rent-free confidence.
Tips for Making a Better Origami Dragon
Use Thin Paper for Cleaner Folds
Dragons involve several layers of paper near the body. Thick paper can become bulky fast, especially around the neck and wings. If your dragon feels like you are folding cardboard armor, switch to thinner paper.
Crease Accurately From the Beginning
Small errors multiply as the model develops. A slightly crooked diagonal crease can become a crooked body, uneven wings, and a dragon that appears to have made poor life choices. Take your time with the first folds.
Practice the Bird Base Separately
If the bird base gives you trouble, practice it two or three times before starting the dragon. Once the base feels familiar, the rest of the model becomes much easier.
Do Not Overwork the Paper
Repeated folding and unfolding can weaken paper fibers. If a section starts looking fuzzy or tired, use a fresh sheet. Paper is cheaper than frustration.
Common Mistakes and How to Fix Them
The Dragon Will Not Stand
Open the wings wider and adjust the tail angle. A dragon stands better when its weight is balanced across the body, wings, and tail. You can also flatten the bottom slightly with gentle pressure.
The Head Looks Too Big
Make a smaller reverse fold at the tip of the neck. If needed, unfold the head and try again. Origami is wonderfully forgiving until the paper gives you a look.
The Wings Are Uneven
Compare both wing folds from the center body crease. Refold the lower wing edge so both sides match. Symmetry matters because wings are the most visible part of the model.
The Paper Tears
This usually means the paper is too thick, the fold is too sharp, or the same spot has been refolded too many times. Try larger paper or a lighter touch.
Creative Origami Dragon Variations
Fire Dragon
Use red, orange, or gold paper. Shape the wings with sharp angles and give the tail a dramatic upward curve.
Ice Dragon
Use pale blue, silver, or white paper. Keep the wings crisp and narrow for a frosty, elegant look.
Forest Dragon
Use green paper and soften the final shaping. A slightly curved neck and broader wings can make the dragon feel earthy and calm.
Tiny Desk Dragon
Once you understand the folds, try making a mini dragon from a 3-by-3-inch square. Warning: this is adorable but fiddly. Your fingers may file a formal complaint.
Why Origami Dragons Are So Popular
Origami dragons combine three things people love: fantasy, challenge, and transformation. A crane is elegant. A box is useful. A dragon, however, feels magical. It turns paper into a character. That is why dragon models are popular among students, hobbyists, fantasy fans, teachers, and anyone who enjoys crafts with a little drama.
They also teach valuable folding skills. When you make an origami dragon, you practice symmetry, reverse folds, layered shaping, and three-dimensional thinking. These skills carry over into many other origami animals and advanced paper craft projects.
How to Display Your Paper Dragon
Place your finished dragon on a bookshelf, desk, windowsill, or craft display tray. If you make several dragons in different colors, arrange them as a tiny paper dragon council. For party decorations, attach them to string and hang them as lightweight fantasy ornaments. For gifts, place a dragon on top of a wrapped present instead of a bow. It says, “I care,” but also, “This gift is guarded by fire-breathing authority.”
Experience Notes: What Making Origami Dragons Teaches You
The first time you make an origami dragon, you may expect a smooth, peaceful craft session. In reality, it often begins with optimism, continues through mild confusion, and ends with you proudly holding something that looks dragon-adjacent. That is completely normal. Origami rewards repetition. The second dragon is usually better than the first, and the third one often feels like the moment your fingers finally understand what your eyes have been trying to explain.
One helpful experience is to fold slowly during the base stage. Many beginners rush through the first diagonal folds because they seem simple. But the early creases are the skeleton of the model. If they are clean, the bird base collapses neatly, the wings line up, and the neck folds with less resistance. If they are messy, the dragon may still survive, but it may look as if it flew through a ceiling fan.
Another lesson is that paper choice changes everything. Thin kami paper makes the model easier to fold, especially around the head and tail. Larger paper is best for learning because it gives you space to see what is happening. Small paper is fun later, but starting tiny is like learning to park a car by driving a toy truck through a keyhole. Possible? Maybe. Enjoyable? Not especially.
It also helps to treat the final shaping as sculpture. Many people finish the last fold and think the dragon is done. Not quite. Raise the neck a little. Spread the wings. Pinch the tail. Open the body gently. These tiny adjustments add life. A flat dragon looks like a bookmark with ambition. A shaped dragon looks ready to guard treasure.
If you are folding with kids, students, or friends, expect different dragons from the same instructions. Some will have long necks. Some will have huge wings. One may look like a dragon-duck hybrid, and honestly, that one deserves respect. The beauty of origami is that small choices create personality. No two handmade paper dragons are exactly alike.
The best advice is to keep your first attempt. Do not throw it away just because it is uneven. Put it next to your second and third attempts. You will see progress quickly, and that visible improvement is one of the most satisfying parts of paper folding. Origami dragons are not just crafts; they are tiny proof that patience can become shape.
Note: This guide teaches a simplified, beginner-friendly dragon inspired by common origami foundations and general folding techniques. For personal crafting, experimenting with the base, wing angles, and head shape is encouraged.
Conclusion
Making an origami dragon may look complicated, but it becomes manageable when you break it into clear stages: prepare a square sheet, create a bird base, shape the neck and tail, fold the wings, and refine the final pose. The key is patience. Sharp creases, thin paper, and careful shaping make a big difference.
Whether you are folding your first paper dragon for fun, teaching a craft activity, decorating a fantasy-themed party, or building your origami skills, this project is a rewarding challenge. Start with a large sheet, forgive the first attempt, and keep folding. Before long, your desk may have a whole flock of dragons. Technically, a group of dragons might be called trouble, but in this case, it is very charming trouble.