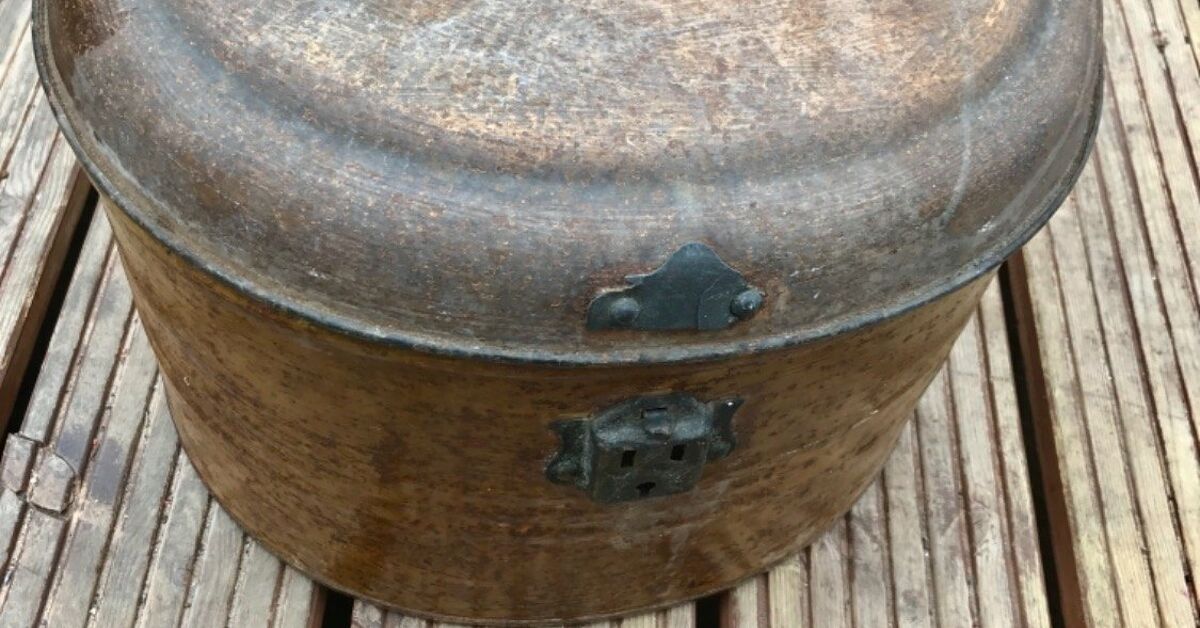

An old hatbox may look like it belongs on a closet shelf beside forgotten scarves and one suspiciously glamorous feather boa. With a little preparation, however, it can become a charming patio planter filled with flowers, foliage, or fragrant herbs.
The project is inexpensive, beginner-friendly, and wonderfully customizable. More importantly, you do not need to sacrifice the hatbox to a soggy, soil-filled death. By using a removable inner pot, you can protect the decorative box while giving the plants the drainage and root space they need.
Can You Really Use a Hatbox as a Planter?
Yes, but most traditional hatboxes should be treated as decorative outer containers rather than ordinary flowerpots. Vintage and modern hatboxes are commonly made from cardboard, paperboard, fabric-covered board, or other materials that deteriorate when continuously exposed to wet soil.
The safest solution is the cachepot method: plant everything in a plastic nursery pot with drainage holes, then place that pot inside the prepared hatbox. The inner pot supports the roots and releases excess water. The hatbox supplies the personality.
This method is especially useful when drainage holes cannot be added to a decorative container. University gardening guidance also recommends placing a plant in a separate draining pot when the ornamental container itself cannot be drilled.
Choose the Right Hatbox
Look for a box that is structurally sound, wide enough to hold a nursery pot, and deep enough to conceal most of the plastic rim. A box measuring approximately 10 to 14 inches across works well for a modest arrangement of annual flowers or compact foliage plants.
Avoid using a valuable antique, a family heirloom, or anything you would be devastated to see wearing a watermark. Outdoor crafts eventually meet rain, humidity, dirt, insects, and the occasional curious squirrel. Choose a hatbox that is attractive but emotionally replaceable.
Materials and Tools You Will Need
- One sturdy hatbox with its lid
- A plastic nursery pot that fits inside the box
- A waterproof plant saucer or shallow plastic tray
- Quality commercial potting mix
- Two to five compact plants
- Heavy-duty plastic sheeting or a thick plastic bag
- Outdoor-rated clear sealer or decoupage finish
- Foam brush or small paintbrush
- Scissors or a utility knife
- Drill or awl for the inner pot, if needed
- Decorative ribbon, handles, feet, or labels
- Optional mulch, preserved moss, or decorative bark
Choose a nursery pot with several drainage holes. Drainage is not a decorative bonus; it allows excess water to escape and helps air reach the roots. Few common patio plants tolerate sitting indefinitely in stagnant water.
Step 1: Clean and Inspect the Hatbox
Empty the box and remove loose dust with a dry microfiber cloth or soft brush. If the exterior is coated or laminated, wipe it gently with a barely damp cloth and allow it to dry completely.
Inspect the bottom, seams, lid, and sidewalls. Reinforce loose joints with a suitable craft adhesive. If the base feels flimsy, cut a circle of corrugated plastic, thin plywood, or rigid waterproof board and place it inside the bottom.
Do not reinforce the box with untreated cardboard. Adding more absorbent cardboard to a patio container is rather like repairing a leaky canoe with crackers.
Check the Previous Use
Repurposed containers should be clean and free from unknown chemical residues. This is particularly important when growing edible plants. Extension guidance recommends avoiding recycled containers that may have held toxic substances or chemicals.
A normal decorative hatbox is generally best used with flowers or foliage plants. For herbs, keep the potting mix and roots completely inside a clean nursery pot rather than allowing them to touch the original box.
Step 2: Weather-Resistant the Exterior
Even when the hatbox sits beneath a covered patio, humidity and splashing water can weaken paper-based materials. Apply two or three thin coats of an outdoor-rated clear sealer to the exterior, following the product directions for drying and recoating.
Test the finish on an inconspicuous area first. Some sealers may darken paper, blur printed designs, or change a matte surface into something shiny enough to signal passing aircraft.
Pay special attention to the lower edge and bottom. These areas are most likely to encounter damp concrete or water dripping from the inner pot. Allow the final coat to cure fully before assembling the planter.
Should You Seal the Inside?
You may coat the inside for additional protection, but sealer alone should not be considered a permanent waterproof liner. The removable inner pot and saucer should handle all direct contact with water.
If the hatbox has a strong paper smell, flaking paint, metallic decoration, or unknown vintage coatings, do not plant directly inside it. Keep the growing medium isolated in the nursery container.
Step 3: Add a Moisture Barrier
Cut a piece of heavy plastic sheeting large enough to cover the bottom and extend several inches up the sides. Press it neatly into the hatbox without puncturing it. Trim the upper edge so it remains hidden below the rim.
Place a waterproof saucer on top of the plastic. The saucer catches the small amount of water that may continue dripping after the nursery pot has drained.
The plastic liner is backup protection, not a miniature swimming pool. Never allow water to collect around the inner pot. Empty the saucer when necessary so the roots are not left standing in water.
Do Not Seal the Plant Inside an Airtight Bag
The liner should protect the box, but the nursery pot must still drain and receive air. Do not wrap the entire pot in plastic or close the liner tightly around its sides. That traps water and defeats the purpose of using a draining container.
Step 4: Prepare the Inner Nursery Pot
Select a plastic pot that leaves approximately half an inch to one inch of space between the pot and the hatbox. This small gap improves airflow and makes it easier to lift the plant arrangement out for watering.
If the nursery pot lacks adequate drainage, add several holes to its bottom. Multiple openings are generally more reliable than one lonely hole trying to manage an entire thunderstorm.
Set the empty nursery pot inside the hatbox and check the height. If it sits too low, place a waterproof riser beneath the saucer. An upside-down plastic plant saucer, rigid foam disk, or short plastic container can work.
Avoid filling the bottom with rocks merely to raise the plant. Rocks add unnecessary weight, and the arrangement becomes difficult to move when severe weather arrives.
Step 5: Choose the Best Potting Mix
Use a fresh commercial potting mix designed for containers. Do not dig heavy soil from the backyard and pack it into the pot. Garden soil can compact inside a container, reducing both drainage and oxygen around the roots.
Container mixes are formulated to remain lighter and better aerated while retaining useful moisture. Common ingredients include bark, coconut coir, peat, perlite, and vermiculite.
Moisten the mix lightly before planting. It should feel evenly damp but not drip when squeezed. Fill the nursery pot to within one or two inches of the rim, leaving enough room for roots and watering.
Step 6: Select Plants for the Patio Conditions
Choose plants according to the amount of sunlight the finished planter will actually receive. Do not rely on optimistic gardening mathematics such as, “The patio gets ten minutes of sun at breakfast, so that probably counts as full sun.”
Observe the location during the day. A sunny patio may receive six or more hours of direct light, while a covered porch may offer bright shade or only brief morning sun. Container-gardening guidance commonly recommends matching plant choices to the available exposure rather than choosing by flower color alone.
Plants for Sunny Patios
- Calibrachoa
- Petunias
- Verbena
- Lantana
- Sweet alyssum
- Compact marigolds
- Trailing portulaca
- Ornamental sweet potato vine
Plants for Part Shade or Bright Shade
- Begonias
- Impatiens
- Coleus
- Lobelia
- Heuchera
- Polka dot plant
- Creeping Jenny
- Small ferns
Use the Thriller, Filler, and Spiller Formula
A balanced mixed planter often contains three basic forms:
- Thriller: One upright or dramatic plant that provides height.
- Filler: Mounded plants that create color and volume around the center.
- Spiller: Trailing plants that tumble over the rim and soften the container.
For example, combine upright coleus as the thriller, begonias as fillers, and creeping Jenny as the spiller. For a sunny arrangement, try angelonia, calibrachoa, and sweet potato vine. This classic design approach helps a small container resemble a complete garden instead of a plant waiting room.
Step 7: Plant the Arrangement
- Arrange the plants in their nursery pots before removing them.
- Position the tallest plant slightly behind center if the planter will be viewed mainly from the front.
- Place shorter plants around it, leaving room for mature growth.
- Remove each plant gently and loosen tightly circling roots with your fingers.
- Plant at approximately the same depth at which each plant was growing previously.
- Fill spaces with potting mix and press lightly to eliminate large air pockets.
- Water slowly until moisture flows from the drainage holes.
Let the pot drain completely before placing it inside the hatbox. This is one of the most important habits in the entire project. Watering directly inside the decorative box increases the chance of overflow, stains, odors, and structural damage.
Step 8: Decorate the Hatbox Planter
Once the practical work is complete, give the planter its final personality. Wrap ribbon around the box, attach a weather-resistant label, paint a monogram, or add decorative handles.
The lid can become part of the display. Prop it vertically behind the planter as a backdrop, place it underneath as a decorative platform, or hang it on the wall above the arrangement. Do not leave a cardboard lid flat beneath the planter unless it has been thoroughly protected from moisture.
Easy Design Themes
- Vintage garden: Botanical prints, muted ribbon, begonias, and trailing ivy.
- Cottage patio: Floral fabric, lace trim, alyssum, and pastel petunias.
- Modern monochrome: A black or white hatbox with sculptural foliage.
- Herb box: Waterproof plant labels with compact basil, thyme, and chives in separate pots.
- Pollinator stop: Long-blooming annuals selected for the light and local climate.
A thin layer of decorative bark or preserved moss can hide visible potting mix. Keep mulch away from plant stems and avoid piling it so thickly that checking soil moisture becomes impossible.
How to Care for Your Hatbox Patio Planter
Water Outside the Hatbox
Lift out the nursery pot and water it over a sink, lawn, or other suitable drainage area. Apply water slowly until it begins to leave the bottom. Allow the container to finish dripping before returning it to the box.
Containers may dry much faster than garden beds, particularly during hot or windy weather. Check the potting mix regularly rather than following a rigid schedule. Water when the surface begins to feel dry, taking the needs of the selected plants into account.
Feed Carefully
Some commercial potting mixes contain starter fertilizer, while others do not. Check the package before adding anything. If feeding is necessary, use a fertilizer labeled for container plants and follow its directions.
More fertilizer does not produce more enthusiasm from a plant. Excessive feeding may damage roots or encourage weak, leafy growth at the expense of flowers.
Protect the Box From Weather
Keep the finished project beneath a covered patio, awning, or porch whenever possible. Bring it indoors before prolonged rain, strong wind, freezing temperatures, or severe storms.
Raise the hatbox slightly above the patio surface with small waterproof feet. This reduces contact with damp concrete and allows air to circulate beneath the base.
Rotate and Groom the Plants
Turn the inner pot every week or two so the plants grow evenly. Remove faded flowers and damaged leaves, and trim aggressive trailing plants when they begin attempting to annex the patio furniture.
Common Mistakes to Avoid
- Filling the cardboard box directly with soil: Moisture will eventually weaken it.
- Using a pot without drainage: Trapped water can damage roots.
- Leaving water in the saucer: Empty collected water promptly.
- Using dense garden soil: It may compact and drain poorly.
- Combining plants with different needs: A thirsty begonia and a drought-loving succulent make awkward roommates.
- Ignoring mature plant size: Tiny transplants can become crowded surprisingly quickly.
- Placing the hatbox in open rain: Sealer improves resistance but does not turn cardboard into marine equipment.
- Watering while the pot remains inside: One accidental overflow may undo hours of careful crafting.
Frequently Asked Questions
Can I plant directly in a cardboard hatbox?
It is possible for a temporary display, but it is not recommended for a durable patio planter. Repeated watering can soften the cardboard, separate glued seams, and encourage staining. A removable plastic pot is more dependable.
Can I place the planter in full rain?
A paperboard hatbox should remain in a protected outdoor location. Even a sealed box can deteriorate when exposed to repeated soaking, standing water, and intense sun.
Can I grow herbs in it?
Yes. Grow the herbs in a clean, food-safe inner pot with drainage. Compact thyme, chives, parsley, and basil can work, although they may have different watering and sunlight requirements.
How long will the planter last?
Its lifespan depends on the original construction, sealing method, humidity, sunlight, and exposure to rain. A sturdy box kept beneath a covered patio may remain attractive through a season or longer. Store it indoors during the off-season.
What can I do when the flowers finish?
Lift out the nursery pot and replace it with a new seasonal arrangement. The same hatbox can display spring flowers, summer foliage, fall mums, or a winter arrangement of evergreen cuttings without rebuilding the entire project.
Conclusion
Transforming a hatbox into a patio planter is a clever way to combine gardening with decorative reuse. The secret is not complicated: protect the hatbox from moisture, place a properly draining nursery pot inside it, use quality potting mix, and select plants suited to the patio’s light.
The result offers far more character than an ordinary plastic pot. It can complement a vintage porch, brighten a small balcony, serve as a seasonal centerpiece, or rescue an overlooked hatbox from another decade of closet duty.
Just remember that the hatbox is the outfit, not the root system. Keep the actual plant container healthy and functional, and your delightful patio planter can remain both charming and practical.
A Composite Maker’s Experience: Lessons From the First Hatbox Planter
The first surprise in a project like this is how enormous a hatbox appears on the table and how surprisingly small it becomes once a nursery pot is placed inside. A 12-inch round box may look spacious enough for an entire English garden, but after accounting for the liner, saucer, pot, and mature plants, restraint becomes useful.
A practical first arrangement might contain one upright coleus, two wax begonias, and one small creeping Jenny. At planting time, the combination can look slightly underdressed. Two weeks later, it begins filling out. A month later, the creeping Jenny may be heading toward the floor as though it has an appointment downstairs.
The next lesson concerns water. It is tempting to leave the nursery pot inside the hatbox and carefully pour in “just a little.” That works until the day the soil is already moist, the saucer overflows, and a dark ring appears on the bottom liner. Removing the inner pot before every watering initially feels fussy, but it quickly becomes routine. It also provides an opportunity to inspect the plant, rotate it, remove dead leaves, and check whether roots are emerging from the drainage holes.
Weight is another detail that becomes obvious only after the project is finished. A damp container filled with several plants can be heavier than expected. Decorative rope handles may look charming, but they should not be trusted to support the arrangement unless they are attached to a genuinely strong inner structure. The safest approach is to lift the box from beneath with both hands.
Placement can require experimentation as well. A container positioned beside a sunny patio door may receive gentle morning light in spring but punishing afternoon heat in midsummer. Leaves may fade, curl, or dry faster than expected. Moving the planter several feet beneath the patio roof can make a dramatic difference. The ability to relocate the entire display is one of the best features of container gardening.
The original decorative plan may evolve too. A large ribbon can become limp in humid weather. Lightweight labels may blow away. Preserved moss can scatter across the patio after an ambitious bird investigates it. Simpler decorations often survive best: a painted border, a weather-resistant tag, or a fabric band secured firmly around the box.
By the end of the season, the most successful part of the project is usually its flexibility. When one annual declines, the entire nursery pot can be removed and refreshed. When fall arrives, summer flowers can be replaced by ornamental peppers, small mums, or cool-season foliage. The box remains the familiar decorative shell while the garden inside it changes.
The central lesson is that a hatbox planter succeeds when appearance and horticulture are handled separately. The outer box can be playful, vintage, elegant, or gloriously overdecorated. The inner pot should be boring, sturdy, well-drained, and easy to remove. That partnership gives the project its charm without asking the plants to survive inside a damp piece of decorative cardboard.