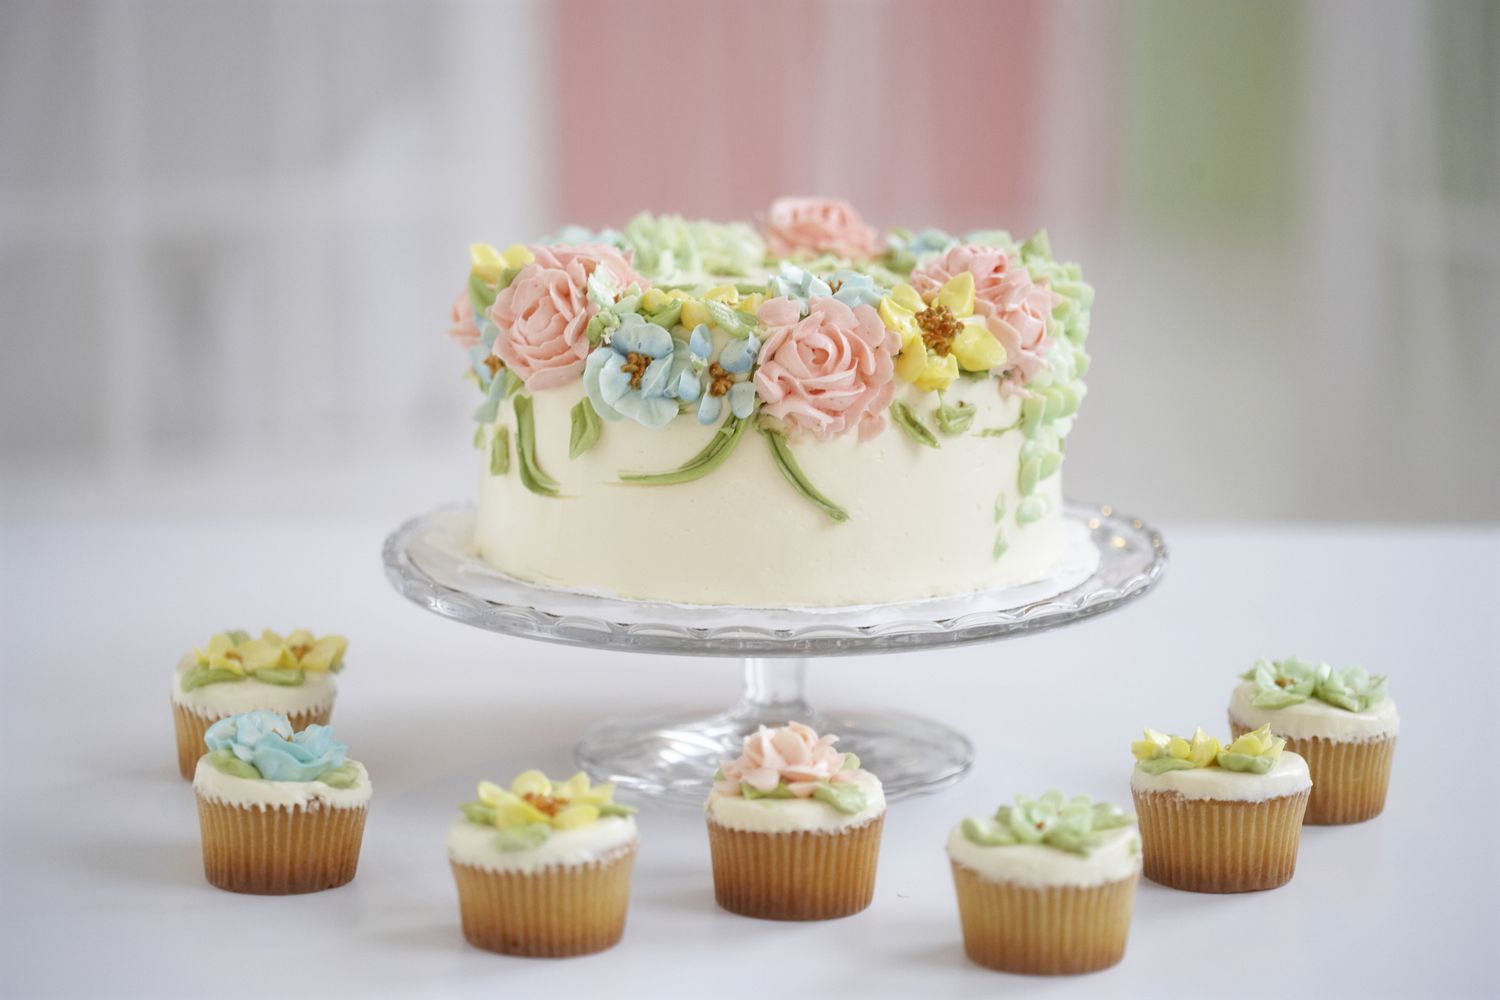

There are two kinds of people in the world: people who think cake decorating is “impossible,” and people who’ve watched a 20-second piping video and said, “I could do that.” The good news? Both groups are rightat first. Frosting flowers look like bakery magic, but they’re mostly a mix of the right buttercream consistency, a few simple tools, and practice that’s less “Michelin-star discipline” and more “oops, that petal became a blob… try again.”
This guide shows you how to make your own frosting flowers (buttercream blooms, rosettes, drop flowers, leaves, and a few fancy-looking upgrades) with clear steps, real troubleshooting, and enough confidence boosters to keep you piping instead of rage-washing the mixing bowl.
What Counts as a “Frosting Flower,” Anyway?
When people say “frosting flowers,” they usually mean one of these:
- Buttercream flowers: The most common. You can pipe roses, rosettes, peonies, chrysanthemums, and succulent-style petals.
- Royal icing flowers: Often used for cookies. They dry hard and can be made ahead, but the vibe is more “delicate” and less “fluffy.”
- Stabilized whipped cream flowers: Lighter and less sweet, but they’re softer and more sensitive to heat and time.
This article focuses mainly on buttercream flowers because they’re the most beginner-friendly and the most dramatic payoff for the least emotional damage.
The Tools You Need (Not a Whole Craft Store)
1) Piping bags: disposable or reusable
Disposable bags are easy for multi-color work and quick cleanup. Reusable bags are sturdy and eco-friendly, but you’ll be washing buttery evidence from the seams forever. Either workschoose what keeps you decorating instead of procrastinating.
2) Must-have piping tips for frosting flowers
If you’re building a “small but mighty” kit, these tips cover a lot of floral territory:
- Large star tip (like a 1M-style): For rosettes, swirls, borders, and quick “flower-ish” cupcakes.
- Drop flower tip (like a 2D-style): For fuller rosettes and layered petals that look like you tried harder than you did.
- Petal tip (like a 104-style): The classic for buttercream roses and ruffles.
- Leaf tip (like a 352-style): For leaves that instantly make flowers look intentional.
- Medium round tip (like a 10–12-ish size): For flower bases and centers.
3) Flower nail + parchment squares (for realistic blooms)
A flower nail is a small metal “turntable” you hold in your hand while piping petals on top of a base. You pipe the flower onto a tiny parchment square, then transfer it to your cake or cupcake. This method is especially helpful for roses and multi-petal flowers.
4) Couplers, scissors, and a “transfer buddy”
A coupler lets you swap tips without changing bagsuseful if you’re doing petals, then leaves, then tiny details. For moving flowers, clean kitchen scissors or a small offset spatula can lift parchment squares without squishing petals.
Buttercream That Behaves: Consistency Is the Whole Game
If frosting flowers had a motto, it would be: “It’s not you, it’s your buttercream.”
Most piping frustration comes from frosting that’s too soft (sad petals) or too stiff (cracked petals, sore hands, existential dread).
Pick a buttercream style that matches your goals
- American buttercream: Butter + powdered sugar. Sweet, sturdy, and great for sharp petals and flowers that hold their shape.
- Swiss/Italian meringue buttercream: Smoother and less sweet, but more temperature-sensitive. Great for silky finishes and elegant piping once you control consistency.
- Hybrid “decorator” buttercream: Some bakers blend styles or add stabilizers for extra structureespecially for intricate flower work.
Know your consistencies: stiff, medium, soft
Think of buttercream consistency like a mood:
- Stiff consistency: Holds peaks firmly. Best for buttercream flowers, petals, and details that need sharp edges.
- Medium consistency: Smooth and pipeable. Great for borders, shells, and rosettes.
- Soft consistency: Spreads easily. Perfect for frosting the cake, not for standing up petals.
Temperature: the silent drama queen
Warm kitchen? Your petals may slump. Cold buttercream? Your piping becomes a forearm workout. If your buttercream is too soft, chill it briefly and re-whip. If it’s too firm, warm it gently (even a few seconds of warmth can help), then re-whip to restore texture.
Quick fixes for common buttercream problems
- Too runny: Chill briefly, then re-whip. If needed, add sifted powdered sugar in small amounts.
- Too stiff: Add tiny splashes of cream or milk, or let it sit a few minutes to soften, then re-whip.
- Air bubbles: Mix on low for a minute, press buttercream against the bowl with a spatula, or let it rest briefly.
- Greasy or broken: Often temperature-relatedwarm or cool slightly, then re-whip until smooth.
Color Like a Pro (Without Turning Everything “Sad Beige”)
For frosting flowers, color matters because petals show every streak. A few tips:
- Use gel color: It’s concentrated, so you won’t thin your buttercream.
- Let colors deepen: Some shades intensify after resting, which helps you avoid over-coloring.
- Two-tone roses: Add one color along one side of the piping bag and another color in the center for a shaded petal look.
- Keep it natural: Slight variation looks realisticperfectly flat color can look a little “plastic flower aisle.”
Three Beginner Frosting Flowers That Look Impressive Fast
1) The 30-second rosette (star tip)
Rosettes are the gateway flower: quick, forgiving, and always cute.
- Fit a piping bag with a large star tip.
- Hold the bag perpendicular to the cupcake or cake surface.
- Start in the center, pipe a spiral outward in one smooth motion.
- Release pressure and flick away to finish cleanly.
Pro move: Make rosettes in varying sizes and add leaves between them. Suddenly it’s “buttercream garden,” not “cupcake swirl.”
2) Drop flower blooms (drop flower tip)
Drop flower tips create layered petals with less effort than petal-by-petal piping.
- Use medium-stiff buttercream.
- Hold the bag straight up.
- Squeeze, let the petals form, then stop pressure and lift away.
- Add a dot center (sprinkles, pearl, or buttercream) for a finished look.
These are great for cupcakes, borders, and “I need 24 flowers by tonight” situations.
3) A classic buttercream rose (flower nail + petal tip)
The rose is the flower everyone wantsand yes, it’s doable. The secret is a stable base plus controlled petals.
- Place a tiny dot of buttercream on the flower nail. Stick on a small parchment square.
- Pipe a cone-shaped base using a round tip. This is your rose “hill.”
- Switch to a petal tip. Keep the narrow end facing up and the wider end closer to the base.
- Pipe one tight center wrap around the cone.
- Add a ring of 3 petals, slightly overlapping, turning the nail as you pipe.
- Add a ring of 5 petals, looser and slightly flared for a fuller rose.
- Lift the parchment with scissors or an offset spatula and place the rose on the cake.
Tip for realism: Make the outer petals slightly taller and looser than the inner petals. That gradual “opening” is what makes it look like a rose instead of a cabbage.
Level-Up Flowers (When You’re Ready to Flex a Little)
Chrysanthemum-style blooms
These use lots of short strokes and look surprisingly fancy. Use stiff buttercream. Pipe layers of petals from the outer edge toward the center, angling petals slightly inward as you go. Finish with a tight cluster in the middle.
Ruffles and “petal frills”
With a petal tip, you can pipe ruffles that mimic flower petals. Pipe a ruffled strip along the edge of a cupcake swirl or around a cake top for a soft floral looklike fabric, but edible.
Succulents (yes, the trendy houseplant kind)
Succulent piping is basically “petals, but make them pointier.” Use stiff buttercream, cooler temperatures, and short controlled pulls. Start from the center and work outward, building layers.
Transfer, Store, and Decorate Without Crushing Your Garden
One of the best tricks in buttercream flower decorating is making flowers ahead.
- Freeze piped flowers: Pipe onto parchment squares on a sheet pan. Freeze until firm, then move to a container.
- Place flowers last: Put flowers onto chilled frosting so they “grab” and stay put.
- Avoid condensation: If moving flowers from freezer to room temp, keep them in a container while they warm slightly to reduce moisture.
How to Fill a Piping Bag Without Wearing Your Frosting
Here’s the cleanest workflow for beginners:
- Set your piping bag in a tall glass and fold the top of the bag over the rim.
- Spoon buttercream into the bag, keeping the outside clean.
- Unfold the top, twist closed, and push buttercream down toward the tip.
- Pipe a quick test swirl on parchment to check consistency and airflow.
Your future self will thank you for not having buttercream on the bag exterior, your hands, your sleeves, and somehow the cabinet door.
Common Frosting Flower Problems (and How to Fix Them Fast)
“My petals are melting.”
Usually the buttercream is too warm/soft. Chill the bag for a few minutes, or chill the bowl and re-whip. If the room is warm, work in shorter bursts and keep extra buttercream in the fridge.
“My petals are cracking or tearing.”
Buttercream is too stiff or you’re piping too fast. Add a tiny splash of cream, re-whip, and focus on steady pressure.
“My flowers look fuzzy and rough.”
Powdered sugar may not be fully incorporated or the buttercream has air pockets. Beat longer for smoothness, then mix briefly on low to reduce bubbles.
“My rose looks like a cinnamon roll.”
Welcome to the club. Tighten the center, make fewer inner petals, and flare the outer petals slightly. Also, rotate the nail smoothlyjerky turns create “spiral snack” vibes.
Simple Decorating Ideas That Look Bakery-Level
- Floral wreath top: Pipe mixed flowers in a circle on top of a cake, leaving the center open for a message.
- Corner bouquet: Cluster flowers on one corner of a sheet cake for a modern look.
- Cascade: Start with a big rose at the top edge, then trail smaller blooms down the side.
- Cupcake bouquet: Pipe flower cupcakes and arrange them tightly in a box or basket. It looks like a bouquet and tastes like a party.
Food Safety and Storage Basics
Buttercream can sit out for a bit during decorating, but if your environment is hot or your frosting includes perishable additions, store finished desserts appropriately. In general, keep decorated items cool, avoid direct sun (your flowers do not want a tan), and bring cake closer to room temperature before serving for the best texture.
of Real-World “Experience” Notes (So You Feel Seen)
The first time you try to make frosting flowers, it’s normal to feel like your piping bag is judging you. You’ll start with big dreams“a delicate buttercream rose!”and end up with something that resembles a seashell wearing a hat. That’s not failure. That’s the warm-up round.
One of the most common beginner moments is discovering that pressure control is the whole sport. Too much pressure and the petals explode outward like they’re late for a meeting. Too little and the buttercream skips and tears, like it’s running out of patience. The sweet spot feels almost boring: steady squeeze, steady rotation, steady breathing. (Yes, people really forget to breathe while piping. It’s like frosting yoga.)
Another universal experience: the kitchen temperature suddenly matters more than it ever has in your life. You can make a gorgeous rosette at 9 a.m., then wonder why everything turns to mush at noon. It’s not that you forgot how to pipeit’s that buttercream has a social life, and heat is its favorite party. The practical fix is simple: work in shorter sessions, chill your piping bag for a few minutes when the buttercream starts feeling too soft, and keep backup buttercream in the fridge. People who decorate a lot often treat chilling as part of the rhythm, not a setback.
You’ll also learn quickly that overfilling the piping bag is a trap. It feels efficient (“I’ll just load the whole batch!”), but an overly full bag warms faster in your hands and becomes harder to control. A half-full bag pipes more cleanly and keeps your grip relaxed. This is one of those tiny changes that makes you feel instantly more skilledlike switching from writing with a crayon to a nice pen.
Color is its own adventure. Many beginners add too much food coloring trying to reach a bold shade, then wonder why the buttercream gets softer. The “experienced decorator” move is using gel color and building shades gradually. Even better: embrace soft gradients. Two-tone roses and lightly varied petals often look more realistic than a single flat neon hue, and they’re more forgiving if the color isn’t perfectly mixed.
The biggest confidence boost comes from a simple habit: keep a parchment sheet nearby and do a 10-second test pipe before you commit to the cake. If the petals aren’t crisp, adjust the consistency right then. If there are air bubbles, squeeze out a bit until it’s smooth. That quick test is the difference between “I ruined the cake” and “I made a tiny tweak and now I look like I know what I’m doing.”
Finally, frosting flowers teach you something unexpectedly useful: your “mistakes” are usually still cute. A slightly messy rosette becomes “rustic.” A rose with uneven petals becomes “garden-inspired.” Add a leaf or two and suddenly the whole thing looks intentional. The real secret isn’t perfectionit’s learning how to steer the buttercream and then styling the results like you meant it all along.
Conclusion
Making your own frosting flowers is one of the fastest ways to upgrade cakes and cupcakes from “homemade” to “whoa, you made that?” Start with rosettes and drop flowers, then move to roses on a flower nail once your buttercream consistency and pressure control feel comfortable. Keep your frosting cool, your bag not-too-full, and your expectations playful. With a handful of tips and a little practice, you’ll be piping buttercream blooms that look genuinely stunningand you’ll still have enough energy left to eat one.