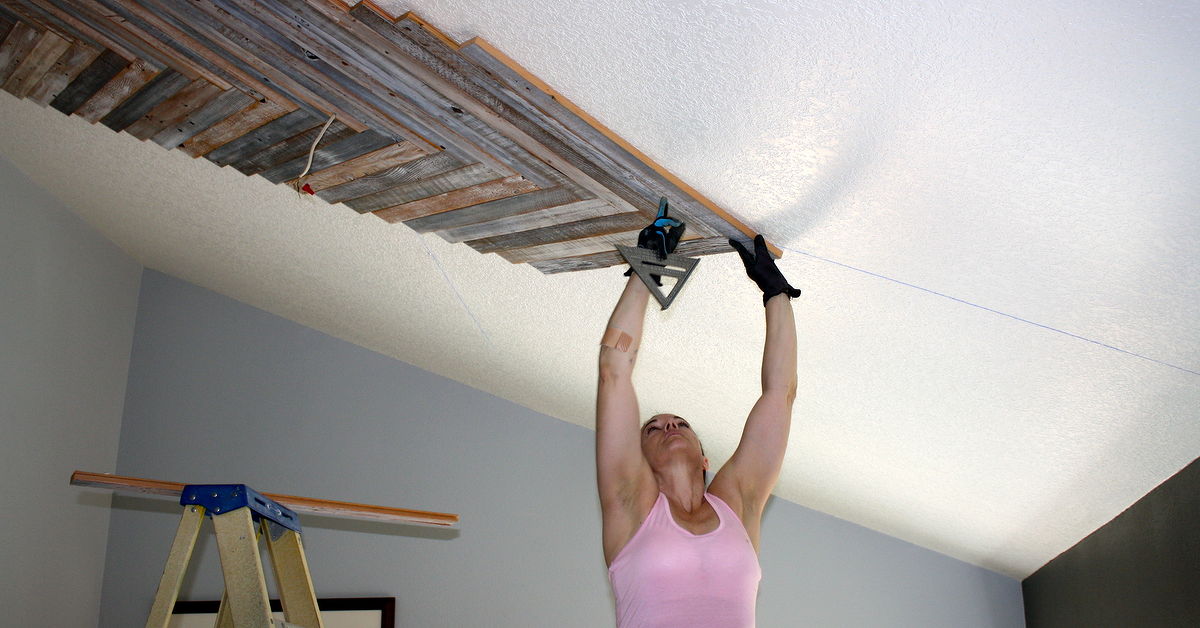

A reclaimed wood herringbone ceiling does something ordinary drywall has never seriously attempted: it makes people look up voluntarily. Instead of functioning as the blank lid on a room, the ceiling becomes a geometric feature filled with aged grain, saw marks, nail holes, shifting colors, and enough personality to make a plain white surface feel slightly underdressed.
The combination is especially effective because its two ingredients balance each other. Reclaimed wood is irregular, weathered, and relaxed. Herringbone is precise, rhythmic, and unapologetically organized. Put them together and you get a ceiling that feels historic without looking dusty, structured without becoming stiff, and dramatic without requiring a chandelier the size of a compact car.
Design principles synthesized from reclaimed-wood and decorative-ceiling guidance.
Why a Reclaimed Wood Herringbone Ceiling Works
It adds movement to a forgotten surface
Herringbone is made from rectangular pieces arranged so that the end of one board meets the side of another, creating a repeating zigzag. Unlike chevron, whose boards are cut into matching angled points, traditional herringbone can be assembled from square-ended pieces. That makes the pattern easier to fabricate, although “easier” should not be confused with “casual.” A tiny layout error can multiply across the ceiling until the final row appears to be attempting an escape through the wall.
The directional pattern guides the eye through the room. Run the central spine toward a fireplace, window wall, kitchen island, or entry, and the ceiling begins reinforcing the architecture below it. In a long room, the pattern can emphasize length. In a wide room, rotating the layout can visually pull the walls together.
Herringbone geometry and the importance of an accurate centerline are supported by installation guidance from This Old House and The Home Depot.
It gives old lumber a refined role
Reclaimed boards may carry circular-saw marks, faded paint, old fastener holes, uneven coloration, and worn edges. Those characteristics are not defects when they are selected deliberately; they are the visual record that makes the material different from newly distressed lumber. On a ceiling, the texture is visible without being touched, kicked, spilled on, or pursued by a robot vacuum having a difficult afternoon.
The geometric layout also keeps rustic material from overwhelming the room. Rather than resembling a collection of random barn boards, the wood becomes part of a controlled composition. That makes a reclaimed wood herringbone ceiling suitable for modern farmhouses, mountain homes, industrial lofts, transitional kitchens, warm minimalist interiors, and contemporary rooms that need more soul than another gray throw pillow can provide.
Reclaimed wood is valued for its individual grain, color, wear, historic markings, and ability to add warmth to ceilings and modern interiors.
Plan the Ceiling Before Buying Wood
Inspect the structure and substrate
First determine what will actually hold the boards. Decorative, relatively thin planks may be attached to a sound wood substrate, properly installed furring strips, or framing located above the drywall. Heavy timbers are an entirely different project. Reclaimed beams can weigh hundreds of pounds and may require engineered connections, wall support, or structural reinforcement.
Do not assume that drywall alone is an adequate fastening surface. Construction adhesive can help distribute the load and keep boards flat, but mechanical fasteners should reach a suitable substrate whenever the material or installation system requires them. Locate joists with a stud finder, verify their direction, and mark them with chalk lines or a laser. If the ceiling is badly bowed, damaged, damp, or soft, repair the underlying problem before covering it. Decorative wood is excellent at hiding ugly ceilings, but it is not a licensed therapist for water leaks.
Ceiling-plank guidance emphasizes a flat, sound substrate, verified framing locations, proper fastening, and structural planning for heavy reclaimed elements.
Check lighting, vents, sprinklers, and access points
Map every recessed light, pendant box, smoke alarm, HVAC register, attic opening, ceiling fan, speaker, and sprinkler head. The pattern should appear to flow around these interruptions rather than collide with them accidentally. Electrical boxes may need approved extensions so their edges remain flush with the new finished surface. Fixtures must also be compatible with the added material and thickness.
Coordinate those details before installing the first board. Cutting a neat opening around a light is normal finish carpentry. Discovering halfway through the job that the central herringbone spine runs directly through three mismatched air vents is how new vocabulary words are invented.
Review local fire and building requirements
Wood used as an interior ceiling finish may be subject to flame-spread and smoke-development requirements based on the building type, room, occupancy, material, and installation method. Local rules can differ, particularly in multifamily buildings, commercial spaces, corridors, stairways, and homes in wildfire-sensitive areas. Confirm requirements with the local building department, designer, or qualified contractor before purchasing untreated reclaimed material.
U.S. model-code guidance regulates the fire performance of interior wall and ceiling finishes, with required classifications depending on occupancy and location.
Choose Reclaimed Wood That Belongs Indoors
Know where the boards came from
Reclaimed wood can come from barns, warehouses, factories, houses, fences, pallets, wine tanks, or industrial structures. Provenance matters. Wood exposed to unknown chemicals, petroleum products, pesticides, animal waste, persistent moisture, or industrial contamination may be unsuitable for an occupied interior.
Purchase from a reputable salvage mill or reclaimed-wood supplier that can explain the source, species, processing, drying, and grading. Professionally prepared boards may be denailed, scanned for metal, kiln-dried, cleaned, and milled to a consistent thickness. Those services cost more than pulling boards from a roadside shed, but they also reduce the chance of introducing insects, hazardous dust, mystery odors, or an antique square nail to your saw blade.
Treat old coatings seriously
Painted or coated reclaimed lumber may contain lead, especially when its age and origin are uncertain. Cutting, scraping, or sanding hazardous coatings can release contaminated dust. Reclaimed boards may also carry mold, grime, droppings, or other biological debris. Do not aggressively sand questionable material indoors and hope that opening a window will transform the situation into a safety plan.
Have suspicious coatings evaluated before disturbance. Depending on the findings, the appropriate solution may involve professional remediation, controlled encapsulation, specialized handling, or rejecting the material altogether. Wear proper eye, hearing, and respiratory protection when processing any reclaimed lumber, and use effective dust collection.
EPA and woodworking guidance warn that deteriorated lead-based coatings and contaminants on salvaged lumber can create hazardous dust when disturbed.
Check moisture content and movement
Reclaimed does not automatically mean dry. Wood continually exchanges moisture with surrounding air, expanding and contracting as indoor humidity changes. Boards installed too wet may shrink and open noticeable gaps. Material that is unevenly dried can cup, twist, or pull against its fasteners.
Bring the wood into the conditioned installation environment and stack it with spacers so air reaches the faces and edges. Use a calibrated moisture meter rather than judging dryness by weight, color, or optimistic intuition. The target should be appropriate for the species, room, region, supplier specifications, and expected indoor conditions.
Wood remains hygroscopic after drying; moisture changes can cause shrinking, swelling, warping, checking, and finish problems.
Design the Herringbone Layout
Select practical board dimensions
Narrow, relatively short pieces create a detailed pattern and adapt well to smaller ceilings. Wider or longer boards produce a bolder look but magnify variations in width, thickness, straightness, and angle. Whatever size you choose, mill the pieces as consistently as possible. Rustic character is charming; random geometry is less charming when the final border varies from two inches to something resembling a pizza slice.
Prepare extra material for trimming, sorting, test cuts, damaged ends, and pattern waste. A standard plank installation may allow roughly 10 percent extra, but herringbone creates more offcuts. For many custom projects, purchasing approximately 15 to 20 percent beyond the measured ceiling area is a practical allowance, especially when the boards contain defects that must be excluded.
Lowe’s recommends extra material for cuts and tests; the higher allowance stated here is a practical inference for a cut-intensive herringbone layout.
Choose a centered or intentionally offset pattern
A centered layout usually looks most formal. Snap a primary centerline along the room’s dominant axis, then establish a perfectly perpendicular cross-line. The intersection becomes the control point for the starter assembly. In an irregular room, however, geometric center may not be the best visual center. A fireplace, island, doorway, ridge beam, or large window may deserve priority.
Measure both ends of the room because walls are rarely perfectly parallel. Then dry-lay several rows on the floor at full scale. This mock-up reveals the true width of the pattern, the position of the zigzag spine, and the size of the perimeter cuts. Shift the layout before installation if it would leave a thin, awkward strip along a prominent wall.
Use a border to manage imperfect edges
A straight plank border, flat trim frame, faux beam, or simple molding can absorb inconsistencies at the perimeter. It also gives the pattern a visual stopping point and reduces the need to scribe dozens of tiny angled pieces against uneven walls. In tray ceilings, the herringbone field can be installed only in the recessed center, producing a rich focal feature without covering every square foot overhead.
Tools and Materials
A typical installation may require the following:
- Processed and acclimated reclaimed wood planks
- Construction adhesive approved for the wood and substrate
- Finish nails, brads, screws, clips, or other specified fasteners
- Plywood backing or wood furring strips when required
- Stud finder, laser level, chalk line, tape measure, and framing square
- Miter saw or track saw with an appropriate blade
- Brad nailer or finish nailer
- Metal detector or handheld scanner for hidden fasteners
- Moisture meter and hygrometer
- Dust extraction, safety glasses, hearing protection, and suitable respiratory protection
- Stable ladders, platform scaffolding, or a properly rated work platform
- Finish, brushes, rollers, rags, and sample boards
Overhead work is tiring, and fatigue makes precise cutting less precise. A platform that allows comfortable movement is often safer and more efficient than repeatedly stretching from a ladder. Follow ladder, scaffold, tool, adhesive, and fastener manufacturers’ instructions throughout the project.
Ceiling-installation sources emphasize safe overhead access, ventilation, protective equipment, proper tools, and adherence to product instructions.
How to Install the Reclaimed Wood Herringbone Ceiling
Step 1: Repair and flatten the ceiling
Remove loose texture, failing paint, protruding fasteners, and damaged material. Correct active leaks before doing anything decorative. Install backing or furring when the existing surface cannot provide reliable attachment. Confirm that the finished assembly will not interfere with doors, windows, crown molding, cabinets, or fixture clearances.
Step 2: Sort the reclaimed boards
Separate boards by color, grain, patina, thickness, and condition. Remove unstable pieces and trim split ends. Scan for embedded metal before cutting. Blend light, medium, and dark boards across the layout instead of accidentally creating one brown continent beside an unexplained gray island.
Numbering small groups can help preserve a carefully planned sequence. Do not try to eliminate every old hole or mark. Those details are part of the reclaimed appearance, provided they are clean, stable, and safe.
Step 3: Mill and prefinish the pieces
Plane or sand the backs as needed so the pieces seat consistently. Rip boards to uniform widths and cut them to repeatable lengths using a stop block. Square ends are essential because each piece references the one before it.
Apply the chosen finish to sample boards first. Clear matte finishes preserve a dry, natural appearance, while oils or amber-toned coatings may deepen brown and red hues considerably. Prefinishing the face, edges, and back can reduce uneven moisture exchange and prevents raw strips from appearing when seasonal movement opens a small joint.
Prefinishing all sides can reduce humidity effects and help disguise gaps that appear as wood moves.
Step 4: Build an accurate starter template
Create a plywood jig or temporary guide that establishes the required angle and keeps the first boards aligned with the centerline. Assemble a small starter “V” or central spine on the floor and confirm it with a framing square. Recheck the dimensions after every few pieces.
The first rows control everything that follows. Being off by a fraction near the center can become a very visible error several feet away. This is the moment to behave like a patient finish carpenter, not a game-show contestant racing a buzzer.
Step 5: Install outward from the control line
Apply adhesive according to its instructions, press the board firmly against the substrate, and use the specified mechanical fasteners to hold it securely. Fasten into backing, furring, or framing as required by the assembly. Avoid excessive nailing that forces thin boards to follow every dip in an uneven surface.
Add pieces symmetrically on both sides of the starter line. Periodically measure from the pattern to multiple reference points instead of trusting only the previous board. Small cumulative errors can be corrected early by adjusting joints slightly; waiting until the wall leaves far fewer polite options.
Ceiling and paneling guides describe using adhesive only on sound surfaces, combining it with appropriate fasteners, and checking alignment continuously.
Step 6: Cut the perimeter and openings
Stop the field short enough to measure and cut the final pieces accurately. Use templates for irregular walls or complex fixture openings. Maintain required clearances around electrical components, heat-producing fixtures, vents, and sprinklers. Never bury junction boxes or service access behind permanent paneling.
Step 7: Add trim and complete the finish
Install the chosen border, molding, or beam treatment. Fill only new nail holes that distract from the design; filling every historic mark may erase the very character you paid to keep. Touch up cut ends and exposed raw edges, then allow the finish and adhesive to cure with adequate ventilation.
Design Ideas for Different Rooms
Living room
Use medium-toned wood with a matte finish and align the central spine with the fireplace or primary view. Keep walls and large furniture relatively quiet so the ceiling remains the star rather than entering a pattern competition with the rug.
Kitchen
A reclaimed ceiling can warm white cabinets, stone counters, black metal fixtures, and stainless steel appliances. Coordinate the layout with the island, but avoid excessive rustic finishes elsewhere. One beautifully weathered surface feels intentional. Seven can feel like the room is applying for barn status.
Bedroom
Lighter gray, tan, or softly washed boards create texture without making the room feel heavy. A herringbone inset inside a tray ceiling can establish a focal point above the bed while leaving the perimeter calm.
Vaulted ceiling
Vaults give the pattern room to breathe. The center spine can follow the ridge or travel perpendicular to it, depending on the desired visual direction. Because height complicates measurement, access, fastening, and fixture work, tall vaulted ceilings are strong candidates for professional installation.
Small entry or powder room
A compact room is an excellent place to use premium reclaimed wood without purchasing an entire truckload. Short boards and a tight pattern create a memorable detail, while a simple perimeter border prevents the ceiling from appearing too busy.
Designers commonly use wood ceilings to add warmth, texture, direction, architectural connection, and visual interest in both rustic and contemporary rooms.
Common Mistakes to Avoid
- Beginning without a full-scale layout: The pattern may end with unattractive slivers along the walls.
- Trusting old boards to be uniform: Variation in width and thickness can quickly throw the geometry off.
- Skipping moisture checks: Wet or poorly acclimated wood may shrink, cup, twist, or open large joints.
- Ignoring hidden metal: Old nails and screws can damage blades and become dangerous projectiles.
- Fastening only to weak drywall: The attachment system must suit the board weight and substrate.
- Covering a moisture problem: Damp wood and concealed leaks can lead to staining, decay, mold, and failed adhesion.
- Using unknown painted lumber: Historic coatings may require testing and specialized handling.
- Making every surface rustic: The ceiling loses impact when it has to compete with equally busy floors, walls, cabinets, and furniture.
- Rushing the starter rows: Herringbone rewards accuracy early and delivers invoices for mistakes later.
Cleaning and Long-Term Maintenance
Dust the ceiling occasionally with a microfiber extension duster or soft-brush vacuum attachment. Avoid soaking rough reclaimed boards, which can trap water in cracks and textured grain. Clean small marks with a lightly damp cloth and a product compatible with the finish.
Maintain stable indoor humidity as much as practical. Seasonal hairline gaps are normal with many solid-wood installations, but sudden widening, staining, sagging, or movement should be investigated. Those symptoms may indicate excessive humidity, a leak, failed adhesive, inadequate fastening, or movement in the underlying assembly.
Inspect areas around roof penetrations, plumbing, bathrooms, and HVAC equipment periodically. A ceiling feature should age gracefully, not quietly collect evidence that the upstairs bathtub has developed ambitions.
Real-World Experience: What This Project Actually Feels Like
The first surprise during a reclaimed wood herringbone ceiling project is how much time is spent not attaching wood to the ceiling. The glamorous part is the finished zigzag. The real work is sorting, measuring, scanning, cleaning, trimming, stacking, checking moisture, and moving the same boards from one pile to another until every piece seems to have its own assigned parking space.
Dry-laying the pattern on the floor is the moment the idea begins to feel real. It also reveals how dramatically old boards can vary. Two planks that looked identical in a stack may differ enough in width to interrupt a joint. One board may have the perfect silver-gray face but twist like it has strong opinions about geometry. Another may contain a beautiful nail hole positioned exactly where the new finish nail needs to go.
Sorting those pieces is not wasted time. It is where the design gains balance. Dark boards can be distributed instead of clumped together. Boards with strong saw marks can become accents. Cleaner pieces can surround fixtures where complicated cuts demand stability. Severely cupped or brittle material can be retired before it causes trouble fifteen feet above the floor.
The starter rows are usually the slowest. Every angle feels important because every angle is important. A laser line helps, but it cannot make decisions for you. The boards still need to be checked against the centerline, one another, and the surrounding room. After several rows, the installation develops a rhythm: adhesive, position, check, fasten, measure, repeat. Then someone asks a question from the doorway, and the next board goes up backward. This is why experienced installers pause regularly and inspect the pattern from the floor.
Working overhead also changes the pace. A cut that takes twenty seconds at a workbench may require several minutes when it involves climbing down, measuring again, cutting, climbing back up, testing the piece, discovering the wall is not square, and repeating the process while pretending not to take the wall’s behavior personally. Good staging reduces these trips. So does labeling pieces and keeping frequently used tools within safe reach.
Another lesson is that perfection and reclaimed character are not the same thing. The layout must be accurate, but the wood does not need to look new. Slightly worn edges, old holes, color shifts, and shallow checking are often what make the ceiling compelling. The goal is controlled irregularity: a precise pattern built from pieces that openly admit they had previous careers.
Lighting changes the result more than expected. Grazing light from windows or wall fixtures emphasizes rough grain and saw marks. Downlights create alternating highlights and shadows along the zigzag. Before finalizing the finish, it helps to hold sample boards overhead at different times of day. A stain that appears warm and subtle on a worktable may look much darker once installed above eye level.
The most satisfying moment arrives after the trim is installed and the room is cleaned. Until then, the ceiling can look like an ambitious construction puzzle. The border suddenly organizes everything. The herringbone field reads as one composition, the reclaimed colors feel intentional, and the entire room gains warmth without losing order.
Visitors may not immediately identify the species, finish, or installation method. They will simply look up. That reaction is the best argument for the project. A reclaimed wood herringbone ceiling is demanding, but it creates the kind of architectural feature people rememberand it gives old lumber one remarkably elegant next chapter.