
Your concrete driveway was supposed to be the strong, silent type. Instead, it is shedding flakes, developing pits, and looking a little like it lost an argument with winter. That frustrating surface damage is called spalling concrete, and while it can look alarming, it is not always a signal that your slab is headed for a dramatic breakup.
Small areas of concrete spalling are often repairable with good preparation, the right patching product, and proper curing. The catch is that concrete does not spall for no reason. Water, freeze-thaw cycles, deicing salts, corrosion, poor drainage, weak finishing, and an overly wet original mix can all play a role. Think of the visible flakes as concrete’s way of filing a complaintloudly and in public.
What Is Spalling Concrete?
Spalling is the chipping, flaking, peeling, or breaking away of concrete from its surface. It can begin as small pinholes or shallow pits, then grow into rough patches where the top layer of cement paste has separated from the stronger concrete underneath. On a driveway or patio, spalling can make the surface uneven, ugly, and harder to clean. On steps, it can also create a tripping hazard.
Homeowners sometimes use the terms spalling, scaling, and pitting interchangeably. They are related but not always identical. Scaling generally describes shallow peeling or flaking near the surface, especially after freeze-thaw exposure. Spalling can be shallow too, but it may also involve deeper chunks breaking away due to internal pressure, corrosion, impact, or structural movement.
A few isolated shallow flakes on an otherwise solid patio may be a cosmetic repair. A broad area that sounds hollow when tapped, keeps growing, or reveals rusty reinforcing steel is a different species of problem entirely. Concrete may be tough, but it is not immortal, and it definitely does not enjoy being soaked, frozen, salted, and ignored for fifteen winters in a row.
What Causes Concrete Spalling?
1. Freeze-Thaw Cycles
In cold climates, water can seep into concrete pores and tiny surface cracks. When that water freezes, it expands and creates internal pressure. Repeat the process through enough winter weather swings, and the upper surface can weaken, flake, and eventually break away. Deicing chemicals can make this worse by keeping the surface wetter and increasing the number of freeze-thaw cycles the concrete experiences.
2. Too Much Water in the Original Mix
Concrete needs water to hydrate and gain strength, but extra water is not a free upgrade. A mix that is too wet can leave the finished surface weaker and more porous. That makes it easier for water to enter later, especially in driveways, sidewalks, and steps exposed to rain, snow, and traffic. Overwatering is the concrete equivalent of making pancake batter so thin that it gives up halfway through the flip.
Weak surface paste may also result from finishing concrete while bleed water is still present, overworking the surface, or curing it poorly. The slab may look fine on installation day, then begin flaking years later once weather and traffic reveal the weak top layer.
3. Deicing Salts and Chemical Exposure
Deicing salts help people avoid surprise ice-skating routines on the front walk, but they can be rough on concrete. Chloride-based deicers can increase surface saturation and may contribute to cracking, scaling, and steel corrosion when salts penetrate deeply enough. The risk is greater for old concrete, porous concrete, damaged slabs, and fresh concrete that has not fully matured.
Salt exposure is especially troublesome when reinforcing steel is present. Chlorides can disrupt the protective environment around embedded steel, allowing corrosion to begin. Rust occupies more volume than the original steel, which creates outward pressure that cracks and pops off surrounding concrete.
4. Rusting Reinforcing Steel
Reinforced concrete relies on a partnership between concrete and steel. When moisture, oxygen, and chlorides reach rebar, the steel can corrode. As rust expands, it pushes against the concrete cover, causing cracks that often run parallel to the hidden reinforcing bar. Eventually, pieces of concrete may break off and expose the rebar.
Rust stains, long linear cracks, loose chunks around a crack, or exposed steel are not ordinary cosmetic defects. They are warning signs that the cause of the spalling may be internal rather than superficial.
5. Water Problems and Poor Drainage
Concrete can handle weather, but it does much better when water is encouraged to leave rather than camp out indefinitely. Downspouts that dump water beside a driveway, flat areas that pond after rain, leaking gutters, broken sprinkler heads, and soil that slopes toward a slab can all keep concrete wetter than it should be.
If a single damaged patch appears directly beneath a roof drip line, near a downspout, or beside a planter that is constantly watered, do not just patch the concrete and call it a victory. Fix the water source first. Otherwise, the patch may become a sequel nobody asked for.
How to Tell Whether Spalling Concrete Is a DIY Repair
A small spall is usually manageable for a confident DIYer when the damage is shallow, localized, and stable. The surrounding concrete should feel solid, with no major movement, no deep cracks, and no exposed reinforcing steel. A sound slab usually produces a fairly solid sound when tapped, while loose or delaminated areas can sound hollow or dull.
Consider a professional concrete contractor or structural engineer when you see any of the following:
- Exposed, bent, or heavily rusted rebar
- Large or deep spalls, especially on stairs, balconies, columns, beams, or retaining walls
- Wide cracks, expanding cracks, or cracks that run in long straight lines
- Concrete that sounds hollow across a broad area
- Slab sections that have sunk, heaved, or developed different heights
- Repeated spalling after previous patches
- Damage near a home’s foundation or structural support elements
Uneven slabs and settlement-related cracks usually involve a problem below the concrete, such as poor subgrade compaction, soil movement, erosion, frost heave, or root pressure. A surface patch may reduce a trip hazard temporarily, but it cannot solve a slab that is moving from underneath.
How to Repair Small Areas of Spalling Concrete
For shallow, nonstructural spalling on a driveway, patio, sidewalk, or step, the repair process is less about magic products and more about preparation. A patch sticks only as well as the surface underneath it. In other words, do not spread fresh repair mortar over loose concrete and hope for a miracle. Hope is not a bonding agent.
Step 1: Gather the Right Tools and Safety Gear
Wear safety glasses, waterproof gloves, sturdy shoes, and a dust mask or respirator suitable for concrete dust. You may need a hammer, cold chisel, wire brush, shop vacuum, stiff scrub brush, mixing bucket, margin trowel, finishing trowel, and a concrete repair material rated for your repair depth and orientation.
For a small horizontal repair, a polymer-modified concrete patcher or repair mortar is often appropriate. For damaged step edges and corners, choose a product designed to build and shape vertical or overhead surfaces. Always read the manufacturer’s instructions because minimum and maximum application depths vary from one repair material to another.
Step 2: Remove Every Bit of Weak Concrete
Use a hammer and cold chisel to remove loose, flaking, crumbly, or hollow-sounding concrete. Continue until you reach solid material. It can feel counterintuitive to make the damaged area slightly larger, but patching over weak material is like putting a new roof on a house made of soggy cereal.
For many repairs, slightly undercutting the patch edges helps give the repair material a stronger mechanical hold. Avoid creating an ultra-thin feather edge unless the product specifically says it can be feathered. Thin unsupported edges are notorious for chipping away later.
Step 3: Clean the Repair Area Thoroughly
Brush away dust and loose debris, vacuum the cavity, and remove oil, grease, dirt, paint, or other bond breakers. A wire brush is useful for roughening and cleaning the old concrete surface. Rinse the area if the repair product calls for it, but do not leave standing water in the cavity.
Many cement-based repair products bond best to concrete that is damp but not dripping. This condition is often called saturated surface dry: the existing concrete has absorbed moisture, but no free water remains on the surface. Check your product instructions before applying any bonding agent, because some polymer-modified patch products are designed to be used without one.
Step 4: Mix the Repair Material Correctly
Measure water carefully and mix only as much repair material as you can place before it begins to set. Do not add extra water to make the mix easier to spread. A soupy patch may be easier on your wrist for five minutes, but it can be weaker, shrink more, and fail sooner.
Mix until the material reaches the consistency specified on the package. Some patching products should resemble a stiff mortar, while flowable repair products are made for horizontal depressions. Never retemper a mix by adding water after it has begun to set.
Step 5: Pack, Shape, and Finish the Patch
Press the repair material firmly into the prepared cavity to eliminate voids and improve contact with the existing concrete. Slightly overfill the patch, then strike it level with a trowel or straightedge. On steps, rebuild the edge just proud of the original shape and trim it once the material begins to firm up.
Match the surrounding texture as closely as possible. A slick trowel finish on an outdoor walkway can become slippery when wet, so consider lightly dragging a broom across the fresh patch when the product instructions allow it. Concrete does not need to be glamorous, but it should not become a surprise skating rink.
Step 6: Cure and Protect the Repair
Fresh concrete repair material needs time and suitable conditions to develop strength. Protect it from rain, direct scorching sun, freezing temperatures, traffic, and aggressive deicers during the curing period recommended by the manufacturer. Some repair products require misting or covering; others use curing compounds or have different instructions.
Do not rush back to parking, grilling, power-washing, or salting the surface just because the patch feels hard. Set time and full cure are not the same thing. Let the repair material complete its job before asking it to carry the neighborhood’s SUVs, snow shovels, and barbecue season.
When Resurfacing Worksand When It Does Not
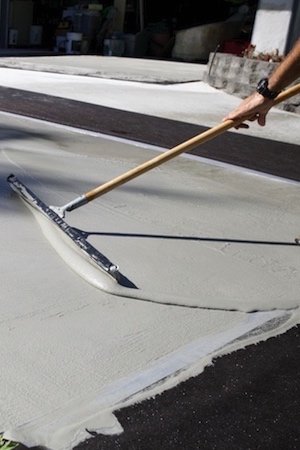
Concrete resurfacing can be a smart option when a slab is structurally sound but has widespread shallow pitting, scaling, or surface spalling. A resurfacer creates a new wear layer over the existing concrete and can restore a more uniform appearance. It is especially useful for older patios, sidewalks, and driveways that have plenty of small blemishes but no serious movement or deep deterioration.
Resurfacing is not a cure for major cracks, active settlement, crumbling edges, severe delamination, or corroded reinforcement. Those conditions need to be repaired first, and some slabs are simply better candidates for replacement. A beautiful resurfaced finish over a sinking slab is still a sinking slabjust wearing nicer clothes.
How to Prevent Spalling Concrete in the Future
Keep Water Moving Away From the Concrete
Check gutters, downspouts, irrigation systems, and grading around driveways and patios. Extend downspouts so water does not dump repeatedly in one location. Correct low spots where puddles form. Fix dripping faucets, leaking hoses, and sprinklers that spray concrete more enthusiastically than the lawn.
Use Deicers Carefully
Shovel snow promptly and use traction materials when practical. Avoid treating new concrete with deicing salts before it has fully cured and matured according to the installer or product manufacturer. For older concrete, use the minimum amount needed and follow product directions carefully. More deicer is not automatically better; sometimes it just means more salty slush getting absorbed by the slab.
Seal Sound Concrete When Appropriate
A quality sealer can help reduce water penetration into concrete. The right product depends on the surface, climate, traffic, previous coatings, and whether you want a penetrating or film-forming finish. Clean and repair the concrete first, and follow the sealer manufacturer’s preparation and reapplication guidance.
Build Future Concrete for Its Environment
When replacing a slab in a freeze-thaw climate, discuss air-entrained concrete, proper drainage, adequate base preparation, reinforcement needs, and curing procedures with the contractor. Air entrainment creates tiny, intentionally distributed air spaces that help relieve pressure when water freezes. Proper mix design and curing matter just as much as the final broom finish.
Practical Experience: Lessons Learned From Spalling Concrete Repairs
One of the most common mistakes people make with spalling concrete is assuming the repair begins with opening a bag of patching compound. It does not. The repair begins with detective work. Before touching a chisel, walk around the slab after rain. Look for puddles, drips, downspout discharge, sprinkler overspray, and landscaping that directs water toward the concrete. A surprising number of damaged driveway corners sit directly below a gutter that has been leaking for years. The concrete did not suddenly become fragile; it was being slowly waterboarded by a roof.
Another hard-earned lesson is that loose concrete is more extensive than it first appears. A patch may look like it needs only a few minutes of chipping, but a light tap can reveal a hollow area around the visible damage. This is not bad news. It is useful news. Removing weak concrete before applying the patch is what separates a durable repair from a temporary gray scab that pops off after the next winter.
Surface preparation also tends to decide whether the repair succeeds. Dust, oil, old paint, loose grit, and chalky concrete all interfere with bonding. Homeowners sometimes spend twenty minutes carefully smoothing a patch but only two minutes cleaning the cavity. Reverse those priorities. The repair material is the easy part; getting the old concrete clean, solid, and properly damp is the part that earns the long-term result.
Mixing is another place where impatience quietly causes trouble. When a patching product seems stiff, the temptation is to splash in extra water. That creates an easier-to-spread mix, but often a weaker one. Measure the water, mix thoroughly, and work in smaller batches. It is much better to mix twice than to mix one giant bucket that begins setting while you are still admiring your trowel technique.
Color matching can be humbling too. Fresh repair mortar is rarely an exact match for weathered concrete. It may dry lighter or darker, and old concrete has years of dirt, sunlight, tire marks, and mystery stains working in its favor. On a highly visible patio, homeowners often get a better-looking result by resurfacing the entire sound slab after making individual repairs. On a driveway or side path, accepting a slightly visible patch is usually the practical choice. A patch that lasts is more valuable than one that wins a beauty contest for three weeks.
Finally, successful repairs usually include prevention. After patching, improve drainage, keep deicers under control, and seal the surface when appropriate. A repaired concrete slab is not asking for a spa day. It is asking for water to stop sitting on it, salt to stop invading it, and the occasional inspection before small flaws become expensive ones. That is a reasonable request from something that has spent decades holding up cars, grills, planters, ladders, and everyone’s questionable weekend projects.
Final Thoughts on Spalling Concrete
Spalling concrete is often repairable when it is shallow, localized, and caused by surface-level wear. The recipe for a long-lasting fix is simple: identify the cause, remove weak material, prepare the surface carefully, use the correct repair mortar, and cure it properly. When damage involves hollow concrete, slab movement, major cracking, exposed rebar, or structural elements, skip the DIY heroics and get qualified help. Concrete repairs are much cheaper when the problem is still smalland much less dramatic than explaining why a balcony chunk landed next to the patio furniture.