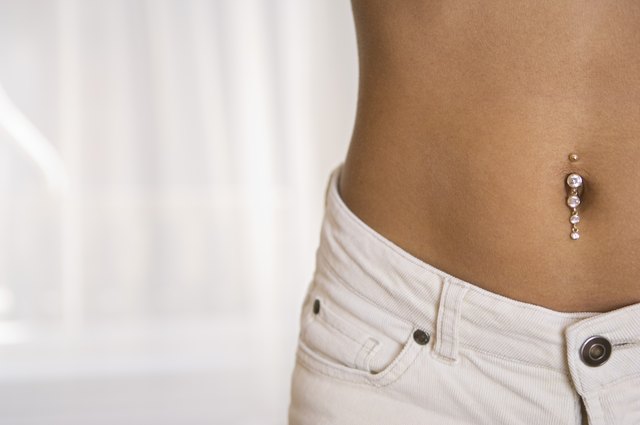

Removing body jewelry should be simple: twist, pull, celebrate. Yet anyone who has wrestled with a microscopic barbell ball knows the truth. Piercing jewelry can behave like it signed a permanent lease with your body.
The correct tools for removing body piercings depend on the jewelry’s closure, gauge, location, and condition. A healed threadless labret requires a different technique from a captive bead ring, while an embedded earring or dermal anchor should not become a weekend do-it-yourself project. This guide explains the most useful piercing removal tools, how to match them with common jewelry styles, and when to hand the job to a professional piercer or healthcare provider.
Safety Comes Before the Toolbox
Before reaching for pliers, determine whether the piercing is fully healed and healthy. Fresh piercings may look settled on the surface while the channel inside is still fragile. Removing starter jewelry too early can irritate the tissue, cause bleeding, or allow the opening to shrink before replacement jewelry is ready.
Even an established piercing can tighten surprisingly quickly after jewelry removal. Have the replacement jewelry cleaned, sized, and ready before taking out the old piece. If you plan to retire the piercing permanently, continue gentle hygiene until the openings have closed and the skin is calm.
Healing and closure guidance:
Do not attempt home removal when:
- The jewelry is partly or completely embedded beneath the skin.
- The piercing is severely swollen, hot, intensely painful, or draining pus.
- You have fever, chills, spreading redness, or red streaks near the piercing.
- An ear cartilage piercing is very red, darkened, swollen, or painful.
- The jewelry has torn through tissue or is hanging from a damaged channel.
- A dermal anchor, surface bar, or genital piercing requires more than removing a detachable end.
- The jewelry will not move after one or two gentle attempts.
Cartilage infections deserve particular attention because cartilage has less blood flow than the earlobe and complications can become serious. Embedded earrings may require local anesthetic and a small incision, which means the appropriate “tool” is a trained cliniciannot bathroom tweezers and heroic optimism.
Infection and embedded-jewelry guidance:
Identify the Jewelry Before Trying to Remove It
Many failed removal attempts happen because the wearer is using the right technique on the wrong closure. Inspect the jewelry under bright light and identify how it opens before applying pressure.
Threaded Barbells and Labret Studs
Threaded jewelry includes straight barbells, curved barbells, circular barbells, labret studs, and many navel or tongue pieces. One or both decorative ends may unscrew. Hold the post or fixed end steady and turn the removable end counterclockwise while looking directly at it.
Internally threaded jewelry has threads inside the post. Externally threaded jewelry has visible threads on the outside of the post. Both usually open by unscrewing an end, although externally threaded posts can feel rough when passing through a piercing.
Threadless or Press-Fit Jewelry
Threadless jewelry does not unscrew. A small bent pin on the decorative end fits tightly inside a hollow post. Hold the post firmly and pull the decorative end straight outward, using a subtle rocking motion if necessary. Spending 20 minutes turning a threadless top accomplishes little beyond giving your fingertips a demanding workout.
Captive Bead Rings
A captive bead ring holds a dimpled bead between the ends of a tensioned ring. The bead is not necessarily threaded. Ring-opening pliers gently widen the ring, while a ball grabber controls the bead so it does not launch across the room and begin a new life under the refrigerator.
Fixed-Bead and Seam Rings
A fixed-bead ring has a bead permanently attached to one side. A seam ring has a small break without a removable section. These rings generally open by twisting the ends sideways in opposite directions. Pulling the ends directly apart can distort the circle and make the jewelry difficult to close correctly.
Segment Rings and Clickers
A segment ring contains a removable section that completes the circle. Traditional versions may require ring-opening pliers, while hinged segment rings and clickers have a tiny hinge and closure seam. Locate the seam before pulling. Forcing the hinge backward can damage the mechanism.
Nostril Screws, L-Bends, and Nose Bones
Nostril screws have a curved tail that must be rotated through the channel. L-shaped studs follow a shorter angled path. Nose bones have a small bulb at the end and may be uncomfortable to remove if the bulb is much wider than the post. Do not yank any of these straight out through resistant tissue.
Dermal Anchors and Surface Jewelry
The decorative top of a dermal anchor may be threaded and removable, but the anchor beneath the skin is a different matter. Removing the implanted base can require specialized technique and wound care. Surface bars are also shaped beneath the tissue and should be assessed by an experienced piercer. Household cutting tools are not an acceptable substitute.
Jewelry construction guidance:
Essential Tools for Removing Body Piercings
1. Clean Nitrile Gloves
Nitrile gloves improve grip on smooth metal and reduce direct contact with the piercing. They are especially useful for tiny threaded balls that seem to become 70% more slippery the moment removal begins. Gloves should be clean, well-fitting, and changed if they touch an unclean surface.
2. Sterile Saline and Clean Gauze
Sterile wound-wash saline can help rinse away dried discharge around the jewelry. Clean gauze provides a lint-minimizing surface for drying and gripping. A warm shower or warm compress may soften stubborn buildup before removal.
Avoid trying to loosen jewelry with hydrogen peroxide, rubbing alcohol, harsh antiseptics, household oil, or industrial lubricant. Piercings are skin, not squeaky garage doors.
3. Rubber or Silicone Grip Pads
Grip pads are excellent for threaded barbells and labret studs. They increase friction without placing metal tools directly against polished jewelry. Small pieces of clean, dry gauze or clean nitrile gloves can perform a similar job when a dedicated pad is unavailable.
4. Ring-Opening Pliers
Ring-opening pliers work in reverse from ordinary pliers: squeezing the handles spreads the jaws. They are designed for captive bead rings and certain segment rings. The tips fit inside the ring, allowing controlled expansion with minimal force.
Select pliers appropriate for the ring’s diameter and gauge. Oversized tools can be awkward around a nostril, lip, or ear, while undersized pliers may not generate enough controlled movement for thick jewelry.
5. Ring-Closing Pliers
Ring-closing pliers compress a ring evenly. They are mainly needed when reinstalling a captive bead, correcting a gap, or closing a traditional segment ring. Grooved jaws help cradle the jewelry, but excessive pressure can flatten or scratch softer metals.
6. Ball Grabber Tool
A ball grabber has retractable wire prongs that surround a small bead or threaded end. It is useful for captive beads, tongue-barbell balls, and jewelry located in cramped areas. The tool improves control and reduces the likelihood of dropping a bead into a sink, carpet, mouth, or mysterious alternate dimension.
Professional CBR tool guidance:
7. Hemostats or Jewelry-Holding Forceps
Professional piercers may use hemostats to stabilize a post while removing an end. These tools can exert significant pressure, so they should be used carefully and never clamped onto skin. Metal jaws may also scratch jewelry, creating rough surfaces that collect debris or irritate tissue.
For home removal, grip pads are usually safer than uncoated hemostats. If a tool must be used, choose one designed for body jewelry and stop immediately if visibility or control is poor.
8. Insertion Tapers
An insertion taper is primarily a jewelry-transfer tool rather than a removal tool. It can connect with compatible internally threaded, threadless, or externally threaded jewelry to guide a replacement post through an established channel.
A taper should match the jewelry’s gauge and connection style. It should not be used to force larger jewelry into a piercing or stretch tissue unexpectedly. Stretching and routine jewelry replacement are different procedures, even if online videos occasionally treat them like cousins at the same chaotic family reunion.
9. Bright Lighting and a Magnifying Mirror
Good visibility may be the most underrated piercing removal tool. A lighted magnifying mirror helps locate hinges, seams, fixed ends, and buildup. For ear jewelry, a second mirror or assistance from another person can prevent blind pulling.
10. A Clean Tray or Small Container
Place a towel over the sink and keep a shallow container nearby. Tiny ends bounce impressively well, and plumbing systems have already collected enough accidental donations.
Which Piercing Removal Tool Should You Use?
| Jewelry Type | Helpful Tools | Basic Opening Method |
|---|---|---|
| Threaded barbell | Nitrile gloves, grip pads | Hold the post and unscrew the removable end counterclockwise. |
| Threadless labret | Grip pads, optional jewelry-holding tool | Hold the post and pull the top straight out with a gentle rocking motion. |
| Captive bead ring | Ring-opening pliers, ball grabber | Expand the ring only enough to release the bead and clear the tissue. |
| Traditional segment ring | Ring-opening and ring-closing pliers | Release the segment without overexpanding or warping the ring. |
| Hinged clicker | Gloves, mirror, optional clicker-opening tool | Find the seam and open the hinged section in its intended direction. |
| Seam or fixed-bead ring | Gloves; professional pliers for heavy gauges | Twist the ends sideways rather than pulling them directly apart. |
| Nostril screw or L-bend | Gloves, mirror | Rotate the shaped post along its curve through the channel. |
| Dermal anchor base | Professional instruments | Have an experienced piercer or clinician evaluate and remove it. |
A Safe General Process for Removing Healed Piercing Jewelry
- Confirm that the piercing is healed. When uncertain, ask the original piercer to evaluate it.
- Prepare the replacement. Verify its gauge, length, diameter, material, and closure style before creating an empty channel.
- Wash your hands. Dry them with a clean disposable towel, then put on clean nitrile gloves if available.
- Clean away buildup gently. Use warm water or sterile saline and allow crusted material to soften instead of scraping it through the piercing.
- Improve visibility. Work under bright light and place a clean towel over nearby drains.
- Stabilize the jewelry. Hold the post, ring, or fixed end without squeezing the tissue.
- Use the closure’s intended motion. Unscrew threaded ends, pull press-fit ends apart, open hinges, or twist seam rings sideways.
- Stop if pain or resistance increases. More force rarely transforms a bad angle into a good decision.
- Guide the jewelry out along its shape. Curved posts should follow their curve rather than being dragged sideways.
- Insert the replacement promptly. Use a compatible taper only when you understand the connection and size.
Special Situations That Need Extra Caution
Removing Jewelry Before an MRI or Medical Procedure
Medical facilities may ask patients to remove body jewelry before imaging, surgery, or procedures near the piercing site. MRI scanners use powerful magnetic fields, and metal can also interfere with imaging. Contact the facility in advance instead of discovering five minutes before the appointment that your captive bead ring has the structural determination of a bank vault.
If the piercing cannot remain empty, ask the medical team and a qualified piercer whether a suitable nonmetallic retainer is permitted. The facility’s safety rules take priority, and not every retainer is appropriate for every procedure.
Medical-procedure guidance:
Removing Jewelry From an Irritated Piercing
Irritation can come from pressure, friction, poor fit, trapped moisture, unsuitable material, or excessive handling. Removing the jewelry is not always the correct first step. A shorter, longer, or differently shaped piece may solve the underlying problem while preserving the piercing.
Have a reputable piercer assess mechanical problems. Seek medical care when symptoms suggest infection, significant allergic reaction, tissue damage, or an abscess. Do not automatically remove jewelry from a potentially infected piercing without professional guidance; the appropriate decision depends on the location and severity.
Removing Oral Jewelry
Tongue and lip jewelry can be slippery, difficult to see, and easy to swallow. Work over a clean surface rather than leaning over a drain. A ball grabber can help control small ends, but swelling, discharge, breathing difficulty, or rapidly increasing pain requires medical attention.
Removing Large-Gauge Jewelry
Thick captive rings and heavy segment rings can store considerable tension. Professional ring-opening and ring-closing pliers may be necessary. Improvised tools can scratch the finish, deform the jewelry, or slip into the surrounding tissue. A quick studio visit is often cheaper than replacing damaged jewelryand considerably cheaper than replacing damaged anatomy.
Common Piercing Removal Mistakes
- Turning the wrong component: Some barbells have one permanently fixed end.
- Trying to unscrew threadless jewelry: Press-fit ends pull apart rather than rotate off.
- Using ordinary pliers directly on jewelry: Serrated jaws can scratch or crush polished surfaces.
- Pulling a seam ring apart: Sideways twisting preserves the circular shape better.
- Removing jewelry before preparing a replacement: The piercing may tighten during the search.
- Working with wet hands: Moisture makes smooth metal harder to control.
- Forcing jewelry through dried buildup: This can scrape and inflame the channel.
- Attempting to dig out an embedded backing: Embedded jewelry may require anesthesia and clinical removal.
- Cutting jewelry while it is in the body: Cutters can slip, leave sharp edges, or drive fragments into tissue.
- Continuing after repeated failure: Swelling from multiple attempts makes professional removal more difficult.
Cleaning and Storing Piercing Removal Tools
Personal tools should be cleaned according to the manufacturer’s directions, dried completely, and stored in a clean closed container. Cleaning removes visible material, but it is not the same as sterilization. Professional studios use validated sterilization processes for reusable instruments that may contact fresh or broken skin.
Do not share personal piercing tools casually. If an instrument becomes contaminated with blood or body fluid, ordinary wiping is not an adequate professional reprocessing method. For routine home jewelry changes, focus on clean hands, clean surfaces, intact healed tissue, and noninvasive tools.
Experiences and Lessons From Real-World Piercing Removal
The following composite situations reflect common experiences reported by piercing wearers and professional studios. They illustrate why identifying the jewelry and using minimal force matter more than owning an enormous toolbox.
The Barbell That Was Not Actually Threaded
A wearer may spend half an hour twisting the decorative end of a helix stud, convinced that it has been overtightened. The ear becomes sore, the fingers become tired, and the jewelry remains completely unimpressed. At a studio, the piercer identifies it as a threadless labret, stabilizes the flat backing, and pulls the top free within seconds.
The lesson is simple: inspect the closure before escalating force. Threaded ends rotate repeatedly as they loosen. Threadless tops may rotate inside the post but will not travel outward until pulled. Knowing that difference can prevent unnecessary swelling.
The Captive Bead That Escaped
Captive bead rings are famous for turning a calm jewelry change into a miniature treasure hunt. A wearer opens a ring with bare fingers, the bead releases suddenly, and everyone in the room freezes while listening for the tiny metallic bounce. The bead is eventually found in a shoe several feet away, proving that body jewelry has ambitious travel plans.
A ball grabber or a clean towel beneath the work area changes the entire experience. The tool controls the bead while ring-opening pliers release tension gradually. Just as important, using only enough expansion to free the bead helps preserve the ring’s circular shape.
The Navel Barbell After a Warm Shower
Threaded navel jewelry may feel permanently stuck because dried buildup has collected near the lower ball. Trying to twist it while dry can irritate the piercing and reduce grip. After a warm shower, gentle rinsing, and thorough drying, clean nitrile gloves often provide enough traction to loosen the end.
The useful lesson is not that heat magically unlocks metal. Warm water softens material around the jewelry, while dry gloves improve friction. If the end still refuses to move, a piercer can hold the post securely with appropriate instruments rather than squeezing the surrounding skin.
The Nostril Screw That Seemed Too Long
Someone removing a nostril screw for the first time may panic when a surprisingly long curved section appears. Pulling straight makes the curve press against the channel, creating resistance and discomfort. Rotating the jewelry gently along its existing curve allows it to exit with much less drama.
This experience demonstrates a broader rule: jewelry should leave the body by following its original geometry. Curved barbells, nostril screws, and circular rings should not be treated like straight posts. When the motion feels wrong, stop and reassess the angle.
The “Just One More Try” Problem
Perhaps the most common bad experience begins after several unsuccessful attempts. The jewelry is still stuck, but the wearer decides that one stronger pull will finish the job. Instead, the tool slips, the skin becomes swollen, and a simple professional removal becomes more uncomfortable.
The better rule is to limit home attempts. If the closure has been correctly identified, the piercing is healed, and gentle controlled movement still does not work, pause. A reputable piercer handles stubborn jewelry regularly and may solve the problem in minutes. Stopping is not defeat; it is excellent tool selection. In this case, the best tool is a professional with good lighting, steady hands, and no emotional rivalry with the jewelry.
Conclusion
The most effective tools for removing body piercings are not always the largest or most complicated. Clean nitrile gloves and grip pads may be enough for a threaded barbell. Threadless jewelry requires controlled pulling rather than endless twisting. Captive bead and segment rings may call for ring-opening pliers, ring-closing pliers, and a ball grabber. Insertion tapers can simplify jewelry transfers when their gauge and connection match correctly.
Whatever tool you choose, use bright light, minimal force, and the movement intended for the jewelry’s closure. Pain, swelling, embedding, severe redness, drainage, tissue damage, or repeated resistance are signs to stop. Professional piercers remove stubborn jewelry every day, while clinicians can safely manage infections, embedded pieces, and injuries. Your piercing may be decorative, but its surrounding tissue is not a hardware experiment.
Research synthesized from guidance and educational material published by the Association of Professional Piercers, American Academy of Dermatology, Mayo Clinic, Cleveland Clinic, American Academy of Family Physicians, Johns Hopkins Medicine, MSD Manual, Painful Pleasures, Urban Body Jewelry, Anatometal, and professional-piercer interviews.
Supporting references: