
Backpack straps have a funny way of behaving like tiny seat belts with big dreams. One day they are politely hanging by your side, and the next they are flapping in the wind, brushing your elbows, catching on chair arms, dangling into bike spokes, or swinging around like they are auditioning for a jump-rope team. The good news? You do not need to replace your backpack just because the straps are too long.
Learning how to shorten backpack straps is a practical skill for students, commuters, hikers, travelers, parents, and anyone who has ever looked down and wondered why their bag has two extra feet of webbing. Whether you want a cleaner look, a safer carry, or a better backpack fit, there are three reliable ways to solve the problem: secure the extra strap without cutting, sew or fasten the strap into a shorter shape, or trim and seal the webbing for a permanent fix.
This guide walks you through each method in plain English, with useful examples, safety notes, and a few “please don’t accidentally ruin your favorite backpack” reminders. Because yes, shortening backpack straps is easybut doing it neatly is where the magic lives.
Why Backpack Straps Get Too Long in the First Place
Backpack straps are often designed to fit many body types, clothing layers, and carrying situations. A backpack that fits a tall adult wearing a winter jacket also has to work for someone smaller wearing a T-shirt. That means manufacturers usually leave extra webbing so the shoulder straps, sternum strap, waist belt, and compression straps can be adjusted widely.
Extra length is not always a design flaw. It gives you flexibility. You may need longer straps when wearing a thick coat, carrying a heavy load, or sharing the backpack with another person. However, when the extra webbing hangs too far below the buckle, it can become annoying, messy, and sometimes unsafe.
Common problems caused by long backpack straps
- Straps slap against your arms or sides while walking.
- Loose webbing catches on doorknobs, desks, airplane seats, or luggage handles.
- Dangling straps can look untidy, especially on a commuter or work backpack.
- Excess strap ends may drag on the ground when the backpack is set down.
- Long straps can interfere with biking, hiking, or moving through crowds.
Before you shorten anything, remember this important rule: fit comes first, cosmetics come second. A backpack should sit close to the body, with both shoulder straps used evenly. For school backpacks, the bag should generally rest around the middle of the back and not hang far below the waist. For hiking backpacks, the hip belt, shoulder straps, load lifters, and sternum strap all work together to distribute weight. If you cut too much, you may lose the ability to adjust the pack correctly later.
Before You Start: Check the Fit First
Do not shorten backpack straps while the bag is empty and lying on the floor. That is how innocent straps become tragic little stubs. First, load the backpack with what you normally carry. A student might add books, a laptop, and a water bottle. A commuter might add a laptop, lunch, charger, and jacket. A hiker should add typical trail weight.
Put the backpack on and adjust it properly. Tighten the shoulder straps until the pack sits close to your back without pulling your shoulders backward. If the backpack has a sternum strap, clip it across your chest for stability. If it has a waist belt or hip belt, fasten it so the weight is supported more comfortably. Walk around for a few minutes. Sit down. Stand up. Pretend you are late for a bus. That little real-life test tells you how much extra strap you truly have.
Mark the excess length
Use painter’s tape, masking tape, chalk, or a washable fabric marker to mark the point where the extra webbing begins. Then add a safety margin. For most everyday backpacks, leave at least 4 to 6 inches of extra webbing beyond your current adjustment. If you wear winter coats or share the bag with someone else, leave more. For hiking packs, be even more cautious because strap length can change depending on load, layers, and terrain.
Once you know how much extra strap you are dealing with, choose one of the three methods below.
Method 1: Shorten Backpack Straps Without Cutting
This is the safest and easiest way to shorten backpack straps. It is perfect if you are nervous about scissors, own a newer backpack, or want to keep the full adjustability of the bag. Instead of permanently removing webbing, you roll, fold, tuck, or secure the extra strap so it stays neat.
Best for
- School backpacks
- Travel backpacks
- Hiking daypacks
- Expensive backpacks you do not want to alter
- Kids’ backpacks that may need more adjustment later
What you need
- Elastic strap keepers, webbing keepers, or hook-and-loop strap wraps
- Small elastic bands, if you need a quick budget fix
- Optional: small clips or Velcro cable ties
Step-by-step instructions
- Adjust the backpack normally. Put it on, tighten the shoulder straps, and make sure the bag sits where you want it.
- Flatten the loose strap. Smooth the webbing so it is not twisted. Twisted webbing looks messy and can wear unevenly.
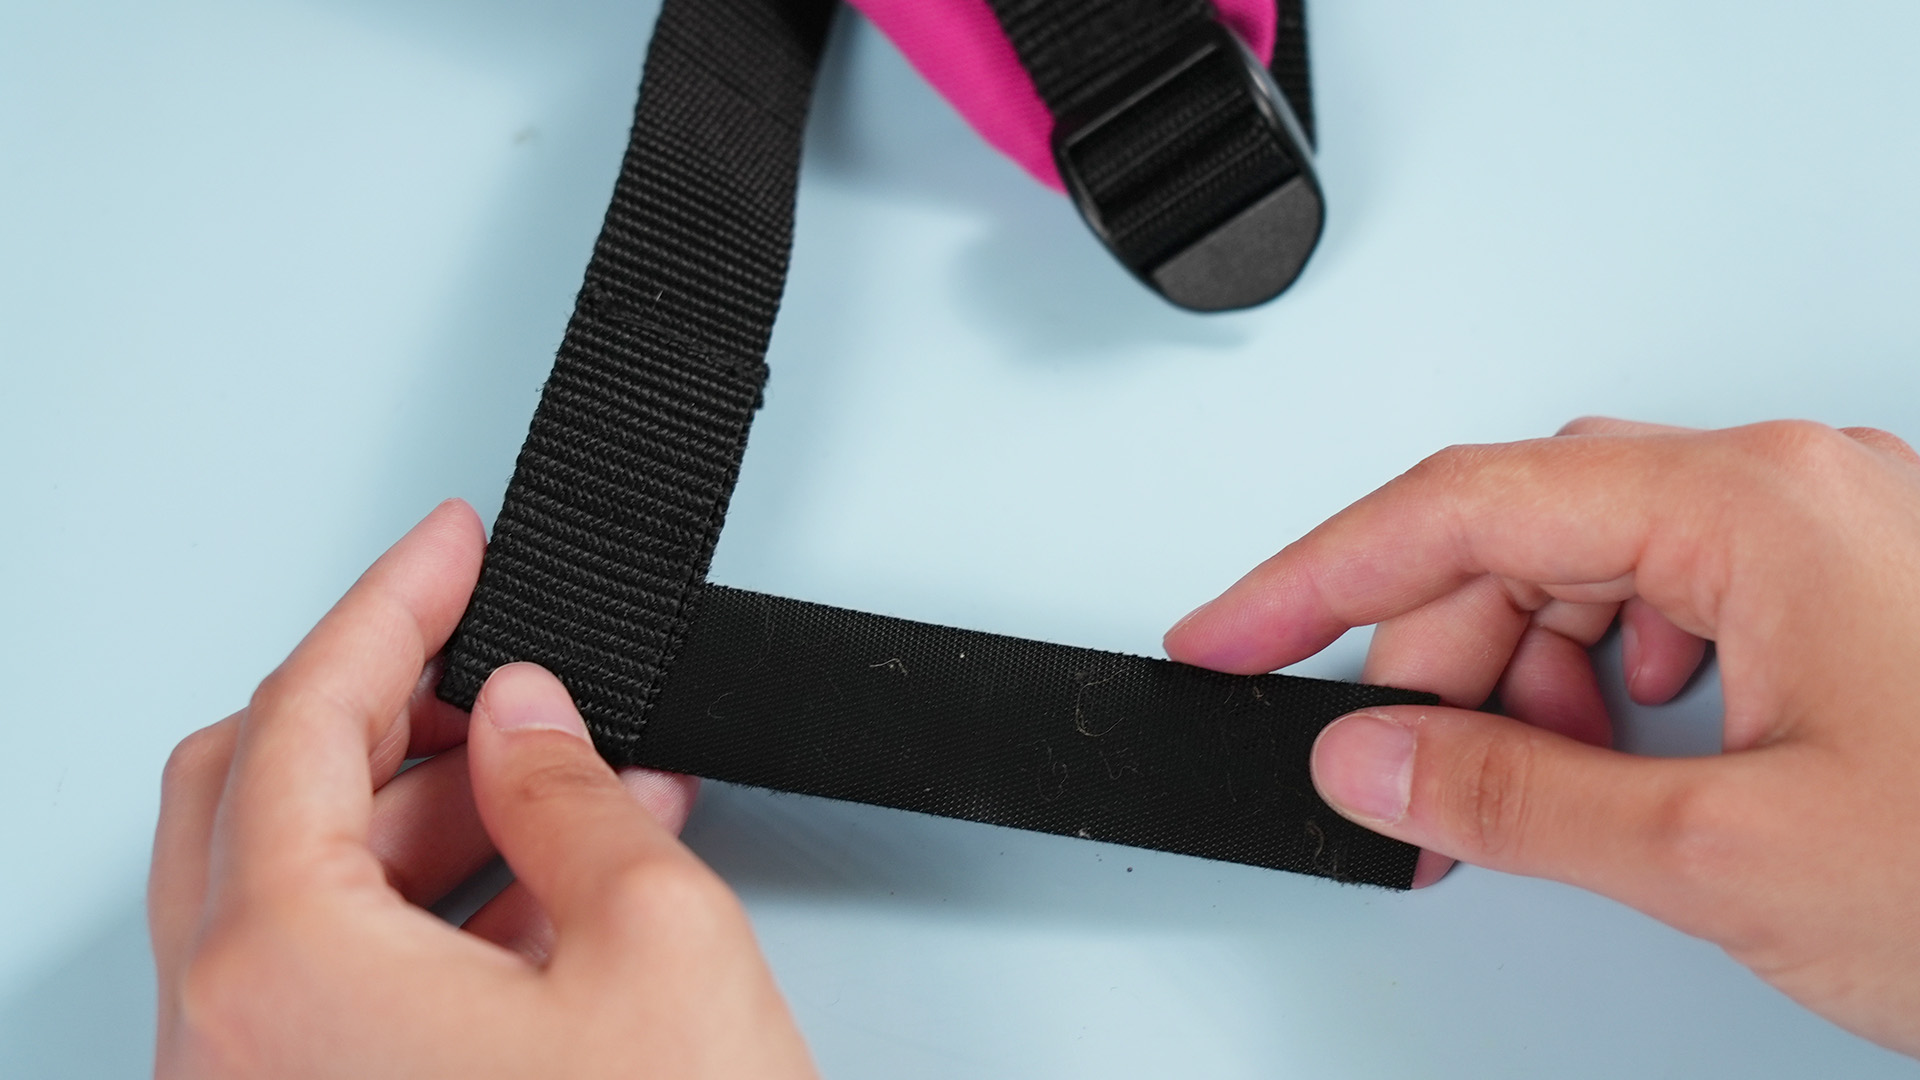
- Roll the extra webbing upward. Start at the loose end and roll toward the buckle. Keep the roll tight and even.
- Secure the roll. Slide an elastic strap keeper around the roll, wrap it with hook-and-loop tape, or use a small elastic band.
- Check movement. Walk around and swing the pack gently. If the roll loosens, use a second keeper or roll the strap tighter.
This method is like giving your backpack straps a tidy little bun. Nothing is cut, nothing is burned, and nothing is permanent. If you later need more length, simply unroll the webbing and adjust the strap again.
Smart example
Imagine you have a commuter backpack with shoulder straps that leave 10 inches of webbing dangling on each side. You roll each loose end into a compact bundle and secure it with black elastic strap keepers. Suddenly, the backpack looks cleaner, the straps stop swinging, and you still have the full length available for winter jacket season. No drama. No tools. No “why did I do that?” moment.
Pros and cons
Pros: This method is quick, reversible, inexpensive, and safe for nearly every backpack. It is especially good for growing kids or shared bags.
Cons: It does not remove the extra material. If the straps are extremely long, the rolled bundle may feel bulky.
Method 2: Fold and Sew the Straps Shorter
If you want a cleaner and more secure solution but do not want to cut the straps, folding and sewing is a great middle option. This method shortens the visible length of the strap while keeping the original webbing intact. It is ideal when you know your preferred strap length but still want a little flexibility in the future.
Best for
- Loose backpack straps that keep slipping out of place
- Straps on older bags that you are comfortable modifying
- Travel backpacks where neatness matters
- DIY users who can hand-sew or use a sewing machine
What you need
- Heavy-duty needle or sewing machine
- Strong polyester thread or bonded nylon thread
- Fabric clips or pins
- Measuring tape
- Scissors for thread trimming
- Optional: thimble or sewing awl for thick webbing
Step-by-step instructions
- Fit the backpack first. Load the bag, wear it, and adjust the straps to your ideal position.
- Fold the excess webbing. Instead of cutting, fold the extra strap back on itself near the buckle or along the strap path.
- Clip the fold in place. Use fabric clips rather than regular pins if the webbing is thick.
- Test the fit again. Put the backpack on and make sure the fold does not rub, poke, or block the buckle.
- Sew a secure stitch pattern. Stitch across the folded section several times. A box stitch or bar tack-style stitch works well for holding webbing.
- Trim loose thread. Clean up the stitches and check that the strap still lies flat.
This method works especially well for strap ends that are too long but do not need to move often. For example, if the side compression straps on your backpack always hang down, you can fold the extra length and stitch it into a shorter tab. The strap remains functional, but it no longer looks like it is trying to escape.
Important sewing tip
Use strong thread. Regular lightweight thread may snap under stress, especially on straps that are pulled often. Polyester thread is a good choice for outdoor gear because it handles moisture and sunlight better than many basic sewing threads. If the webbing is thick, sew slowly and avoid forcing the needle. Your sewing machine is a tool, not a bulldozer.
When not to sew backpack straps yourself
Do not sew into structural straps if you are unsureh3>
Do not sew into structural straps if you are unsure how the backpack carries weight. Shoulder harnesses, hip belts, child carrier straps, and load-bearing attachment points should be treated carefully. A poor stitch job on a decorative strap is annoying. A poor stitch job on a load-bearing strap can be unsafe. For technical hiking packs, child carriers, camera bags, or heavy travel packs, consider using a professional gear repair service.
Pros and cons
Pros: Sewing creates a neat, durable, semi-permanent fix. It avoids raw cut edges and keeps the original strap length available if stitches are removed later.
Cons: It requires tools and basic sewing confidence. Thick webbing can be hard to sew by hand, and poor stitching may not hold well.
Method 3: Cut and Seal the Backpack Straps
Cutting is the cleanest-looking and most permanent way to shorten backpack straps. It is also the method that deserves the most caution. Once you cut webbing, you cannot magically grow it back. There is no backpack strap fertilizer. Measure carefully, leave extra length, and only cut when you are completely sure.
Best for
- Old backpacks with very long strap ends
- Minimalist backpacks where dangling webbing is a constant problem
- Straps that will not need major future adjustment
- Non-critical strap ends, such as excess webbing beyond a buckle
What you need
- Measuring tape
- Chalk, marker, or masking tape
- Sharp scissors or a utility knife
- Lighter, candle, or heat tool
- Metal spoon, pliers, or another non-flammable tool for pressing the sealed edge
- Ventilated workspace
Step-by-step instructions
- Load and wear the backpack. Adjust it exactly as you normally would.
- Mark the cutting point. Identify the excess strap, then add several inches of safety margin.
- Remove the backpack. Lay the strap flat on a table and double-check your mark.
- Cut straight across. Use sharp scissors for a clean edge. A jagged cut will be harder to seal neatly.
- Heat-seal the edge. Carefully pass the cut end near a flame until the fibers begin to melt slightly. Do not hold it in the flame too long.
- Press the edge flat. Use metal pliers, the back of a spoon, or another safe tool. Do not use your fingers. Melted synthetic webbing is hot and rude.
- Let it cool. Once cool, check the edge. It should feel sealed, not fuzzy.
- Test the buckle. Make sure the strap cannot slip through the adjuster too easily. If needed, fold and stitch the end to create a stopper.
Safety notes for cutting and sealing
Most backpack webbing is made from nylon, polyester, or polypropylene. These synthetic materials can fray after cutting, which is why sealing the edge with heat is common. However, melting plastic can release unpleasant fumes, so work in a well-ventilated area. Keep the flame small, move slowly, and keep water nearby just in case. If the backpack is made from cotton webbing or another natural fiber, heat sealing will not work the same way; you may need to fold and sew the end instead.
How much strap should you leave?
For everyday backpacks, leaving 4 to 6 inches beyond your usual adjustment is usually sensible. For outdoor packs, leave more. You may need extra length for bulky clothing, weight changes, different users, or future repairs. Also make sure the remaining strap has enough length to stay securely threaded through the buckle. If you cut too close to the adjuster, the strap may slip out at the worst possible timeusually when your coffee is in one hand and your dignity is in the other.
Pros and cons
Pros: Cutting gives the cleanest result and removes bulk. It is ideal for straps that are clearly much longer than needed.
Cons: It is permanent. If you cut too much, the backpack may not fit over heavy clothing or may not fit another user. Heat sealing also requires caution.
Which Strap-Shortening Method Should You Choose?
The best method depends on your backpack, your confidence level, and how permanent you want the change to be.
- Choose Method 1 if you want the safest, easiest, fully reversible fix.
- Choose Method 2 if you want a neater semi-permanent solution without cutting.
- Choose Method 3 if you are certain the straps are too long and you want a permanent clean finish.
For most people, strap keepers are the best first step. They solve the dangling problem without risk. If you still dislike the extra webbing after a few weeks, sewing or trimming may make sense. Think of it like getting a haircut: start with a trim before requesting “surprise me.”
Backpack Strap Fit: What “Short Enough” Really Means
Shortening straps is not only about appearance. It is also about how the backpack feels. A properly adjusted backpack should sit close to the body without swinging. The shoulder straps should feel snug but not painfully tight. If the bag has a sternum strap, it should help stabilize the shoulder straps without squeezing your chest. If the bag has a waist belt or hip belt, it should help control weight and movement.
For school and everyday backpacks, the bottom of the bag should not hang far below the waist. A pack that droops too low can pull backward and make you lean forward. For hiking packs, the fit is more technical: the hip belt should carry much of the weight, while the shoulder straps and load lifters help keep the pack close and balanced.
Signs your backpack straps are adjusted poorly
- The backpack bounces while you walk.
- The bag hangs low against your lower back or hips.
- The shoulder straps dig into your neck or armpits.
- You feel pulled backward by the load.
- The loose strap ends flap, twist, or snag constantly.
If shortening the loose ends does not improve comfort, the problem may not be strap length. The backpack may be the wrong size, overloaded, poorly packed, or not designed for your body shape. In that case, adjusting the load or choosing a better-fitting pack may help more than trimming the webbing.
Extra Tips for a Cleaner Backpack Strap Setup
Use matching strap keepers
Black elastic keepers blend with most backpacks, but you can also find colors that match hiking, tactical, or travel packs. Matching keepers make the backpack look intentionally organized instead of hastily tied together five minutes before leaving the house.
Avoid bulky knots
Tying knots in backpack straps may seem like a quick fix, but knots can jam buckles, create pressure points, and make adjustment difficult. They also look a little chaotic, like your backpack lost a fight with a shoelace. Rolling and securing the excess webbing is cleaner.
Do not cut straps on borrowed or warranty-covered bags
If the backpack is borrowed, rented, or still under warranty, avoid permanent changes. Cutting straps may void repair coverage or reduce resale value. Use reversible strap keepers instead.
Check the straps after a week
After shortening backpack straps, use the bag for several days and check your work. Strap keepers may need tightening. Sewn folds may need extra stitches. Cut ends should be checked for fraying. A little inspection prevents a small problem from becoming an awkward public backpack malfunction.
of Real-Life Experience: What Actually Works When Shortening Backpack Straps
In real life, the best way to shorten backpack straps often depends less on the backpack and more on the person using it. A college student rushing between classes has different needs than a weekend hiker, and a frequent flyer stuffing a backpack under an airplane seat has different problems than a parent adjusting a child’s school bag.
For everyday backpacks, the no-cut method is usually the winner. I have seen people spend too much time worrying about perfect strap length when all they really needed was a pair of elastic strap keepers. This is especially true for laptop backpacks. The shoulder straps may be adjusted perfectly, but the leftover webbing hangs down and brushes the user’s hands while walking. Rolling the loose ends and securing them makes the whole bag feel tidier in about two minutes.
One useful trick is to roll the webbing toward the inside of the strap rather than the outside. This keeps the bundle closer to the body and less visible from the front. On darker backpacks, black elastic keepers almost disappear. On hiking packs, however, bright keepers can be helpful because they are easier to find if one falls off at camp or during a gear shuffle.
For school backpacks, reversible fixes are especially smart. Kids grow, jackets change with the season, and the amount of stuff in the bag seems to multiply mysteriously, as if notebooks are breeding in the main compartment. Cutting a child’s backpack straps too short in September can become a problem by January when a winter coat enters the story. Strap keepers or hook-and-loop wraps keep things neat without locking the fit into one size.
Sewing works best for people who are already comfortable with basic repairs. It is a good option for side compression straps, waist strap tails, and other areas where the excess webbing is always in the way. The biggest lesson is to test the fold before sewing. Clip it, wear the pack, walk around, and make sure the folded section does not rub against your arm or waist. A fold that looks perfect on the table may feel annoying after 20 minutes of walking.
Cutting should be saved for situations where the extra strap is truly excessive. On one older travel backpack, the shoulder strap tails were so long they caught under the bag every time it was set down. After adjusting the pack with a realistic load, leaving a generous safety margin, cutting straight across, and heat-sealing the ends, the backpack looked much cleaner. But the key was patience: measure, test, mark, and only then cut.
The most common mistake is trimming straps while the backpack is empty. An empty backpack sits differently than a loaded one. Add a laptop, shoes, water bottle, or textbooks, and suddenly the adjustment changes. Another mistake is cutting too close to the buckle. A little extra webbing is not the enemy; uncontrolled dangling webbing is. Leave enough length to adjust comfortably.
Overall, the most practical approach is simple: start reversible, move to sewing if needed, and cut only when you are sure. Backpack straps may be small, but they play a big role in comfort, safety, and everyday convenience. Shorten them thoughtfully, and your backpack will feel less like a messy bundle of straps and more like a piece of gear that actually works with you.
Conclusion
Shortening backpack straps is one of those small fixes that can make a backpack feel dramatically better. If the straps are merely dangling, roll them and secure them with strap keepers. If you want a cleaner semi-permanent solution, fold and sew the extra webbing. If the straps are far too long and you are sure about the fit, cut and heat-seal them carefully.
The golden rule is simple: do not sacrifice adjustability for appearance. A neat backpack is nice, but a comfortable backpack is better. Load the bag, test the fit, leave extra length, and choose the method that matches your needs. Done right, your straps will stop flapping, snagging, and causing backpack chaos. Your shoulders may not send a thank-you card, but they will appreciate the effort.
Note: This article is based on practical backpack-fitting, outdoor gear, pediatric backpack safety, and webbing-repair guidance. For load-bearing, child-carrier, or technical hiking backpack straps, consider professional repair before making permanent modifications.