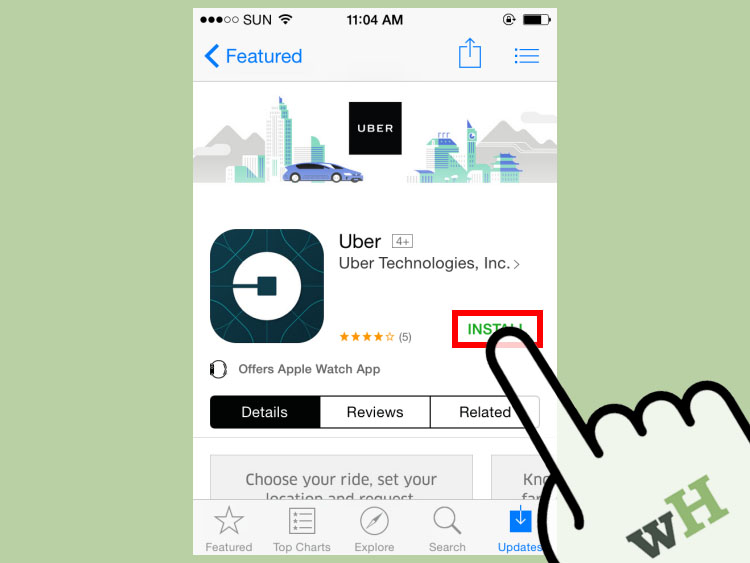

Using Uber with an international phone sounds like it should be simple: open the app, type the destination, hop in the car, and try not to look too confused when the airport pickup area has seven doors named almost the same thing. In many cases, it really is that easy. Uber works in thousands of cities around the world, and your existing account can usually travel with you. The problem is not the ride itself. The problem is your phone number, mobile data, SMS verification, roaming settings, payment method, and that one moment when the app asks for a code you cannot receive because your home SIM is currently enjoying a digital vacation.
This guide explains 3 ways to use Uber with an international phone, whether you are traveling with your regular U.S. number, a foreign SIM card, an eSIM, a data-only travel plan, or a borrowed device. The goal is simple: help you request rides abroad without panic-tapping your screen at baggage claim like you are defusing a tiny glass bomb.
Before we jump in, remember this key idea: you do not always need a local phone number to use Uber overseas. What you do need is access to your Uber account, a working internet connection, a valid payment method, and a way to handle verification if Uber asks for it. Set those up before you travel, and your future self will want to send you a thank-you postcard.
Why International Phones Can Cause Uber Problems
Uber accounts are tied to a mobile number, email address, password or passkey options, payment methods, and security settings. When you travel internationally, one or more of those pieces can suddenly become inconvenient. Your home number may not receive SMS messages abroad. Your travel eSIM may provide data but no voice or text. Your bank may block an international Uber charge as suspicious. Airport Wi-Fi may be weak exactly when you need it most, because apparently technology has a flair for drama.
Most Uber issues abroad fall into four categories:
- Verification issues: Uber may send a code by SMS, call, email, or app-based security method when you sign in, update your number, or confirm account activity.
- Connection issues: The app needs mobile data or Wi-Fi to show pickup points, driver details, route tracking, and ride status.
- Payment issues: Some cards need international transactions enabled, and some payment options are country-specific.
- Pickup communication issues: Drivers may call or message through the app, especially at airports, hotels, train stations, and confusing city centers.
The good news: all of these problems are preventable with a little planning. The even better news: you do not need to become a telecommunications engineer. You just need to choose the right setup from the three methods below.
Method 1: Use Uber Abroad With Your Existing Phone Number
The easiest way to use Uber internationally is to keep your existing Uber account connected to your current phone number. This works especially well if your home mobile plan supports international roaming, Wi-Fi calling, or SMS reception overseas. You keep your familiar number, your saved payment methods, your ride history, and your account reputation. In other words, the app recognizes you as you, not as a mysterious tourist-shaped question mark.
Step 1: Check Your Uber Login Before Leaving Home
Open the Uber app before your trip and confirm that you can sign in normally. Make sure your email address is current, your phone number is correct, and your password or login method works. If you changed phones recently, do not wait until you land in another country to discover that your account is still attached to an old number living in a drawer somewhere.
Go to your Uber account settings and review your personal information. If you need to update your phone number, do it before you leave. Updating a phone number often requires an SMS verification code, and receiving that code is much easier while your regular mobile service is fully working.
Step 2: Set Up a Backup Verification Method
If Uber offers security options such as two-step verification through an authenticator app, set it up before your trip. A security app can generate codes without relying on SMS, which is very useful when you are abroad, using a data-only eSIM, or standing in a hotel lobby where your home carrier has apparently decided to become a decorative icon.
Also make sure your email account is accessible from your phone. If Uber sends account notices, receipts, or recovery information by email, you need to be able to open that inbox. This sounds obvious, but many travelers use a new phone, reset a password, or get locked out of email because their email provider also wants SMS verification. That is the travel-tech version of locking your suitcase key inside your suitcase.
Step 3: Turn On International Roaming or Wi-Fi Calling Carefully
Contact your mobile carrier or check your plan before departure. Some plans include international texting. Others charge per message, per call, or per megabyte of data. If you only need your home number for verification texts, you may be able to keep your primary SIM active while using Wi-Fi or a travel eSIM for data. On many phones, dual SIM settings allow one line for calls and texts and another line for cellular data.
Wi-Fi calling can also help in some cases. If your carrier supports it, enabling Wi-Fi calling before your trip may allow your phone to receive calls or texts over a strong Wi-Fi connection. Rules vary by carrier, country, and device, so test it before relying on it. “I assumed it would work” is not a strategy; it is the opening scene of a travel headache.
Best For
This method is best for travelers who still have access to their home number, people on international roaming plans, business travelers, frequent flyers, and anyone who wants the lowest-friction Uber experience abroad.
Watch Out For
Roaming can be expensive if you leave data roaming on without understanding your plan. Turn off automatic downloads, avoid unnecessary background app refresh, and use Wi-Fi where safe. Also, do not remove or deactivate your home SIM if it is the only way you can receive verification codes.
Method 2: Use Uber With a Local SIM or Travel eSIM
A local SIM card or travel eSIM is one of the smartest ways to get affordable data abroad. It can make Uber faster, maps smoother, and airport arrivals less chaotic. With mobile data, you can request a ride outside the terminal, track your driver, message through the app, and adjust pickup details if you accidentally select “Door 4” while standing confidently at “Door 14.”
The important distinction is this: many travel eSIMs are data-only. They give you internet access, but they may not provide a regular phone number for calls or SMS. That is fine for using the Uber app after you are already logged in. It is not fine if Uber suddenly asks for a verification text sent to your home number and your home SIM is turned off.
Step 1: Install and Activate the eSIM Before You Need It
If your phone supports eSIM, you can often install a travel data plan before departure. Many modern iPhones and Android phones allow dual SIM use, meaning you can keep your home number active for calls and texts while using the eSIM for data. This combination is ideal for Uber: your app gets internet from the travel eSIM, while your account can still receive SMS or calls on the original number if needed.
If you are using a physical local SIM, check whether removing your home SIM will prevent you from receiving verification codes. If your Uber account is already signed in and stable, you may be fine. But if you get logged out, change phones, clear app data, or trigger a security check, you may need access to the original number.
Step 2: Keep Your Uber Account Number Stable
Do not rush to change your Uber account phone number to a temporary travel SIM unless you truly plan to use that number long-term. Temporary numbers expire. Tourist SIMs get recycled. Some prepaid numbers cannot receive certain verification messages. If you attach your Uber account to a short-term number and then lose access to it, you may create a future login problem for yourself.
A better approach is to keep your main Uber account linked to your permanent number and use the local SIM or eSIM only for internet access. That way, your identity stays consistent while your data connection adapts to the country you are visiting.
Step 3: Use In-App Messaging When Possible
Uber usually allows riders and drivers to communicate through the app. In many places, phone numbers are anonymized, meaning the driver should not see your real personal number when you call or message through Uber. This is helpful when using an international phone because you can send a simple in-app message like, “I’m at Terminal 2, Exit B, wearing a blue backpack,” instead of trying to place an international call that costs more than the sandwich you bought at the airport.
Use clear pickup notes. Avoid slang. If you do not speak the local language, keep messages short and easy to translate: “I am at hotel entrance,” “I am near the taxi sign,” or “I am at Gate 3.” The driver does not need your travel memoir. They need your exact location.
Best For
This method is best for tourists, digital nomads, students, backpackers, and anyone who wants affordable mobile data while keeping their Uber account tied to a permanent number.
Watch Out For
Data-only eSIMs are excellent for maps and ride requests, but they may not solve SMS verification. Also, some phones must be unlocked to use another carrier’s SIM or eSIM. Check your device and carrier status before you travel.
Method 3: Use Uber on the Web, Another Device, or With Help From Someone Else
If your international phone setup goes sideways, you still have options. Uber can be accessed from the app and, in many locations, through a web browser. This can help if your phone is low on storage, the app is glitching, your device is borrowed, or you are using a tablet, laptop, or hotel computer. It is not as convenient as the app, but when you need a ride, “slightly less convenient” is much better than “walking three miles with luggage and a facial expression of regret.”
Step 1: Request a Ride Online
Uber’s web ride request option allows users to sign in from a browser, enter pickup and destination details, choose a ride, and pay through the account. This can be useful if your phone can connect to Wi-Fi but the app is not working properly. It can also help if your phone screen is damaged or you are using a device that does not support the app.
Before relying on this method, make sure you know your Uber login details and can access your email or verification method. A browser does not magically bypass account security. It simply gives you another doorway into the same account.
Step 2: Ask a Trusted Person to Request a Ride for You
Uber allows users in many places to request rides for someone else. A friend, family member, hotel staff member, or travel companion may be able to request a ride and enter your name and phone number as the rider. This is useful if your phone has no service, your account is locked, or you are helping someone who does not have the Uber app.
When someone else requests the ride, make sure you receive the car details: driver name, vehicle model, license plate, pickup location, and estimated arrival time. Do not get into a car just because a driver waves confidently. Confidence is not a verification system.
Step 3: Use Hotel Wi-Fi or Airport Wi-Fi Safely
Wi-Fi can rescue your Uber plans, especially at airports, hotels, cafes, and train stations. However, use public Wi-Fi carefully. Prefer official networks from the airport, hotel, or cafe. Avoid suspicious networks with names like “FREE_WIFI_SUPER_FAST_REAL_100_PERCENT.” If you need to update payment information or log in to sensitive accounts, use a secure connection and avoid sharing private details on questionable networks.
Once your ride is confirmed, take a screenshot of the driver and vehicle details in case your connection drops. Stay near a known pickup point, watch the app map if possible, and use in-app safety features such as trip sharing when available.
Best For
This method is best for emergencies, app problems, dead SIM cards, lost phones, travelers with laptops or tablets, and situations where someone else can safely arrange the ride.
Watch Out For
If you cannot receive verification codes, web access may still be blocked. Also, if another person books the ride, the trip is connected to their account, payment method, and support history. Coordinate clearly so everyone knows who is riding, where the pickup is, and how to contact the rider.
International Uber Checklist Before You Travel
A smooth international Uber experience starts before you leave home. Use this checklist a few days before your flight:
- Open the Uber app and confirm you are signed in.
- Update your phone number and email if needed.
- Add or confirm a payment method that works internationally.
- Tell your bank or card issuer about travel if required.
- Install app updates before departure.
- Enable a backup verification method if available.
- Save your hotel address in English and the local language if possible.
- Check whether Uber operates in your destination city.
- Review airport pickup instructions before requesting a ride.
- Keep a backup transportation option, such as licensed taxis or public transit.
Payment Tips for Using Uber With an International Phone
Payment problems are common when using Uber abroad, and they are not always Uber’s fault. Banks may decline foreign transactions to protect against fraud. Cards may fail because the billing address, CVV, or country settings do not match. Some payment methods, gift cards, credits, and wallet balances may be limited by country or currency.
Add at least two payment methods before you travel. A major credit card with no foreign transaction fee is usually a strong choice. A digital wallet such as Apple Pay or Google Pay may also work where supported. If your card is declined, try another payment method, contact your bank, or re-add the card in the app with accurate information.
Also pay attention to currency options. In some markets, Uber may show local currency or offer preferred currency pricing. Compare fees when possible. Paying in local currency can sometimes avoid extra conversion costs from dynamic currency conversion, though your card issuer may still apply its own exchange rate or foreign transaction fee.
Airport Pickup Tips for International Uber Rides
Airports are where Uber confusion reaches Olympic levels. Many airports require rideshare pickups at specific zones, not directly outside baggage claim. The app may ask for your terminal, door, floor, or pickup area. Some airports put rideshare pickup on departures level instead of arrivals. This is why travelers often see their driver circling nearby while they stand in the wrong place, both parties wondering whether GPS has developed a sense of humor.
Do not request the ride until you have collected your bags and know where you are allowed to meet the driver. Follow the app’s pickup instructions, airport signs, and local rules. If the driver messages you, answer quickly and clearly. Share landmarks: “near Starbucks,” “outside Exit 5,” “rideshare zone C,” or “under the blue sign.”
If your data connection is weak inside the airport, move toward the official pickup area before requesting. Screenshots can help if the connection drops after the ride is accepted.
Common Mistakes to Avoid
Mistake 1: Turning off your home number completely. If your Uber account depends on that number for verification, you may lock yourself out.
Mistake 2: Changing your account to a temporary SIM number. That number may expire, leaving you with a recovery problem later.
Mistake 3: Assuming a data-only eSIM can receive SMS. Many cannot. Read the plan details before purchase.
Mistake 4: Waiting until landing to update account details. Update your Uber profile while you still have reliable service at home.
Mistake 5: Requesting too early at airports. Wait until you are ready and in the correct pickup zone.
Real-World Experiences: What Using Uber Abroad Actually Feels Like
Using Uber with an international phone is usually less dramatic than people fear, but the small details matter. Imagine landing in Paris with a U.S. phone, a travel eSIM, and three hours of airplane sleep that barely counts as sleep. You open Uber, and the app works because you are still signed in. Your eSIM gives you data, your home number remains active for texts, and your card is already saved. You follow the airport pickup signs, choose the right terminal, and message the driver: “I am at rideshare pickup, Door 8.” The ride arrives. You feel like a logistics genius. This is the dream setup.
Now imagine the messier version. You land in Mexico City, swap your home SIM for a local SIM, and open Uber after months of not using it. The app asks you to verify your account with a code sent to your old number. That SIM is in your backpack. Your SIM ejector tool is somewhere between your passport and a granola bar. Airport Wi-Fi keeps disconnecting. Suddenly, a five-minute task becomes a tiny international incident. This is why preparation matters.
Another common experience happens with data-only eSIMs. They are fantastic for maps, translation apps, restaurant searches, and Uber ride tracking. But travelers sometimes assume that “connected” means “reachable by phone number.” Not always. A data-only eSIM gives your phone internet, not necessarily a local number. If Uber only needs the internet, you are fine. If Uber asks for SMS verification, you need your original number, a backup security method, or another recovery option.
Hotels can also be surprisingly useful. If your app works but pickup is confusing, ask the front desk where rideshare drivers usually stop. Many hotels have a preferred entrance or a street address that works better than the lobby’s map pin. In busy cities, entering the hotel name may place your pickup on the wrong side of the block. A local staff member can often tell you, “Use the side entrance on 6th Street,” which is the kind of sentence that can save ten minutes and one awkward driver cancellation.
Travelers also learn quickly that messaging beats calling when language barriers exist. A short in-app message can be translated, reread, and matched to a visible landmark. Phone calls are faster when both people speak the same language, but they can turn into a comedy sketch when they do not. Keep written messages simple: “I am outside Terminal 1,” “I am beside the pharmacy,” or “I am wearing a red jacket.” This is not the moment for elegant prose.
The best experience comes from redundancy. Have mobile data, but also know the Wi-Fi option. Keep your home number active if possible, but also set up app-based verification. Add one card, but carry another. Know Uber, but also know the local taxi stand. Travel rewards the prepared and gently teases the overconfident.
Conclusion
Using Uber with an international phone is completely manageable when you understand the three main options: keep your existing number active, use a local SIM or travel eSIM for data, or request rides through the web or another trusted device when needed. The smartest setup for most travelers is a combination: keep your permanent number connected to your Uber account, use affordable travel data, confirm payment methods before departure, and prepare backup verification before your trip.
Uber can be one of the easiest ways to move around a foreign city, especially when you are tired, carrying luggage, or trying to avoid negotiating fares in a language you last studied for two weeks on an app. Plan your phone setup in advance, and your international Uber ride can feel less like a tech puzzle and more like what it should be: a simple ride from point A to point B, with maybe a nice view out the window.
SEO Tags
Note: This article is for general travel guidance. Uber features, payment options, verification methods, and availability may vary by country, city, device, carrier, and account status.