
Your hair may have been trying to curl for years while you kept brushing it into a fluffy triangle and wondering why it refused to cooperate. The good news is that many waves, curls, and coils become more noticeable when they receive enough moisture, gentle handling, suitable styling products, and a drying method that does not bulldoze the pattern.
Bringing out your natural curl is not about forcing straight hair to become permanently curly. Curl pattern is largely influenced by genetics, follicle shape, and the structure of each hair fiber. The goal is to reveal and support the texture you already havenot negotiate a new contract with your DNA.
First, Find Out What Your Hair Naturally Wants to Do
Before buying a cabinet full of curl creams, observe your hair without brushing, straightening, or aggressively towel-drying it. After washing and conditioning, let it dry with minimal handling. Look for S-shaped waves, spirals, corkscrews, bends, or small coils.
You may have more than one curl pattern. The hair around your face might form ringlets while the back creates loose waves. That is normal. Hair texture can also change with length, hormonal shifts, chemical treatments, heat damage, climate, and aging.
Pay attention to more than curl type
Curl charts can provide a useful vocabulary, but they do not tell the whole story. Product selection should also account for:
- Strand thickness: Fine strands are easily weighed down, while coarse strands may need richer products.
- Density: Dense hair may require sectioning to distribute products evenly.
- Porosity: More porous hair tends to absorb moisture quickly but may lose it just as fast.
- Scalp condition: An oily, flaky, irritated, or sensitive scalp may need a different cleansing schedule from the hair lengths.
Build a Curl-Friendly Washing Routine
Curly hair often feels drier because scalp oils have a more winding journey from the roots to the ends. Overwashing can remove too much oil, but avoiding shampoo indefinitely can lead to buildup, itching, and curls that look as enthusiastic as wet shoelaces.
Wash according to your scalp and texture
There is no universal schedule. Fine waves with an oily scalp may need cleansing several times a week. Thick curls or coils may remain comfortable with less frequent washing. Dermatologists generally recommend washing when the scalp needs it rather than following a rigid social-media rule.
Concentrate shampoo on the scalp. Massage gently with your fingertips, not your nails, and allow the lather to move through the lengths as you rinse. Scrubbing the ends can increase tangling and dryness.
Use a clarifying shampoo when curls become limp
Leave-in conditioners, oils, creams, dry shampoo, gels, and hard-water minerals can accumulate on the hair. Signs of buildup include dullness, sticky strands, flat roots, curls that will not hold, and products that seem to sit on the surface.
A clarifying wash every few weeksor whenever buildup becomes noticeablecan give the curl pattern a reset. Follow it with conditioner because clarifying formulas may cleanse more deeply than everyday shampoos.
Condition Like Your Curls Depend on It
Conditioner improves slip, reduces friction, and makes detangling less dramatic. Apply it mainly from the mid-lengths to the ends unless your scalp tolerates and needs additional moisture.
Detangle while the hair is wet and slippery
For many curly textures, dry brushing separates curl clumps and creates frizz. Detangle in the shower after applying conditioner. Start at the ends and gradually work upward using your fingers, a wide-tooth comb, or a flexible detangling brush.
If the tool repeatedly catches, add more water and conditioner instead of declaring war on the knot. Wet hair can be vulnerable to breakage, so slow and gentle wins this particular race.
Try a deep-conditioning treatment when needed
A weekly or occasional moisturizing mask may help hair that feels rough, dry, chemically treated, or difficult to manage. Fine waves may need only a lightweight mask and a short treatment time. Dense coils may prefer richer formulas.
More conditioning is not automatically better. Hair that becomes overly soft, limp, or unable to hold a curl may need less product, a clarifying wash, or a better balance between moisturizing and strengthening formulas.
Apply Styling Products While Your Hair Is Very Wet
Water is one of the most important ingredients in a curl routine. Applying products to soaking-wet or thoroughly damp hair helps strands gather into smooth curl clumps before frizz has a chance to organize a rebellion.
Choose products based on the result you want
- Leave-in conditioner: Adds slip and softness, especially for dry or tangled hair.
- Curl cream: Provides moisture, smoothing, and definition but may weigh down fine hair.
- Mousse or foam: Offers lightweight volume and is often useful for waves or fine curls.
- Gel: Creates hold and can form a cast that protects the curl shape while drying.
You do not need all four. A fine, wavy texture may thrive with mousse alone. Dry, thick curls may prefer leave-in conditioner followed by gel. Start with small amounts. You can add another dab, but removing half a jar of curl cream from one section is considerably less elegant.
Distribute products evenly
Divide dense hair into sections so the back does not miss out on the routine. Smooth the product over the hair with flat palms, rake it through with your fingers, or use a curl-friendly styling brush. Then scrunch upward from the ends toward the roots.
A squishing sound usually indicates that the hair contains enough water. If it feels sticky or coated before it has even dried, you may have used too much product.
Experiment With Curl-Defining Techniques
Scrunching
Cup the ends of your wet hair in your hands and lift them toward the scalp. Squeeze gently, release, and repeat around your head. Scrunching encourages waves and curls to spring upward instead of drying in an elongated position.
Finger coiling
Wrap small wet sections around a finger in the direction they naturally turn. Finger coiling can define stubborn pieces around the face or create a more uniform finish. It works especially well when you do not feel like coiling your entire head until next Tuesday.
Brush styling
A styling brush can smooth sections and encourage curl clumps. Apply gentle tension as the brush moves through a wet section, then shake or scrunch the hair. Adjust the section size: larger sections generally create bigger clumps, while smaller sections produce more individual curls.
Replace the Bath Towel With a Gentler Option
Traditional terrycloth towels can roughen the hair surface and pull curl clumps apart. Instead, use a microfiber towel or a soft cotton T-shirt. Squeeze out excess water without rubbing.
Try ploppingbut do not overdo it
Plopping involves lowering wet, styled curls onto a T-shirt or microfiber towel and wrapping the fabric around the head. It supports the curls while absorbing excess moisture and can be particularly helpful for waves and loose curls.
Try plopping for approximately 10 to 30 minutes before air-drying or diffusing. Leaving thick, wet hair wrapped for many hours may slow drying, flatten roots, or irritate a sensitive scalp.
Air-Dry or Diffuse Without Disturbing the Pattern
Once styling is complete, keep your hands out of your hair. Touching, separating, and rearranging curls during drying is one of the fastest routes to frizz.
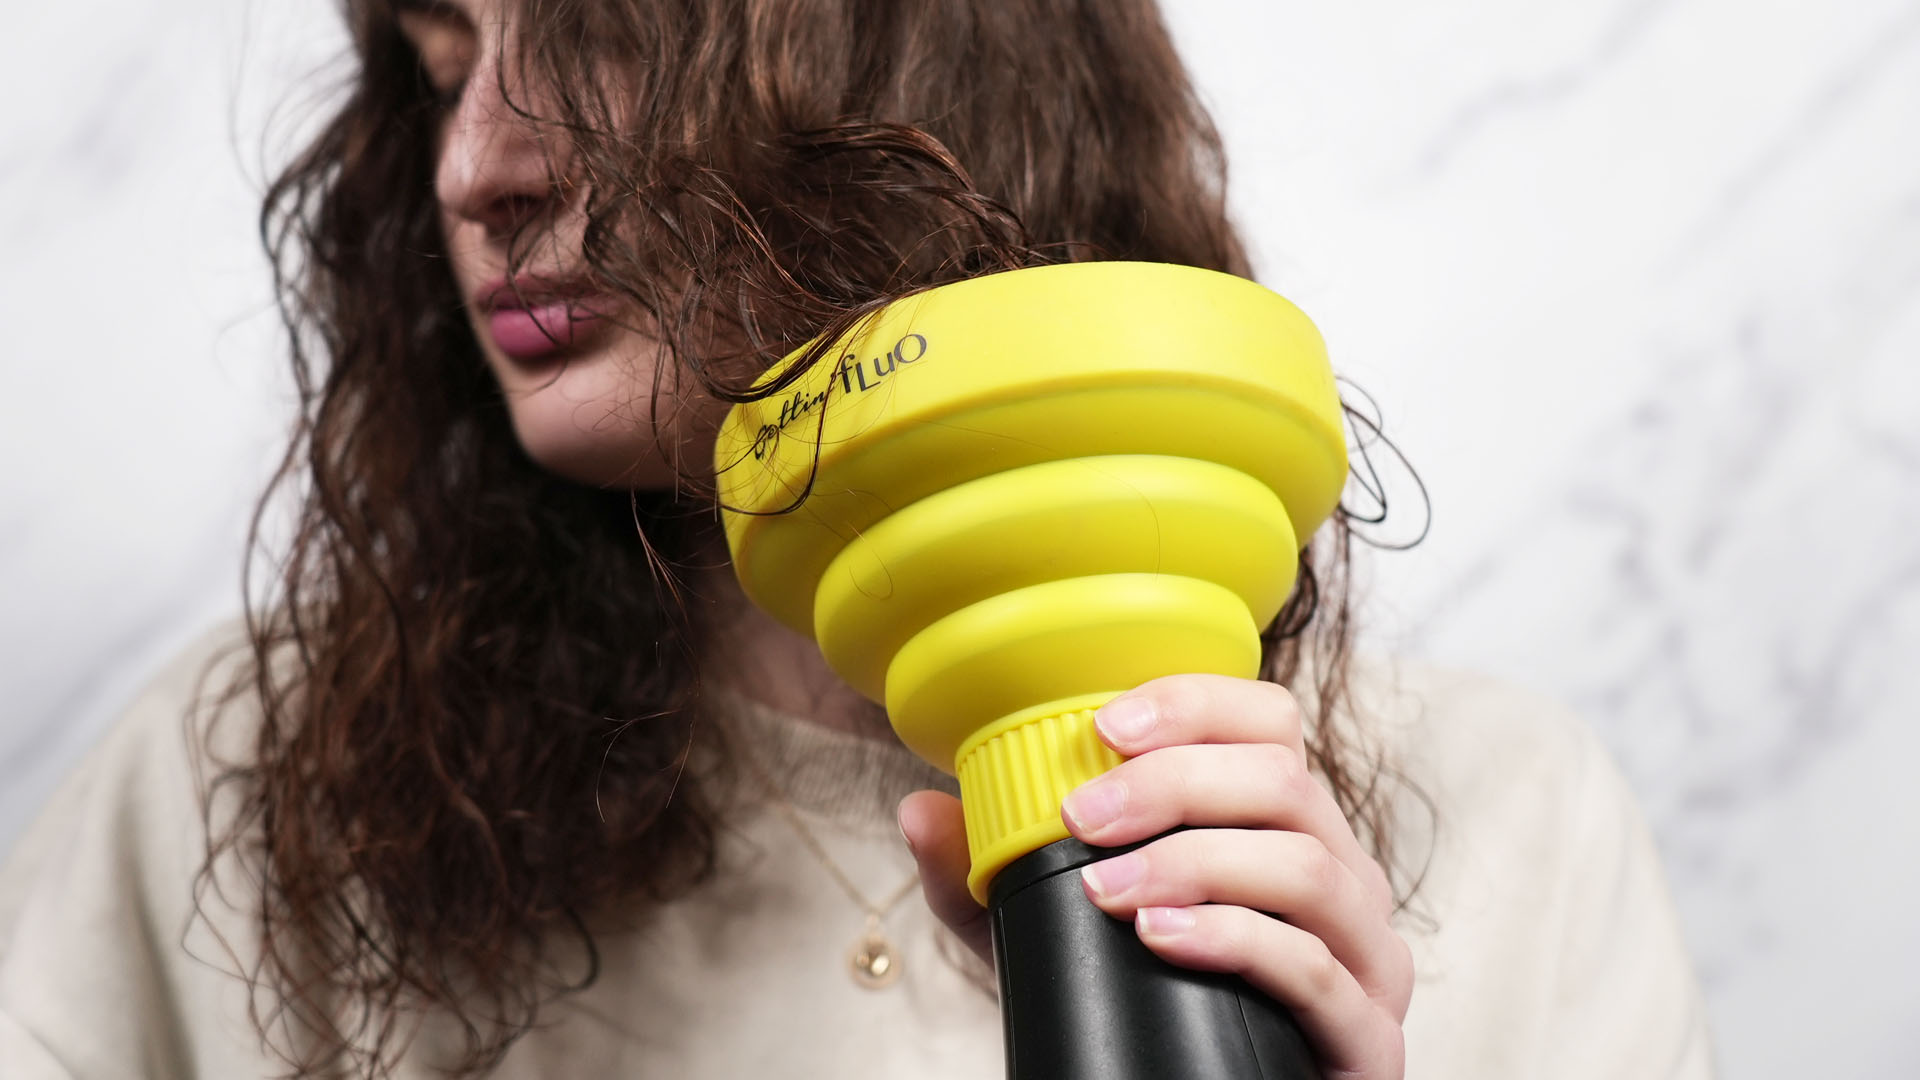
How to diffuse natural curls
- Apply a heat protectant when recommended by the product directions.
- Set the dryer to low or medium heat and low airflow.
- Hover the diffuser around the roots first to begin drying without disturbing the clumps.
- When the hair is partly dry, gather sections into the diffuser bowl and lift them toward the scalp.
- Move to a new section rather than repeatedly shaking the diffuser.
- Stop when the hair is dry or nearly dry.
High temperatures can alter the cuticle and internal structure of hair fibers, especially when heat exposure is frequent or applied to already damaged hair. A diffuser spreads airflow more broadly than a concentrated nozzle, but low heat and sensible drying time still matter.
Scrunch out the gel cast
Strong-hold gel may dry into a hard shell called a cast. Do not panic and assume you have accidentally varnished your head. Wait until the hair is completely dry, then gently scrunch it to soften the cast. The result should be defined curls with movement and less stiffness.
Protect Your Curls While You Sleep
Nighttime friction can flatten curls, create tangles, and increase breakage. A satin or silk pillowcase, scarf, or bonnet provides a smoother surface than standard cotton.
Longer curls can be gathered into a loose, high ponytail known as a pineapple. Use a soft scrunchie and avoid pulling tightly at the hairline. Short hair may be protected with a bonnet or several loose sections.
These methods do not freeze curls in time, but they can help prevent you from waking up with one perfect side and one side that appears to have attended a wrestling tournament.
Refresh Curls Between Wash Days
You do not always need to soak your entire head. Lightly mist flattened areas with water, then smooth or scrunch them back into shape. Add a tiny amount of leave-in conditioner, mousse, or gel only where necessary.
If your curls become progressively duller, heavier, or stickier with each refresh, stop adding product. It may be time to wash rather than apply another layer and hope for a small miracle.
Get a Haircut That Supports Your Curl Pattern
The right haircut can remove damaged ends, reduce excessive weight, and give curls room to spring upward. Long, one-length hair may stretch loose waves, while thoughtfully placed layers can improve movement and volume.
Choose a stylist who regularly works with your curl type. Bring photographs of your hair on good and bad days, explain how you normally style it, and discuss shrinkage before the scissors appear. Some stylists cut curls dry to observe their natural position, while others prefer wet cutting. Neither approach is universally best; experience and communication matter more.
Avoid Habits That Can Hide or Weaken Natural Curls
- Do not brush dry curls unless you intentionally want a brushed-out style.
- Limit repeated flat-ironing, high-temperature blowouts, and unprotected heat.
- Avoid tight hairstyles that pull on the roots and hairline.
- Do not pile heavy oils and butters onto fine or low-density hair.
- Space out bleaching, relaxing, and chemical straightening services.
- Trim split or damaged ends that no longer form healthy curls.
Keratin smoothing treatments and chemical straighteners may loosen or alter the curl pattern. Depending on the treatment and the extent of damage, the original texture may not fully return until new hair grows.
Troubleshooting Common Curl Problems
Your curls look flat or greasy
Use less leave-in conditioner or cream, clarify buildup, apply rich products farther from the roots, and experiment with lightweight mousse or gel.
Your hair is defined but crunchy
Wait until it is completely dry and scrunch out the cast. If it remains stiff, use less gel during the next wash day or choose a formula with more flexible hold.
Your hair is frizzy before it dries
Apply products to wetter hair, work in smaller sections, improve product distribution, and avoid rough towel-drying. Some frizz is a natural feature of textured hair, not evidence that you have failed a secret curl examination.
Your waves disappear after a few hours
Reduce heavy creams, add a stronger-hold mousse or gel, clarify buildup, and make sure the hair is completely dry before touching it.
Your curl pattern suddenly changes
Texture can shift because of damage, hormones, aging, medications, nutritional issues, or certain scalp and medical conditions. Consult a board-certified dermatologist if a sudden change occurs with significant shedding, bald patches, scalp pain, inflammation, or breakage.
A Simple Natural Curl Routine for Beginners
- Cleanse your scalp with an appropriate shampoo.
- Condition and detangle from the ends upward.
- Leave the hair very wet after rinsing.
- Apply a small amount of leave-in conditioner if needed.
- Add mousse or curl cream based on your strand thickness.
- Apply gel when you need stronger, longer-lasting definition.
- Scrunch the hair and remove excess water with a T-shirt.
- Air-dry or diffuse on low heat and low airflow.
- Do not touch the hair until it is dry.
- Scrunch out any cast and protect the curls overnight.
Test the routine for several wash days before replacing every product. Humidity, application technique, water hardness, haircut, and the amount of water in your hair can affect the result as much as the label on the bottle.
Experiences and Lessons From the Natural-Curl Process
Most successful curl routines are developed through experimentation rather than one spectacular wash day. A common early experience is discovering that hair previously described as “puffy” was actually wavy or curly hair being brushed after it dried. When that same hair is conditioned, styled wet, scrunched, and left alone, small S-waves often begin appearing around the ears and underneath the top layer.
Another frequent lesson is that more product does not necessarily create more curl. Someone with fine, shoulder-length waves may begin with leave-in conditioner, curl cream, mousse, oil, and gel because an online routine recommended all five. The result can be flat roots and damp-looking ends that take half a business day to dry. After simplifying the routine to mousse and a small amount of gel, the waves may become lighter, springier, and more durable.
People with thick curls often encounter the opposite problem. Applying one small dollop of product over the entire head can leave the top smooth while the hidden sections remain dry and undefined. Dividing the hair into four or six sections usually improves coverage. Adding water during application can help the product spread without requiring an excessive amount.
Diffusing also involves a learning curve. The first attempt sometimes includes high heat, maximum airflow, and vigorous movementessentially using the diffuser like a leaf blower. The hair dries quickly, but the curl clumps separate into a cloud. On the next attempt, hovering at the roots, using lower airflow, and waiting until the hair is partly dry before lifting the curls can produce dramatically better definition.
Gel is another source of unnecessary alarm. A beginner may feel the hard cast and assume the routine has failed. Scrunching dry curls for a minute or two can transform that rigid shell into soft, defined spirals. This small step often becomes the moment when gel changes from “absolutely not” to “where have you been all my life?”
Weather teaches its own lessons. A routine that creates flawless curls during a dry winter may behave differently in humid summer air. Stronger hold, smaller product amounts, or a different balance of humectants and sealing ingredients may be useful. The goal is not to eliminate every halo of frizz. Natural curls move, expand, and respond to the environment. A little frizz can create volume and character.
Many people also notice that their pattern improves gradually after reducing frequent straightening. Heat-damaged ends may remain stretched even when new growth forms tight curls. Regular trims can slowly remove those straighter sections. The transition requires patience because no mask can permanently repair a severely altered hair fiber, despite what an extremely persuasive product label may suggest.
The most valuable experience is learning to evaluate results instead of copying routines exactly. If hair feels coated, use less product or clarify. If it feels rough, increase conditioning or reduce heat. If curls are soft but disappear quickly, add hold. If they are defined but flat, use lighter products and style away from the scalp. Your hair provides feedback after every wash day; the trick is listening without buying six new bottles each time it has an opinion.
Conclusion
To bring out the natural curl in your hair, focus on moisture, gentle detangling, wet styling, appropriate product weight, low-friction drying, and protection between washes. Avoid treating every curl type the same, and change only one or two parts of your routine at a time so you can identify what actually works.
Healthy curls do not have to be perfectly uniform or completely free of frizz. A successful routine is one that keeps your scalp comfortable, reduces unnecessary damage, fits your schedule, and helps your natural texture look lively rather than exhausted.