
A fireplace mantel can make a room look finished, polished, and just a little smug about its own good taste. It frames the fireplace, gives you a place for decor, and turns a blank wall into a focal point. But installing one is not just a “hold it up and hope for the best” kind of weekend project. A good fireplace mantel installation needs careful measuring, solid support, proper leveling, andmost importantlysafe clearance from heat.
This guide walks you through how to install a fireplace mantel in 14 practical steps. It covers the planning, measuring, anchoring, test-fitting, and finishing work that separates a secure mantel from a future regret. Whether you are working with a floating wood shelf mantel, a more traditional surround, or a mantel over masonry, the overall process is similar: plan first, mount second, admire dramatically after.
One important note before we grab the drill: not every fireplace follows the same rules. A masonry fireplace, a factory-built gas unit, and an electric fireplace can all have different clearance requirements. That means the smartest DIY move is to check your fireplace manual, manufacturer requirements, and local code before you commit to height, depth, or materials.
What You Need Before Installing a Fireplace Mantel
Most fireplace mantel installations go more smoothly when you have the basics ready from the start. Depending on your mantel style and wall type, you may need:
- Tape measure
- Stud finder
- Level or laser level
- Pencil
- Drill and driver bits
- Pilot bit or masonry bit
- Lag screws or manufacturer-supplied fasteners
- Wall cleat or mounting bracket
- Shims
- Wood filler
- Paintable caulk
- Safety glasses
- A helper, because mantels are heavy and gravity is rude
How to Install a Fireplace Mantel: 14 Steps
Step 1: Identify Your Fireplace Type Before You Do Anything Else
Start by figuring out whether you have a masonry fireplace, a factory-built gas or wood-burning unit, or an electric fireplace. This matters because clearance requirements and installation limits can vary a lot. A wood mantel above a working fireplace has to respect heat safety rules, while an electric fireplace may allow more flexibility depending on the unit.
If you already have a fireplace insert or a factory-built firebox, pull out the installation manual. It may specify exactly how close a combustible mantel can be installed above the opening. Do not assume that one internet diagram fits every firebox. Fireplaces are like toddlers: they all have rules, and they get dramatic when ignored.
Step 2: Confirm Mantel Clearance and Local Code Requirements
Before you pick a height, confirm the clearance rules for your setup. Many masonry fireplace rules require combustible trim and mantels to stay out of the hottest zone near the firebox opening. In practical terms, deeper mantels usually need more vertical clearance. Factory-built fireplaces can have reduced clearances only when their testing and manufacturer instructions specifically allow it.
This step is not glamorous, but it is the one that keeps your stylish new shelf from becoming a very expensive lesson in heat damage. When in doubt, ask your local building department or a certified fireplace professional.
Step 3: Measure the Fireplace Opening and Surrounding Wall
Measure the width and height of the fireplace opening, then measure the wall space above and around it. Also note tile, stone, trim, or uneven surfaces that could affect how the mantel sits. If your fireplace has an existing surround or raised hearth, measure those too.
These dimensions help you choose a mantel that looks proportionate. In many rooms, a mantel that extends a few inches beyond the opening on each side looks balanced without feeling oversized. Depth matters too. A shelf that is too shallow can look skimpy, while one that sticks out too far may create clearance or traffic problems.
Step 4: Choose the Right Mantel Size, Style, and Mounting Method
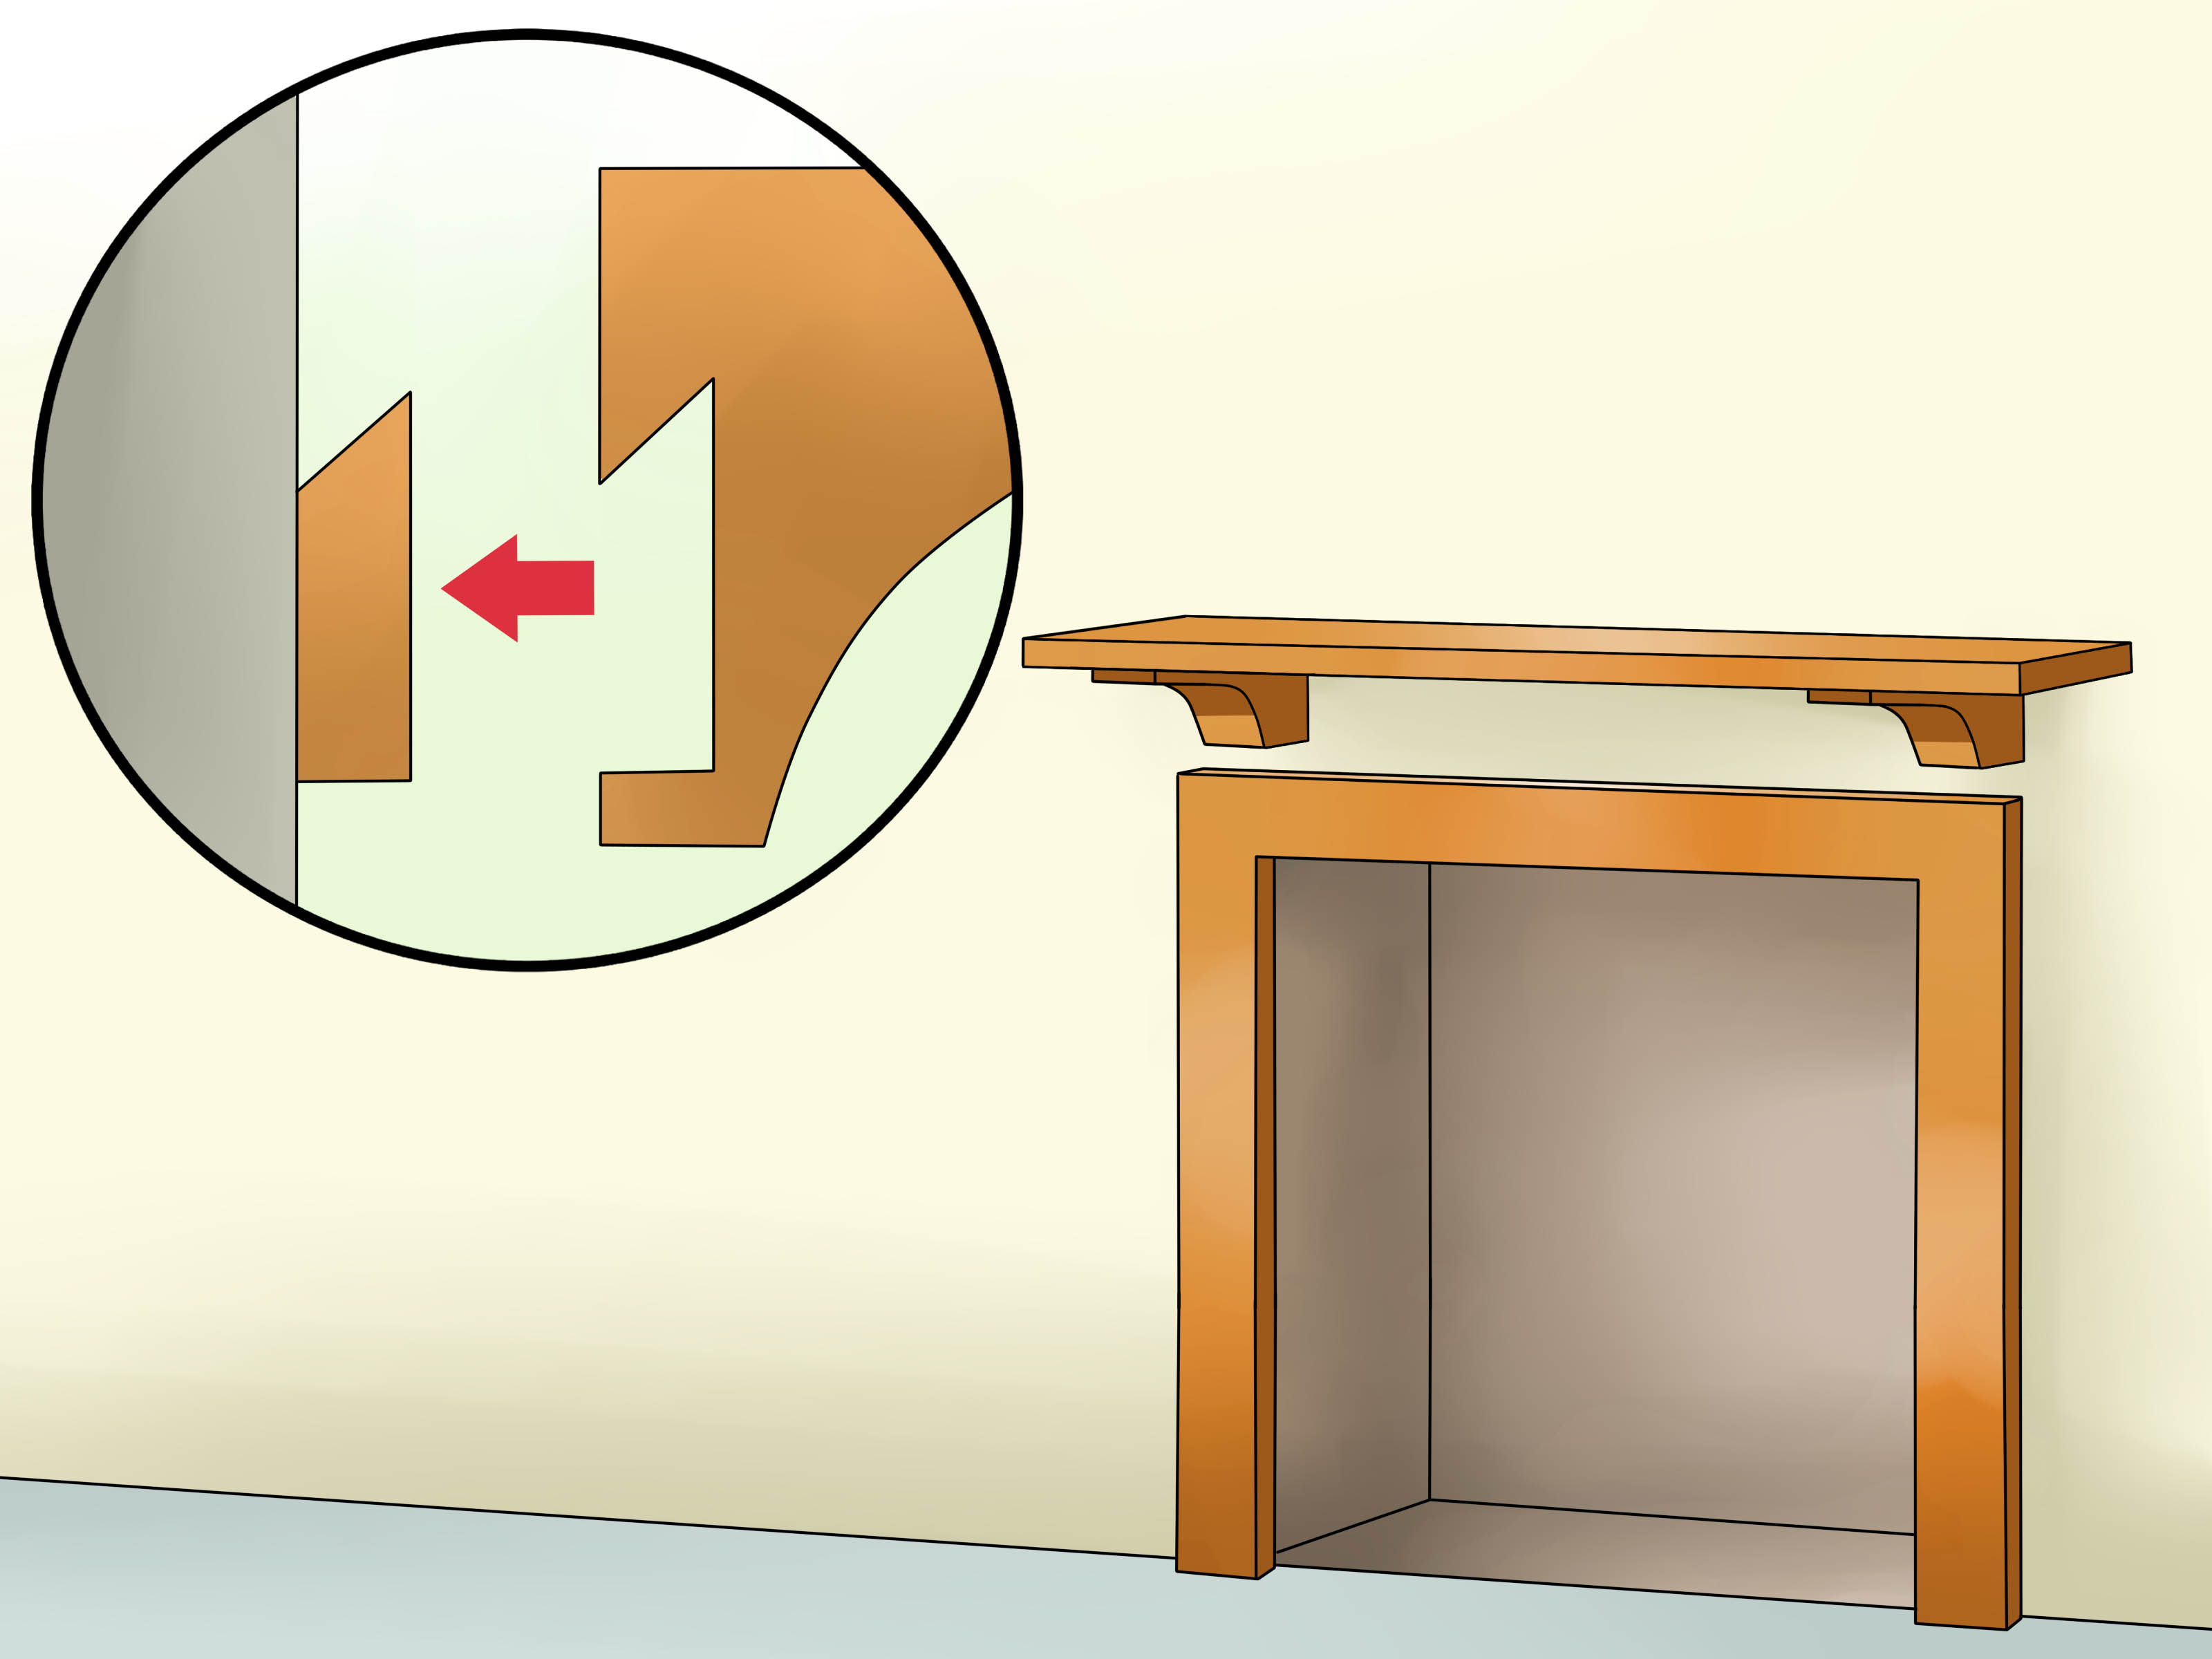
Now decide whether you are installing a floating shelf mantel, a full mantel surround, or a decorative beam-style mantel. Floating mantels usually mount with a hidden cleat, rod system, or backplate. Traditional surrounds may assemble in pieces before installation and then fasten to cleats at the wall.
Think about both style and structure. A chunky reclaimed-look beam may be perfect in a rustic room, while a crisp painted shelf suits a more classic or modern space. Just make sure the mounting method matches your wall type. Drywall over wood studs, brick, and stone each require different fastening strategies.
Step 5: Let the Mantel Acclimate and Finish It Before Final Installation
If your mantel is real wood, let it acclimate indoors before installation, especially in very humid or very dry conditions. This reduces the chance of movement after mounting. It is also smart to sand, prime, stain, or seal most of the piece before it goes on the wall.
Why now? Because finishing a mantel on a sawhorse is easier than trying to stain a horizontal shelf while standing on a ladder and questioning all your life choices. You can usually save the final touch-up coat for after installation, but the messy prep work is much easier beforehand.
Step 6: Mark the Fireplace Centerline
Find the exact center of the fireplace opening and transfer that centerline to the wall above it. This line becomes your reference point for the entire installation. If the mantel is off-center even slightly, your eye will notice it every single time you walk into the room.
Use a pencil so you can adjust the marks easily later. If you are installing a wide shelf, also mark the overall width to preview where the ends will land. This helps you check that the mantel clears tile edges, trim, stone returns, and adjacent decor features.
Step 7: Mark the Finished Height and Draw a Level Reference Line
Once you know your required clearances, mark the finished height of the mantel or the bracket line. Use a level or laser level to draw a straight reference line across the wall. This is where your cleat, bracket, or top-of-mantel measurement will be aligned.
Take a minute to step back and look at it from several angles. Does the height feel visually balanced in the room? Does it leave enough breathing room above the firebox? Is it going to look good with artwork, a mirror, or holiday decorations? This is the easiest point in the project to change your mind, so use it.
Step 8: Locate Studs or Solid Masonry Anchor Points
Use a stud finder to locate studs across the mantel width and mark the center of each one. For longer mantels, hitting at least two studs is usually the goal, and more is even better. If your fireplace wall is brick or stone, identify solid anchor locations and plan for appropriate masonry fasteners.
Do not rely on random drywall anchors for a heavy mantel unless the manufacturer specifically allows that method for the weight involved. A mantel is not a lightweight picture frame. It may carry decor, seasonal items, or accidental leaning from every person who says, “Wow, this looks great.” Build for real life.
Step 9: Dry-Fit or Assemble the Mantel First
If your mantel comes in multiple pieces, assemble it on a protected surface before installation. Many surrounds use dowels, cams, or hidden connectors for the legs and shelf. If you are installing a floating mantel, do a dry-fit check at the wall before fastening anything permanently.
Have a helper hold the mantel in place while you check centering and level. Use a standard level across the shelf and, if needed, a smaller level front to back. Lightly trace the outline or key edges on the wall. Those pencil marks make bracket placement much easier in the next steps.
Step 10: Position the Cleat or Mounting Bracket on the Wall
Hold the wall cleat, bracket, or backplate on the reference line and align it with your stud marks or masonry layout. Check for level again before marking the fastener locations. If your mantel uses a hidden cleat system, precise placement here is what makes the final installation look tight and professional.
On uneven stone or textured surfaces, take extra time. A bracket may be perfectly level while the wall behind it is not perfectly flat. That is normal. The trick is to mount the support correctly first, then solve minor gaps later with shims or finish work.
Step 11: Pre-Drill Pilot Holes
Pre-drill pilot holes into studs if you are fastening to a framed wall. If you are drilling into brick or stone, use the proper masonry bit and drill depth recommended for your anchors. Pilot holes reduce the chance of splitting wood, help screws drive straighter, and make the whole process feel much less like a wrestling match.
Wear safety glasses here. It is hard to look cool while blinking sawdust out of your eyes. Actually, it is hard to look cool during any part of a dusty DIY project, but safety still wins.
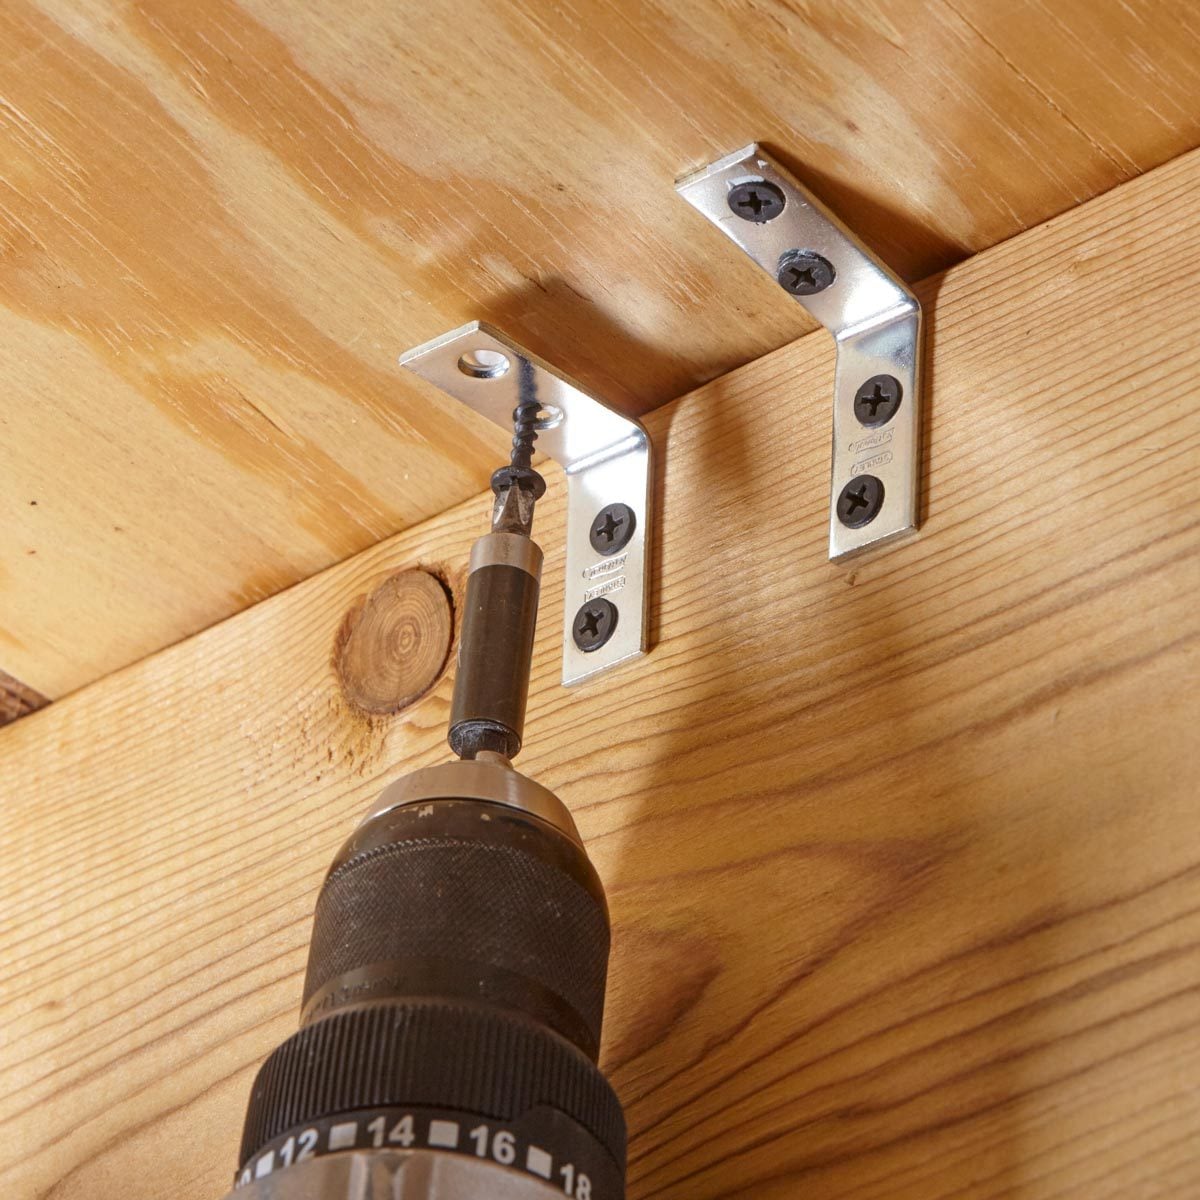
Step 12: Fasten the Cleat or Bracket Securely
Drive the supplied screws or lag bolts through the cleat into the studs, or use the correct masonry anchors for brick and stone. Tighten the fasteners firmly, but do not overtighten so much that you strip the stud, crush drywall, or distort the bracket.
Once the bracket is mounted, check level again. This is a tiny pause that can save you from a lot of frustration later. A mantel installed on a crooked cleat will stay crooked no matter how inspirational your attitude is.
Step 13: Test Fit the Mantel and Shim Where Needed
With help, slide or place the mantel onto the bracket or cleat. Check that it seats fully against the wall, sits level, and does not wobble. On stone, brick, or older walls, small gaps are common. Use shims at the contact points if needed, then re-seat the mantel and check again.
This is also the moment to make sure the piece is visually centered and that the reveal around the fireplace looks intentional. A mantel can be structurally secure but still look awkward if it sits a little too high on one side or leaves an odd gap on the other.
Step 14: Lock the Mantel in Place and Finish the Touch-Ups
Once the mantel fits properly, install the locking screws, set screws, or hidden fasteners required by the mounting system. The goal is to prevent the mantel from lifting, sliding, or shifting over time. Some floating mantels secure from below, others from the back or top, depending on the design.
Finish by filling visible fastener holes with wood filler, touching up paint or stain, and adding a thin bead of paintable caulk where appropriate. If the mantel is painted, this final step makes the installation look built-in instead of merely attached. Then stand back and enjoy the fact that your fireplace now looks like it has opinions about interior design.
Common Fireplace Mantel Installation Mistakes to Avoid
Even a simple mantel installation can go sideways when small details get skipped. These are the big mistakes to avoid:
- Ignoring fireplace clearance rules: Always verify the required distance from the firebox opening.
- Missing the studs: A heavy mantel needs solid support, not wishful thinking.
- Skipping the level checks: Check before drilling, after mounting the bracket, and after test-fitting the mantel.
- Using the wrong anchors in masonry: Brick and stone are not drywall with better PR.
- Installing unfinished wood too soon: Acclimation and pre-finishing help reduce surprises later.
- Forgetting wall irregularities: Uneven stone, tile, or plaster often requires shimming.
Final Thoughts on How to Install a Fireplace Mantel
Installing a fireplace mantel is one of those home projects that looks decorative but depends on very practical work behind the scenes. Measure carefully, respect heat clearance rules, anchor into solid structure, and do not rush the fitting process. The best mantel installations look effortless only because the prep work was not.
Done right, a fireplace mantel adds style, storage space for decor, and a finished architectural detail that makes the whole room feel more intentional. It is a project that rewards patience, precision, and the occasional willingness to redo one crooked pencil mark before it becomes a crooked shelf.
Real-World Experience: What Installing a Fireplace Mantel Actually Feels Like
If you have never installed a fireplace mantel before, the process can feel weirdly simple on paper and surprisingly fussy in real life. Measuring, marking, drilling, hanginghow hard could it be? Then you hold the mantel against the wall for the first time and discover that your “straight” fireplace is not exactly straight, your stone surround is not exactly flat, and your perfect plan suddenly needs a helper, three shims, and a calmer personality.
One of the biggest lessons people learn during a fireplace mantel installation is that visual balance matters just as much as raw measurements. A mantel can be technically centered and still look off if the hearth is slightly uneven, the tile layout is asymmetrical, or the firebox opening is not perfectly square. That is why experienced DIYers do a dry-fit before drilling into anything. Seeing the mantel on the wall, even temporarily, gives you a chance to spot issues your tape measure politely kept to itself.
Another common experience is realizing how important the mounting system really is. Many first-time installers spend most of their energy picking the wood finish, profile, and style, then treat the cleat or bracket like a boring side character. In reality, the hidden hardware is the hero of the story. When the cleat is level, firmly anchored, and properly aligned with studs or masonry fasteners, the rest of the installation becomes dramatically easier. When it is off by even a little, the mantel reminds you of that mistake forever.
People also tend to underestimate how helpful a second person is. Mantels are awkward more than they are impossible. Even lighter floating shelves can be tough to position while checking level and keeping the finish protected. A helper lets you focus on alignment instead of trying to hold a long beam-style shelf with one hand while reaching for a level with the other like some sort of home improvement octopus.
Then there is the finish work, which often ends up being the difference between “nice DIY project” and “wait, was this always here?” Tiny details like caulking a hairline gap, filling a fastener hole, or touching up a scuffed corner can completely change the final look. This is especially true over brick or stone fireplaces, where the wall surface rarely gives you an easy, flush fit. Pros expect a little finesse at the end. That is not failure. That is the job.
Perhaps the most useful real-world takeaway is this: installing a fireplace mantel is less about speed and more about sequence. When you follow the ordercheck clearance, measure carefully, mark center, find studs, mount the cleat, test fit, then lock it in placethe project feels manageable. Skip around, rush the layout, or improvise the fasteners, and the project gets expensive in a hurry. The good news is that a well-installed mantel pays you back every day. It becomes the visual anchor of the room, the place for candles, art, holiday garlands, and all the small things that make a house feel lived in. Not bad for a shelf with main-character energy.
SEO Tags