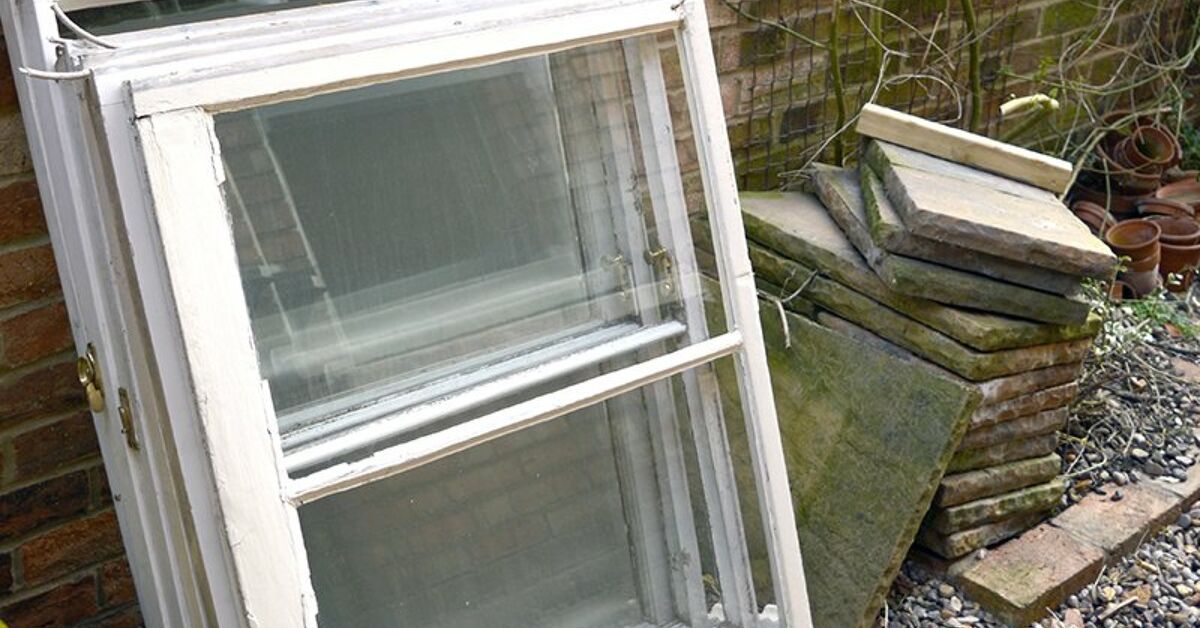

Some DIY projects whisper, “I’m practical.” Others shout, “Look at me, I rescued an old window and now I smell like basil!” An upcycled window herb planter DIY does both. It turns a forgotten window frame, a scrap of wood, and a few cheerful herbs into a charming mini garden that looks like it wandered out of a farmhouse kitchen and decided to become useful.
This project is perfect for small spaces, patios, balconies, porches, sunny kitchen walls, and anyone who likes the idea of clipping fresh parsley without making a dramatic trip to the grocery store. Even better, it gives old materials a second life. Instead of sending a worn-out window frame to the landfill, you turn it into a decorative herb planter with personality, function, and just enough rustic character to make guests ask, “Wait, did you make that?”
Below, you’ll learn how to choose the right window, build a sturdy planter box, prepare it for herbs, and keep your plants thriving. You do not need to be a professional carpenter. You do need basic tools, patience, and the emotional strength to accept that soil will somehow end up on your shoes.
What Is an Upcycled Window Herb Planter?
An upcycled window herb planter is a garden container made by reusing an old window frame as the decorative backing or structure for a planter box. The window becomes the visual centerpiece, while the box holds soil and herbs such as basil, thyme, rosemary, parsley, chives, oregano, mint, or sage.
The finished piece can lean against a wall, hang on a fence, sit on a porch, or mount beneath a sunny window. Depending on your design, it can look rustic, cottage-style, modern farmhouse, vintage, coastal, or delightfully “I found this behind the garage and made it fabulous.”
Why Make a DIY Window Herb Planter?
There are plenty of store-bought herb planters out there, but an upcycled version offers something new plastic planters rarely provide: character. Old windows have texture, history, chipped edges, interesting muntins, and that slightly imperfect charm that makes a garden feel lived-in rather than assembled from aisle seven.
It Saves Money
You can often find old windows at salvage yards, flea markets, Habitat-style resale shops, renovation leftovers, or even your own storage shed. Scrap wood can become the planter box, and small herb starts are usually inexpensive. The result looks custom without requiring a custom-budget panic attack.
It Reduces Waste
Upcycling gives materials another purpose. A window that no longer works for a house can still work beautifully as a garden feature. Reusing existing materials also reduces the need to buy everything new, which makes this project eco-friendly as well as wallet-friendly.
It Makes Fresh Herbs Easy to Reach
A window herb planter keeps culinary herbs close to your cooking area. Place it near a kitchen door, patio table, or sunny porch, and you can snip a handful of basil for pasta, chives for eggs, or mint for lemonade without conducting a full backyard expedition.
Safety First: Check the Old Window Before You Start
Before you fall in love with a weathered window frame, inspect it carefully. Older painted windows may contain lead-based paint, especially if they came from homes built before 1978. If the paint is peeling, powdery, or flaking, do not sand it casually. Lead dust is not a “rustic finish.” It is a health hazard.
Use a lead test kit if you are unsure, or choose an unfinished, newer, or professionally stripped frame. For a planter used around food herbs, safety matters. If the window has questionable paint, seal it properly or skip it and find a safer piece. Your basil deserves drama-free surroundings.
Best Herbs for a Window Planter
Most herbs prefer bright light and well-drained soil. A sunny spot with at least six hours of light is ideal for many favorites, especially Mediterranean herbs. If your space gets less light, choose herbs that tolerate partial shade better.
Great Herbs for Sunny Window Planters
Basil loves warmth and bright light. It is perfect for pesto, salads, sandwiches, and tomato dishes. Rosemary prefers drier soil and adds structure to the planter. Thyme stays compact, smells wonderful, and handles containers well. Oregano is hardy, flavorful, and useful in sauces, roasted vegetables, and marinades. Sage has soft leaves and a bold flavor that works beautifully with roasted dishes.
Herbs for Slightly Less Sun
Parsley, chives, mint, and cilantro can handle a little less direct sun than basil or rosemary. Mint is vigorous, which is a polite gardening way of saying it may try to take over the neighborhood. Keep mint in its own small pot inside the planter if you want peace.
Materials You Will Need
- One old window frame, cleaned and inspected
- Wood boards for the planter box, such as cedar, pine, or reclaimed lumber
- Exterior screws or nails
- Wood glue suitable for outdoor use
- Drill and drill bits
- Saw, or pre-cut boards from a hardware store
- Sandpaper or sanding block
- Non-toxic exterior paint, stain, or clear sealer
- Landscape fabric or a breathable liner
- Potting mix, not heavy garden soil
- Herb seedlings or seeds
- Optional: hooks, brackets, chain, chalkboard labels, or small plant markers
Step-by-Step: How to Make an Upcycled Window Herb Planter DIY
Step 1: Clean and Inspect the Window Frame
Remove dirt, cobwebs, loose hardware, and old caulk. If the window has glass panes, decide whether to keep or remove them. Keeping glass can create a decorative greenhouse-style look, but it adds weight and can break. Removing the glass makes the planter lighter and safer, especially outdoors or around kids and pets.
If you keep the glass, clean it well and make sure it is secure. If you remove it, wear gloves and eye protection. Old glass has a way of reminding you that DIY is fun but not invincible.
Step 2: Measure the Width of the Window
Measure the bottom edge of the window frame. Your planter box should match this width or be slightly narrower. A common depth for a herb planter is about 6 to 8 inches, which gives many herbs enough room without making the structure too heavy.
If you plan to grow larger herbs like rosemary or dill, go deeper. If you are making a compact kitchen-style herb display, a shallower box may work for chives, thyme, and parsley.
Step 3: Build the Planter Box
Cut one front board, one back board, two side boards, and one bottom board. Dry-fit the pieces before fastening them. Apply outdoor wood glue along the edges, then attach the boards with exterior screws. Screws are usually better than nails for this project because they create a stronger hold.
The box does not need to be fancy. It needs to be square, stable, and capable of holding soil without sighing dramatically and falling apart. If your reclaimed boards are slightly imperfect, that can add charm. If they are wildly warped, save them for a different project, perhaps abstract garden sculpture.
Step 4: Drill Drainage Holes
Drainage is not optional. Herbs dislike sitting in soggy soil, and waterlogged roots can lead to weak growth or rot. Drill several holes along the bottom of the planter box. If the planter will sit against a house wall, angle or position the drainage holes so water drains away from siding.
You can also add small feet or spacers underneath the planter box to improve airflow and prevent the bottom from staying wet. This tiny detail can help the wood last longer.
Step 5: Sand and Seal the Wood
Sand rough edges, splinters, and sharp corners. Then seal the wood with an exterior-grade, non-toxic finish. If the planter will hold edible herbs, choose products labeled safe for garden use once cured. You can paint the outside for style, but avoid coating the inside with anything questionable that may contact soil.
For a rustic look, use a clear matte sealer. For cottage charm, paint the frame white, sage green, dusty blue, or soft black. For a bolder design, paint the planter box and leave the old window frame weathered. Contrast is your friend. So is not accidentally painting your driveway.
Step 6: Attach the Planter Box to the Window
Place the planter box along the lower part of the window frame. Drill pilot holes first to prevent splitting, then screw the box into the frame from the back or through the inside of the box. Use sturdy fasteners because wet soil is heavier than it looks.
If the window frame is thin or fragile, add a support board across the back. This distributes weight and gives the screws something stronger to grip. Do not rely on delicate old trim to hold a loaded planter. Vintage charm is lovely; gravity is undefeated.
Step 7: Add a Liner
Line the bottom of the planter with landscape fabric. This keeps soil from escaping through drainage holes while still allowing water to move through. Avoid sealing the bottom completely with plastic unless you add drainage openings. A planter without drainage is basically a tiny swamp with branding.
Step 8: Fill with Potting Mix
Use a quality potting mix designed for containers. Garden soil can become compacted in a planter, making it harder for roots to breathe and water to drain. For Mediterranean herbs such as rosemary, thyme, oregano, and sage, choose a fast-draining mix or add perlite for extra drainage. For parsley, chives, and mint, a standard moisture-retentive potting mix works well.
Step 9: Plant Your Herbs
Arrange herbs before planting. Place taller herbs toward the back and trailing or compact herbs toward the front. Rosemary, sage, or dill can act as upright accents. Thyme can soften the front edge. Chives add height without bulk. Parsley fills gaps nicely, like the helpful friend who always brings snacks.
Gently remove seedlings from their nursery pots, loosen tight roots, and plant them at the same depth they were growing before. Firm the soil around each plant and water thoroughly until water drains from the bottom.
Step 10: Add Labels and Finishing Touches
Add plant markers, small chalkboard tags, stamped spoons, or painted wooden labels. Labels are especially useful if you are growing herbs that look similar when young. No one wants to discover they used oregano instead of thyme only after the soup has developed a personality disorder.
Where to Place Your Upcycled Window Herb Planter
Choose a location with enough light for the herbs you planted. A south-facing or west-facing area often works well for sun-loving herbs. If your planter is indoors, place it near the brightest window available. If light is limited, consider a small grow light.
Outdoors, make sure the planter is protected from extreme wind. If you hang it on a wall or fence, use strong brackets rated for the full weight of wet soil, plants, and the window frame. When in doubt, overbuild the support. Plants are cute, but a falling planter is not a charming surprise.
Watering and Care Tips
Water when the top inch of soil feels dry. Herbs in containers dry out faster than herbs planted in the ground, especially during hot weather. However, do not water on autopilot. Check the soil first. Basil may want more consistent moisture, while rosemary and thyme prefer to dry slightly between waterings.
Fertilize lightly. Many herbs produce the best flavor when they are not overfed. Too much fertilizer can encourage leafy growth with weaker flavor. Trim herbs regularly to keep them bushy and productive. Pinch basil above a set of leaves to encourage branching. Cut chives near the base. Harvest thyme and oregano by snipping stems, not yanking at them like you are starting a lawn mower.
Design Ideas for Different Styles
Farmhouse Herb Planter
Use a whitewashed window frame, natural wood planter box, and black metal hooks. Add basil, rosemary, thyme, and parsley for a classic kitchen garden look. Finish with handwritten labels for that “fresh biscuits may happen here” energy.
Modern Rustic Planter
Paint the frame matte black and use clean cedar boards for the planter box. Keep the herb selection simple: rosemary, thyme, sage, and oregano. This design works beautifully on patios with neutral furniture and minimalist decor.
Cottage Garden Planter
Choose a pastel window frame, add trailing thyme, chives, parsley, and edible flowers such as nasturtiums if the planter gets enough light. The result feels cheerful, romantic, and slightly like it belongs beside a teapot.
Apartment Balcony Herb Planter
Use a smaller window frame and lightweight wood. Add compact herbs and mount the planter securely to a balcony wall or railing with proper hardware. Keep mint in a separate pot to control its growth.
Common Mistakes to Avoid
The biggest mistake is skipping drainage. The second biggest is using unsafe old paint. The third is planting herbs with very different water needs in the same cramped box. Rosemary and mint, for example, are not ideal roommates. Rosemary likes things drier; mint enjoys moisture and world domination.
Another mistake is overcrowding. Tiny herb starts look innocent at first, but they grow. Leave space between plants so air can circulate. Good airflow helps reduce disease problems and keeps the planter easier to maintain.
Extra Experience: Lessons from Making an Upcycled Window Herb Planter DIY
The first thing you learn while making an upcycled window herb planter is that old windows are rarely as square as they look. They lean, bow, wobble, and occasionally behave like they have opinions. That is part of the charm, but it also means measuring twice is not enough. Measure twice, dry-fit once, stare at it suspiciously, and then drill.
One practical experience is to build the planter box slightly stronger than you think necessary. Dry potting mix feels light, but after watering, the box becomes much heavier. Add herbs, wet soil, and the frame itself, and suddenly your adorable planter has the mass of a small appliance. Use exterior screws, pilot holes, and a support board if needed. A little extra structure prevents future heartbreak and emergency sweeping.
Another useful lesson is to test the planter’s placement before filling it. Hold the empty frame and box where you plan to display it. Check sunlight, height, watering access, and whether you can comfortably harvest herbs. A planter mounted too high may look beautiful, but if you need a ladder every time you want basil, the project has become less “kitchen garden” and more “culinary obstacle course.”
Drainage is also something you appreciate more after the first rainstorm. If the planter sits outdoors, water needs a clear escape route. Drill enough holes and avoid blocking them with fabric, rocks, or compacted soil. After the first watering, watch where the water drains. If it runs down a wall, onto a seating area, or directly into your shoes, adjust the setup before calling the project finished.
Herb choice matters more than color coordination. It is tempting to choose herbs based only on how pretty they look together, but plant needs should lead the design. Rosemary, thyme, oregano, and sage make a great group because they all appreciate good drainage and brighter conditions. Parsley, chives, and mint can work well together if you keep the soil a bit more evenly moist. Basil often does best when it gets warmth, sun, and regular harvesting.
The best part of this DIY project is how quickly it becomes part of daily life. Once the herbs settle in, you start using them casually. A little thyme goes into roasted potatoes. Chives land on scrambled eggs. Basil makes even a basic sandwich feel like it has hired a stylist. The planter stops being just decor and becomes a tiny, useful garden that rewards you for remembering to water it.
There is also creative freedom in every version. Some windows look best with chipped paint sealed under a clear coat. Others need a bold new color. Some planters look great with metal handles, hooks for garden scissors, or a small chalkboard panel. You can add a narrow shelf above the planter for seed packets or a small watering can. You can hang it vertically, lean it casually, or mount it like a living piece of wall art.
Most importantly, do not chase perfection. Upcycled projects shine because they keep a little history. A nick in the frame, a patched screw hole, or uneven weathering tells the story. The goal is not to make an old window look factory-new. The goal is to make it useful, safe, sturdy, and beautiful in a way only reused materials can be.
Conclusion
Learning how to make an upcycled window herb planter DIY is a rewarding way to combine gardening, sustainability, and home decor in one practical project. With an old window frame, a simple wooden planter box, proper drainage, safe finishes, and the right herbs, you can create a charming mini garden that looks custom and works hard.
Whether you place it on a porch, balcony, patio, fence, or sunny kitchen wall, this planter brings fresh flavor within reach and gives forgotten materials a second act. It is budget-friendly, beginner-friendly, and full of personality. Plus, every time you snip fresh herbs for dinner, you get to feel just a little smugin the wholesome, pesto-scented way.