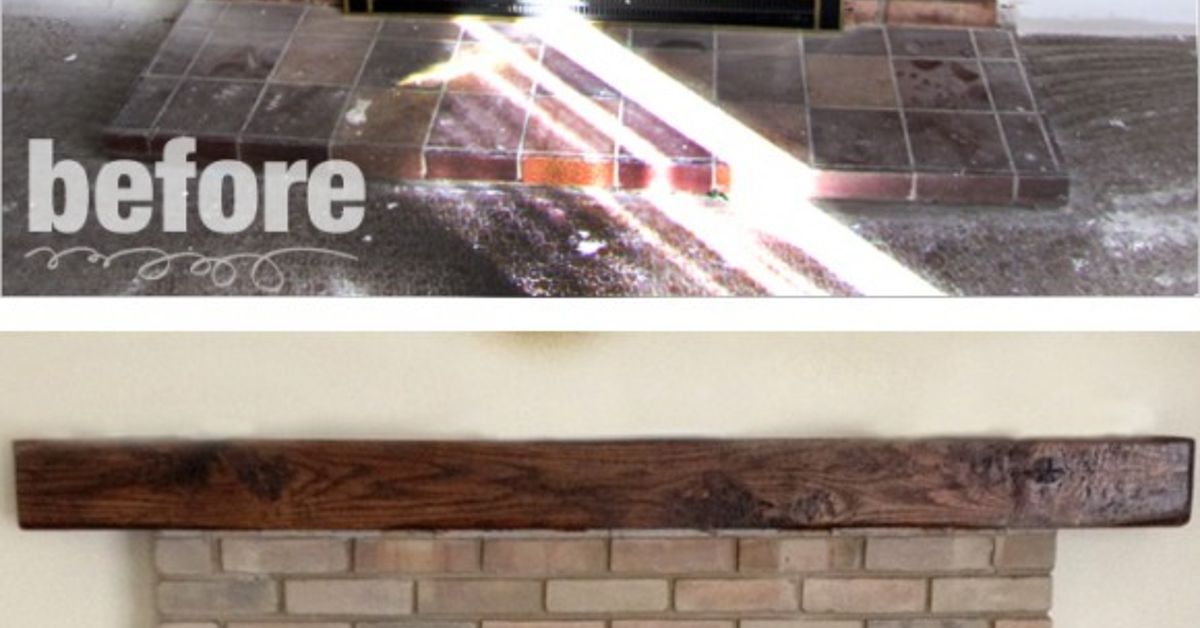

A fireplace remodel can change a room faster than almost any other weekend project. One minute your living room is giving “1978 basement rec room,” and the next it looks like a designer casually wandered in with a latte and a perfect neutral paint swatch. The magic often comes down to two simple tools: paint and stain.
Whether you have a red brick fireplace, a tired wood mantel, a soot-stained surround, or a hearth that looks like it has survived three generations of holiday chaos, a smart paint-and-stain plan can refresh the whole space without tearing out masonry or draining your renovation budget. The key word is “smart.” Fireplaces deal with heat, soot, texture, old finishes, porous brick, and sometimes mystery stains that appear to have been created by a tiny chimney goblin. Good prep matters.
This guide walks through how to remodel a fireplace using paint, stain, whitewash, limewash-inspired finishes, and wood refinishing techniques. You will learn what to paint, what to stain, what to leave alone, and how to make the finished fireplace look intentional instead of “we panicked on a Saturday.”
Why Paint and Stain Are So Popular in Fireplace Remodels
Paint and stain are popular because they offer dramatic visual change without requiring a full demolition. A full fireplace replacement may involve masonry work, carpentry, tile installation, venting questions, and plenty of dust. Painting or staining, by comparison, can often be done with basic tools, careful cleaning, and patience.
Paint gives the most complete transformation. It can cover dated brick, unify mismatched surfaces, make a dark fireplace feel lighter, or create a bold focal point with charcoal, black, navy, cream, or warm gray. Stain is more subtle. Instead of hiding the material, it changes the tone while allowing some of the natural texture to remain visible. For brick, masonry stain can preserve a more organic look. For a wood mantel, stain can highlight the grain and add warmth.
The best fireplace remodels usually combine both. For example, you might paint red brick a soft warm white, stain the mantel in a medium walnut tone, and use matte black paint on the fireplace screen. That mix of finishes gives the room depth, which is designer-speak for “not everything looks like it came from the same can.”
Before You Start: Know Your Fireplace Surface
Not every fireplace surface behaves the same. Brick, stone, tile, wood, metal, and the firebox all require different products and preparation. The biggest mistake homeowners make is treating the entire fireplace as one giant wall. It is not. It is a collection of materials that happen to gather around fire, which is exactly as dramatic as it sounds.
Brick Fireplace
Brick is porous, textured, and absorbent. It can hold soot, dust, moisture, and mineral deposits. Paint can look beautiful on brick, but it is also a long-term decision because removing paint from brick is difficult. If you love the natural texture, consider whitewash, limewash-style products, or masonry stain instead of solid paint.
Stone Fireplace
Natural stone can be tricky because each stone type absorbs coatings differently. Some stones look great with a diluted wash, while others become blotchy. Always test in a hidden spot. If the stone is valuable, historic, or especially porous, consider speaking with a masonry professional before painting it.
Wood Mantel and Surround
Wood is the easiest part of many fireplace remodels to stain or paint. A mantel can be sanded, cleaned, conditioned, stained, sealed, or painted like other interior trim. The important detail is distance from heat. If the mantel is too close to the firebox opening, check local codes and clearance requirements before adding new material or finishes.
Tile Surround
Tile can be painted, but it requires a bonding primer designed for slick surfaces. Glossy tile is not impressed by ordinary wall paint. It will reject it like a cat rejecting off-brand food. Clean, scuff, prime, and use a durable enamel or specialty coating if you want the finish to last.
Firebox
The firebox is the interior area where the fire burns. Do not use regular interior paint here. Many high-heat paints are made for metal fireplace screens, stoves, grills, or exterior surfaces exposed to heat, but some are not intended for direct flame contact. Read the product label carefully. If the firebox is damaged, cracked, or crumbling, repair it with proper refractory materials before thinking about cosmetics.
Step 1: Clean Like the Finish Depends on It
Because it does. Fireplace surfaces collect soot, ash, dust, smoke residue, and sometimes greasy film from years of indoor life. Paint and stain cannot bond well to grime. If you paint over soot, the soot may bleed through and make your fresh finish look like it has a five o’clock shadow.
Start by removing loose debris with a stiff brush and vacuum. Use a shop vacuum if you have one. Protect floors with drop cloths and tape off nearby walls, trim, built-ins, and flooring. For brick or masonry, scrub the surface with warm water and a suitable cleaner. Many DIY guides recommend a degreasing cleaner or TSP substitute for heavy soot, followed by a clean-water rinse. Let the surface dry completely before priming, painting, or staining.
Drying is not optional. Brick can hold moisture inside its pores, and trapped moisture is one reason coatings fail. Give masonry plenty of time to dry, especially if you scrubbed deeply. If the fireplace has active leaks, dampness, white powdery efflorescence, or recurring stains, solve the moisture issue first. Paint is not a tiny waterproof superhero cape.
Step 2: Decide Between Paint, Stain, Whitewash, and Limewash
Your finish choice should match both your design goal and the condition of the fireplace. Here is the practical difference.
Paint for Full Coverage
Paint is best when you want a clean, opaque finish. It covers strong brick colors, hides inconsistent tones, and can make the fireplace blend into the wall or stand out as a dramatic feature. For brick, use a masonry-compatible primer and a high-quality acrylic latex paint or masonry paint. A roller with a thicker nap helps reach textured brick faces, while a brush works paint into mortar lines.
Stain for Natural Texture
Brick stain penetrates or bonds differently than paint and often allows texture and variation to remain visible. It is a good choice when you like the look of masonry but not the exact color. Stain can shift red brick toward brown, gray, charcoal, or softer earth tones. It is less “new mask” and more “better lighting.”
Whitewash for a Soft, Casual Look
Whitewash usually uses diluted paint to soften brick while allowing some of the original color to show through. It is popular for cottage, farmhouse, coastal, and relaxed traditional interiors. The more water you add, the more brick tone shows. The less water you add, the closer you get to paint.
Limewash-Style Finishes for Old-World Character
Limewash creates a chalky, mineral look that can be distressed for a weathered finish. It is especially attractive on brick because it adds softness without looking too flat or plastic. It can be a great compromise for homeowners who want a lighter fireplace but still want movement and character.
Step 3: Choose the Right Color
Fireplace color should connect with the room, not shout at it from across the carpet. Start with the permanent elements: flooring, wall color, trim, ceiling beams, built-ins, tile, and furniture. If your room has warm wood floors, a creamy white or greige fireplace may feel more natural than a cold blue-white. If the room has black metal accents, a charcoal fireplace can look modern and grounded.
For a timeless fireplace remodel, consider these combinations:
- Warm white brick with a walnut-stained mantel: bright, cozy, and flexible.
- Charcoal brick with a natural oak mantel: bold but still warm.
- Soft gray masonry with white trim: calm, classic, and easy to decorate.
- Black painted surround with a medium-brown mantel: modern farmhouse without trying too hard.
- Whitewashed red brick with a clear-coated mantel: relaxed and textured.
Always sample first. Paint a test area on cardboard or directly on an inconspicuous section of brick. Check it in morning light, afternoon light, and evening lamp light. Fireplace colors can shift dramatically because texture creates shadows.
Step 4: Prime Brick and Masonry Properly
Primer is the difference between a fireplace remodel that lasts and one that starts peeling just in time for guests to notice. Brick and mortar are absorbent, so they often need more primer than a smooth wall. Use a primer designed for masonry or one with strong adhesion and stain-blocking properties.
Apply primer with a brush first along mortar joints, corners, and deep texture. Then roll the broad brick faces. If the fireplace has soot staining or you are moving from dark brick to a light color, a second coat of primer may be helpful. Let primer dry according to the manufacturer’s instructions. Do not rush drying time; impatience is how DIY projects learn slapstick comedy.
Step 5: Paint the Fireplace
Once the surface is clean, dry, and primed, painting is straightforward. Use a brush for edges and mortar lines, then a roller for the brick faces. Work in small sections so you can catch drips and heavy spots before they dry. Textured brick can hide missed areas, so look from different angles as you go.
Most brick fireplaces need two coats for even coverage. A third coat may be necessary for very porous brick, deep mortar joints, or dramatic color changes. Choose the sheen carefully. Matte and flat finishes hide imperfections and look soft, but they can be harder to clean. Satin or eggshell finishes are easier to wipe down and still look refined. Semi-gloss can highlight texture, which may be good or bad depending on your brick.
Step 6: Stain or Refinish the Wood Mantel
A stained mantel can make a painted fireplace look richer and more finished. If the mantel is bare wood, sand it with the grain, remove dust, and apply a pre-stain conditioner if the wood is soft or blotch-prone. Pine, for example, can absorb stain unevenly and end up looking like a leopard with commitment issues.
If the mantel already has a clear finish, you may need to sand more thoroughly or use a stain-and-finish product designed to go over an existing finish after light sanding. For the most professional look, test the stain on the underside or back edge of the mantel. Apply thin coats, wipe off excess, and let each coat dry properly. Finish with a clear protective topcoat suitable for interior wood.
For a classic fireplace remodel, medium brown stains such as walnut, chestnut, or aged oak work well. For a lighter room, natural oak or clear matte finishes can feel fresh. For drama, espresso or black-brown stain pairs beautifully with white or gray painted brick.
Step 7: Update Metal Details
Fireplace doors, screens, vents, and tools can make or break the remodel. Old brass doors may look dated against newly painted brick. Black high-heat paint can refresh many metal components, but only if the product is rated for the surface and heat exposure. Remove doors or screens when possible, clean them thoroughly, scuff glossy surfaces, and spray in a well-ventilated area according to the label.
Do not spray paint anything while it is attached near carpet, curtains, or a freshly painted wall unless you enjoy creating modern art by accident. Also, do not paint surfaces directly exposed to flame unless the coating specifically says it is safe for that use.
Fireplace Remodel Ideas Using Paint and Stain
Modern Minimalist Fireplace
Paint the brick or surround a smooth matte white, then stain the mantel light oak. Keep decor simple: one large mirror, a vase, and maybe a stack of books that suggests you read poetry near the fire, even if the remote is hiding under them.
Moody Charcoal Fireplace
Use charcoal or soft black paint on brick for a dramatic focal point. Add a warm walnut mantel to prevent the room from feeling cold. This works especially well in rooms with leather furniture, brass accents, cream walls, or built-in shelving.
Farmhouse Whitewash Fireplace
Whitewash red brick so some of the original color peeks through. Pair it with a rustic stained beam mantel. The result feels casual, bright, and welcoming without making the fireplace look brand new.
Classic Painted Brick and Trim
Paint the brick the same color as the surrounding wall, then paint the mantel and trim in a slightly glossier white. This creates a built-in architectural look and helps a bulky fireplace calm down visually.
Two-Tone Fireplace Remodel
Paint the brick a warm neutral and stain the mantel dark. The contrast draws attention to the fireplace shape while keeping the palette grounded. This is a smart option when you want the fireplace to feel updated but not trendy.
Common Fireplace Painting Mistakes to Avoid
Skipping the Deep Clean
Soot and dust ruin adhesion. Clean first, rinse if needed, and let the surface dry completely.
Using Regular Wall Paint Without Primer
Brick is not drywall. Use the right primer and paint system for masonry.
Ignoring Moisture Problems
If brick is damp or has recurring white powdery deposits, investigate moisture before coating it.
Painting Historic Brick Too Quickly
Paint can be difficult to remove from brick. If your home has historic masonry, think carefully before covering it.
Using the Wrong Product Near Heat
Not every “high heat” paint belongs inside a fireplace. Always read the product label and follow safety instructions.
Maintenance After a Fireplace Remodel
After painting or staining, give the finish time to cure before heavy cleaning or decorating. Avoid placing smoky candles, wet greenery, or resin-heavy decorations directly against fresh paint. For routine cleaning, dust the mantel and surround regularly. Use a soft cloth or mild cleaner when needed, and avoid harsh abrasives that can dull the finish.
If you use a wood-burning fireplace, schedule regular inspections and keep the firebox, hearth, and chimney properly maintained. Burn only dry, seasoned wood. Wet or treated wood can create more smoke, more residue, and more problems than cozy ambiance. The goal is a beautiful fireplace, not an indoor campfire with paperwork.
Experience Notes: What a Real Fireplace Paint and Stain Remodel Feels Like
The first thing you learn during a fireplace remodel is that brick has more holes than your schedule has free time. From across the room, brick looks flat. Up close, it is a canyon system. Every mortar joint, chip, pit, and rough edge wants attention. That is why the cleaning and priming stages often take longer than the actual painting.
One useful experience is to start with a small test section behind a fireplace screen or low on the side. This test tells you how thirsty the brick is, how the color dries, and whether old soot stains will bleed through. Many homeowners choose a paint color from a tiny swatch and forget that brick texture creates shadows. A warm white on smooth drywall can look creamy and calm. On rough brick, it may look brighter because the raised edges catch light. Testing prevents regret, and regret is much harder to clean than a brush.
Another lesson: do not underestimate the mantel. A freshly painted fireplace with a tired orange mantel can look unfinished. Staining or painting the mantel gives the whole remodel a more deliberate look. If you want warmth, stain the mantel. If you want crisp architecture, paint it to match the trim. If you want drama, choose a dark stain and let it contrast with pale brick.
For whitewashing, the best experience-based tip is to keep a rag nearby and work in layers. It is easier to add more whitewash than remove a heavy coat after it dries. Apply the diluted paint, wipe it back, step away, and look from across the room. The fireplace should look softly aged, not like it lost a fight with a bucket of milk.
For solid painting, use both a brush and a roller. A roller alone will miss mortar lines. A brush alone will make you question your life choices by the second row of brick. Brush the joints, roll the faces, then back-brush any heavy spots. Keep checking for drips under brick edges because gravity is always invited to DIY projects.
Ventilation also matters. Even low-odor products can feel strong when you are working close to masonry for hours. Open windows when possible, use fans safely, and take breaks. Wear eye protection when scrubbing soot and a dust mask when brushing old masonry or sanding wood. This is not glamorous, but neither is sneezing into wet primer.
Finally, style the fireplace slowly after the remodel. Let the finish cure, then add decor in stages. A mirror, a piece of art, two candlesticks, a plant, or a simple stack of firewood can be enough. The newly painted or stained fireplace should be the star. Do not cover your hard work with nineteen tiny objects unless your design goal is “gift shop during an earthquake.”
Conclusion
A fireplace remodel with paint and stain is one of the most rewarding home updates because it changes the mood of the entire room without requiring a full renovation. The best results come from matching the finish to the material: masonry primer and paint for brick, masonry stain or whitewash for texture, proper wood stain for the mantel, and heat-rated products only where appropriate. Clean thoroughly, test colors, respect drying times, and think of the fireplace as a layered design feature rather than a single surface.
With the right prep and a clear plan, your fireplace can go from dated and dusty to warm, stylish, and completely intentional. It may even become the kind of focal point that makes guests say, “Wow, did you remodel?” At which point you can casually say, “Oh, just a little paint and stain,” while silently accepting your standing ovation.
Note: Always follow product labels, local building codes, and fireplace safety recommendations. If your fireplace has cracks, moisture issues, smoke problems, or damaged masonry, consult a qualified professional before applying paint or stain.