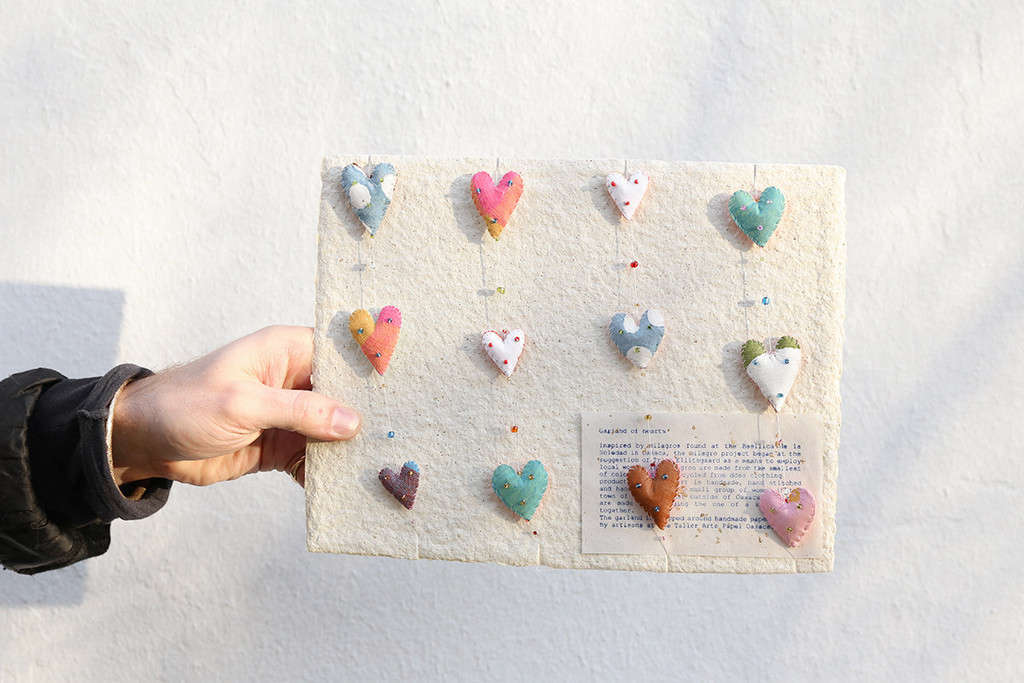

A colorful garland of hearts is the kind of decoration that walks into a room, tosses confetti into the air, and says, “Yes, we are celebrating somethingeven if that something is Tuesday.” Simple, cheerful, and surprisingly versatile, a heart garland can turn a blank wall, mantel, doorway, party table, classroom board, nursery shelf, or bedroom mirror into a warm little moment of handmade charm.
Unlike decorations that require a ladder, a degree in engineering, or a mysterious bag of hardware from the junk drawer, a DIY heart garland is friendly to beginners. You can make one with cardstock, scrapbook paper, felt, fabric, pom-poms, ribbon, baker’s twine, yarn, or even leftover gift wrap. It can look sweet and romantic for Valentine’s Day, bright and playful for a birthday, soft and pastel for a baby shower, or rainbow-happy for everyday wall decor. In short, it is a tiny craft with big main-character energy.
This guide covers what a colorful garland of hearts is, how to make one, which materials work best, styling ideas, color combinations, mistakes to avoid, and real-life experiences that make the project easier, prettier, and less likely to end with glue on the dog.
What Is a Colorful Garland Of Hearts?
A colorful garland of hearts is a decorative string, chain, or banner made from heart-shaped pieces arranged along ribbon, twine, thread, yarn, or cord. The hearts may be flat, folded, layered, sewn, glued, punched, painted, or cut by hand. Some garlands are neat and elegant; others are delightfully chaotic, like a craft drawer had a romantic awakening.
The basic idea is simple: repeat heart shapes in a pleasing pattern and hang them where they can add color, texture, and personality. The finished garland can be short enough to drape across a picture frame or long enough to stretch across a party backdrop. It can be made in five minutes with pre-cut paper hearts or turned into an afternoon craft with layered designs, hand lettering, glitter accents, and 3D folded shapes.
Why Heart Garlands Are So Popular
Heart garlands remain popular because they combine three things people love: easy crafting, affordable supplies, and emotional impact. A heart shape instantly communicates warmth, affection, friendship, celebration, and joy. Add color, and suddenly the decoration feels personal rather than store-bought.
They are also adaptable. A red and pink heart garland works beautifully for Valentine’s Day. A rainbow heart garland can decorate a classroom, reading nook, craft room, or children’s party. A white, blush, and gold garland feels soft enough for a bridal shower. A felt heart garland can be reused year after year, which makes it practical as well as adorable.
Best Materials for a DIY Heart Garland
Cardstock
Cardstock is one of the best choices because it is sturdy, easy to cut, and available in many colors. It holds its shape better than regular printer paper and looks clean when hung. Use cardstock for flat hearts, layered hearts, folded hearts, and garlands that need to survive more than one afternoon.
Scrapbook Paper
Scrapbook paper is perfect when you want patterns: polka dots, florals, stripes, gingham, metallic accents, watercolor designs, or tiny hearts inside bigger hearts. That is heart-ception, and yes, it works.
Construction Paper
Construction paper is affordable and kid-friendly. It is not as crisp as cardstock, but it is great for family crafts, classroom activities, and quick decorations.
Felt
Felt gives a soft, cozy look and is ideal for reusable garlands. It does not fray like many fabrics, so it is easy to cut into hearts. Felt hearts can be glued, stitched, or clipped onto twine.
Fabric
Fabric hearts create a charming handmade look, especially when mixed with ribbon or lace. Cotton prints, flannel, linen blends, and leftover quilting scraps all work well. For more structure, attach fabric to felt or stiff interfacing before cutting.
Ribbon, Twine, Yarn, or String
The hanging material matters more than people think. Satin ribbon looks polished. Baker’s twine feels cute and casual. Jute twine gives a rustic farmhouse vibe. Yarn feels soft and playful. Clear fishing line can make hearts appear as if they are floating, which is fancy without being fussy.
How to Make a Colorful Garland Of Hearts
Step 1: Choose Your Color Palette
Start by picking three to six colors. Too few colors can look flat; too many can look like a craft store sneezed. Good combinations include red, pink, and white for a classic Valentine look; lavender, peach, mint, and cream for spring; rainbow shades for kids’ parties; or blush, gold, and ivory for a softer celebration.
Step 2: Decide on the Heart Size
Small hearts, around two inches wide, are great for delicate garlands on shelves, mirrors, or picture frames. Medium hearts, around three to five inches wide, work well for mantels, windows, and party tables. Large hearts make strong wall decor or photo backdrops. For a lively look, mix two or three sizes.
Step 3: Cut the Hearts
You can draw a heart by hand, use a printed template, fold paper in half and cut half a heart, use a craft punch, or cut shapes with a machine. Folding the paper before cutting is the old-school method because it gives you a symmetrical heart. It also makes you feel briefly like a crafting wizard.
Step 4: Arrange the Pattern
Before attaching anything, lay the hearts on a table or floor. Try different color sequences. You might alternate pink, red, white, and gold. You might group shades from light to dark for an ombré look. You might mix solid hearts with patterned hearts. This step prevents the classic “oops, all purple hearts ended up on one side” problem.
Step 5: Attach the Hearts
There are several easy ways to attach hearts to a garland. Punch two small holes near the center or top of each heart and thread ribbon through. Tape or glue the hearts to twine. Stitch paper hearts together with a sewing machine using a wide stitch. Clip hearts onto string with mini clothespins. Or sandwich the string between two matching hearts and glue them together.
Step 6: Hang and Adjust
Use removable wall hooks, painter’s tape, clear tape, thumbtacks, or ribbon loops depending on the surface. Hang the garland with a soft curve rather than pulling it tight like a laundry line under pressure. A gentle drape looks more relaxed and decorative.
Creative Design Ideas
Rainbow Heart Garland
A rainbow heart garland is cheerful, bold, and perfect for children’s rooms, classrooms, birthday parties, and craft corners. Arrange hearts in red, orange, yellow, green, blue, indigo, and violet. For a softer version, use pastel rainbow colors.
3D Paper Heart Garland
For a fuller look, cut three or four identical hearts, fold each one down the center, and glue the sides together to create a dimensional heart. String several 3D hearts together for a floating paper sculpture effect. It looks impressive but does not require advanced skills, which is the craft world’s version of finding money in a coat pocket.
Felt Heart and Pom-Pom Garland
Alternate felt hearts with pom-poms for texture. This style looks great in nurseries, playrooms, and cozy living rooms. Use soft pinks and creams for a sweet look, or bright colors for a playful one.
Message Heart Garland
Write short words or phrases on each heart: “love,” “kindness,” “joy,” “be mine,” “you matter,” or names of family members. This turns the garland into both decoration and message board. For classrooms, students can write compliments or friendship notes on the hearts.
Photo Heart Garland
Print small photos and attach them to larger heart cutouts. This makes a meaningful display for anniversaries, birthdays, weddings, graduation parties, or family celebrations. It is also a sneaky way to make relatives say, “Aww,” and then stand there staring at the wall for ten minutes.
Where to Display a Colorful Garland Of Hearts
A heart garland works almost anywhere, but some spots make it shine. Drape it across a mantel, above a bed, around a mirror, across a window, on a bookshelf, behind a dessert table, along a staircase railing, or over a classroom bulletin board. For parties, use it as a backdrop for photos. For everyday decor, keep the colors softer so it blends into the room instead of shouting, “Holiday aisle, but make it permanent.”
If hanging a garland in a child’s room, place it out of reach of very young children and away from cribs, beds, fans, heaters, candles, and lamps. Paper and fabric decorations should never hang near open flames or hot bulbs. Cute decor is wonderful; accidental drama is not part of the theme.
Color Psychology and Styling Tips
Color affects the mood of your garland. Red feels bold, warm, and energetic. Pink feels sweet and affectionate. White adds freshness. Gold adds sparkle. Purple brings a creative, dreamy mood. Blue and mint can make the design feel calm and modern. Yellow adds sunshine. Green feels fresh and spring-like.
For a polished look, repeat colors in a pattern. For a playful look, randomize them. For a designer-style finish, mix solid paper with one or two patterns rather than using every pattern you own. Yes, the tiny cupcake paper is adorable. No, it does not always need to meet the glitter zebra cardstock.
Common Mistakes to Avoid
Using Paper That Is Too Thin
Very thin paper curls, tears, and looks floppy. If you only have printer paper, double it up or glue it onto another sheet for strength.
Skipping the Layout Step
Laying out the hearts first helps you balance color, size, and pattern. This takes two minutes and saves you from remaking the garland while muttering at a glue stick.
Making the Garland Too Heavy
Large felt hearts, thick fabric, and heavy embellishments may cause the garland to sag. Use stronger twine or ribbon for heavier materials, and keep the spacing balanced.
Using Too Much Glue
A little glue goes a long way. Too much can wrinkle paper, soak through fabric, or create shiny marks. Glue dots, tape runners, and double-sided tape are clean options for paper projects.
How to Make It Budget-Friendly
A colorful garland of hearts can be extremely inexpensive. Use leftover wrapping paper, old greeting cards, paper bags, magazine pages, scrap fabric, ribbon scraps, or paint sample cards. You can also cut hearts from cereal boxes and cover them with decorative paper. Recycling materials gives the project character and helps reduce waste.
For a no-shopping version, gather paper you already own, fold it, cut hearts, and tape them to string. That is it. No specialty machine, no glitter explosion, no emergency craft-store run required.
How to Store and Reuse Your Heart Garland
If you want to reuse the garland, store it carefully. Wrap it around a piece of cardboard, place tissue paper between layered pieces, and keep it in a flat box or zip-top bag. Felt and fabric garlands usually last longer than paper versions, but cardstock can survive well if kept dry and untangled.
Label the storage bag by season or event, such as “Valentine Garland,” “Birthday Hearts,” or “Rainbow Party Decor.” Future you will appreciate this. Future you is tired and does not want to dig through a box labeled “miscellaneous joy.”
Experience Notes: What Making a Colorful Garland Of Hearts Teaches You
Making a colorful garland of hearts sounds simple, and it is, but the experience has a way of teaching small lessons about creativity, patience, and personal style. The first thing you learn is that color choices matter more than expected. When the hearts are lying flat on the table, every color looks cute. Once they are hanging together, the palette suddenly has opinions. Bright red next to neon orange can feel energetic, while blush pink beside cream feels gentle. A single gold heart can look elegant; twenty gold hearts can look like a party hosted by a disco ball.
The second lesson is that handmade decor does not need to be perfect. In fact, the slightly uneven hearts often look the most charming. A hand-cut edge gives the garland warmth. A tiny off-center hole does not ruin anything. A heart that leans a little to the left is not a failure; it is simply emotionally expressive. This is one reason the craft is wonderful for families and classrooms. Everyone can contribute, and the finished piece feels like a collection of personalities rather than a factory-made product.
Another useful experience is learning how different materials behave. Cardstock gives crisp results and photographs well. Construction paper is easy for kids but can wrinkle with too much glue. Felt feels cozy and lasts longer, but it needs sharper scissors. Ribbon looks pretty but can twist. Twine is sturdy but rustic. Once you understand these little quirks, future projects become easier. Crafting is partly creativity and partly negotiating with supplies that have their own tiny attitudes.
There is also something satisfying about turning basic materials into an object that changes the mood of a room. A plain mantel can look festive in minutes. A classroom board can feel welcoming. A doorway can become a cheerful entrance. The garland does not have to be expensive to feel meaningful. In many cases, the best version is made from scraps: leftover cardstock, old wrapping paper, ribbon from a gift bag, or fabric from another project. That mix gives the garland a story.
From experience, the easiest way to enjoy the process is to prepare before starting. Cut more hearts than you think you need. Keep a small bowl nearby for paper scraps. Test your hanging method before attaching every heart. Step back from the wall once or twice while arranging the garland. And if children are helping, assign jobs: one person sorts colors, one punches holes, one threads string, and one proudly announces that every heart is “the best one.” This system keeps the table calmer and makes the project feel collaborative.
The final experience worth mentioning is emotional. A colorful garland of hearts is not just decoration; it is a small visible gesture. It says someone took time to make a space feel special. That is why it works for Valentine’s Day, birthdays, anniversaries, classrooms, care packages, dorm rooms, and everyday corners that need a little cheer. It is affordable, forgiving, and personal. In a world full of fast decor, a handmade heart garland has a quiet magic: it turns paper, string, and color into a reminder that small things can brighten a place beautifully.
Conclusion
A colorful garland of hearts is one of the easiest and most rewarding DIY decorations you can make. It requires simple supplies, welcomes creativity, and works for many occasions beyond Valentine’s Day. Whether you choose cardstock, felt, fabric, ribbon, twine, rainbow colors, soft pastels, or personalized messages, the key is to make the garland feel like it belongs in your space.
The best part is that this project is flexible. You can finish a simple paper heart garland in minutes or spend an afternoon building a layered, textured design. You can craft it alone for a peaceful creative break or make it with family, friends, classmates, or party guests. Either way, the result is cheerful, affordable, and full of handmade personality.
Note: For best results, use sturdy paper or felt, plan your color pattern before attaching the hearts, and keep decorations away from heat sources, candles, fans, and areas where very young children can pull them down.