
There is something deeply satisfying about rescuing a tired old object. A rusty pair of pruning shears, a flea-market wrench, a dull silver chain, or a brass locket that looks like it survived three divorces and a basement floodthese pieces may look finished, but many of them are only neglected, not doomed. With the right DIY metal restoration approach, you can often clean, polish, protect, and reuse them without turning your garage into a chemistry experiment or your kitchen into a crime scene.
The trick is knowing what you are looking at before you start scrubbing like a maniac. Rust, tarnish, and patina are not the same thing. Old tools and old jewelry do not respond to the same cleaners. And sometimes the smartest move is not to make an item look brand-new, but to make it look healthy, usable, and beautifully aged. That is where this guide comes in.
If you want to restore old tools, remove rust from metal, clean tarnished jewelry, and protect your hard-won results, here is how to do it with a little patience, a little elbow grease, and just enough restraint to avoid polishing the soul out of the piece.
What Is Actually Happening to the Metal?
Rust
Rust forms on iron and steel when moisture and oxygen get cozy for too long. On tools, rust often starts as surface discoloration and can graduate into crusty corrosion that interferes with moving parts, weakens edges, and makes a once-trusty tool feel like it belongs in an archaeological dig.
Tarnish
Tarnish is more common on silver, copper, and brass. Instead of flaky orange corrosion, you get a dark, dull, or discolored film on the surface. Tarnish looks dramatic, but it is often easier to handle than deep rust. Think of it as metal’s way of saying, “I need a spa day,” not “I have entered my swamp era.”
Patina
Patina is where things get interesting. On some metalsespecially brass, bronze, and coppera softened, aged surface can be desirable. It adds character, depth, and that “I have stories” energy. If you are restoring a collectible, antique, or decorative item, stripping off all patina may reduce its charm and sometimes its value. Restoration is not always about making metal shiny. Sometimes it is about making it honest.
Before You Start: Build a Smart, Safe Setup
DIY metal restoration works best when you act like a careful craftsperson, not a reality-show contestant. Set up in a well-ventilated area with gloves, eye protection, soft cloths, brushes, small bowls, and a labeled workspace. If you are using any commercial rust remover or metal polish, read the instructions first. Revolutionary concept, I know.
You should also keep these ground rules in mind:
- Start with the gentlest method before moving to stronger products.
- Test any cleaner on a hidden area first.
- Never mix household chemicals.
- Keep water exposure brief for pieces with glued settings, plating, or delicate stones.
- Dry everything thoroughly after cleaning.
If a piece is highly valuable, antique, heavily plated, set with soft gemstones, or structurally damaged, professional restoration may be the smarter move. “DIY” is a proud label, but “I ruined Grandma’s ring” is not.
How to Restore Old Tools Without Wrecking Them
Step 1: Assess the Damage
Look closely at the tool before doing anything. Light surface rust on a hand trowel is one thing. Deep pitting on a wrench, a seized hinge on pruners, or heavy corrosion around a saw blade is another. If the tool is just dirty and lightly oxidized, you may need nothing more than a brush, mild abrasive, and protective oil. If it is severely rusted, you may need soaking time, more aggressive brushing, and realistic expectations.
Step 2: Remove Dirt, Grease, and Loose Rust
Use a stiff brush or dry cloth to remove loose debris first. Mud, sawdust, old grease, and flaking rust get in the way and can make you think the metal is worse than it really is. For hand tools, this first pass often reveals whether you are dealing with cosmetic rust or a deeper issue.
Step 3: Choose the Right Rust-Removal Method
For light rust, start with fine steel wool, a wire brush, or fine-grit sandpaper. A baking soda paste can also help lift surface oxidation on sturdy pieces. Work slowly and evenly so you clean the metal instead of gouging it.
For moderate rust, a vinegar soak is a popular and effective DIY solution for old tools. After soaking, scrub the loosened rust with a wire brush or steel wool, rinse, and dry immediately. This works especially well on garden tools, bolts, and compact metal parts.
For heavy corrosion, a commercial rust remover may save time and frustration. Follow the label directions closely, then scrub, rinse if required, and dry the piece completely. Heavy rust can sometimes hide pitting underneath, so do not expect every tool to emerge looking like it just came off the hardware-store shelf in 1987.
Step 4: Clean Joints, Springs, and Moving Parts
Pruners, shears, and adjustable tools need extra attention. Rust loves hinges and moving joints because moisture hangs around where metal pieces touch. Once the visible rust is removed, work a light oil into the joint, move the tool back and forth, and wipe away the dirty residue. Repeat until the action feels smooth again.
Step 5: Sharpen Only After Cleaning
If you sharpen before removing rust and grime, you are basically seasoning dinner before washing the pan. Clean first, then sharpen blades, edges, or bevels using the appropriate stone or file. On pruning tools, a refreshed edge plus a clean, lubricated hinge can make an old tool feel surprisingly expensive.
Step 6: Protect the Metal
Once the tool is clean and dry, apply a light coat of oil, paste wax, or another suitable protective finish. This step matters just as much as rust removal. A restored tool with no protective barrier is basically a comeback tour with no security team.
Store tools in a dry place, off the ground if possible. Add silica gel packs to toolboxes, avoid damp leather pouches, and wipe down tools before putting them away. If you use gardening tools, remove soil and moisture after each session and re-oil metal parts regularly. Prevention is less glamorous than restoration, but it is a lot cheaper.
How to Clean Tarnished Jewelry at Home
Identify the Metal First
Jewelry restoration is not just tiny-tool restoration with better lighting. You need to know whether you are cleaning sterling silver, gold, stainless steel, brass, copper, silver plate, costume jewelry, or a mixed-material piece with stones, glue, enamel, or plating. The safest cleaning routine depends on the weakest material in the item, not the strongest.
Start With the Universal Gentle Method
For many pieces, the safest approach is simple: warm water, a drop or two of mild dish soap, a soft cloth, and a very soft brush. Let the piece soak briefly if it is water-safe, then gently clean around crevices and settings. Rinse carefully and dry with a microfiber cloth. If there are loose stones, avoid rough handling and do not rinse over an open sink drain unless you enjoy high-stakes treasure hunts.
Cleaning Sterling Silver
Silver is one of the most common metals people want to revive because tarnish can make it look dramatically older than it is. For light tarnish, start with soapy water and a soft cloth. For heavier tarnish, a baking soda paste can work on solid sterling silver if used gently and rinsed thoroughly. Dry with a microfiber or silver cloth, not a paper towel, which can scratch the surface.
Be extra careful with silver-plated pieces. Aggressive scrubbing can wear through the plating and reveal the base metal underneath. Once that happens, your “restoration” becomes “unexpected design reveal.”
Cleaning Gold Jewelry
Gold jewelry usually responds well to warm water, a little dish soap, and a soft brush. Dirt tends to collect behind settings and under stones, so gentle brushing can make a major difference. Avoid harsh chemicals, especially on pieces with soft gems, glued components, or older settings.
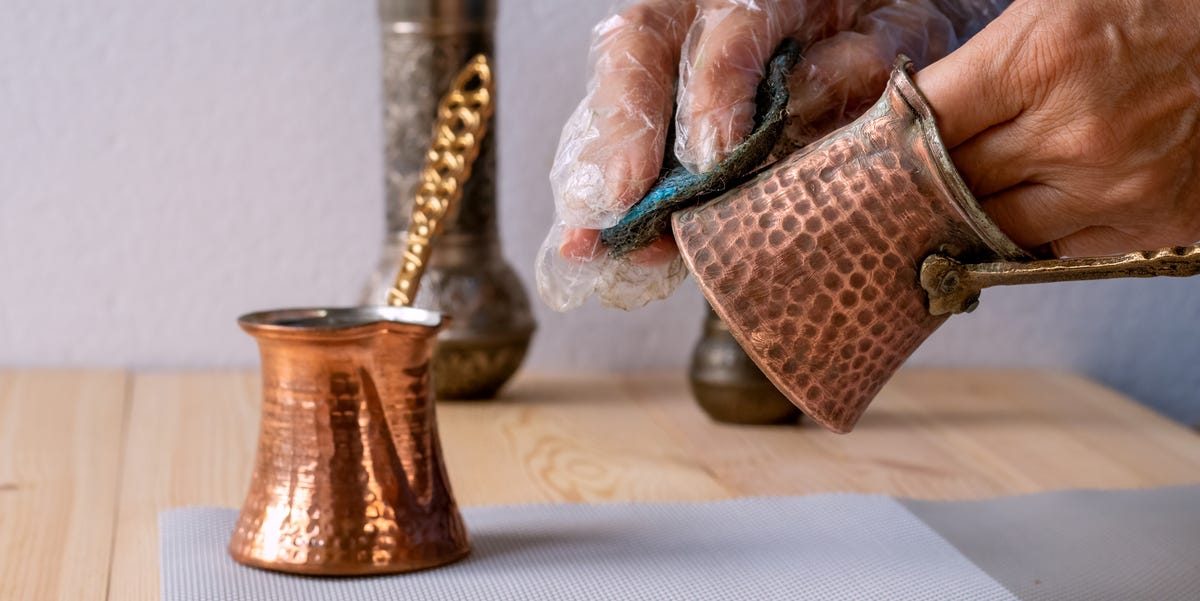
Cleaning Brass and Copper Jewelry
Brass and copper jewelry can be cleaned with mild soap and water when you want to preserve more of the aged look. If you want a brighter finish, DIY acidic cleaners may help on sturdy pieces, but they should be used carefully and sparingly. Overdoing it can strip away an attractive patina, dull the finish, or make the item look oddly new in all the wrong places.
What About Gemstones?
This is where many DIY jewelry-cleaning adventures go off the rails. Hard stones like diamonds and sapphires are not the same as pearls, opals, turquoise, or glued-in costume stones. Opals should be cleaned only with warm, soapy water. Pearls and other soft, delicate materials should be handled very gently and kept far away from harsh cleaners, abrasives, and extended soaking.
If you do not know what the stone is, do not guess. “Looks sturdy” is not a gemological category.
Cleaning Mistakes That Can Turn Restoration Into Regret
- Using toothpaste on everything: It can be too abrasive for many jewelry pieces and softer surfaces.
- Soaking plated or glued pieces: Water can loosen adhesives and damage finishes.
- Boiling jewelry: Heat can stress stones, settings, and certain metals.
- Over-scrubbing silver plate: You may remove the finish you were trying to save.
- Stripping desirable patina: Not every dark surface needs to become bright and shiny.
- Skipping the drying step: Moisture left behind invites fresh corrosion.
- Ignoring storage: Restoration without better storage is just pressing rewind on the problem.
How to Know When to Stop
Good DIY metal restoration is not about perfection. It is about improving condition, function, and appearance without causing damage. If an old hammer is solid, clean, and protected, it has succeeded, even if it still shows its age. If a silver necklace sparkles again but still carries a little softness in the details, that can be a win. If a brass box keeps its warm antique tone instead of looking like a trumpet in a marching band, even better.
Ask yourself three questions:
- Is it clean enough to be used or worn safely?
- Have I removed active rust, grime, or damaging buildup?
- Am I improving the piece, or am I now polishing out its character?
If you answer the first two with yes and the third with “uh-oh,” it is time to stop.
Simple Examples of DIY Metal Restoration Projects
Example 1: Rusty Garden Pruners
Brush off plant residue, soak metal parts if needed, scrub away rust, dry thoroughly, lubricate the hinge, sharpen the blade, and finish with a light protective coating. Suddenly the pruners no longer feel like punishment.
Example 2: Tarnished Silver Chain
Wash with mild soapy water, gently clean links with a soft cloth, use a silver-safe polishing method if necessary, rinse carefully, and dry completely. Store in a dry anti-tarnish pouch or soft box instead of tossing it into the legendary knot pile.
Example 3: Brass Locket With Vintage Charm
If the aged tone is appealing, clean it gently with soap and water and stop there. If it is patchy and dull rather than attractively aged, brighten it carefully, then protect the finish. The goal is character, not identity theft.
What DIY Metal Restoration Feels Like in Real Life: The Experience Behind the Process
One of the best things about DIY metal restoration is that it rarely feels like a purely technical task. It feels personal. You start with an object that looks tired, forgotten, maybe even a little hopeless, and somewhere between the brushing, soaking, buffing, and wiping, the piece starts telling you what it used to be. An old screwdriver stops looking like junk and starts looking like something that built shelves, fixed bikes, or lived in a real workshop before it ended up in a coffee can under somebody’s bench.
Jewelry restoration has its own kind of magic. A tarnished silver ring can look flat and lifeless in your hand, but after a careful cleaning, the details begin to reappearthe engraving, the curve of the setting, the little design choices you could not even see before. It is oddly emotional. Not dramatic movie-soundtrack emotional, maybe, but enough to make you pause for a second and think, “Wow, this was under there the whole time.”
The experience also teaches patience in a very direct way. Rust does not disappear because you stared at it with determination. Tarnish does not vanish because you bought a microfiber cloth and believed in yourself. Good results usually come from repeated, gentle passes. Clean a little, inspect a little, dry a little, and keep going. The first instinct is often to scrub harder or soak longer, but the more you restore metal, the more you learn that pressure is not the same thing as skill.
There is also a surprising amount of detective work involved. You begin noticing small clues: the color under the tarnish, the way the metal reacts to moisture, the difference between solid metal and plating, whether a dark finish is damage or deliberate age. That is when restoration gets fun. It stops being random cleaning and becomes a conversation with the object. The metal tells you what it can handle, and your job is to listen before you do something enthusiastic and regrettable.
Another common experience is discovering that perfection is overrated. A fully restored tool may still show tiny pits from old rust. A vintage bracelet may still have faint wear near the clasp. But those details do not always count as flaws. Often they are proof that the piece has lived a life and survived it. When you restore metal thoughtfully, you are not erasing historyyou are stabilizing it, revealing it, and making the item useful again.
And yes, there is a deeply satisfying reveal at the end. The final wipe-down, the first smooth opening of cleaned shears, the shine returning to a pendant, the blade that no longer sticks, the warm glow of brass after the grime is gonethese are tiny victories, but they feel bigger than they should. Maybe that is the real appeal of DIY metal restoration. It gives you visible proof that care matters. A little attention can change how something looks, works, and lasts. Not bad for an afternoon project and a pair of gloves.
Final Thoughts
DIY metal restoration is part maintenance, part rescue mission, and part reality check. The goal is not to make every piece look factory-fresh. The goal is to bring old tools and jewelry back to life in a way that respects the material, preserves what matters, and protects the piece for future use. Start gently, match the method to the metal, protect the finish when you are done, and remember that character is not damage.
Whether you are reviving a rusty shovel, a pair of battered pruners, a silver bracelet, or a brass heirloom, the best results come from patience and restraint. In other words, restore like a craftsperson, not like a raccoon with a scrub brush.