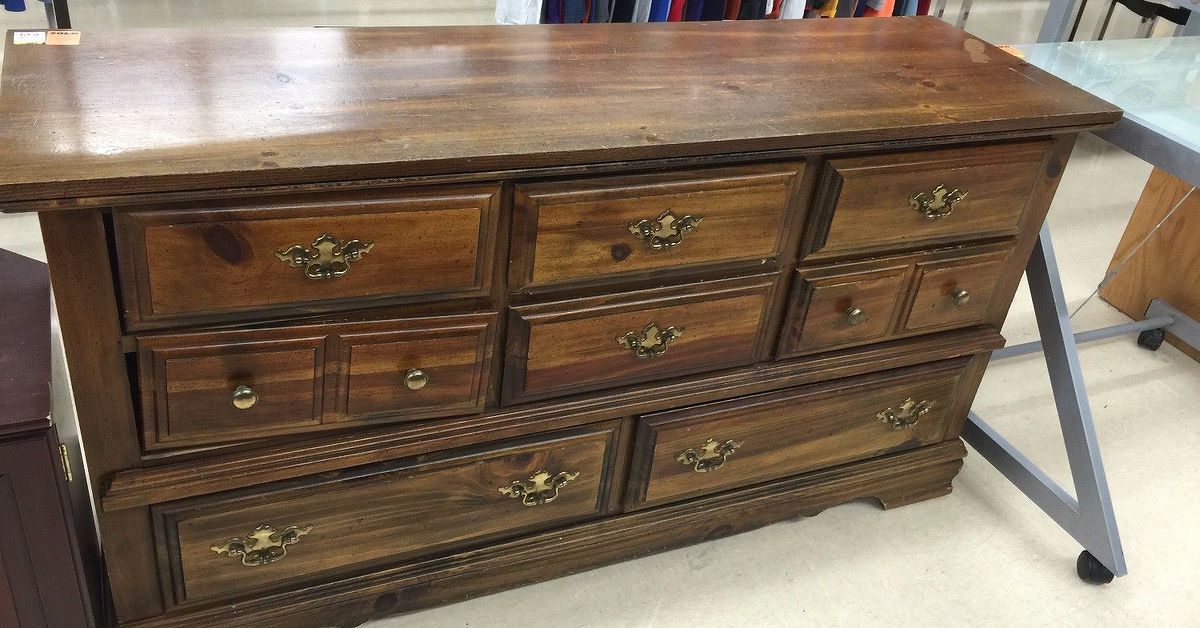

Some furniture glow-ups are modest. New knobs, maybe. A fresh coat of paint, if you’re feeling wild. But turning a dresser into an entertainment center? That’s the kind of makeover that makes a room look smarter, more custom, and a lot less “I panic-bought this TV stand at 11:42 p.m.”
A dresser-to-entertainment-center conversion is one of those rare DIY ideas that checks nearly every box: it saves money, repurposes old furniture, adds serious storage, and gives your living room a collected look that flat-pack furniture sometimes struggles to fake. Done well, it can look designer. Done poorly, it can look like a dresser that lost a fight with a drill. The good news is that the difference usually comes down to planning, prep, and a few practical decisions about safety, ventilation, and cable management.
If you’ve been eyeing an old chest of drawers and wondering whether it has a second act in your living room, the answer is yeswith a few important caveats. Here’s how to turn a dresser into an entertainment center that looks intentional, works hard, and doesn’t create chaos every time you need to find the remote.
Why a Dresser Makes a Surprisingly Great Entertainment Center
The appeal is obvious once you see it in action. Dressers are already built to store things, and entertainment centers are basically storage with a TV involved. That overlap is what makes this project work so well. A sturdy dresser gives you drawers for remotes, game controllers, batteries, cables, manuals, coasters, and all the other little living-room freeloaders that love to multiply after dark.
It also brings more personality than many standard media consoles. Vintage dressers can lean mid-century, traditional, cottage, farmhouse, or eclectic depending on their lines and hardware. Even newer dressers can be transformed with paint, stain, legs, trim, or cane inserts. Instead of buying something that looks like everyone else’s streaming setup, you end up with a piece that looks layered and lived-in.
And then there’s the storage advantage. A typical open entertainment stand puts everything on display: cable box, console, soundbar accessories, mystery wires, dust. A dresser lets you hide the mess. Frankly, this alone deserves applause.
Choose the Right Dresser Before You Touch a Paintbrush
Not every dresser is a good candidate. The best piece is sturdy, level, and appropriately sized for your room and your television setup. A low, wide dresser is usually easiest to convert because it already resembles a media console. Tall dressers can work too, but they tend to be better for wall-mounted TVs above them rather than televisions sitting directly on top.
What to Look For
Solid wood is the dream because it handles sanding, painting, and light modifications well. Veneer, laminate, MDF, and particleboard can also work, but they need more careful prep and gentler treatment. If the dresser is wobbly, water-damaged, cracked at key joints, or missing major structural parts, keep walking. Not every thrift-store “find” is a find. Sometimes it’s just a future headache wearing brass pulls.
Measure the top surface, the room, and the electronics you want to store inside. Think beyond the TV itself. You may want room for a soundbar, router, gaming console, streaming box, speakers, or decor. If the dresser is too shallow, it may look good for five minutes and then force your cords to perform acrobatics behind the piece.
Smart Layout Ideas
One of the most popular conversions is removing one or two top drawers and creating an open shelf for electronics while keeping the lower drawers intact for storage. That gives you the best of both worlds: closed storage below, tech access above. Another option is removing the center bank of drawers on a long dresser and leaving the outer drawers intact. That creates a balanced, built-in look that feels much more “custom console” than “former bedroom resident.”
Safety Comes First, Especially With TVs
Here’s the not-so-glamorous but very important part: not every dresser should automatically become a TV stand, especially in homes with children. If kids are around, the safest version of this project is often a dresser used as a media console with the TV mounted to the wall above it. Why? Because drawers can tempt climbing, and consumer safety guidance has repeatedly warned about tip-over risks involving both furniture and televisions.
If your TV will sit on top of the piece, the dresser needs to be sturdy, low enough to feel stable, and properly anchored when possible. The television should sit as far back as possible, cords should be controlled, and heavy items should stay low. This is not the moment for “good enough.” This is the moment for anti-tip hardware and common sense.
In other words, yes, make it pretty. But make it safe enough that nobody’s movie night ends with a trip to urgent care.
How to Turn a Dresser Into an Entertainment Center
1. Clean It Like You Mean It
Before you sand, paint, or remove anything, clean the dresser thoroughly. Dust, wax, old polish, and mysterious sticky residue can all interfere with adhesion. Use a degreaser or a good furniture-safe cleaner and let the piece dry completely. This step is boring, which is exactly why people rush it. Don’t.
2. Remove Drawers and Plan the New Layout
Pull out the drawers and decide what stays, what goes, and what gets reworked. If you’re converting a drawer bay into an open media shelf, remove the drawer front carefully so you can potentially reuse it as a decorative false front or trim material. Check the drawer runners and center supports. You may need to remove some of them to create a clean opening.
At this stage, it helps to set your electronics inside the dresser opening and test the fit. Leave enough space to access buttons, cords, and ports without having to disassemble the entire piece every time Wi-Fi decides to be dramatic.
3. Add Shelves or Structural Support
If you remove drawers, the empty space may need a fixed shelf. Plywood or solid wood shelving works well. Secure it level, and make sure it can support the weight of your equipment. If the dresser top will carry a television, reinforce weak interiors as needed. A beautiful makeover is not improved by sagging.
4. Create Cable Management Openings
This is the step that separates “cute furniture flip” from “usable entertainment center.” Drill cable holes in the back panel or use hole saw bits with grommets for a cleaner look. If the back is flimsy, cut carefully and support it while drilling. Openings should be large enough for plugs and cords but not so huge that the back looks like it lost a fight with a raccoon.
Plan a cord path. Don’t just make holes and hope for enlightenment. Think about where power strips, routers, consoles, and soundbars will sit so the cord routing feels natural and tidy.
5. Don’t Ignore Ventilation
Electronics need airflow, especially receivers, gaming consoles, and cable boxes. A closed dresser cavity can trap heat if you don’t modify it properly. Leave space around devices, use an open shelf when possible, and consider enlarging back openings or using vent panels if you plan to store hotter-running equipment. If you’re housing an A/V receiver, extra clearance matters. This is furniture, yes, but it should not become a tiny wooden sauna for your electronics.
6. Sand, Prime, and Paint or Stain
Now for the makeover magic. Lightly sand glossy finishes so primer and paint can grip. If the dresser is MDF, laminate, or melamine, use the right bonding primer and don’t skip scuff-sanding. For wood pieces, a light all-over sanding is usually enough unless you’re stripping damage or uneven finish.
Then prime, paint, and seal. Thin, even coats beat one thick “I have no patience” coat every time. A satin or semi-gloss finish is often a sweet spot for durability and easy cleaning. Want a more relaxed look? Go for a soft matte and swap in updated hardware. Want something moodier? Deep navy, olive, charcoal, black, or warm brown stains can make a dresser look impressively expensive.
7. Update the Hardware and Details
New knobs and pulls can completely change the vibe. Sleek brass hardware nudges the piece toward elevated and modern. Black hardware gives it a tailored, grounded look. Wood knobs keep things casual and organic. You can also add furniture legs, trim, or fluted accents if you want a more custom appearance.
If you removed drawers and created open bays, line the back with wallpaper, beadboard, or a painted contrast panel for extra style. It’s a small touch, but it makes the piece feel finished rather than merely repurposed.
8. Style It Like a Real Entertainment Center
Once the electronics are in place, style the top with restraint. A lamp, a stack of books, a tray, or a vase can soften the setup without crowding it. If the TV is wall-mounted above, the dresser can act as the room’s anchor. If the TV sits on top, keep side accessories low and balanced so the arrangement feels calm, not cluttered.
Design Ideas That Work Beautifully
Mid-Century Mood
Use a low walnut dresser with clean lines, tapered legs, and minimal brass pulls. Remove the center drawers to create an open electronics shelf and keep the outer drawers for storage. The result feels timeless and polished.
Modern Cottage
Paint an older dresser in a creamy white, soft mushroom, or dusty blue. Add cup pulls, a wood top, and woven baskets inside any open shelving. It feels warm, practical, and very easy to live with.
Moody Built-In Look
Choose a longer dresser, paint it a dark rich tone, and wall-mount the TV above. Flank the dresser with bookcases or sconces if space allows. Suddenly the whole wall looks intentional, and your living room gets a promotion.
Mistakes to Avoid
The biggest mistake is choosing a dresser based only on looks. Pretty is nice. Stable is better. The second mistake is forgetting ventilation. The third is skipping cable planning, then acting shocked when cords breed like rabbits. Other common problems include using the wrong primer, painting over dirt or wax, keeping drawers that block device access, and overdecorating the top until the TV area feels crowded.
Another easy misstep is forcing the dresser to do too much. If your setup includes a giant receiver, several consoles, large speakers, and a subwoofer, a tiny vintage dresser may simply not be the hero for this job. Let the furniture match the function.
Is a Dresser-to-Entertainment-Center Makeover Worth It?
In most cases, absolutely. If you already own a dresser or can source one secondhand, this project can deliver custom style and practical storage for less than buying a high-end media console. It’s also a more personal solution. Instead of buying a piece that just fills space, you create one that fits your room, your habits, and your mess.
That said, the best version of this project isn’t the fastest one. It’s the one that respects the bones of the furniture, makes room for electronics to breathe, and handles safety like an adult. That’s what turns a clever DIY into a piece you’ll still love a few years from now.
So yes, a dresser can become an entertainment center. In the right hands, it can become a really good one. Stylish, useful, and far more charming than another forgettable box under a screen. Not bad for a piece of furniture that used to store socks.
Real-Life Experience: What It’s Actually Like to Live With a Dresser Entertainment Center
The most surprising thing about converting a dresser into an entertainment center is that it doesn’t just change the furnitureit changes how the room behaves. Before the makeover, the area under the TV often becomes a magnet for clutter. Game cases drift in, chargers coil into little wire nests, remotes vanish into the couch cushions, and somehow there is always one mystery HDMI cable with no known purpose. A dresser setup tends to calm all of that down because it gives everything a home.
In real life, the drawers are the secret sauce. One drawer can hold remotes, batteries, charging cords, and instruction manuals. Another can handle board games, extra blankets, or those coasters everyone ignores until someone sets a cold drink directly on wood. If you have kids, one drawer can even become the “quiet movie-night drawer” with coloring books, headphones, and snacks that don’t sound like a marching band when opened.
There’s also something satisfying about how substantial the piece feels in the room. Standard entertainment centers can sometimes look flimsy or temporary, especially in larger living spaces. A dresser has visual weight. It grounds the television wall, makes the setup feel intentional, and can hold its own against larger sofas, rugs, and art. Even in smaller rooms, a low dresser can make the space look more finished because it reads as furniture first and tech storage second.
Of course, living with one teaches you a few lessons quickly. The first is that cord control matters more than you think. The makeover may look flawless from the front, but if the back is a jungle of wires, you’ll notice every time you plug something in. The second lesson is that ventilation is not optional for electronics-heavy households. If you’re using a gaming console or receiver often, airflow needs to be part of the plan from day one, not an afterthought you mutter about once everything runs warm.
Another real-world perk is flexibility. A dresser entertainment center can evolve with the room. If you move, repaint, switch decor styles, or even repurpose the piece again later, it still has options. It can go back to bedroom storage, become a dining-room sideboard, or serve as an entry console. That versatility makes the project feel smarter than buying a highly specific media unit that only works in one setup.
And perhaps the best part is the emotional payoff. A repurposed dresser usually has more character than something ordered with two-day shipping and assembled with mild resentment. Maybe it belonged to a family member. Maybe it was rescued from a thrift store for the price of two fancy coffees. Maybe it was just an outdated piece you were tired of ignoring. Whatever the story, when it becomes the centerpiece of movie nights, game days, and lazy Sundays, it starts to feel less like a DIY project and more like a small victory. Functional, stylish, and a little smugin the best possible way.