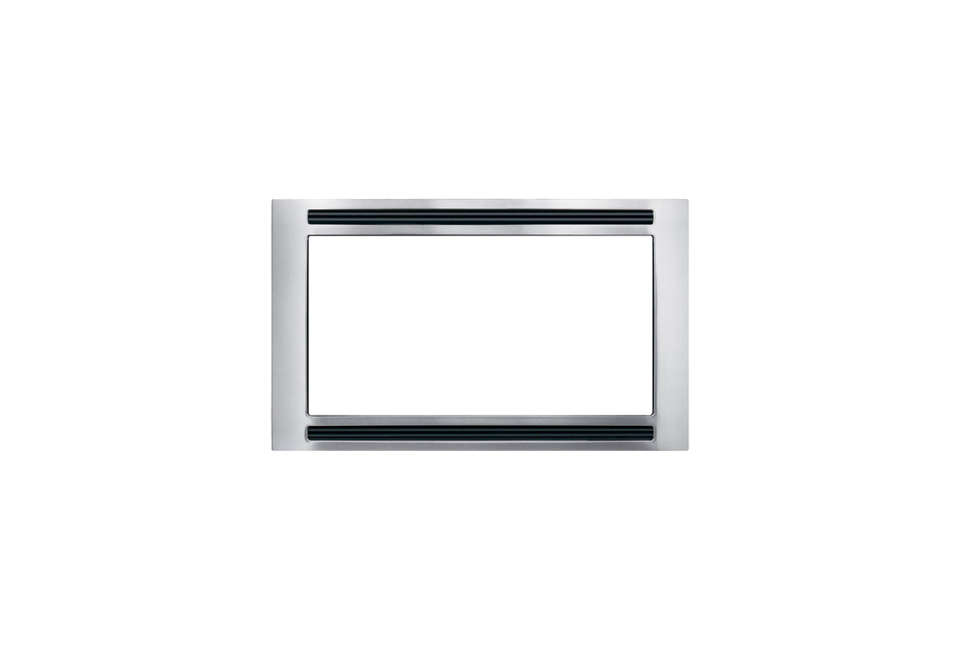

If a countertop microwave is the kitchen equivalent of wearing sneakers with a tuxedo, a trim kit is the tailor who saves the outfit. The Frigidaire 30 in. SS Trim Kit is designed to give a compatible Frigidaire microwave the polished, built-in appearance homeowners love without forcing the microwave to sit awkwardly on the counter, stealing prep space like a tiny stainless-steel landlord.
At its simplest, this stainless steel microwave trim kit frames the microwave opening, helps manage the built-in installation, and creates a finished look that blends with modern kitchen cabinetry and stainless appliances. But there is a very important catch: microwave trim kits are not universal fashion accessories. They are model-specific installation components. That means before you buy, measure, cut, or enthusiastically wave a screwdriver around, you need to verify that the trim kit matches your microwave model and cabinet opening.
This in-depth guide explains what the Frigidaire 30 inch trim kit does, who it is for, what to check before buying, and how it performs in real kitchen settings.
What Is the Frigidaire 30 in. SS Trim Kit?
The Frigidaire 30 in. SS Trim Kit is a stainless steel built-in microwave accessory intended to help compatible Frigidaire microwaves sit neatly inside a cabinet or wall opening. Instead of leaving gaps around the appliance, the trim kit provides a framed front that makes the installation look intentional, clean, and coordinated.
For many shoppers, the main appeal is visual. A microwave sitting on the counter can be convenient, but it can also interrupt the flow of a kitchen design. A built-in microwave trim kit allows the microwave to look more like part of the cabinetry layout. The result is a more custom appearance without necessarily paying for a fully integrated luxury appliance package.
Key Product Details
Common Frigidaire 30 inch stainless steel trim kit listings include model MWTK30FGUF, which is associated with a stainless steel finish and a 30 inch width. Product listings commonly describe the trim kit as a microwave accessory with an overall width of 30 inches, height of about 18 inches, and shallow front depth around 1.5 inches. The listed product weight is approximately 10.45 pounds.
Installation materials typically include the front frame assembly, exhaust duct, bottom mounting rail, and mounting screws. These parts are not decorative extras; they support proper placement, airflow, and secure installation. In other words, the kit is not just a pretty face. It is the pretty face with a job.
Why a Microwave Trim Kit Matters
A microwave produces heat, needs ventilation, and must be supported correctly. A trim kit helps solve several design and installation challenges at once. It covers exposed cabinet edges, creates a consistent front profile, and helps guide airflow according to the manufacturer’s built-in installation design.
The biggest mistake shoppers make is assuming a trim kit is only cosmetic. While appearance is a major benefit, the right kit also helps the microwave fit the space correctly. Using the wrong trim kit can lead to poor alignment, blocked vents, unsafe installation, rattling, or a finished look that says, “We tried our best,” which is not usually the design statement people want above a wall oven.
Design and Finish: Why Stainless Steel Works
The “SS” in Frigidaire 30 in. SS Trim Kit stands for stainless steel, and that finish is one of the reasons this accessory remains popular. Stainless steel pairs well with refrigerators, ranges, dishwashers, wall ovens, and range hoods. It also has a neutral, professional look that fits many kitchen styles, from transitional to modern farmhouse to full-on “I watch cooking shows and own three kinds of salt.”
The smooth stainless finish helps the microwave blend into the appliance wall rather than standing out as a separate countertop machine. This is especially useful in kitchens where visual continuity matters. If your cabinets are white, gray, navy, natural wood, or espresso, stainless steel usually plays nicely with the palette.
One practical note: stainless steel looks best when cleaned regularly with a soft cloth and non-abrasive cleaner. Fingerprints happen. Life happens. Someone will touch the trim right after eating chips. Accept this truth and keep a microfiber cloth nearby.
Compatibility: The Most Important Buying Step
Before buying the Frigidaire 30 in. SS Trim Kit, compatibility should be your first, second, and third concern. This kit is designed for select Frigidaire or Electrolux-family microwave models that specify use with a built-in trim kit. Some documentation references compatible microwave models such as FGMO226NUF, FGMO226NUD, FPMO227NUF, CGMO226NUF, and CPMO227NUF. Retailer Q&A information also confirms compatibility between MWTK30FGUF and FGMO226NUF.
That does not mean every 30 inch Frigidaire microwave will fit this trim kit. The microwave model number matters more than the visual similarity. Two microwaves can look nearly identical from the front and still have different vent locations, chassis dimensions, or mounting requirements.
How to Check Compatibility
Look for the model number on the microwave rating label, owner’s manual, product page, or purchase receipt. Then compare it with the trim kit installation guide or official product compatibility information. If you are replacing an older microwave, do not assume the old trim kit will work with the new unit. This is the kitchen-appliance version of assuming one phone charger fits everything. Sometimes it does. Sometimes it absolutely does not.
Dimensions and Cabinet Cutout Planning
The Frigidaire 30 inch trim kit is commonly listed with overall dimensions of approximately 30 inches wide, 18 inches high, and 1.5 inches deep. Installation documentation for related MWTK30 models also shows cabinet or wall cutout guidance, including a cutout height range of about 16 3/4 inches to 17 inches, a cutout width range of about 24 3/4 inches to 25 inches, and a minimum depth of about 20 inches.
These measurements are not decorative suggestions. Cabinet cutout size affects safety, alignment, ventilation, and whether the front frame sits squarely. A cutout that is too small can make installation impossible. A cutout that is too large can create visible gaps or weak support. A floor that is not level can make the microwave look crooked even if the trim kit is technically installed correctly.
Measure Twice, Cut Once, Regret Never
Before installation, measure the cabinet opening carefully. Check width, height, depth, side clearance, rear clearance, and floor level. If building over a wall oven, manufacturer guidance commonly calls for clearance between the wall oven and microwave oven. Also confirm whether the installation is allowed above the specific type of wall oven you own.
If your cabinetry is custom, older, or slightly out of square, a professional installer may be worth the cost. A trim kit can hide small visual gaps, but it cannot perform miracles. It is stainless steel, not wizardry.
Installation Overview
The installation process generally involves preparing the cabinet opening, securing the exhaust duct, attaching the bottom mounting rail to the microwave, sliding the assembled microwave into position, and installing the front frame assembly. The manufacturer’s installation guide emphasizes reading instructions completely, unplugging the microwave before installation, and handling metal parts carefully to avoid injury.
Proper installation is the responsibility of the installer, and product failure caused by improper installation may not be covered under warranty. That is worth repeating in plain English: if the trim kit is installed incorrectly and something goes wrong, the warranty may not rescue you like a superhero in a stainless cape.
Tools and Skill Level
The instructions describe the work as requiring basic mechanical and electrical skills. Many confident DIY homeowners can handle the project, especially if the cabinet opening is already correctly sized. However, if cutting cabinetry, relocating outlets, or installing above a wall oven is involved, professional help is a smart choice.
One common installation issue is alignment. The frame needs to sit square with the microwave, and screws must catch properly. Rushing this step can cause uneven gaps or a frame that looks slightly tilted. A small level, a patient attitude, and a willingness to adjust before tightening everything down can make the final result look far more professional.
Benefits of the Frigidaire 30 in. SS Trim Kit
1. A Cleaner Built-In Look
The most obvious benefit is appearance. The stainless steel frame helps transform a compatible microwave from a countertop appliance into a more integrated kitchen feature.
2. Better Countertop Space
Moving the microwave into a cabinet or wall opening frees up counter space. In smaller kitchens, this can make a big difference. Suddenly there is room for a coffee station, cutting board, mixer, or that decorative bowl nobody is allowed to actually use.
3. Coordinated Appliance Design
If your kitchen already includes stainless steel appliances, this trim kit helps maintain a consistent look. It can be especially attractive when installed near a stainless wall oven.
4. Manufacturer-Matched Fit
When paired with the correct Frigidaire microwave model, the trim kit provides a more reliable fit than generic filler solutions. Model-specific design matters because ventilation, screw placement, and front-frame alignment must work together.
Potential Drawbacks to Consider
The Frigidaire 30 in. SS Trim Kit is useful, but it is not perfect for every kitchen. First, compatibility is narrow. If your microwave is not one of the supported models, this kit may not work. Second, some older model listings may show limited availability or discontinued status at certain retailers, which means shoppers may need to compare current Frigidaire trim kit models carefully.
Third, installation can be more involved than expected. A trim kit sounds simple until you are measuring a cabinet opening with one hand and wondering why the screw hole appears to have moved out of spite. Proper preparation prevents most headaches.
Finally, stainless steel requires maintenance. It is durable and attractive, but fingerprints and smudges are part of the deal. If you want a finish that never shows anything, you may need to install your kitchen in a museum and never invite relatives.
Who Should Buy This Trim Kit?
The Frigidaire 30 in. SS Trim Kit is a good fit for homeowners who already own, or plan to buy, a compatible Frigidaire microwave and want a clean built-in look. It is also useful for remodelers trying to match stainless appliances in a cabinet wall or above an electric wall oven where the manufacturer allows that configuration.
It is not ideal for shoppers who want a universal trim solution, renters who cannot modify cabinetry, or anyone who has not confirmed the microwave model. If you are unsure, pause before ordering. The right trim kit feels satisfying. The wrong trim kit becomes a shiny reminder to always read the model number.
Buying Tips Before You Order
Start by confirming your microwave model number. Then compare the exact trim kit model and finish. Stainless steel, black stainless, 27 inch, and 30 inch versions can look similar in search results, so read carefully. Also check return policies, especially if buying from a retailer where availability changes often.
Next, review the installation guide before the package arrives. This helps you understand cutout size, included parts, tools, and whether the cabinet needs adjustment. If you are working with a contractor, send the installation guide early. Contractors appreciate specifications more than surprise boxes labeled “please make this fit.”
Finally, inspect the trim kit when it arrives. Look for dents, scratches, missing screws, or bent frame edges before installation begins. It is much easier to resolve shipping damage before the kit is halfway attached to a cabinet.
Cleaning and Maintenance
Maintenance is simple. Use a soft cloth and mild cleaner suitable for stainless steel. Wipe with the grain when possible. Avoid abrasive pads, harsh powders, or aggressive scrubbing. The trim kit is not a cookware pan, and treating it like one may leave scratches.
Periodically check that the frame remains secure and that no unusual vibration develops when the microwave runs. If the microwave starts rattling after installation, investigate the mounting points and cabinet support. A properly installed trim kit should feel stable and look even.
Real-World Experience with the Frigidaire 30 in. SS Trim Kit
In real kitchens, the Frigidaire 30 in. SS Trim Kit often makes the biggest difference in how “finished” the microwave area feels. A microwave placed inside a cabinet opening without a proper trim kit can look like it moved in before the cabinets were ready. Add the stainless steel frame, and suddenly the whole setup looks planned. It is a small design move with a surprisingly large visual payoff.
The first experience many homeowners notice is the improvement in counter space. Removing a microwave from the countertop can make the kitchen feel larger almost immediately. That extra space becomes useful for food prep, coffee gear, a toaster, or simply breathing room. In a compact kitchen, even a few square feet of recovered counter area can feel like a luxury upgrade.
The second experience is installation anxiety. Most people open the box expecting a simple frame, then discover rails, ducts, screws, clearance rules, and measurements that suddenly make the project feel more serious. That is not a bad thing. It simply means the trim kit is part of the microwave’s built-in system, not just a decorative picture frame. The best results come from reading the guide first, dry-fitting parts, checking the cabinet opening, and keeping a level nearby.
A common homeowner lesson is that the cabinet floor matters. If the base is uneven or weak, the finished microwave may not sit straight. The trim can be perfectly manufactured and still look off if the opening is not square. This is why experienced installers spend time preparing the opening before attaching the frame. It is less exciting than the final reveal, but it is the step that makes the reveal worth photographing.
Daily use is where the stainless trim earns its keep. It visually connects the microwave with other stainless appliances and makes the kitchen wall look calmer. There are fewer awkward shadows around the appliance and fewer visible gaps. Cleaning is also straightforward, although fingerprints show up, especially around the lower edge where people naturally touch the frame while opening or closing the microwave door.
The most practical advice from real-world use is simple: buy the trim kit at the same time as the microwave if possible. Waiting until later can create availability problems, especially with model-specific accessories. Also, keep the installation manual even after the job is done. If you ever replace the microwave, sell the home, or troubleshoot a vibration, those instructions become more useful than expected.
Overall, the Frigidaire 30 in. SS Trim Kit is one of those accessories that seems minor until you see the finished kitchen. It does not cook, beep, defrost, or reheat yesterday’s pizza. But it makes the appliance look like it belongs, and in kitchen design, belonging is half the battle.
Final Verdict
The Frigidaire 30 in. SS Trim Kit is a smart finishing piece for compatible Frigidaire microwaves. Its stainless steel design, built-in appearance, and model-specific installation hardware make it a practical choice for homeowners who want a cleaner, more polished kitchen layout. The most important rule is compatibility: match the exact microwave model, check the cutout dimensions, and follow the installation instructions carefully.
If your microwave and cabinetry meet the requirements, this trim kit can make a standard microwave installation look significantly more custom. It is not flashy. It is not complicated once properly understood. It simply does its job: frame the microwave, clean up the wall, and make the kitchen look like an adult was in charge.
Note: Always verify the exact microwave model, cabinet cutout dimensions, electrical location, and manufacturer installation guide before purchasing or installing any built-in microwave trim kit.